कला
सुन्दरता र कल्याण
हस्तकला
संस्कृति र इतिहास
मनोरञ्जन
वातावरण
खाना र पेय
रिभर्स इन्जिनियरिङ
विज्ञान
खेलकुद
प्रविधि
पहिर्न मिल्ने



The Twisted Nematic LCD
Schadt and Helfrich, 1970. Every other display in this batch makes light; the LCD is a valve in front of a backlight. Rod-shaped molecules line up with a rubbed surface and twist a quarter-turn between two plates, carrying polarised light round with them — the cell is clear. A few volts stand the molecules up, the twist vanishes, the light is blocked. A valve costs power only to switch, which is why the LCD won. You will build a working cell.
उन्नत
6 hours
निर्देशनहरू
1
1
The molecule whose shape is the whole device
The molecule whose shape is the whole device
5CB — 4-cyano-4'-pentylbiphenyl — is the first room-temperature liquid crystal (Gray, 1972), and almost every early LCD uses it or a relative. Its shape is the device: a rigid biphenyl rod so the molecules line up (the nematic phase), a floppy pentyl tail so it stays liquid, and a polar cyano end that is the handle the electric field grabs to switch it. Rigid enough to align, floppy enough to flow, polar enough to steer.
2
2
The twist, and why it needs two polarisers
The twist, and why it needs two polarisers
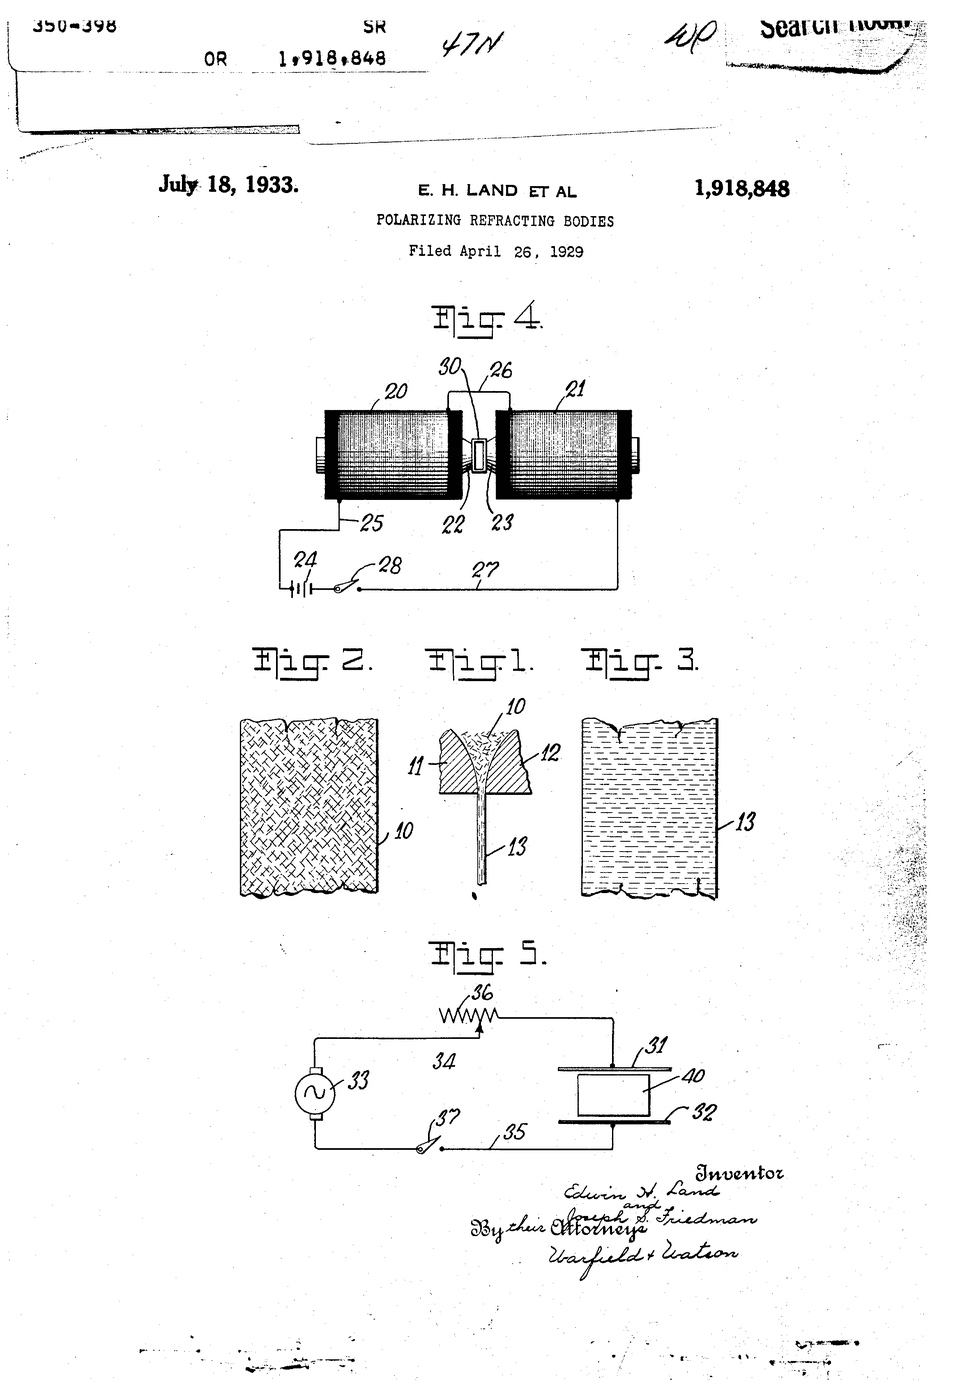
A liquid-crystal cell does nothing visible without a polariser each side — it rotates polarisation, which the eye cannot see. The plates are rubbed at 90 degrees, so the molecules form a quarter-turn helix that guides polarised light round to pass the crossed rear polariser: bright. A few volts stand the molecules up, the helix dies, the light is blocked: dark. Read the embedded polariser blueprint first.
3
3
Build a working cell and rub the alignment layer
Build a working cell and rub the alignment layer
A real build. Two ITO-coated glass plates (find the conductive side with a meter, ~hundreds of ohms). Wipe a thin PVA or polyimide film on each and RUB firmly one way — the grooves align the molecules. Assemble conductive faces in, rubbing directions at 90 degrees, ~10 um spacers, three edges sealed. Draw in 5CB by capillary action (warm it above ~35 C so it flows), seal the last edge. Add a polariser each side, axes crossed.
Test: crossed polarisers, no volts = bright; touch 3-5 V AC to the two ITO faces and the lit area goes dark. Use AC, not DC — DC electrolyses and kills the cell in minutes.
यस चरणका सामग्री:
 ITO लेपित सिसाको स्लाइड2 टुक्रा
 तरल क्रिस्टल 5CB1 मिलि
 ध्रुवीकरण फिल्टरको पाता2 पाना
चाहिने औजार:
 प्रयोगशाला स्तरको डिजिटल बहुमापक
 बेन्चको विद्युत् आपूर्ति
 सूक्ष्म चिम्टाको सेट
4
4
Measure the threshold voltage
Measure the threshold voltage
Jupyter नोटबुक लोड हुँदैछ…
चाहिने औजार:
 टेबुल कम्प्युटर
सामग्री
3- 2 टुक्राप्लेसहोल्डर
- 1 मिलिप्लेसहोल्डर
- 2 पानाप्लेसहोल्डर
आवश्यक उपकरणहरू
4- प्लेसहोल्डर
- प्लेसहोल्डर
- प्लेसहोल्डर
- प्लेसहोल्डर
सम्बन्धित ब्लुप्रिन्ट
यी ब्लुप्रिन्टहरूले ज्ञान साझा गर्छन् — प्रविधि, सामग्री वा सिद्धान्त

CC0 सार्वजनिक डोमेन
यो ब्लुप्रिन्ट CC0 अन्तर्गत जारी गरिएको छ। तपाईं अनुमति नसोधी प्रतिलिपि, परिमार्जन, वितरण र प्रयोग गर्न सक्नुहुन्छ।
ब्लुप्रिन्ट मार्फत उत्पादनहरू किनेर सिर्जनाकर्तालाई सहयोग गर्नुहोस् सिर्जनाकर्ता कमिसन विक्रेताले तोकेको, वा यो ब्लुप्रिन्टको नयाँ संस्करण बनाउनुहोस् र आम्दानी बाँड्न आफ्नो ब्लुप्रिन्टमा जडानको रूपमा समावेश गर्नुहोस्।