فن
خوبصورتی اور تندرستی
دستکاری
ثقافت اور تاریخ
تفریح
ماحول
خوراک اور مشروبات
ریورس انجینئرنگ
سائنسز
کھیل
ٹیکنالوجی
پہننے والے آلات
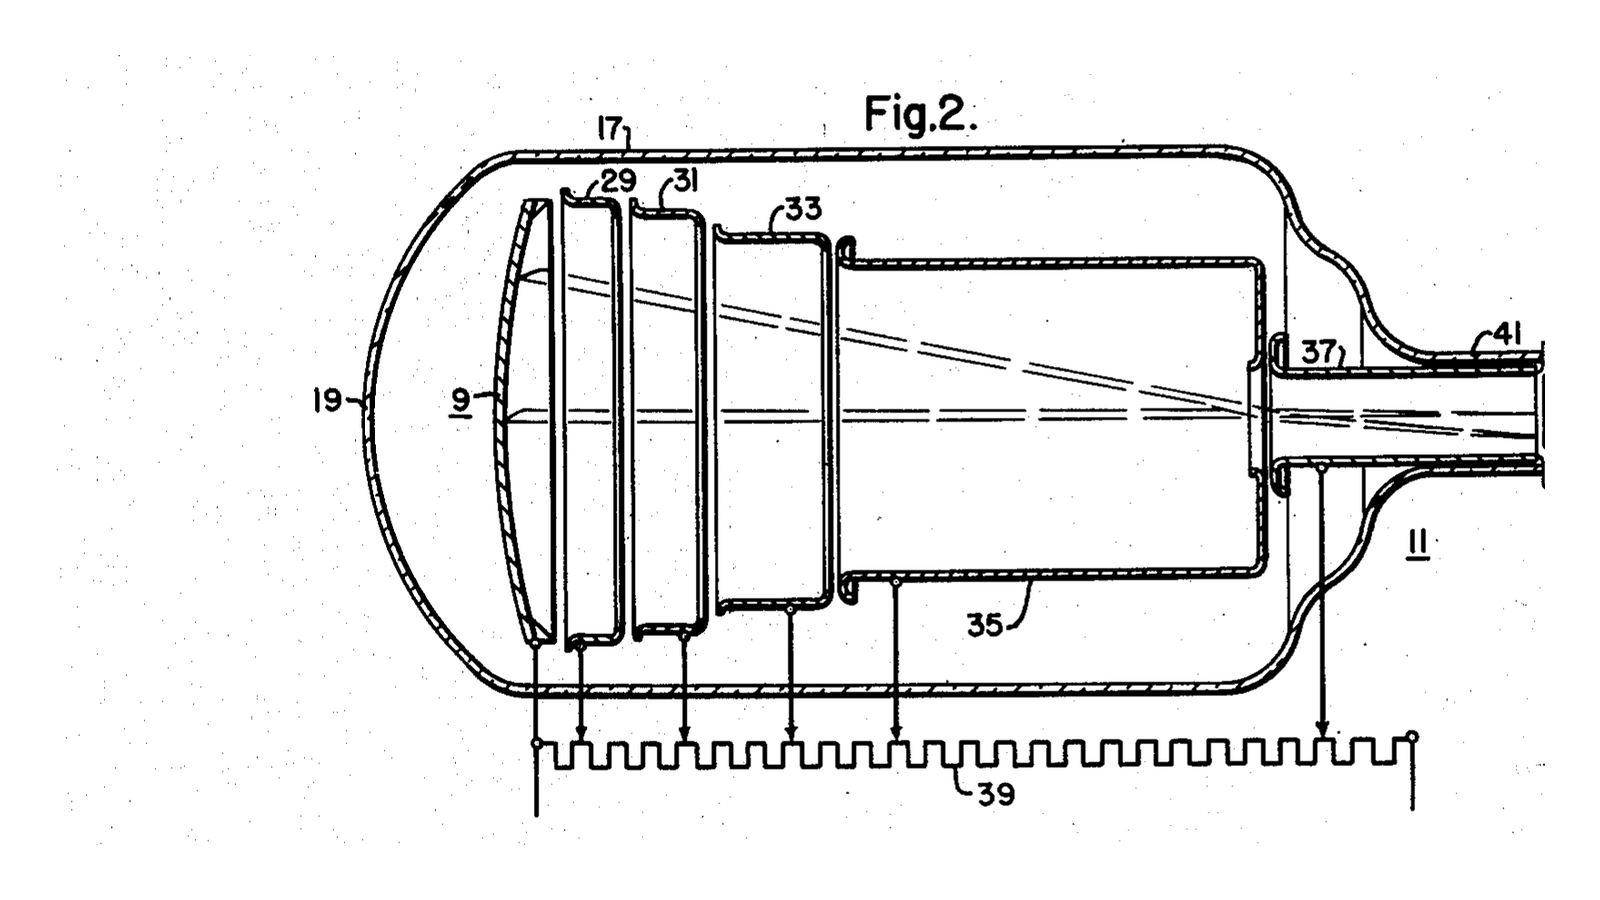


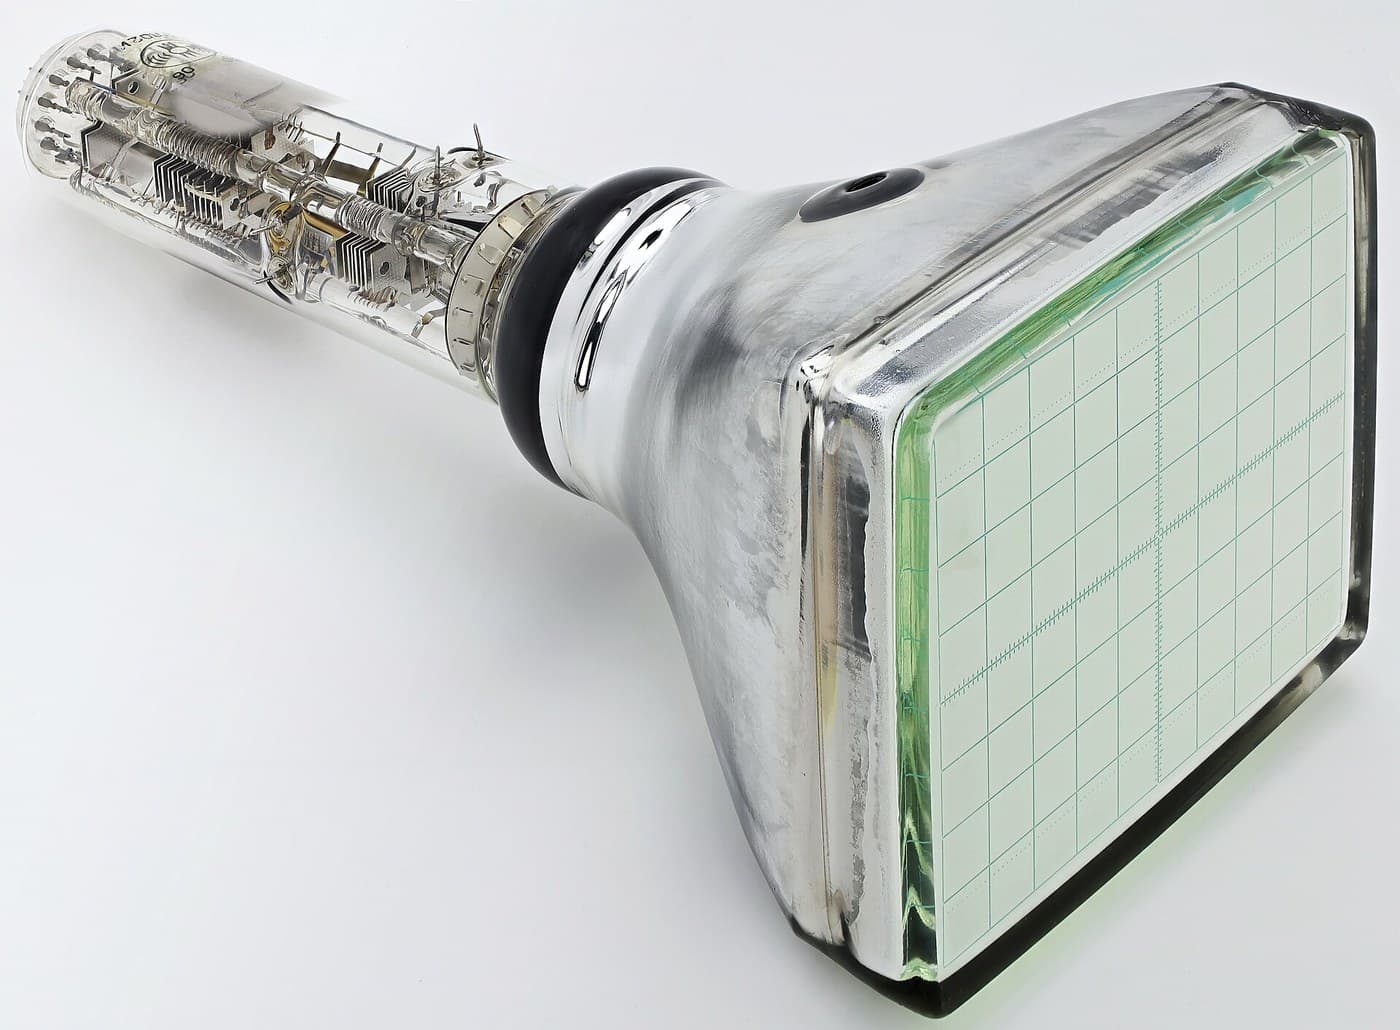
Mason & Coltman Image Intensifier
For fifty years, watching an X-ray image live meant sitting in a completely dark room. The fluoroscopic screen from the first blueprint in this batch is genuinely faint - so faint that radiologists wore red goggles for twenty minutes beforehand so their eyes would already be dark-adapted when they walked in. They were reading a barely-glowing screen with the rod cells of the eye, which have no colour vision and poor acuity, while standing next to an unshielded beam.
**US 2,523,132**, "Photosensitive apparatus", Ruric C. Mason and John W. Coltman, assigned to Westinghouse, filed 10. August 1949 and granted 19. September 1950. It made the image thousands of times brighter, and it did it with two multiplied tricks.
**Minification.** Take the light from a large input screen and land it on a small output screen. The same total light in a fraction of the area is brighter by the ratio of the areas - a 230 mm input onto a 25 mm output is roughly 85 times, from geometry alone, costing nothing.
**Flux gain.** The input screen's light releases electrons from a photocathode; those electrons are accelerated through tens of kilovolts and slam into the output phosphor carrying far more energy than the photon that started them, making many light photons each. Another fifty times or so.
Multiply them and the image is thousands of times brighter than the screen it replaced. The doctor could stand in a lit room, look through an eyepiece, and - crucially - point a television camera at it.
**The patent's actual claim is about noise**, which is worth noticing. Its first claim specifies "an X-ray responsive fluorescent screen of the zinc sulphide type" AND "a photoelectric surface which responds substantially only to light in the blue, ultra-violet and higher frequencies". A photocathode sensitive to red light also emits electrons from sheer heat, which arrive as a snowstorm on the output. Matching the photocathode's threshold to the phosphor's blue emission keeps the signal and starves the noise.
**You will build the minification half and measure it**, with a lens instead of electron optics - and then you will measure the thing the whole device cannot do, which is more interesting than the thing it can.
نیا سیکھنے والا
90 minutes
ہدایات
1
1
Make a large, dim, evenly-lit input
Make a large, dim, evenly-lit input
You need a stand-in for a fluoroscopic screen: large, uniform, and genuinely faint.
Take the phosphor screen from the first blueprint in this batch, or a sheet of white acrylic lit from behind through several layers of tracing paper. Aim for something around 150 mm across that you can only just see in a dark room - if it is comfortable to look at, dim it further, because the entire point is a source too faint to work with.
Measure its luminance with a light meter held close, and note the reading and the distance. Then measure the LIT diameter with a ruler - not the diameter of the sheet, the diameter of the part that is actually glowing. That distinction is the first branch of the troubleshooting step and it catches most people.
Put a resolution target on it - a printed set of bars, or a comb of card - so you have something whose sharpness you can judge as well as its brightness.
اس مرحلے کے لیے مواد:
 ایکریلک شیٹ1 ٹکڑا
 نیم شفاف ٹریسنگ کاغذ3 شیٹ
درکار اوزار:
 روشنی ناپنے والا آلہ (وارد/منعکس)
 پیمانہ
 جانچ کی ایل ای ڈی ٹارچ
 انک جیٹ ٹرانسپیرنسی فلم
2
2
Minify it, and measure the gain
Minify it, and measure the gain
Use a lens to form a small image of the whole lit screen on a piece of white card. A 50 mm camera lens or a simple magnifier both work; you want an image about 25 mm across, so a reduction of roughly six to one in diameter.
Focus carefully, then measure the image diameter with a caliper and its luminance with the meter at the SAME distance and angle you used in step 1.
Compute the ratio of areas from the two diameters, and compare it with the ratio of the two meter readings. They should be in the same ballpark, and where they differ the flow step tells you why - almost always because the lens aperture is collecting only part of the light cone, or because you measured the sheet rather than the lit patch.
**This is a real intensifier's minification gain, complete.** In the patent's tube the reduction is done by electron optics rather than glass, but the arithmetic is identical, and it is the larger of the two gains in most tubes.
اس مرحلے کے لیے مواد:
 محدب عدسہ1 ٹکڑا
 نالی دار گتے کی چادریں1 شیٹ
درکار اوزار:
روشنی ناپنے والا آلہ (وارد/منعکس) ڈیجیٹل ورنیئر کیلیپر ۶ انچ
 تپائی (کاربن فائبر، گیند نما سر)پیمانہ
3
3
The half you cannot build, and what it is worth
The half you cannot build, and what it is worth
The second gain needs a photocathode, a vacuum and thirty kilovolts, and this blueprint is not going to have you build that. But you can measure its electronic equivalent and see exactly what it does and does not achieve.
Point a photodiode at your minified image and amplify its output with an op-amp at a known gain - ten, then a hundred, then a thousand. Watch the signal on an oscilloscope at each.
The trace gets bigger. Look closely at the fuzz ON the trace: it gets bigger by exactly the same factor. The ratio of signal to noise is identical at every gain setting, because you amplified both together.
That is precisely what the acceleration stage in a real intensifier does. Every photoelectron becomes many output photons, so everything gets brighter - the signal and the statistical fluctuation alike. It is a magnificent brightness amplifier and it is not, and cannot be, an information amplifier.
اس مرحلے کے لیے مواد:
 آپ ایمپ آئی سی1 ٹکڑا
 مزاحمت کاروں کا سیٹ1 ٹکڑا
 بریڈ بورڈ1 ٹکڑا
درکار اوزار:
 آسیلوسکوپ
 تجربہ گاہی درجے کا ڈیجیٹل ملٹی میٹر
 قابلِ ترتیب میز کی بجلی سپلائی
 مگرمچھ کلپ آزمائشی تار
 فوٹو ڈایوڈ (BPW34)
4
4
The quantum sink, measured with a camera
The quantum sink, measured with a camera
Here is the measurement that explains why the intensifier mattered - and it is not the brightness one.
Photograph your dim screen twice: once at low ISO with a long exposure, once at very high ISO with a short exposure, matched so both images have the same brightness on screen. The high-ISO frame collected far fewer photons and made up the difference with gain.
Now zoom into a flat, evenly-lit area of each and compare the graininess. Better still, measure it: sample a patch and compute the standard deviation of pixel values divided by the mean. The low-ISO frame will be smooth; the high-ISO frame will be visibly speckled, at the same average brightness.
**Gain moved the brightness. It did nothing for the noise, because the noise was set by how many photons were counted.** Signal-to-noise goes as the square root of the number of quanta, so the narrowest point in the chain - the fewest quanta anywhere along it - decides the quality of everything after it. In a real intensifier that point is the X-ray photons absorbed by the input screen, and it is called the quantum sink.
So the prize is not the bright picture. It is that the eye no longer needs a bright picture, which means the tube can be run at a LOWER dose and the amplifier can make up the difference. The image intensifier is a dose-reduction device wearing the costume of a brightness device.
درکار اوزار:
 ڈجیٹل کیمرہتپائی (کاربن فائبر، گیند نما سر)
 ڈیسک ٹاپ کمپیوٹر
5
5
Two gains, and the one that is not a gain
Two gains, and the one that is not a gain
Jupyter نوٹ بک لوڈ ہو رہی ہے…
6
6
When the gain does not add up
When the gain does not add up
Three measurement faults, then the check that matters more than any of them.
Flow
Loading...
درکار اوزار:
روشنی ناپنے والا آلہ (وارد/منعکس)7
7
Compendium: the TV chain, and what killed the tube
Compendium: the TV chain, and what killed the tube
**What it unlocked immediately.** Once the image was bright enough to photograph, it could be recorded on cine film - cineangiography, which made cardiac catheterisation possible - and then pointed at a television camera, which put the image on a monitor in a lit room, let several people watch at once, and let the radiologist stand somewhere other than in the beam. Almost every safety and workflow improvement in fluoroscopy for thirty years came from that one change in brightness.
**Vignetting, pincushion, and the S-distortion.** Electron optics are not as good as glass. The image is dimmer at the edges than the centre, straight lines bow outward, and the Earth's own magnetic field bends the electron paths enough that rotating the tube changes the distortion - so an intensifier's image warps slightly as the C-arm is swung. Every one of those is a consequence of steering electrons across a large evacuated volume, and none of them exists in a flat panel.
**Caesium iodide, which came from the first blueprint in this batch.** Early tubes used a zinc sulphide input screen, exactly as the patent's claim says. Replacing it with CsI grown in parallel needles roughly doubled the absorbed X-ray fraction while keeping the image sharp - which, per the quantum sink, is a real information gain rather than a brightness one. It is the single biggest improvement the technology ever received.
**What replaced it.** The flat panel detector: a scintillator laid directly onto a matrix of photodiodes with a thin-film transistor behind each. No vacuum, no electron optics, no distortion, no vignetting, and a device 30 mm thick instead of half a metre. Image intensifiers are still in service and still being made for mobile C-arms where cost matters, but the direction is one way.
**And the honest summary of the whole thing:** the intensifier did not make the picture better. It made a picture of the same quality visible under conditions where a human could use it - and then let the dose come down until the picture was as poor as clinicians would tolerate. That is a very common shape in engineering, and it is worth recognising it for what it is.
مواد
7- 1 ٹکڑاپلیس ہولڈر
- 3 شیٹپلیس ہولڈر
- 1 ٹکڑاپلیس ہولڈر
- پلیس ہولڈر
- 1 ٹکڑاپلیس ہولڈر
- پلیس ہولڈر
- پلیس ہولڈر
درکار اوزار
13- پلیس ہولڈر
- پلیس ہولڈر
- پلیس ہولڈر
- پلیس ہولڈر
- پلیس ہولڈر
- پلیس ہولڈر
- پلیس ہولڈر
- پلیس ہولڈر
- پلیس ہولڈر
- پلیس ہولڈر
- پلیس ہولڈر
- پلیس ہولڈر
- پلیس ہولڈر
متعلقہ بلیو پرنٹ
یہ بلیو پرنٹ علم بانٹتے ہیں — تکنیک، مواد یا اصول


CC0 پبلک ڈومین
یہ بلیو پرنٹ CC0 کے تحت جاری کیا گیا ہے۔ آپ اجازت لیے بغیر اس کام کو نقل، ترمیم، تقسیم اور کسی بھی مقصد کے لیے استعمال کرنے کے لیے آزاد ہیں۔
میکر کی حمایت کریں ان کے بلیو پرنٹ کے ذریعے پروڈکٹس خرید کر جہاں وہ میکر کمیشن وینڈرز کی طرف سے مقرر، کماتے ہیں، یا اس بلیو پرنٹ کی نئی تکرار بنائیں اور آمدنی شیئر کرنے کے لیے اسے اپنے بلیو پرنٹ میں کنکشن کے طور پر شامل کریں۔