تعاون
فن
خوبصورتی اور تندرستی
دستکاری
ثقافت اور تاریخ
تفریح
ماحول
خوراک اور مشروبات
ریورس انجینئرنگ
سائنسز
کھیل
ٹیکنالوجی
پہننے والے آلات
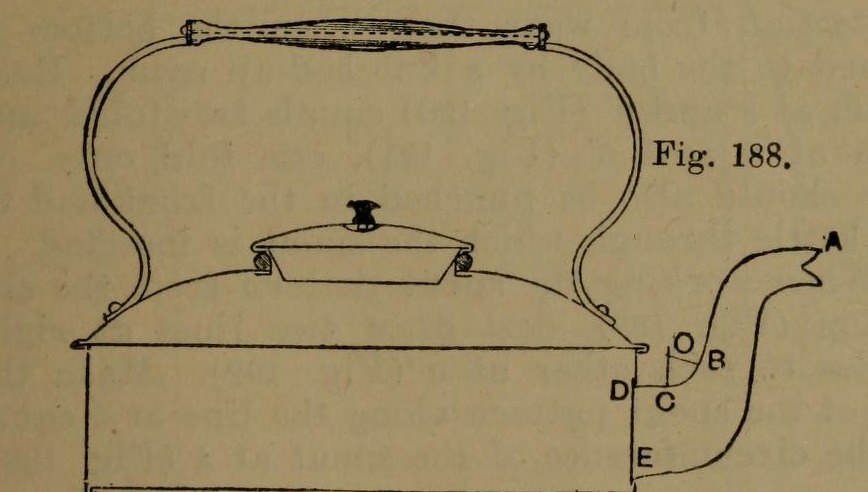


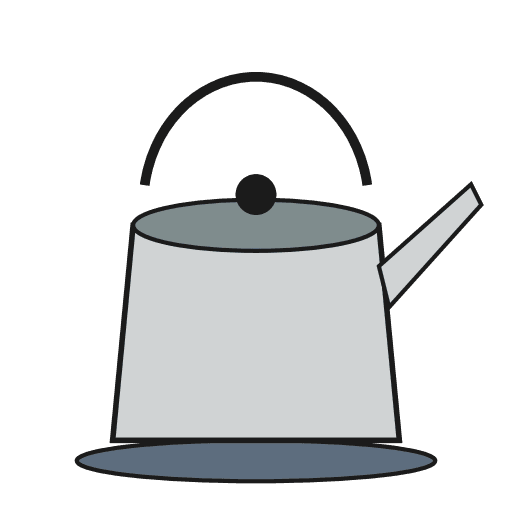
Stovetop Kettle: a Square Copper Kettle (Hasluck, 1907)
A tinsmith's square kettle in sheet copper, 9 x 9 in and 3 5/8 in deep: a box body with folded corner seams, a hollowed top pened on, a brazed and bent spout, a small cover, and a wooden handle on brass uprights.
Hasluck prefers copper; tinplate also works and is a separate route.
Source: Paul N. Hasluck, Tinplate Work (1907), pp. 91-98. Unknown: copper gauge, solder. Picture: Figs. 188-189 of the book.
اعلیٰ
Unknown
ہدایات
1
1
Cut the patterns
Cut the patterns
For a body 9 x 9 x 3 5/8 in, cut two ends 9 1/2 x 4 in and two sides 9 1/4 x 4 in, notched for box seams at the corners (Figs. 190-191), with allowances to fold at top and bottom. Punch the spout hole in the front. Cut the bottom 9 1/2 in square, notched for a 1/4 in edge. Set out the top as a 10 1/2 in square with curved allowances for hollowing and a 4 in circle for the cover hole (Fig. 193); set out the spout from the elevation (Fig. 192), the cover and its cone-shaped rim (Figs. 194-195).
اس مرحلے کے لیے مواد:
 تانبے کی چادر1 body, bottom, top, spout, cover
درکار اوزار:
 دو نوکوں والا پرکار
 خط کھینچنے والی سوئی
 چادر کاٹنے کی قینچی
2
2
Braze and shape the spout
Braze and shape the spout
Thin the long edges by hammering. Set in the throat with a stretching hammer on a beak iron, bend the spout round until the edges overlap, bind it with wire, lay spelter and borax along the inside of the seam and braze it; then close and braze the under seam. Fill it with lead and bend the neck with a round-faced hammer on the hollowing block; file off spare spelter and smooth it. Run out the lead, throw off a seating round the large end, trim the top with snips and tin the inside.
اس مرحلے کے لیے مواد:
 نامعلوم دھات1 spelter
 قلعی1 tinning
درکار اوزار:
 ہموار کرنے والی ہتھوڑی
 کھونٹا
 لوہے کا تار
 سہاگے کا سفوف
 بریزنگ کا شعلہ
 سیسہ
 سوراخ دار کفگیر
 سخت لکڑی کا ٹکڑا
 دھات کی ریتیچادر کاٹنے کی قینچی
3
3
Fold and seam the body
Fold and seam the body
Fold the top edges square, the front and back outwards and the sides likewise; fold the bottom edges right over inwards to take the bottom (Fig. 188). Hook each side's end over the front's and work the corner seam on a straight-edged tool (Figs. 198-199). Turn up the bottom's 1/4 in edge, push it edge-down into the bottom folds, and solder the bottom and seams.
اس مرحلے کے لیے مواد:
 ٹن-سیسے کا ٹانکہ1 ٹکڑا
درکار اوزار:
 لکڑی کا ہتھوڑاکھونٹا
 برقی سولڈرنگ آئرن
 فلکس
4
4
Hollow the top and make the cover
Hollow the top and make the cover
Hollow the top on the block: sink the four sides a little, hollow the corners with a bullet-faced hammer, flatten each side along the block edge, even the shoulder and smooth it all over. Pare the edges, mark the flange with an edging machine, set it down square with a hatchet stake and mallet, and take up an edge to fit over the body. Cut the cover hole with circular snips and fit a narrow wired rim, worked over inside. Make the cover: solder its cone rim to fit the wired rim, throw off a flange, hollow the cover disc and seam it on, and fix the knob.
اس مرحلے کے لیے مواد:
لوہے کا تار1 rimٹن-سیسے کا ٹانکہ1 ٹکڑانامعلوم دھات1 cover knobدرکار اوزار:
ہموار کرنے والی ہتھوڑیسخت لکڑی کا ٹکڑاکھونٹالکڑی کا ہتھوڑاچادر کاٹنے کی قینچیبرقی سولڈرنگ آئرنفلکس5
5
Handle, top and spout
Handle, top and spout
Cut two handle uprights from stout brass or copper band (Fig. 196), drill them for rivets and for the spindle that carries the wooden handle, and bend them to shape. Rivet them to the top and solder over the rivet heads inside. Pene the top down onto the body and solder along each edge. Push the spout through its hole from inside until its large end butts against the front, and solder it strongly from inside.
اس مرحلے کے لیے مواد:
 پیتل کی چادر1 handle uprights
 پیتل کی سلاخ1 spindle
 دستہ1 wood
 تانبے کی ریوٹ1 number not givenٹن-سیسے کا ٹانکہ1 ٹکڑا
درکار اوزار:
 ہاتھ کا برما
 ریوٹ کا ہتھوڑالکڑی کا ہتھوڑابرقی سولڈرنگ آئرنفلکس
مواد
9- 1 body, bottom, top, spout, coverپلیس ہولڈر
- 1 cover knobپلیس ہولڈر
- 1 tinningپلیس ہولڈر
- 3 ٹکڑےپلیس ہولڈر
- 1 rimپلیس ہولڈر
- 1 handle uprightsپلیس ہولڈر
- 1 spindleپلیس ہولڈر
- 1 woodپلیس ہولڈر
- 1 number not givenپلیس ہولڈر
درکار اوزار
17- پلیس ہولڈر
- پلیس ہولڈر
- پلیس ہولڈر
- پلیس ہولڈر
- پلیس ہولڈر
- پلیس ہولڈر
- پلیس ہولڈر
- پلیس ہولڈر
- پلیس ہولڈر
- پلیس ہولڈر
- پلیس ہولڈر
- پلیس ہولڈر
- پلیس ہولڈر
- پلیس ہولڈر
- پلیس ہولڈر
- پلیس ہولڈر
- پلیس ہولڈر
منسلک بلیو پرنٹ مواد


یہ بلوپرنٹ بناتا ہے
CC0 پبلک ڈومین
یہ بلیو پرنٹ CC0 کے تحت جاری کیا گیا ہے۔ آپ اجازت لیے بغیر اس کام کو نقل، ترمیم، تقسیم اور کسی بھی مقصد کے لیے استعمال کرنے کے لیے آزاد ہیں۔
میکر کی حمایت کریں ان کے بلیو پرنٹ کے ذریعے پروڈکٹس خرید کر جہاں وہ میکر کمیشن وینڈرز کی طرف سے مقرر، کماتے ہیں، یا اس بلیو پرنٹ کی نئی تکرار بنائیں اور آمدنی شیئر کرنے کے لیے اسے اپنے بلیو پرنٹ میں کنکشن کے طور پر شامل کریں۔