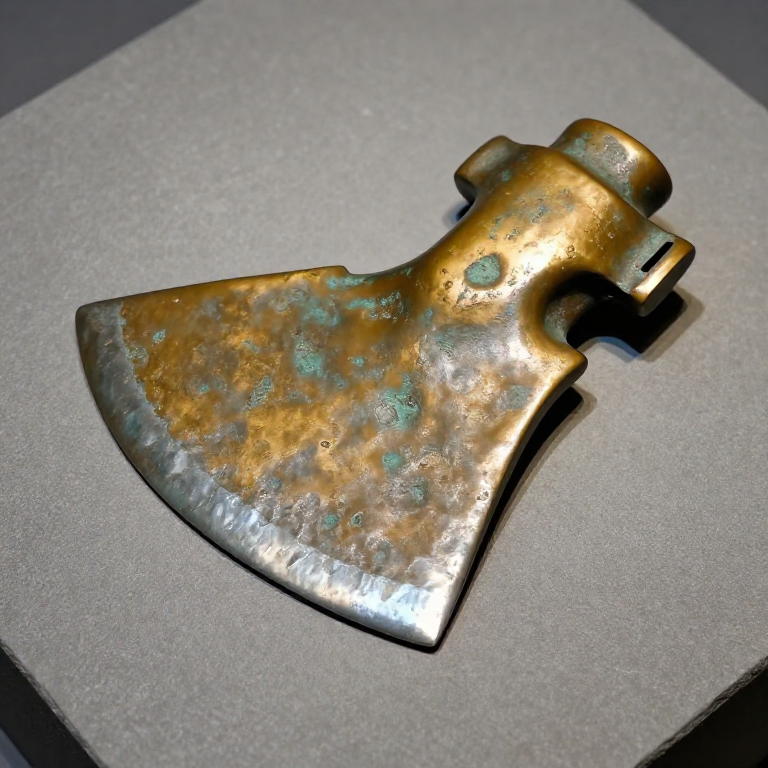
Casting a Bronze Flat Axe — The First Metal Cutting Tool
The flat axe was the first metal tool to surpass its stone predecessor in every way — sharper, more durable, and resharpened by simple hammering rather than knapping a new edge. Cast from bronze (roughly 90% copper, 10% tin), these axes appeared across Europe, the Near East, and East Asia from around 3300 BCE.
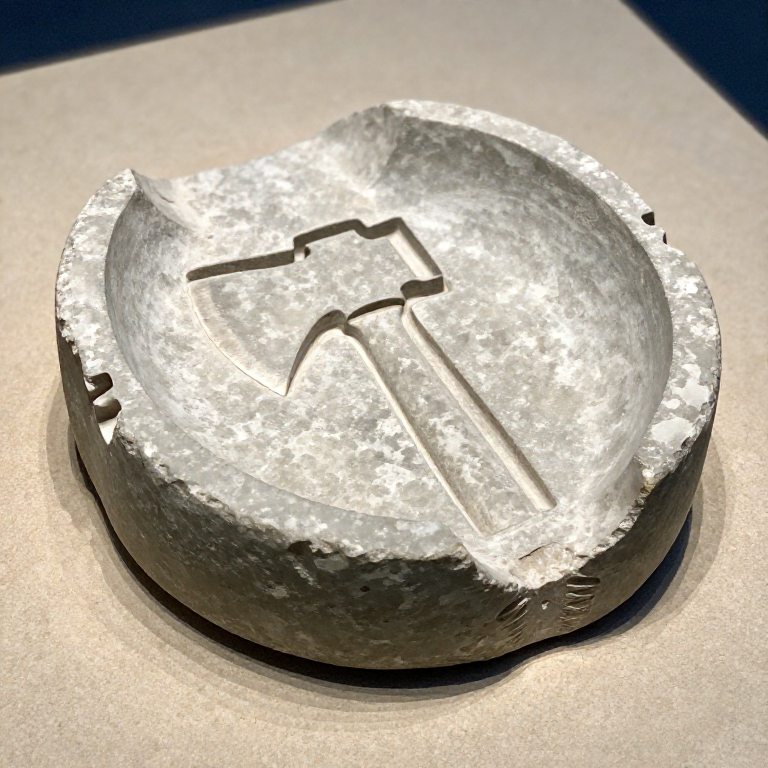
This blueprint uses an open-face stone mould — the simplest casting method. Molten bronze is poured into a carved soapstone cavity and allowed to cool. The resulting casting has one flat face (from the mould floor) and one slightly convex face (from the open top where the metal surface tensions). After demoulding, the axe is cold-hammered to harden the cutting edge, ground to shape, and hafted onto a wooden handle with rawhide lashing.
A single flat axe required the combined knowledge of mining, smelting, alloying, crucible-making, mould-carving, and woodworking — making it one of the most knowledge-intensive objects of its era.
Instrukcje
Prepare the mould
Prepare the mould
Materiały do tego kroku:
 Animal Fat (Tallow)30 g
Charge the crucible with bronze
Charge the crucible with bronze
Materiały do tego kroku:
 Copper Sheet (0.5-1mm)270 g
Melt and alloy the bronze
Melt and alloy the bronze
Materiały do tego kroku:
 Charcoal3 kg
Pour the bronze into the mould
Pour the bronze into the mould
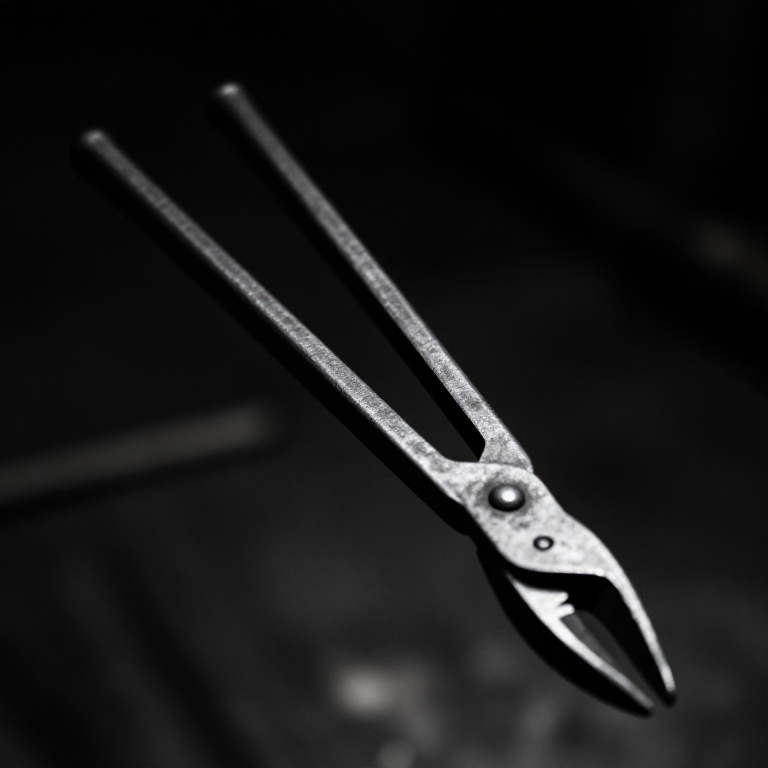
Tools needed:
 Crucible Tongs (long-handled)
Cool and demould
Cool and demould
Remove the pour channel and flash
Remove the pour channel and flash
Tools needed:
 Hammerstone
Cold-hammer the cutting edge
Cold-hammer the cutting edge
Tools needed:
 Flat Stone Slab
Grind and sharpen
Grind and sharpen
Materiały do tego kroku:
 Sandstone (Abrasive)1 sztuka
 Whetstone1 sztuka
Shape the haft
Shape the haft
Bind the axe head to the haft
Bind the axe head to the haft
Materiały do tego kroku:
 Rawhide Strips2 m
Materiały
6- Placeholder
- Placeholder
- 1 sztukaPlaceholder
- Placeholder
Wymagane narzędzia
3- Placeholder
- Placeholder
- Placeholder
Materiały z połączonych planów
Powiązane blueprinty
Te blueprinty dzielą się wiedzą — technikami, materiałami lub zasadami
Related blueprints
Other builds that share materials, tools, or techniques with this one.


CC0 Domena publiczna
Ten plan jest udostępniany na licencji CC0. Możesz go swobodnie kopiować, modyfikować, rozpowszechniać i wykorzystywać do dowolnych celów, bez konieczności uzyskiwania zgody.
Wesprzyj Makera kupując produkty przez jego plan, za co zarabia Prowizja Makera ustalony przez sprzedawców, lub stwórz nową iterację tego planu i dołącz go jako połączenie w swoim własnym planie, aby dzielić się przychodami.