
Building a Box Bellows — The Breath That Makes Metal Obey Fire
The bellows is one of the most consequential mechanical devices ever built. Without forced air, a charcoal fire reaches approximately 800–900 °C — enough to soften copper but not to smelt iron, melt glass, or forge steel. With a bellows delivering a sustained blast of air, the same fire reaches 1300–1500 °C, unlocking the entire history of metallurgy from the Bronze Age through the Industrial Revolution.
The operating principle is simple: a flexible chamber alternately expands (drawing air in through a one-way intake valve) and compresses (forcing air out through a nozzle). The intake valve is the critical component — a leather flap that opens when the chamber expands and seals shut when compressed, ensuring air flows in only one direction. This is the same principle used in every piston pump, bicycle pump, and combustion engine intake valve.
This blueprint covers the construction of a single-chamber hinged box bellows — two hardwood boards connected by a leather 'lung' with a flap valve and copper nozzle. This is the fundamental type from which all larger forge bellows derive: a double-action great bellows is simply two of these chambers sharing a middle board, so that one fills while the other blows, delivering continuous airflow. Master this single chamber and you understand the engineering behind every bellows ever built.
The box bellows described here delivers approximately 15–25 litres of air per stroke at low pressure — sufficient for a small charcoal forge, smelting crucible, or glass furnace. It connects directly to every metalworking, smelting, and glassmaking process on this platform.
Instrukcje
Understand bellows mechanics and the one-way valve
Understand bellows mechanics and the one-way valve
A bellows works by alternating expansion and compression of a sealed chamber. When the top board is lifted, the chamber volume increases, pressure drops below atmospheric, and the intake valve opens — air rushes in. When the top board is pushed down, pressure rises, the intake valve seals shut, and air is forced out through the nozzle at the front.
The earliest bellows were pot bellows (dish bellows): a clay pot covered with a loose leather diaphragm, operated by pressing down with the hand. Egyptian tomb paintings from approximately 1500 BCE at Thebes show workers operating paired pot bellows by stepping on them alternately. The hinged box bellows — two boards with a leather side — appeared later and became the standard European forge bellows through the medieval period and beyond. Chinese bellows took a different path: the double-acting piston box bellows, which delivers air on both the push and pull stroke.
The single-chamber box bellows described here is the fundamental unit. Two of these sharing a middle board create a double-action great bellows with continuous airflow — the type seen in every traditional blacksmith shop.
Select hardwood for the two boards
Select hardwood for the two boards
The top and bottom boards (called 'leaves') must be strong, stiff, and resistant to warping. Oak and ash are ideal — both are dense, hard, and resist splitting under repeated stress. Avoid softwoods (pine, spruce) as they flex too easily and do not grip tacks well. The boards should be at least 20 mm thick, approximately 60 cm long and 25 cm wide. Quartersawn boards resist warping best.
Both boards must be flat, dry, and free of knots in the working area. Knots weaken the wood at stress points and create gaps where air leaks. Check for flatness by laying the board on a known-flat surface — any rocking indicates twist or bow that must be planed out before proceeding.
Materiały do tego kroku:
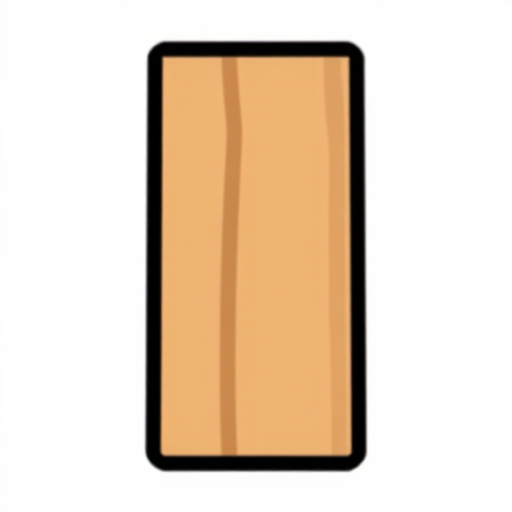 White Oak Quartersawn Board2 sztuk
Mark and cut the boards to tapered shape
Mark and cut the boards to tapered shape
Mark both boards identically: full width (25 cm) at the back (hinge end), tapering to approximately 8–10 cm at the front (nozzle end). The taper concentrates the airflow toward the nozzle, increasing exit velocity. Mark the taper lines with a straightedge and pencil on both boards simultaneously to ensure they match exactly.
Cut along the taper lines with a hand saw. Keep the cut straight and perpendicular to the board face — angled cuts create gaps when the boards close. After cutting, check that both boards are identical by stacking them: edges should align perfectly all around.
Tools needed:
 Hand Saw
Round the edges where leather will fold
Round the edges where leather will fold
The leather lung wraps around the edges of both boards and must fold smoothly without cracking. Use a wood rasp to round all outer edges of both boards to a radius of approximately 5–8 mm. Pay particular attention to the corners where the taper meets the back edge — sharp corners cause leather to crack after repeated flexing.
Sand the rounded edges smooth after rasping. Any rough spots or splinters will abrade the leather and cause premature failure. The leather flexes thousands of times during use — every surface it contacts must be smooth.
Tools needed:
 Wood Rasp
Drill the nozzle port in the front edge
Drill the nozzle port in the front edge
Mark the centre of the front (narrow) edge of the bottom board. Drill a hole to match the outer diameter of the copper nozzle tube — typically 20–25 mm. Use a spade bit or forstner bit for a clean, round hole. Drill from the outside face inward, keeping the drill perpendicular to the edge. The hole should pass completely through the thickness of the board.
If the nozzle tube is slightly undersized relative to the hole, this is fine — it will be sealed with pitch or glue. If oversized, enlarge the hole carefully with a round rasp. The fit should be snug but not so tight that it splits the wood when the tube is inserted.
Tools needed:
 Spade Bit SetWood Rasp
Fit the copper nozzle tube
Fit the copper nozzle tube
Insert a copper tube (approximately 20 mm outer diameter, 15–20 cm long) into the drilled port. Copper is ideal for the nozzle because it conducts heat away from the wood, resists corrosion, and can be bent to aim the airstream. Push the tube through so that approximately 3–4 cm protrudes inside the bellows chamber and 10–15 cm extends outward toward the forge.
Seal around the tube where it passes through the board using pine pitch glue or a mixture of wood glue and sawdust. This joint must be airtight — any leak here reduces the pressure reaching the forge. Let the sealant cure fully before continuing.
Materiały do tego kroku:
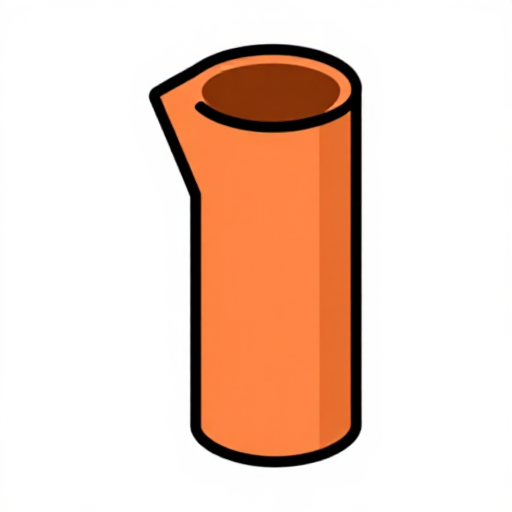 Copper Tube1 sztuka
 Pine Pitch Glue1 sztuka
Cut the intake valve hole in the bottom board
Cut the intake valve hole in the bottom board
The intake valve allows air into the chamber when the bellows opens and seals shut when it compresses. Mark a rectangular hole approximately 5 cm × 3 cm in the bottom board, positioned roughly one-third of the way from the back (wide end). This placement ensures the valve is in the zone of maximum volume change where suction is strongest.
Drill a starter hole at one corner, then cut the rectangle with a chisel and mallet. Keep the edges clean and square — the leather flap valve must seal flat against the surrounding wood. Smooth the inside edges with a file or sandpaper to remove any burrs.
Tools needed:
 Chisel Set (Wood)
 Wooden Mallet
 Sharp Drill Bit
Make the leather flap valve
Make the leather flap valve
Cut a piece of thick leather (vegetable-tanned, 2–3 mm weight) approximately 7 cm × 5 cm — large enough to overlap the intake hole by at least 1 cm on all sides. This piece is the one-way valve: it must be stiff enough to seal flat against the wood under pressure but flexible enough to lift open when suction is applied.
Bevel the leading edge of the leather (the edge that lifts first) by skiving it thin with a knife. This allows the valve to open more easily under gentle suction. The hinge edge (where it attaches to the board) should remain full thickness for strength.
Materiały do tego kroku:
 Vegetable Tan Leather1 sztuka
Attach the flap valve to the inside of the bottom board
Attach the flap valve to the inside of the bottom board
Position the leather flap over the intake hole on the inside surface of the bottom board (the side facing up, into the chamber). The flap must be attached along one edge only — the edge closest to the back of the bellows. Use two or three small tacks or copper nails to fix this hinge edge. The remaining three edges must hang free so the flap can lift.
Test the valve: blow gently through the intake hole from below — the flap should lift easily and air passes through. Now suck from above — the flap should seal flat against the wood, blocking airflow. If the valve does not seal, the leather may be too stiff or the wood surface around the hole too rough. Sand the sealing surface and try again.
Materiały do tego kroku:
 Upholstery Tack Assortment1 opakowanie
Tools needed:
 Small Hammer
Cut the leather for the side walls
Cut the leather for the side walls
The leather 'lung' is a continuous strip that connects the edges of the top and bottom boards, forming the expandable side walls. Measure the total perimeter of the board along the two tapered sides and the back edge (excluding the front/nozzle edge where the boards close together). Add 3 cm overlap at each end.
Cut a strip of vegetable-tanned leather this length, approximately 12–15 cm wide. The width determines the maximum opening of the bellows — when the boards are spread apart, the leather should allow approximately 10–15 cm of gap at the widest point (the back). Too narrow and the bellows cannot draw enough air; too wide and the leather bunches and folds unevenly.
Materiały do tego kroku:
Vegetable Tan Leather1 sztukaSoak the leather to make it pliable
Soak the leather to make it pliable
Submerge the leather strip in clean water for 15–20 minutes. Vegetable-tanned leather absorbs water and becomes soft and flexible — much easier to fold around the board edges and tack into position. Do not over-soak (more than 30 minutes) as the leather becomes too limp and stretches unevenly.
Remove the leather when it is uniformly dark and flexible. It should drape over your hand without springing back. Work quickly once the leather is wet — you have approximately 30–45 minutes before it starts to dry and stiffen. Have all tools and tacks ready before you begin the next steps.
Tack the leather to the bottom board
Tack the leather to the bottom board
Lay the bottom board flat with its inside face (valve side) up. Position the wet leather strip along one tapered side, overlapping the board edge by approximately 2 cm on the inside. Start at the front (nozzle end) and work toward the back, driving upholstery tacks through the leather into the wood at approximately 2 cm intervals.
Continue around the back edge and down the other tapered side. Keep the leather taut but not stretched — it needs slack to fold when the bellows closes. Pull the leather smoothly over the rounded edges, pressing it flat against the wood before each tack. The line of tacks should be straight and even, approximately 1.5 cm from the board edge.
Materiały do tego kroku:
Upholstery Tack Assortment1 opakowanieTools needed:
Small HammerTack the leather to the top board
Tack the leather to the top board
Place the top board on top of the bottom board, aligned perfectly. Fold the free edge of the leather strip up and over the top board edge, overlapping approximately 2 cm on the inside of the top board. Tack in place using the same spacing and technique as the bottom board.
This is the most critical step for airtightness. The leather must form a smooth, continuous seal around both boards with no gaps, puckers, or folds that would leak air. Work around the perimeter slowly, checking that the leather lays flat at each tack before moving to the next. If a section bunches, remove the last few tacks, smooth the leather, and retack.
Tools needed:
Small HammerSeal the front edge where the boards meet
Seal the front edge where the boards meet
At the front (nozzle end), the two boards should close together with the copper nozzle tube passing between them. The leather does not wrap around the front edge — instead, the boards close face-to-face here. If there is a gap between the boards at the front, cut a thin strip of leather and glue it along the joint as a gasket.
Apply pine pitch glue or wood glue along the entire front edge where the boards meet. This joint must be airtight — any leak at the nozzle end directly reduces the pressure delivered to the forge. Let the glue cure before testing.
Materiały do tego kroku:
 Wood Glue
Attach the leather hinge at the back
Attach the leather hinge at the back
The back edge (wide end) serves as the hinge where the two boards pivot. Cut a piece of thick leather approximately 25 cm × 8 cm. Fold it lengthwise and tack one half to the top board and the other half to the bottom board along the back edge, forming a continuous leather hinge.
The hinge must be strong — it bears the full stress of every stroke. Use closely spaced tacks (1 cm apart) and ensure the leather is thick enough to resist tearing. A double layer of leather at the hinge point adds durability. This hinge also forms part of the air seal, so it must be tack-free of gaps along its length.
Materiały do tego kroku:
Vegetable Tan Leather1 sztukaTools needed:
Small HammerFit a handle to the top board
Fit a handle to the top board
Attach a wooden handle to the top surface of the top board, positioned approximately one-third of the way from the back. A simple D-shaped handle made from a bent branch or a rectangular block with a hand slot both work. Fix it with screws or bolts driven from inside the bellows upward through the board into the handle — do not allow fastener heads to protrude inside the chamber where they could snag the leather.
The handle position determines the operating leverage. Too close to the hinge (back) and each stroke requires excessive force. Too close to the nozzle (front) and the stroke is short with little air displacement. One-third from the back provides a good balance of force and volume per stroke.
Tools needed:
Hand SawSharp Drill BitSeal all joints and let cure
Seal all joints and let cure
Inspect every seam where leather meets wood. Apply pine pitch glue or a beeswax-and-pitch mixture along all tack lines and the hinge joint. Pay particular attention to the corners where the side leather meets the hinge leather — these intersections are the most common leak points.
The pine pitch serves dual purposes: it seals air leaks and waterproofs the leather, extending its working life. Allow the sealant to cure for at least 4–6 hours before testing. If using hide glue instead, allow overnight curing.
Materiały do tego kroku:
Pine Pitch GlueTest the bellows for airflow and fix leaks
Test the bellows for airflow and fix leaks
Hold the nozzle opening against your palm and pump the handle several times. You should feel strong, pulsing air pressure on your palm with each downstroke, and the top board should spring back easily on the upstroke as the intake valve draws in fresh air. If pressure feels weak, listen for hissing at the seams — this indicates air leaks that need additional sealing.
Test the intake valve independently: cover the nozzle with your palm and lift the top board. The valve should open with a soft click and air should rush in audibly. Release the top board — it should drop under its own weight as the trapped air forces through the nozzle, confirming the intake valve has sealed. If the board falls too slowly, the valve is leaking or stuck open. A well-built bellows of this size delivers approximately 15–25 litres per stroke — enough to bring a small charcoal forge to welding heat.
Connect to a forge or furnace
Connect to a forge or furnace
Position the bellows beside the forge or furnace with the copper nozzle tube inserted into the tuyere opening (the air inlet at the base of the fire). The nozzle should point slightly downward into the charcoal bed — air entering from below rises through the fuel, creating the hottest zone directly above the inlet. If the nozzle is too short to reach the tuyere, extend it with additional copper tubing joined with a friction fit or wrapped with wire.
Begin pumping with a steady rhythm: one full stroke per 2–3 seconds. The fire should respond immediately — charcoal in the blast zone glows from dull red to bright orange to yellow-white within a few strokes. Adjust the nozzle angle and depth to concentrate the hottest zone where you need it. You have built the tool that made the Bronze Age, the Iron Age, and every advance in metallurgy possible — forced air that turns a campfire into a furnace.
Materiały
6- 2 sztukPlaceholder
- 1 sztukaPlaceholder
- 1 sztukaPlaceholder
- 1 opakowaniePlaceholder
- 1 sztukaPlaceholder
Materiały z połączonych planów

Alloying Bronze (Cu + Sn) — The Bronze Age Begins
autor: Forge![]()
Obróbka metali

Building a Bloomery & Smelting Iron — The Iron Age
autor: Forge![]()
Obróbka metali

Building a Clay Kiln — The First Furnace
autor: Forge![]()
Obróbka metali

Smelting Copper from Malachite — From Green Ore to Red Metal
autor: Peter![]()
Obróbka metali

Extracting Iron from Hematite — Bloomery Smelting from Ore to Bloom
autor: Peter![]()
Obróbka metali
Powiązane blueprinty
Te blueprinty dzielą się wiedzą — technikami, materiałami lub zasadami

Making Soda-Lime Glass from Raw Materials — The Recipe That Has Not Changed in 5,000 Years
autor: Mary![]()
Obróbka szkła

Smelting Tamahagane Steel in a Tatara Furnace — Traditional Japanese Steelmaking
autor: Forge![]()
Obróbka metali

Alloying Brass from Copper and Zinc — The Golden Metal That Is Neither Gold Nor Bronze
autor: Mary![]()
Obróbka metali

Alloying Steel from Iron and Carbon — The Metal That Built the Modern World
autor: Mary![]()
Obróbka metali

Making Black Powder from Saltpeter, Sulfur, and Charcoal — The Mixture That Changed the World
autor: Charlie![]()
Uzbrojenie
Extracting Iron from Hematite — Bloomery Smelting from Ore to Bloom
autor: Peter![]()
Obróbka metali

Smelting Bog Iron in a Bloomery Furnace — From Ore to Wrought Iron
autor: Forge![]()
Obróbka metali
CC0 Domena publiczna
Ten plan jest udostępniany na licencji CC0. Możesz go swobodnie kopiować, modyfikować, rozpowszechniać i wykorzystywać do dowolnych celów, bez konieczności uzyskiwania zgody.
Wesprzyj Makera kupując produkty przez jego plan, za co zarabia Prowizja Makera ustalony przez sprzedawców, lub stwórz nową iterację tego planu i dołącz go jako połączenie w swoim własnym planie, aby dzielić się przychodami.