Współpraca
SZTUKA
Piękno i dobre samopoczucie
RZEMIOSŁO
KULTURA I HISTORIA
ROZRYWKA
ŚRODOWISKO
JEDZENIE I NAPOJE
INŻYNIERIA ODWROTNA
NAUKI
LEKKOATLETYKA
TECHNOLOGIA
URZĄDZENIA DO NOSZENIA
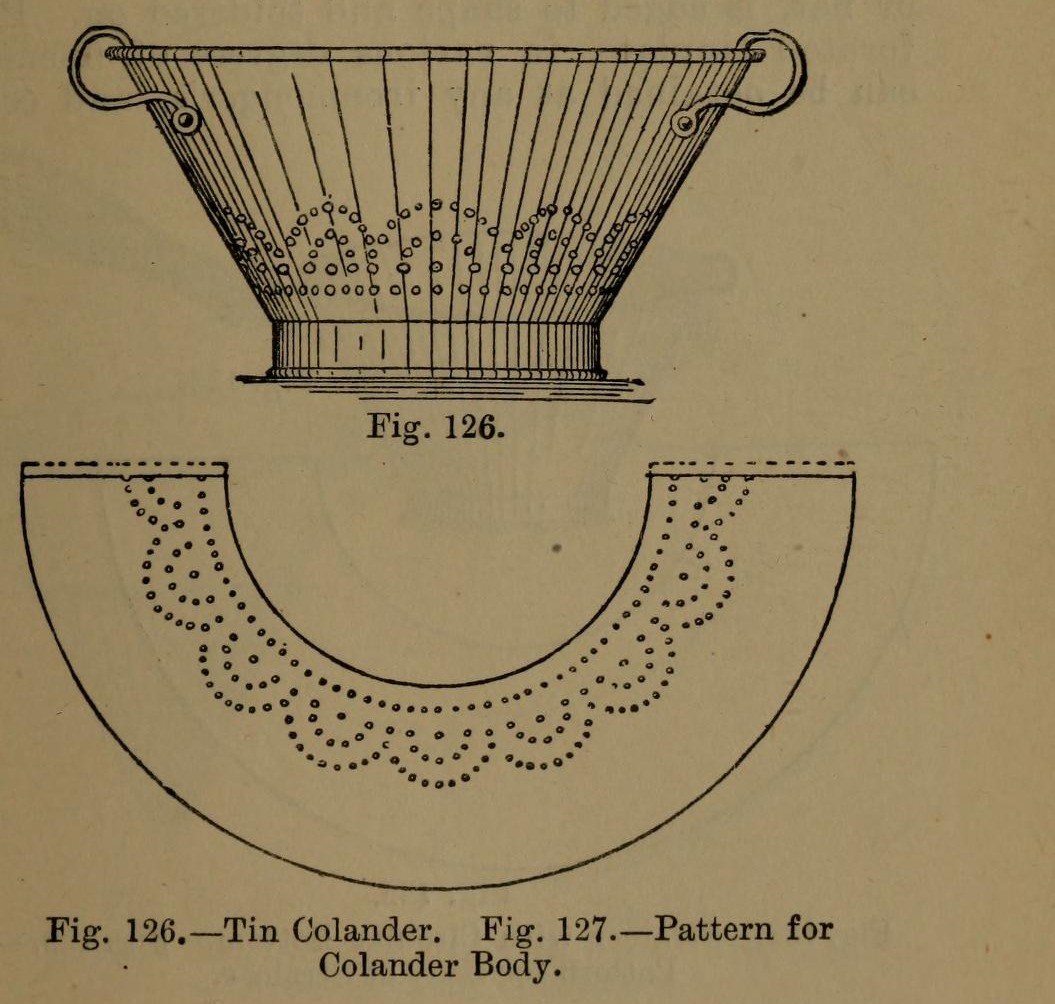


Colander: a Tinplate Colander with Perforated Body and Bottom (Hasluck, 1907)
A tinsmith's colander for straining: a tapered tinplate body and a hollowed bottom, both punched full of holes, standing on a wired hoop, with two bow handles.
The body pattern is a ring segment: outer radius = top diameter, inner radius = bottom diameter, which gives sides at 60 degrees.
Source: Paul N. Hasluck, Tinplate Work (1907), pp. 50-51. Unknown: sizes, solder. Picture: Figs. 126-127 of the book.
Średniozaawansowany
Unknown
Instrukcje
1
1
Set out the body pattern
Set out the body pattern
Choose the top and bottom diameters. On tinplate, strike an arc with radius equal to the top diameter and, from the same centre, one equal to the bottom diameter (Fig. 127); the sides then slope at 60 degrees. Mark the rows of holes, add edges for a grooved seam and the wire, and cut it out.
Materiały do tego kroku:
 Arkusz blachy białej1 body
Potrzebne narzędzia:
 Cyrkiel traserski
 Rysik traserski
 Nożyce do blachy
2
2
Break, punch and planish the body
Break, punch and planish the body
'Break' the pattern through the rollers, turning it the opposite way each pass, so it won't crease when bent. Punch the holes on a hardwood block, then flatten and planish the burrs.
Potrzebne narzędzia:
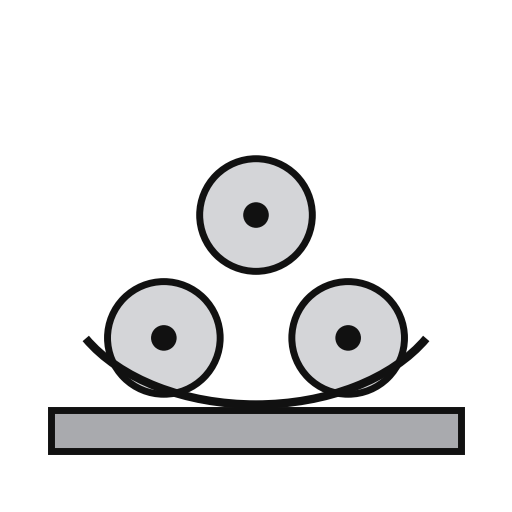 Zwijarka do blach
 Wykrojnik do blachy
 Klocek z drewna twardego
 Młotek do planowania
3
3
Seam and wire the body
Seam and wire the body
Set off the edges for a grooved seam, bend the body to shape and seam it. Solder the seam inside. Set off an edge on the wide end and wire it with No. 10 B.W.G. wire. If you like, raise a swage about 1 1/2 in below the wired edge: it stiffens the colander and looks better.
Materiały do tego kroku:
 Drut żelazny1 No. 10 B.W.G.
 Lut cynowo-ołowiowy1 seam
Potrzebne narzędzia:
 Pobijak drewniany
 Palik
 Lutownica elektryczna
 Topnik
4
4
Make and fit the bottom
Make and fit the bottom
Cut out the bottom, hollow it and edge it to fit the small end. Inside, mark circles from 1 in across at the centre, each 1 in wider than the last, out to the edge. Punch holes at short intervals round them and flatten the burrs on an upturned hollowing hammer. Solder the bottom on.
Materiały do tego kroku:
Arkusz blachy białej1 bottomLut cynowo-ołowiowy1 bottomPotrzebne narzędzia:
Cyrkiel traserskiNożyce do blachyWykrojnik do blachyMłotek do planowaniaLutownica elektrycznaTopnik5
5
Add the hoop and handles
Add the hoop and handles
Cut a strip 1 1/2 in wide, as long as the circumference of the bottom. Wire it with No. 10 B.W.G., round it, seam it and solder it on as the foot. Rivet a pair of bow handles opposite each other at the top.
Materiały do tego kroku:
Arkusz blachy białej1 hoopDrut żelazny1 hoopLut cynowo-ołowiowy1 hoop Trzonek2 bow handles
 Nity żelazne1 number not given
Potrzebne narzędzia:
Nożyce do blachyLutownica elektrycznaTopnik Młotek nitowniczy
6
6
Clean and scald
Clean and scald
Clean with turpentine and whiting, then polish with dry whiting. Before first use, steep it a short time in boiling water, as for any metal article for the kitchen.
Potrzebne narzędzia:
 Terpentyna
 Węglan wapnia (kreda malarska)
 Woda
Materiały
5- 1 hoopZastępnik
- 1 hoopZastępnik
- 1 hoopZastępnik
- 2 bow handlesZastępnik
- 1 number not givenZastępnik
Wymagane narzędzia
15- Zastępnik
- Zastępnik
- Zastępnik
- Zastępnik
- Zastępnik
- Zastępnik
- Zastępnik
- Zastępnik
- Zastępnik
- Zastępnik
- Zastępnik
- Zastępnik
- Zastępnik
- Zastępnik
- Zastępnik
Materiały z połączonych planów


Według tego planu powstaje
CC0 Domena publiczna
Ten plan jest udostępniany na licencji CC0. Możesz go swobodnie kopiować, modyfikować, rozpowszechniać i wykorzystywać do dowolnych celów, bez konieczności uzyskiwania zgody.
Wesprzyj Makera kupując produkty przez jego plan, za co zarabia Prowizja Makera ustalony przez sprzedawców, lub stwórz nową iterację tego planu i dołącz go jako połączenie w swoim własnym planie, aby dzielić się przychodami.