
Współpraca
SZTUKA
Piękno i dobre samopoczucie
RZEMIOSŁO
KULTURA I HISTORIA
ROZRYWKA
ŚRODOWISKO
JEDZENIE I NAPOJE
INŻYNIERIA ODWROTNA
NAUKI
LEKKOATLETYKA
TECHNOLOGIA
URZĄDZENIA DO NOSZENIA
Forge Blast Fan: Riveted Sheet-Iron Drum, Shrunk-Collar Spindle and Four Screwed Blades, Belt-Driven at 360 rpm (Edwinson, 1886)
Forge

Autor

Forge

14. listopad 2026NO
6
0
0
0
0

Forge Blast Fan: Riveted Sheet-Iron Drum, Shrunk-Collar Spindle and Four Screwed Blades, Belt-Driven at 360 rpm (Edwinson, 1886)

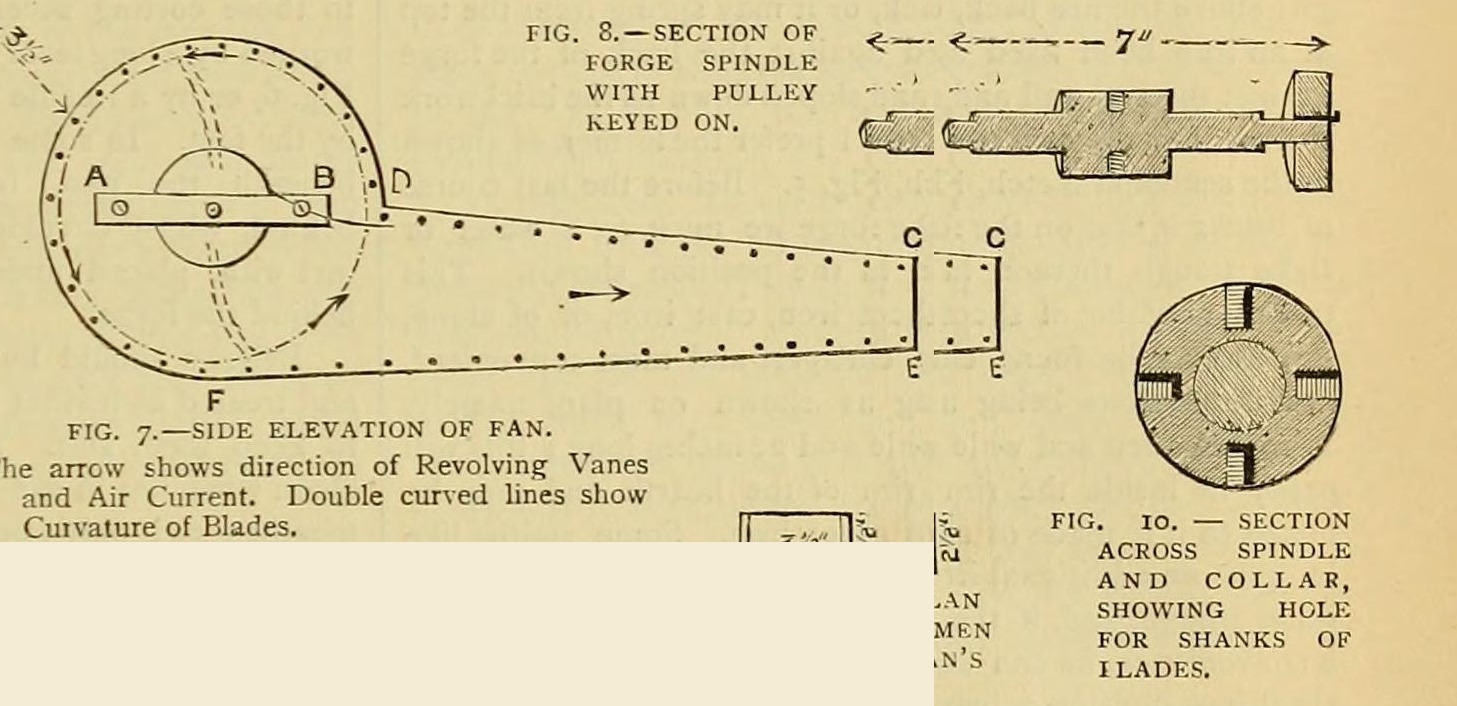
George Edwinson's home-made forge fan (Amateur Work, 1886), which he preferred to bellows: two 1/8 in. sheet-iron sides with a 3 1/2 in. intake, a riveted 1/16 in. casing, a turned 3/4 in. spindle with a shrunk-on collar holding four forged, slightly scooped blades, brass bearings, and a 2 in. pulley driven from a 2 ft hand wheel at 30 rpm for 360 rpm.
Zaawansowany
Three to four days

Instrukcje

1

His sizes

Wczytywanie notatnika Jupyter…
2

Read Edwinson

"Under no circumstances should I advise an amateur to make his own bellows, but he may be able to make a fan."
3

Cut the sides

Cut two sides from 1/8 in. sheet iron to his fig. 7: 9 in. across at the widest, 2 1/2 in. at the narrowest, 2 ft long. Cut a 3 1/2 in. hole in each for the spindle and air intake, drill two 3/8 in. holes for bolts A and B (filed square), and drill the rivet holes round the edge.

Materiały do tego kroku:

Blacha ze stali miękkiejBlacha ze stali miękkiej1 sztuka

Potrzebne narzędzia:

Nożyce do blachyNożyce do blachy
Wiertarka stołowaWiertarka stołowa
Pilniki (pilnik ręczny)Pilniki (pilnik ręczny)
PunktakPunktak
4

Rivet the casing

Cut 5 in. strips of 1/16 in. sheet with 3/4 in. margins bent down (4 in. clear): 14 in. from C to D, 20 in. from E to F, and about 22 in. round the drum from D to F (measure it). Mark the rivet holes through the side holes, nick between holes so the drum strip bends without buckling, and rivet, backing each head with stout iron. Leave a foot of the drum strip open. (Easier: make the sides 2 in. larger with outward flanges and rivet the strips to them.)

Materiały do tego kroku:

Blacha ze stali miękkiejBlacha ze stali miękkiej1 sztuka
Nity żelazneNity żelazne1 sztuka

Potrzebne narzędzia:

Nożyce do blachyNożyce do blachy
Wiertarka stołowaWiertarka stołowa
Zestaw nitowniczyZestaw nitowniczy
MłotekMłotek
Miara zwijanaMiara zwijana
5

Turn the spindle

Turn 7 in. of 3/4 in. round iron smooth. Turn one end to 1/2 in. for 5/8 in. and the other to 1/2 in. for 2 1/8 in., with sharp shoulders. Bore a 2 x 2 in. collar a shade under size, heat it red and slip it on 1 in. in from a shoulder, then cool it in water to shrink it tight.

Materiały do tego kroku:

Pręt z kutego żelazaPręt z kutego żelaza1 sztuka
WodaWoda1 sztuka

Potrzebne narzędzia:

Tokarka do metaluTokarka do metalu
Kuźnia kowalskaKuźnia kowalska
Szczypce kowalskieSzczypce kowalskie
6

Drill the collar

Drill four 5/16 in. holes 5/8 in. deep at quarters round the middle of the collar and tap them 3/8 in. (fig. 10).

Potrzebne narzędzia:

Wiertarka stołowaWiertarka stołowa
Gwintowniki ręczneGwintowniki ręczne
Pokrętło do gwintownikówPokrętło do gwintowników
7

Forge the blades

Forge four blades (fig. 9) from 5/8 or 3/4 in. round iron, upsetting and flattening the ends to 1/16 in. thick (or weld 1/4 in. plate to 5/8 in. arms and thin it). Thread the arm ends to fit the collar, curve the blades slightly into a scoop, and bend the arms a little off concentric for a steadier blast.

Materiały do tego kroku:

Pręt z kutego żelazaPręt z kutego żelaza1 sztuka

Potrzebne narzędzia:

Kuźnia kowalskaKuźnia kowalska
KowadłoKowadło
MłotekMłotek
Gwintowniki ręczneGwintowniki ręczne
8

Bearings and assembly

Bolt a 1/2 in. brass bar at least 1 1/4 in. wide across each intake hole (A-B) and bore it true for the spindle. Fit one bearing, pass the spindle in, fit the other and bolt up. Screw the blades in through the open part of the drum, each slightly askew, check they turn without touching, and close the drum with thin-headed bolts, nuts outside.

Materiały do tego kroku:

Pręt mosiężnyPręt mosiężny1 sztuka
Zestaw śrub sześciokątnychZestaw śrub sześciokątnych1 sztuka

Potrzebne narzędzia:

Wiertarka stołowaWiertarka stołowa
Tokarka do metaluTokarka do metalu
Pilniki (pilnik ręczny)Pilniki (pilnik ręczny)
9

Drive it

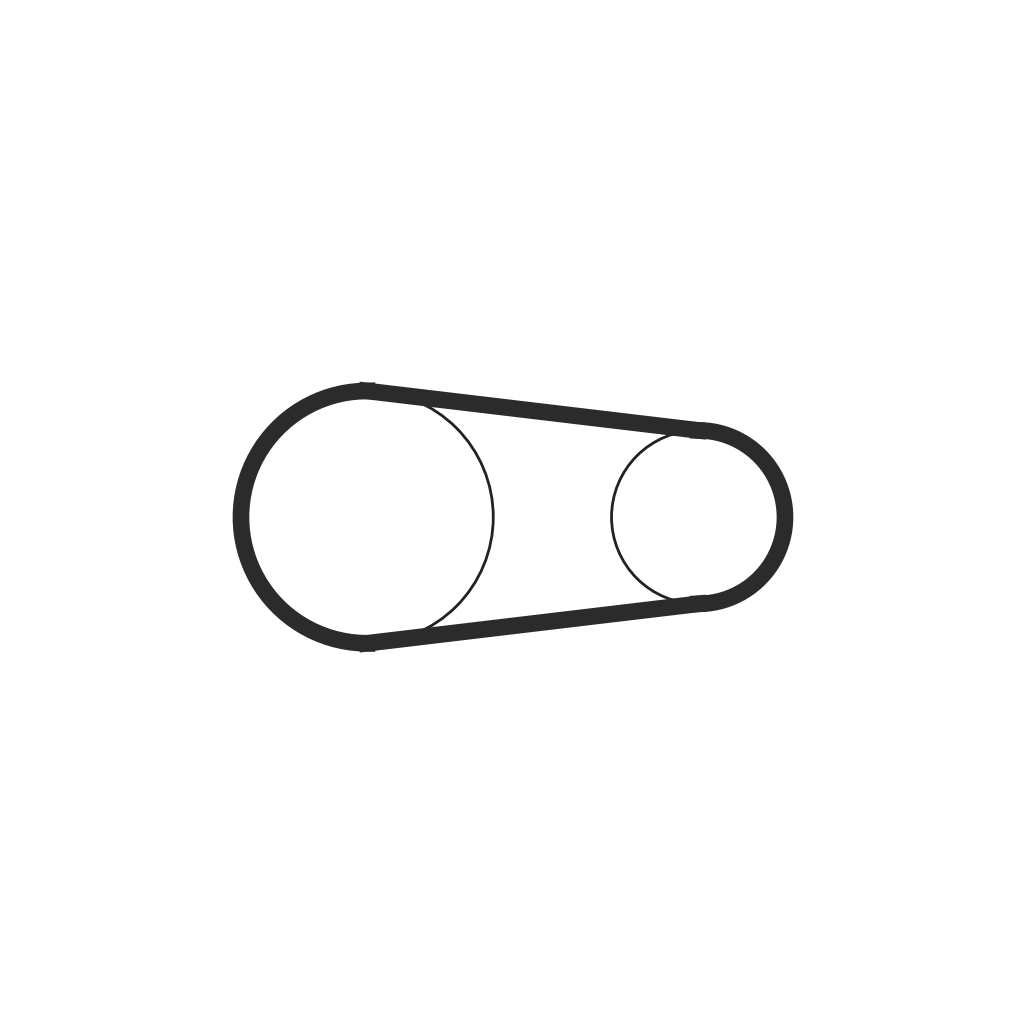
File a flat on the 1 1/2 in. of spindle that stands out on the pulley side and key a 2 in. pulley with a 1 1/2 in. face to it. Belt it from a 2 ft wheel turned at 30 rpm: the fan runs at 360 rpm. Put the crank by the forge head, worked by hand or a foot lever (ours: details left to the reader in the source), and pipe the 3 1/2 x 2 1/2 in. mouth to the tuyere.

Materiały do tego kroku:

KrążekKrążek1 sztuka
Pas napędowyPas napędowy1 sztuka

Potrzebne narzędzia:

Pilniki (pilnik ręczny)Pilniki (pilnik ręczny)
MłotekMłotek
10

Troubleshooting

Fan troubleshooting.

Flow

Loading...
11

History and honest limits

From George Edwinson, "Smithing and Forging" I, **Amateur Work, Illustrated**, vol. V (1886), pp. 162-164 and figs. 7-11 (checked on the archive.org scan amateurworkillus05lond). He leaves the crank, wheel frame and pipe to the reader; the metric figures and tools are ours.

Materiały

8

Wymagane narzędzia

13

Według tego planu powstaje

CC0 Domena publiczna

Ten plan jest udostępniany na licencji CC0. Możesz go swobodnie kopiować, modyfikować, rozpowszechniać i wykorzystywać do dowolnych celów, bez konieczności uzyskiwania zgody.

Wesprzyj Makera kupując produkty przez jego plan, za co zarabia Prowizja Makera ustalony przez sprzedawców, lub stwórz nową iterację tego planu i dołącz go jako połączenie w swoim własnym planie, aby dzielić się przychodami.

Dyskusja

(0)

Zaloguj się aby dołączyć do dyskusji

Ładowanie komentarzy...