
Współpraca
SZTUKA
Piękno i dobre samopoczucie
RZEMIOSŁO
KULTURA I HISTORIA
ROZRYWKA
ŚRODOWISKO
JEDZENIE I NAPOJE
INŻYNIERIA ODWROTNA
NAUKI
LEKKOATLETYKA
TECHNOLOGIA
URZĄDZENIA DO NOSZENIA
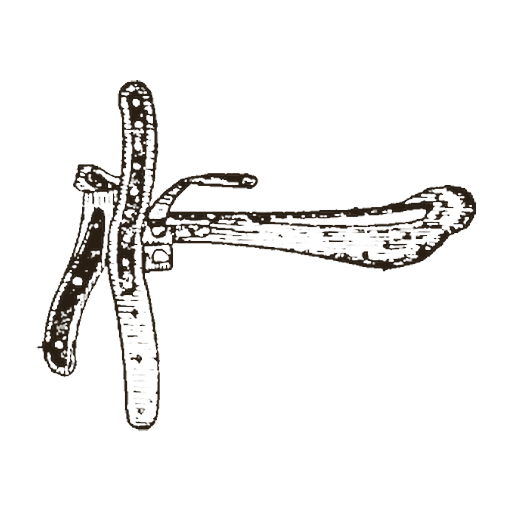
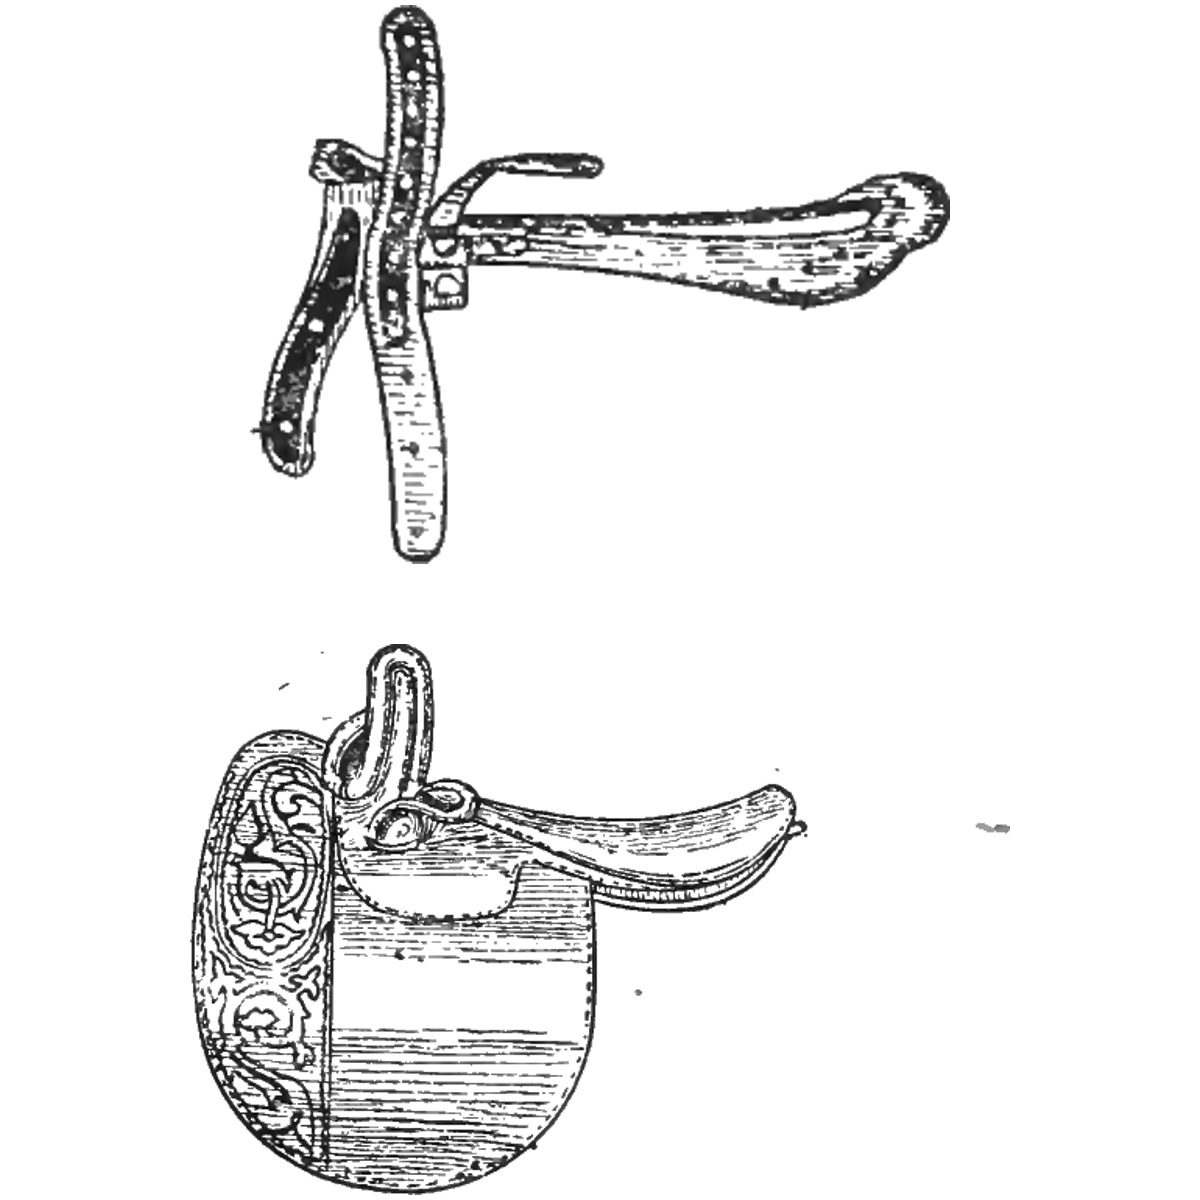
Lady's Side Saddle: Stuffed Head, Small Off-Head, Bolstered Safe and Leather Girth (Hasluck, Saddlery, 1904)
Tex

Autor

Tex

13. listopad 2026FO
9
0
0
0
0

Lady's Side Saddle: Stuffed Head, Small Off-Head, Bolstered Safe and Leather Girth (Hasluck, Saddlery, 1904)

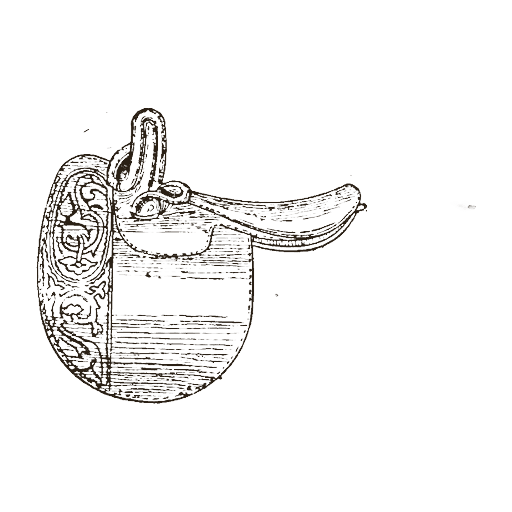
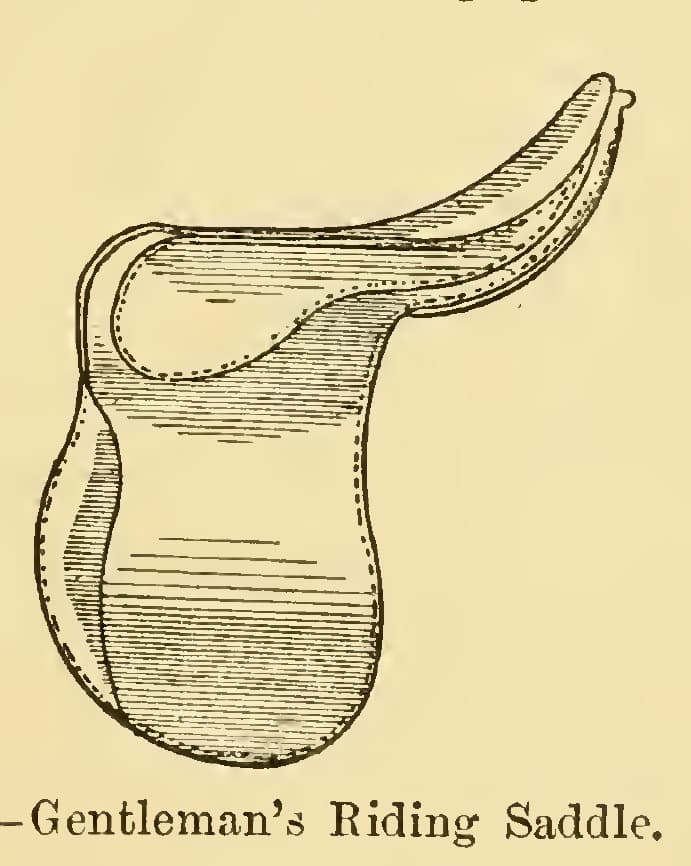
On a side saddle the rider sits with both legs on the near side, the right knee over a stuffed head in front. This is the side saddle from Paul N. Hasluck's Saddlery (1904): a bought tree with a small off-head, the seat built like the gentleman's saddle but padded higher on the riding side, a quilted (bolstered) safe on the near side, and a thin leather girth that buckles from the saddle. He refers back to the gentleman's saddle for many steps, and so does this blueprint.
Zaawansowany
About 4-5 days

Instrukcje

1

His sizes in centimetres

Wczytywanie notatnika Jupyter…
2

Read Saddlery, ch. III

"The head or point is the part projecting on the side of the saddle in front, over which the rider's knee is placed"; "the safe is the part in front which reaches beyond the saddle, covering the horse's shoulder to keep the rider's clothes from the horse." The tree (Fig. 6) is bought; trees differ in head, seat and cantle.
3

Web the tree and build the seat ground

Get a side saddle tree with a small off-head. Strain the web thoroughly and fit the cross pieces and linen to form a ground for the seat, exactly as for the gentleman's saddle. Cover it with white serge for stuffing, but make the sausage pad on the side where the rider sits nearly twice as thick as on the off side: if the seat ran down steep towards the riding side, the rider could fall. Increase the rounding gradually, sloping it down towards the front; sharp corners there would hurt the rider.

Materiały do tego kroku:

Terlica siodła damskiegoTerlica siodła damskiego1 sztuka
Taśma naciągowaTaśma naciągowa1 sztuka
Tkanina lnianaTkanina lniana1 sztuka
Serża wełnianaSerża wełniana1 sztuka
Wypełnienie wełnianeWypełnienie wełniane1 sztuka
GwoździeGwoździe1 sztuka
Nić lnianaNić lniana1 sztuka
Wosk pszczeliWosk pszczeli1 sztuka

Potrzebne narzędzia:
ObcęgiObcęgi
Młotek ciesielskiMłotek ciesielski
NożyczkiNożyczki
Dwie igły rymarskieDwie igły rymarskie
SzydłoSzydło
4

Stuff the head

Before covering the seat: cut two pieces of stiff leather the shape of the head, reaching to the bottom on the inside and large enough outside to stitch round the horn. Stitch one firmly on each side, put two or three tacks in the outer one at the bottom, and thin and shape the edges. Shape white serge to the head, round at the top and about 2-1/2 in wider along the sides and as much longer at the top; tack round it with white linen thread, turning the edges in and puckering the top so it bulges when stuffed. Stitch it inside the head to the stitches in the leathers so it covers the edge of the horn, bulging equally all round. Stuff clean carded flock, cut small, from the bottom, pushing it up with the seat awl until firm, plump and smooth; hold it with a few loose stitches back and forth along the sides, top up the centre if needed and level it with the seat awl.

Materiały do tego kroku:

Skóra uprzężowaSkóra uprzężowa1 sztuka
Serża wełnianaSerża wełniana1 sztuka
Wypełnienie wełnianeWypełnienie wełniane1 sztuka
Nić lnianaNić lniana1 sztuka
Wosk pszczeliWosk pszczeli1 sztuka
GwoździeGwoździe1 sztuka

Potrzebne narzędzia:

Nóż do skóryNóż do skóry

NożyczkiNożyczki
SzydłoSzydło
Dwie igły rymarskieDwie igły rymarskie
Żelazo do siedziskaŻelazo do siedziska
Młotek ciesielskiMłotek ciesielski
5

Cover and stuff the seat

Put serge on the outer side of the small head, nailed at the bottom and turned in along its edge. Put on the serge seat cover as for the gentleman's saddle, but cut it round the stuffed horn, turn the edges under and nail the ends in front; along the small horn, turn in the seat cover's edge and whip it to the turned-in edge of the piece underneath. Cut the slit in the centre and stuff as for the gentleman's saddle. Quilt along the ridge from the near-side horn to the root of the cantle, giving a flat, full, square edge, and the same on the other side; refill and level the centre and both points with the seat awl.

Materiały do tego kroku:

Serża wełnianaSerża wełniana1 sztuka
Wypełnienie wełnianeWypełnienie wełniane1 sztuka
GwoździeGwoździe1 sztuka
Nić lnianaNić lniana1 sztuka
Wosk pszczeliWosk pszczeli1 sztuka

Potrzebne narzędzia:

NożyczkiNożyczki
Młotek ciesielskiMłotek ciesielski
SzydłoSzydło
Dwie igły rymarskieDwie igły rymarskie
Żelazo do siedziskaŻelazo do siedziska
6

Cover the head and seat in hogskin

Nail hogskin over the long point at the back, pull it tight and tack it close round the top to remove every pleat; leave it to dry. Damp the hogskin seat and put it on, with a small piece of hogskin outside the small point; cut the seat round the long point, cross the ends in front and tack them low. When dry, cut firm leather to fit the hollow at the back of the long point and hogskin about 1/8 in larger all round; shave both and paste them together.

Materiały do tego kroku:

Skóra świńskaSkóra świńska1 sztuka
Skóra uprzężowaSkóra uprzężowa1 sztuka
Klej pszennyKlej pszenny1 sztuka
GwoździeGwoździe1 sztuka

Potrzebne narzędzia:

Nóż do skóryNóż do skóry

GąbkaGąbka
ObcęgiObcęgi
Młotek ciesielskiMłotek ciesielski
7

Welt the skirts and seat

Fit and mark the skirts as for the gentleman's saddle. Put the thin hogskin welt along the upper edge of the seat and stitch skirt and welt together only as far as the root of the big point, and the same opposite under the short point. From there stitch a wider doubled welt to the skirt to the end. Put a narrow welt round the hole cut for the point with a broad welt on it, and a narrow and broad welt under the short point, and stitch the seat to the hogskin piece there. Tack the ends round the long point neatly under the skirt on the near side.

Materiały do tego kroku:

Skóra świńskaSkóra świńska1 sztuka
Skóra na tybinkiSkóra na tybinki1 sztuka
Nić skórzanaNić skórzana1 sztuka
Wosk szewskiWosk szewski1 sztuka

Potrzebne narzędzia:

Nóż do skóryNóż do skóry
SzydłoSzydło
Dwie igły rymarskieDwie igły rymarskie
8

Fit the cover to the head

Remove the long-point cover, put a small welt round the back piece, cover it with hogskin and stitch the cover to it all round without stretching or pleating. Turn the cover inside out, damp it, slip it down over the point and nick the bottom so it sits flat on the seat. Paste between the back piece and the point and press it hard into the hollow; hold it with two or three thicknesses of soft brown leather and a soft rag rolled round until the paste dries. Nail the back piece to the tree at the bottom with two or three tacks out of sight, and cut and stitch the pleats in the seat behind the cantle.

Materiały do tego kroku:

Skóra świńskaSkóra świńska1 sztuka
Klej pszennyKlej pszenny1 sztuka
Skóra owcza (basil)Skóra owcza (basil)1 sztuka
Szmaty bawełnianeSzmaty bawełniane1 sztuka
GwoździeGwoździe1 sztuka
Nić skórzanaNić skórzana1 sztuka
Wosk szewskiWosk szewski1 sztuka

Potrzebne narzędzia:

Nóż do skóryNóż do skóry
GąbkaGąbka
SzydłoSzydło
Dwie igły rymarskieDwie igły rymarskie
Młotek ciesielskiMłotek ciesielski
9

Put the seat on the tree

Cover the points running to the panel pockets with thin hogskin or basil, as for the gentleman's saddle. Damp the seat, nail it in front and then at the back, tightening it well round the sides. Nail the hogskin piece behind the short point and pull the welt seam exactly along the edge. Draw the skirt points tightly forward with a tack in the end, the skirt edges under the points; cover the nails and leather ends there, and cut the waste close to the nails all round.

Materiały do tego kroku:

Skóra świńskaSkóra świńska1 sztuka
Gwóźdź siodlarskiGwóźdź siodlarski1 sztuka
GwoździeGwoździe1 sztuka

Potrzebne narzędzia:

GąbkaGąbka
ObcęgiObcęgi
Młotek ciesielskiMłotek ciesielski
Nóż do skóryNóż do skóry
10

Make the near-side flap and bolstered safe

Cut the near-side flap and safe (Fig. 7) as two pieces joined in a straight line, the point side in front: the back part like a saddle flap but a little fuller at the bottom, reaching no farther than the end of the saddle-bar front; the safe running a little beyond the centre at the top. Join them with a closing stitch in strong black wax thread, crossing it every six or seven stitches. For the bolstered safe, cut hogskin the size of the safe plus 1 in all round, quilt and mark it with a small single crease in a regular pattern, and press a design into it. Line it with calico stitched along every mark with white or yellow silk or linen thread, outer lines first, flat and without puckers, pricking a hole in every space. Stuff each space with very fine flock cut small, just enough to show the pattern and feel soft. Fit the cover edge to edge on the safe, crease and prick its edge very fine, stitch the straight edge wrong side out over the joint, turn it over and stitch round the edge double-handed. Paste hogskin on the flap part and stitch it round.

Materiały do tego kroku:

Skóra na tybinkiSkóra na tybinki1 sztuka
Skóra świńskaSkóra świńska1 sztuka
Perkal surowy (kaliko)Perkal surowy (kaliko)1 sztuka
Wypełnienie wełnianeWypełnienie wełniane1 sztuka
Nić lnianaNić lniana1 sztuka
Nić skórzanaNić skórzana1 sztuka
Wosk szewskiWosk szewski1 sztuka
Klej pszennyKlej pszenny1 sztuka

Potrzebne narzędzia:

Nóż do skóryNóż do skóry
BigownicaBigownica
Palnik propanowyPalnik propanowy
Przecinak do szycia skóryPrzecinak do szycia skóry
NożyczkiNożyczki
SzydłoSzydło
Dwie igły rymarskieDwie igły rymarskie
11

Fit the off-side flap and both flaps

The off-side flap is small, exactly as for a gentleman's saddle but fuller in the rounds below. Make a gullet piece from the front end of the flap to a little over the centre at the top, to be covered by the point of the safe. Nail the off-side flap underneath from the point backwards and above the point in front, and the near-side safe and flap the same way. Where the web hangs down for the straps, punch a hole in the front of the safe close by the tree and near the end of the flap, and turn that part of the flap to the point under the tree, nailing it along the gullet. The girth straps go on the web.

Materiały do tego kroku:

Skóra na tybinkiSkóra na tybinki1 sztuka
GwoździeGwoździe1 sztuka

Potrzebne narzędzia:

Dziurkacz do skóryDziurkacz do skóry
Młotek ciesielskiMłotek ciesielski
Nóż do skóryNóż do skóry
12

Make the leather girth

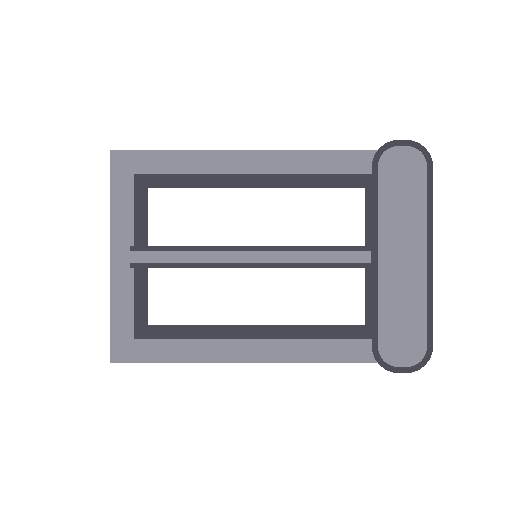
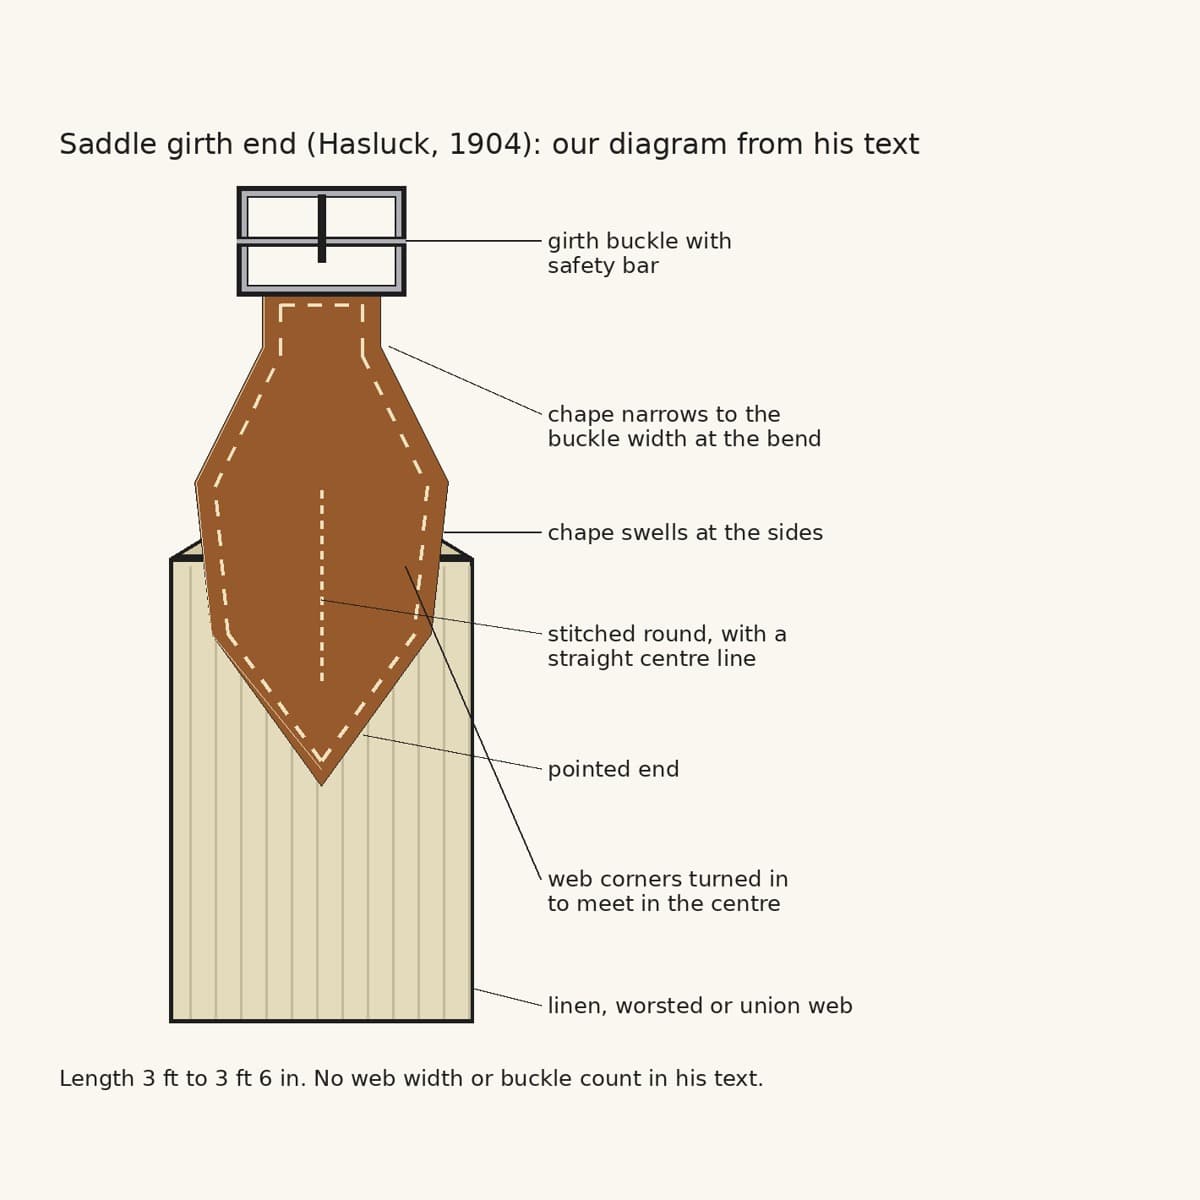
Make the thin brown leather girth, which a gentleman's saddle does not have: 3-1/2 ft long and 2 in wide, with a 1 in roller buckle at one end on a chape cut slanting from both sides to its width. Make a loop for it and another about 6 in lower for the overlap of the strap. Cut another piece 1 ft by 2 in with a strap 1 ft 6 in by 1 in stitched to one end; edge and rub the borders and make a narrow hot crease near the edge. Put two rows of cross-stitching on the near side of the girth and two on the off side. It buckles the reverse way to the usual, so it can be adjusted with the rider in the saddle.

Materiały do tego kroku:

Skóra owcza (basil)Skóra owcza (basil)1 sztuka
Sprzączka z rolkąSprzączka z rolką1 sztuka
Nić skórzanaNić skórzana1 sztuka
Wosk szewskiWosk szewski1 sztuka

Potrzebne narzędzia:

Nóż do skóryNóż do skóry
BigownicaBigownica
Palnik propanowyPalnik propanowy
Wzornik do szlufekWzornik do szlufek
SzydłoSzydło
Dwie igły rymarskieDwie igły rymarskie
Dziurkacz do skóryDziurkacz do skóry
Miara zwijanaMiara zwijana
13

Nails and panel

Place the tough nails as on a gentleman's saddle: one at each skirt point in front, one through each flap at the point, and one on each side at the narrow end of the skirts behind. Make the panel as in chapter II but slightly wider, to go under the safe in front, and fill the near side rather more.

Materiały do tego kroku:

Gwóźdź siodlarskiGwóźdź siodlarski1 sztuka
Skóra owcza (basil)Skóra owcza (basil)1 sztuka
Serża wełnianaSerża wełniana1 sztuka
Wypełnienie wełnianeWypełnienie wełniane1 sztuka
Nić lnianaNić lniana1 sztuka

Potrzebne narzędzia:

Młotek ciesielskiMłotek ciesielski
SzydłoSzydło
Dwie igły rymarskieDwie igły rymarskie
Żelazo do siedziskaŻelazo do siedziska
14

Troubleshooting

Side saddle troubleshooting.

Flow

Loading...
15

History and honest limits

From **Saddlery**, edited by Paul N. Hasluck, David McKay, 1904 (archive.org saddlery00hasl), chapter III, "Ladies' Side Saddles", pp. 26-35, Figs. 6-8; every fraction was read on the scan. He gives few sizes of his own here and refers to the gentleman's saddle (chapters I-II) for the web, seat, skirts and panel, as this blueprint does. The leaping head (Fig. 8), quilted skirts, glove pocket (about 4-1/2 by 3-1/2 in) and girth cross straps are not made here. The tools and metric figures are ours.

Materiały

19

Wymagane narzędzia

14

Według tego planu powstaje

CC0 Domena publiczna

Ten plan jest udostępniany na licencji CC0. Możesz go swobodnie kopiować, modyfikować, rozpowszechniać i wykorzystywać do dowolnych celów, bez konieczności uzyskiwania zgody.

Wesprzyj Makera kupując produkty przez jego plan, za co zarabia Prowizja Makera ustalony przez sprzedawców, lub stwórz nową iterację tego planu i dołącz go jako połączenie w swoim własnym planie, aby dzielić się przychodami.

Dyskusja

(0)

Zaloguj się aby dołączyć do dyskusji

Ładowanie komentarzy...