Współpraca
SZTUKA
Piękno i dobre samopoczucie
RZEMIOSŁO
KULTURA I HISTORIA
ROZRYWKA
ŚRODOWISKO
JEDZENIE I NAPOJE
INŻYNIERIA ODWROTNA
NAUKI
LEKKOATLETYKA
TECHNOLOGIA
URZĄDZENIA DO NOSZENIA
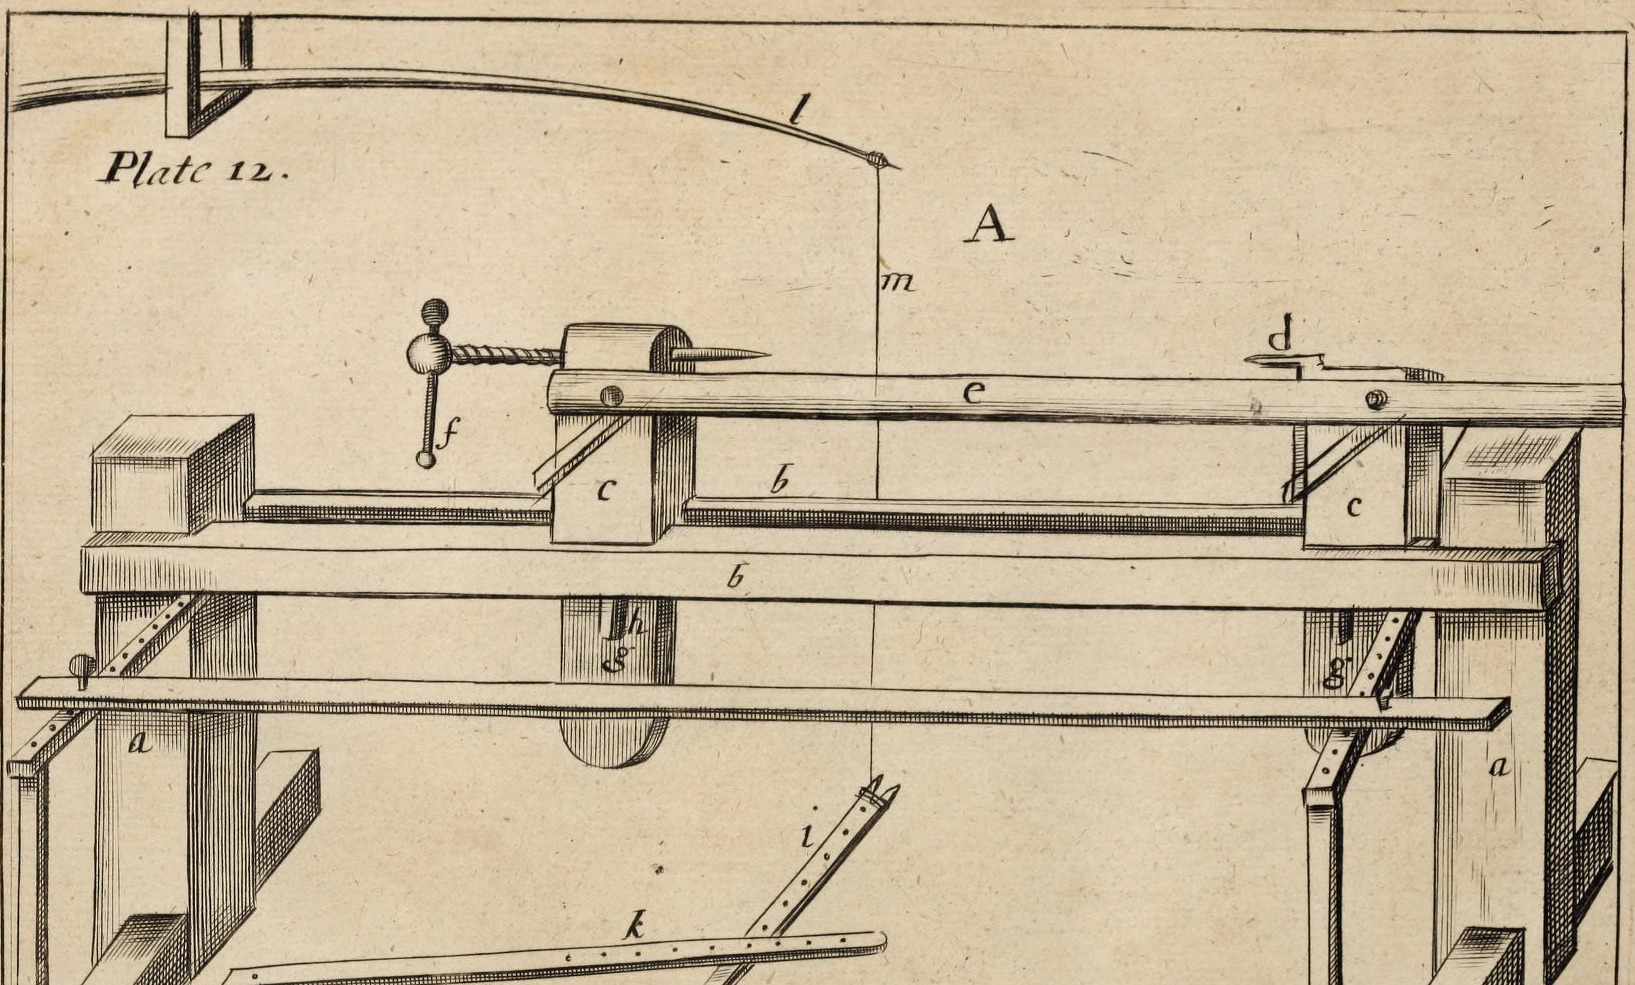


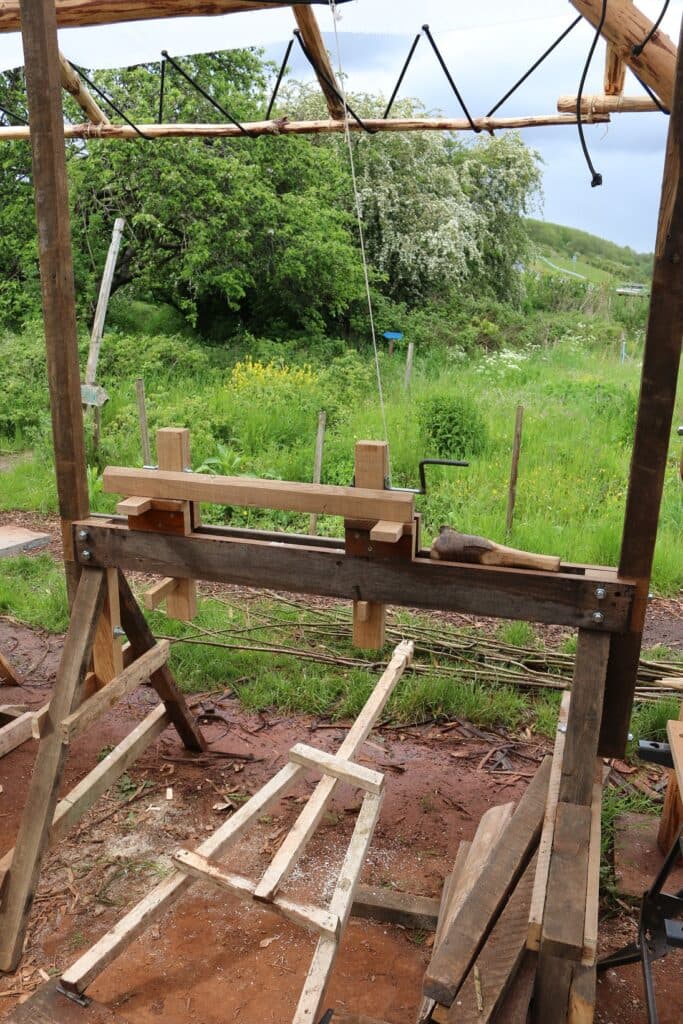
Turner's Pole Lathe with Puppets, Screw Centre and Treadle (Moxon, 1680)
The workshop pole lathe of Joseph Moxon's Mechanick Exercises: legs and twin cheeks bolted square, sliding puppets wedged through the bed, a fixed steel-pointed pike and an adjustable screw centre, a hinged treadle with a cross-treadle, and a fir pole pinned to the ceiling for the spring.
Zaawansowany
Two to three days
Instrukcje
1
1
His sizes
His sizes
Wczytywanie notatnika Jupyter…
2
2
Read Mechanick Exercises
Read Mechanick Exercises
"The Lathe is described in Plate 12. A. This Machine is so vulgarly known..."
3
3
Legs and cheeks
Legs and cheeks
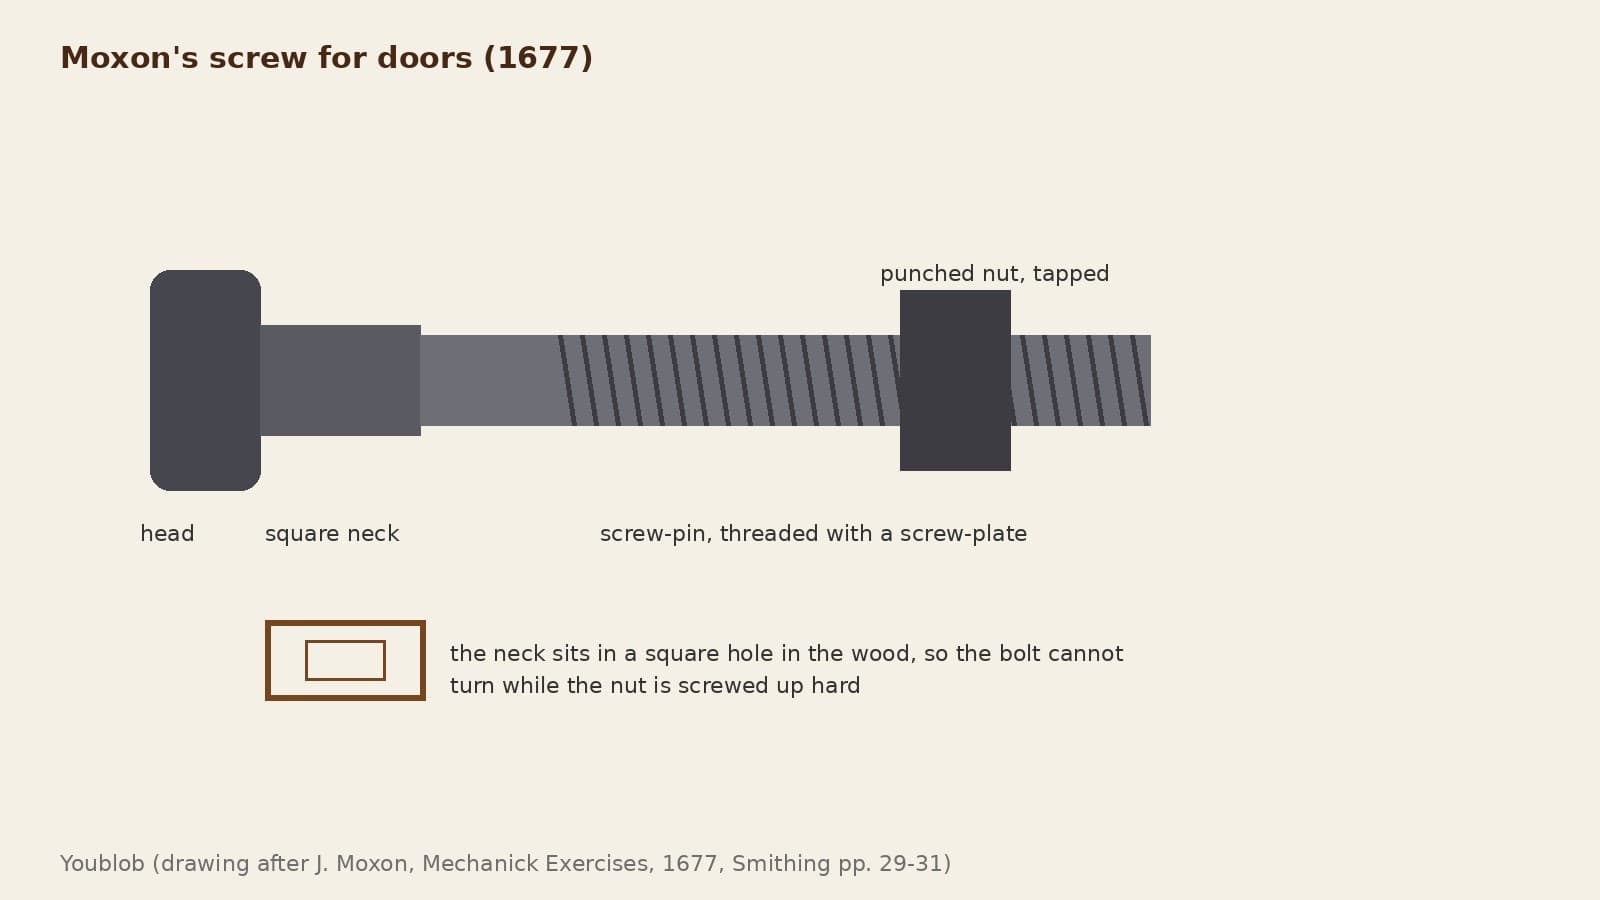
Set up two legs about 2 ft 10 in (86 cm) high, plumb, each with a tenon on top as thick as the gap you want between the two cheeks. Lay a cheek each side of the tenons, level, and fix them: pinned, or better with an iron bolt whose square neck sits in a square hole in the near cheek, drawn up by a nut. Brace legs and cheeks to the floor and walls so nothing trembles.
Materiały do tego kroku:
 Deska z dębu białego1 sztuka
 Śruba zamkowa1 sztuka
Potrzebne narzędzia:
 Piła ręczna
 Dłuto do gniazd
 Pobijak drewniany
 Świder korbowy z wiertłem
4
4
Puppets
Puppets
Make two (or two or three pairs of) square puppets, strong rather than weak and as short as your work allows: the centres must stand a little more than half the work's diameter above the cheeks. Give each a tenon at the foot that slides in the gap between the cheeks, with a mortise through it below the cheeks for a tapering wedge, driven with a mallet to clamp the puppet down.
Materiały do tego kroku:
Deska z dębu białego1 sztuka Klin z drewna twardego1 sztuka
Potrzebne narzędzia:
Piła ręcznaDłuto do gniazdPobijak drewniany5
5
Pike and screw centre
Pike and screw centre
Near the top of one puppet fix a strong iron pike with a tempered steel point. Through the other fit an iron screw in a nut in the puppet, also with a steel point, both points in one straight line facing each other. Put an iron handle 7-8 in long with a knob at each end through the screw head. Cut the puppets to square shoulders just below the pikes to carry the rest.
Materiały do tego kroku:
 Pręt z kutego żelaza1 sztuka
 Pręt kwadratowy ze stali narzędziowej1 sztuka
Potrzebne narzędzia:
 Kuźnia kowalska
 Kowadło
 Zestaw do gwintowania
 Kadź hartownicza
6
6
Rest and oil horn
Rest and oil horn
Make the rest a square piece 1-1.5 in thick, 2-2.5 in broad, a little longer than the gap between the puppets. Hang a horn tip down on the outside of the right-hand puppet near the top, filled with oil, with a wooden cover and button carrying an iron wire that reaches nearly to the bottom, to oil the centre holes.
Materiały do tego kroku:
Deska z dębu białego1 sztuka Róg bydlęcy1 sztuka
 Drut żelazny1 sztuka
 Olej maszynowy1 sztuka
Potrzebne narzędzia:
Piła ręcznaŚwider korbowy z wiertłem7
7
Treadle and cross-treadle
Treadle and cross-treadle
Make a treadle about 2.5 in broad, 1 in thick and 3 ft (up to 4 ft) long. Nail its back end to the floor with a piece of leather, 1-1.5 ft behind the lathe and midway between the legs, so the front reaches 1.5-2 ft past the front of the lathe. Cut a square notch 1.5 in wide and 2 in long in the far end for winding the string. Fix an iron pin about 0.5 in thick, standing 1.5-2 in up, in the middle; under the cheeks fix a cross-treadle with a row of holes 2-3 in apart to take the pin.
Materiały do tego kroku:
Deska z dębu białego1 sztuka Rzemień skórzany1 sztuka
 Gwoździe żelazne1 sztukaPręt z kutego żelaza1 sztuka
Potrzebne narzędzia:
Piła ręczna MłotekŚwider korbowy z wiertłem
8
8
Pole and string
Pole and string
Use a fir pole, thick or thin to suit the work; if it is too stiff, thin its upper and under sides with a draw-knife. Pin the thick end to a ceiling timber with one nail so it pivots. About a foot away nail two cheeks to the joists with a batten across their foot to carry the pole. Run the string from the pole's thin end, round the work, to the treadle.
Materiały do tego kroku:
 Drewniany drąg1 sztuka
 Sznurek1 sztukaGwoździe żelazne1 sztukaDeska z dębu białego1 sztuka
Potrzebne narzędzia:
 OśnikMłotek
9
9
Troubleshooting
Troubleshooting
Pole lathe troubleshooting.
Flow
Loading...
10
10
History and honest limits
History and honest limits
From Joseph Moxon, **Mechanick Exercises**, Numb. X, Turning (1680), pp. 176-185 and Plate 12 (checked on the archive.org scan mechanickexercis00moxo). He gives no sizes for cheeks, puppets or pole; metric and the wood choices are ours.
Materiały
12- 1 sztukaZastępnik
- 1 sztukaZastępnik
- 1 sztukaZastępnik
- 1 sztukaZastępnik
- Zastępnik
- 1 sztukaZastępnik
- 1 sztukaZastępnik
- 1 sztukaZastępnik
- 1 sztukaZastępnik
- 2 sztukZastępnik
- 1 sztukaZastępnik
- 1 sztukaZastępnik
Według tego planu powstaje

Powiązane blueprinty
Te blueprinty dzielą się wiedzą — technikami, materiałami lub zasadami
CC0 Domena publiczna
Ten plan jest udostępniany na licencji CC0. Możesz go swobodnie kopiować, modyfikować, rozpowszechniać i wykorzystywać do dowolnych celów, bez konieczności uzyskiwania zgody.
Wesprzyj Makera kupując produkty przez jego plan, za co zarabia Prowizja Makera ustalony przez sprzedawców, lub stwórz nową iterację tego planu i dołącz go jako połączenie w swoim własnym planie, aby dzielić się przychodami.