SZTUKA
Piękno i dobre samopoczucie
RZEMIOSŁO
KULTURA I HISTORIA
ROZRYWKA
ŚRODOWISKO
JEDZENIE I NAPOJE
INŻYNIERIA ODWROTNA
NAUKI
LEKKOATLETYKA
TECHNOLOGIA
URZĄDZENIA DO NOSZENIA
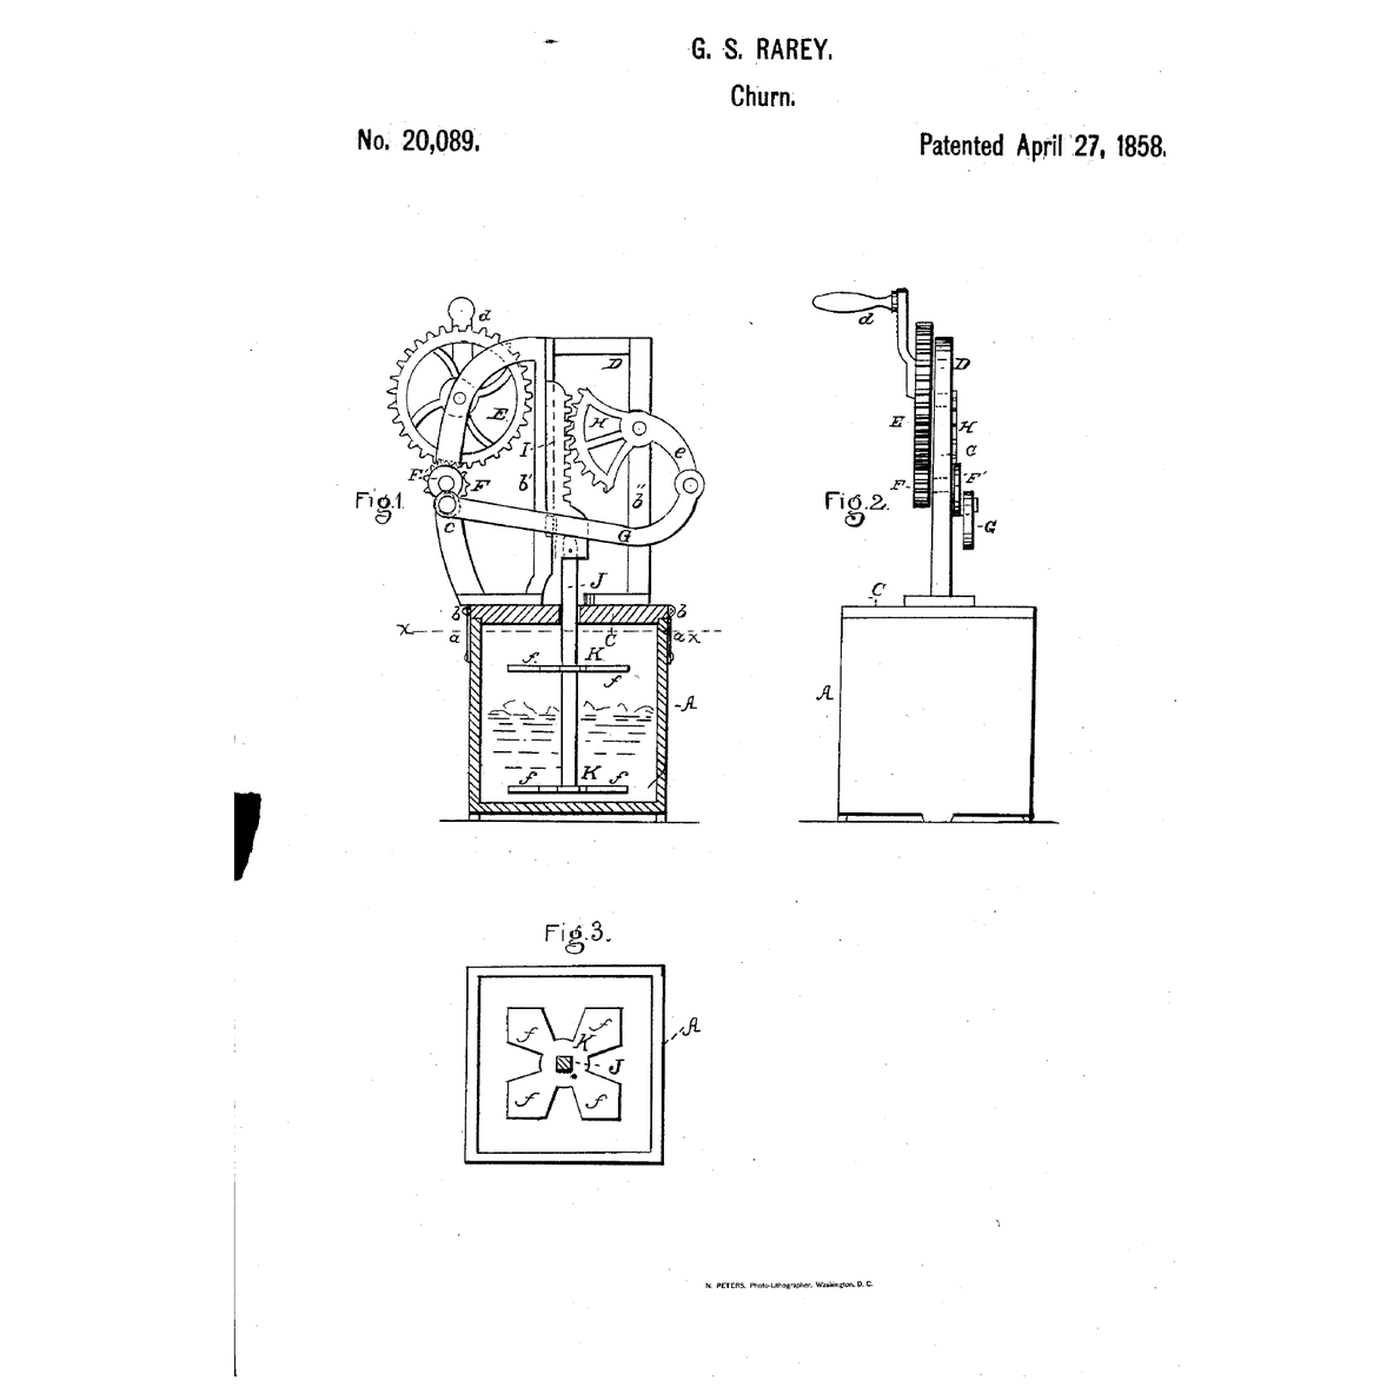


Rack-and-Segment Crank Churn: A Crank Rocks a Toothed Segment That Drives the Dasher Up and Down
G. S. Rarey of Columbus, Ohio, received US 20,089, dated 27 April 1858, for a churn that turns a crank into an up-and-down dasher stroke: a toothed wheel drives a pinion with a crank pulley, a rod from it rocks a toothed segment, and the segment works a rack bar carrying the dasher rod.
This rung prints the frame, gears, segment, rack and dashers at tabletop scale, on a stock pot.
Zaawansowany
About 6 hours, plus printing
Instrukcje
1
1
Gearing and stroke
Gearing and stroke
Wczytywanie notatnika Jupyter…
2
2
Crank-worked dashers, before it
Crank-worked dashers, before it
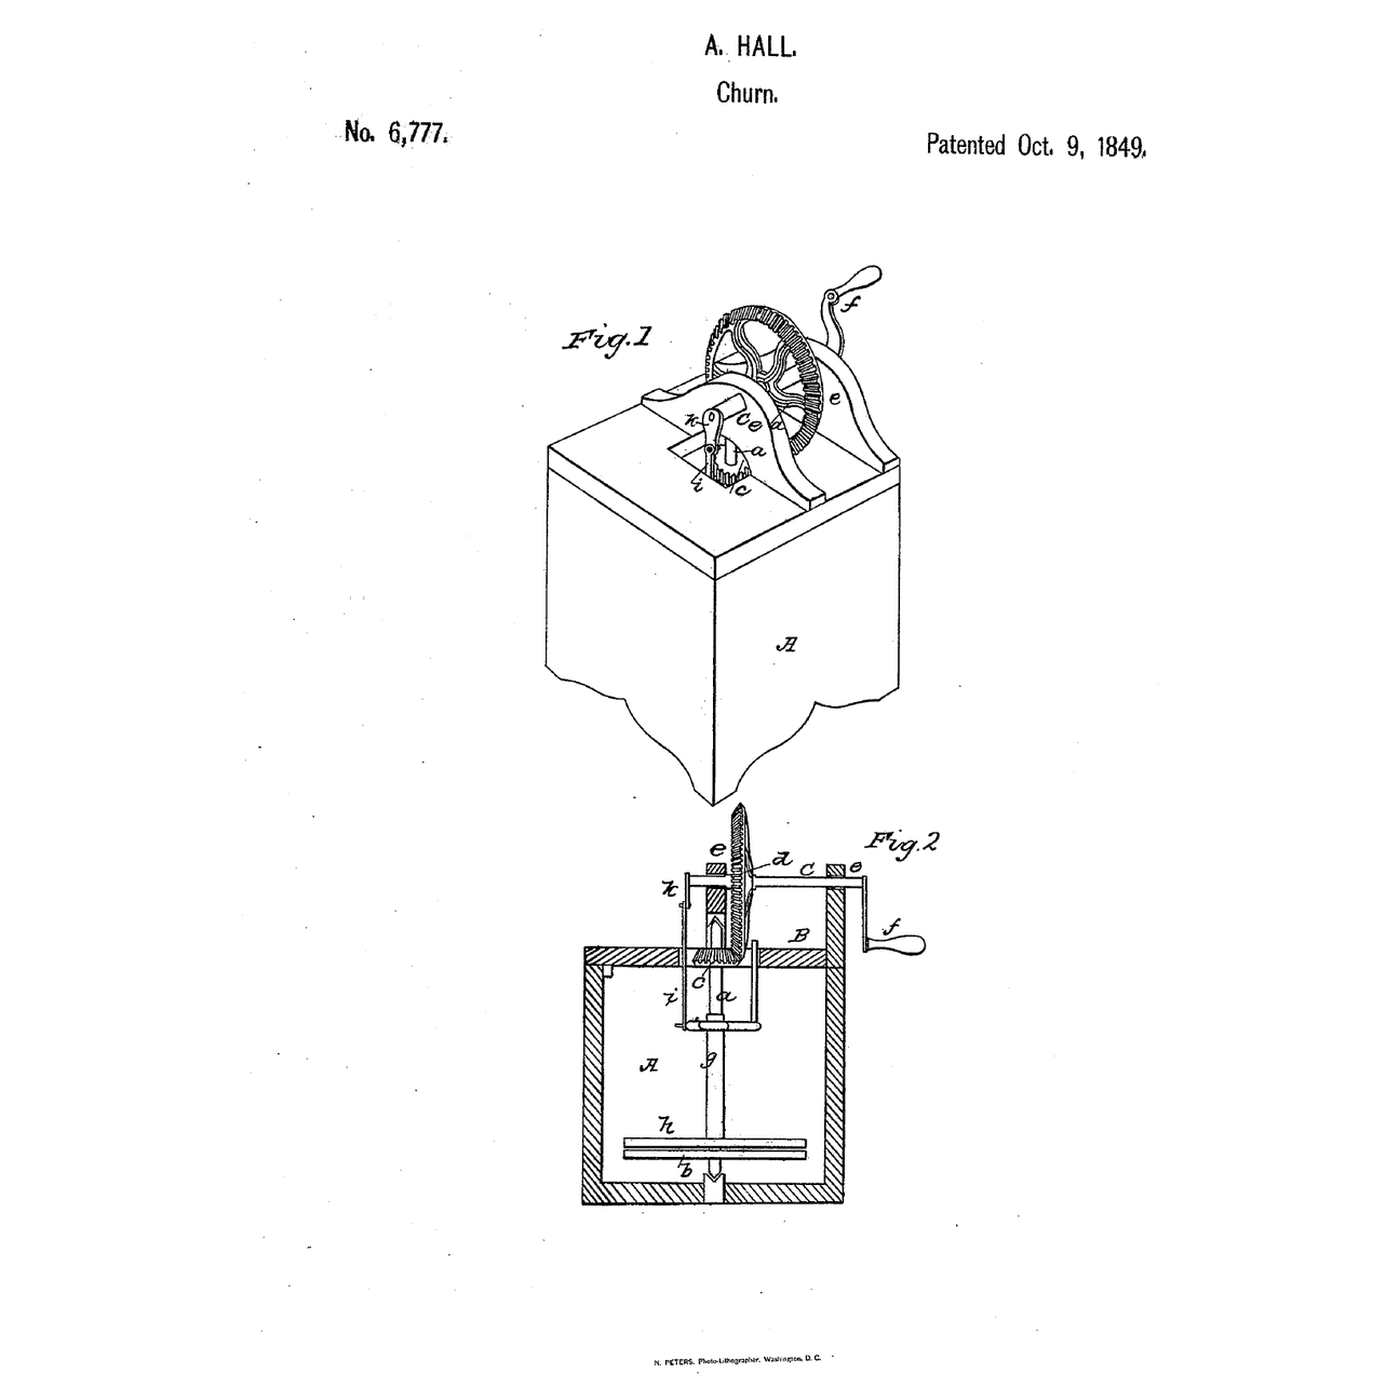
Hall worked a plunging dasher from a crank through a rod; Rarey adds a pinion, a toothed segment and a rack.
3
3
Read US 20,089
Read US 20,089
"This is a simple device and a good length of stroke with a quick speed may be given the dasher K, and by a very direct means so that not much power can be lost by friction."
4
4
Print the parts
Print the parts
Print the frame (/uploads/blueprints/rack-segment-crank-dasher-churn-frame-d.stl), the lid (/uploads/blueprints/rack-segment-crank-dasher-churn-lid-c.stl), wheel E with its crank (/uploads/blueprints/rack-segment-crank-dasher-churn-wheel-e.stl), pinion F (/uploads/blueprints/rack-segment-crank-dasher-churn-pinion-f.stl), the crank pulley (/uploads/blueprints/rack-segment-crank-dasher-churn-crank-pulley.stl), the segment (/uploads/blueprints/rack-segment-crank-dasher-churn-segment-h.stl), the rack (/uploads/blueprints/rack-segment-crank-dasher-churn-rack-i.stl), the rod (/uploads/blueprints/rack-segment-crank-dasher-churn-rod-g.stl) and two dashers (/uploads/blueprints/rack-segment-crank-dasher-churn-dasher-k.stl). The lid and frame need a 240 mm print bed. Print in PETG at 0.2 mm layers, 30 % infill, 4 walls; wash before first use.
Materiały do tego kroku:
 Filament PETG1 sztuka
Potrzebne narzędzia:
 Drukarka 3D z filamentem (FDM)
5
5
Frame on the lid
Frame on the lid
Bolt the frame upright on the lid with two M4 screws, washers and lock nuts. Glue a 10 mm dowel into the boss for wheel E, standing 16 mm out in front, and one into the boss for the segment, standing 14 mm out behind. Drill a small pilot in each dowel's end.
Materiały do tego kroku:
 Kołki z twardego drewna1 sztuka
 Klej do drewna1 sztuka
 Śruby maszynowe1 sztuka
 Podkładka płaska1 sztuka
 Nakrętka samohamowna z wkładką nylonową1 sztuka
Potrzebne narzędzia:
 Piła ręczna
 Wiertarka ręczna
 Zestaw wkrętaków
6
6
Gears, rod and rack
Gears, rod and rack
Push pinion F's axle through the curved bar from the front, slide the crank pulley onto its flat behind, and fix it with an M3 screw and washer in the axle's end. Put wheel E on its dowel, meshing with F, held by an M3 screw and washer through the hole in its crank arm; put the segment on its dowel, held the same way. Slide the rack into the guide with its teeth toward the segment. Join the crank pulley to the end of the segment's curved arm with the rod, using M6 screws and lock nuts.
Materiały do tego kroku:
Śruby maszynowe1 sztukaPodkładka płaska1 sztukaNakrętka samohamowna z wkładką nylonową1 sztukaPotrzebne narzędzia:
Zestaw wkrętaków7
7
Dasher and rod
Dasher and rod
Cut a 10 mm square hardwood strip 231 mm long as the dasher rod and sand it. Fit one dasher at its foot and the other about 86 mm higher, each fixed by an M3 screw through its boss, drilled through the rod. Stand the rod in the pot, set the lid on with the rod through its square hole, and screw the rod into the rack's socket.
Materiały do tego kroku:
 Garnek wysoki1 sztuka
 Listwa z drewna twardego1 sztukaŚruby maszynowe1 sztuka
Potrzebne narzędzia:
Piła ręcznaWiertarka ręczna Papier ściernyZestaw wkrętaków
8
8
The build in 3D
The build in 3D
FreeCAD model of this build: the pot and lid, the frame with its curved bar, wheel E with the crank, pinion F, the crank pulley and rod, the segment with its curved arm, the rack in its guide, the square dasher rod and two notched dashers.
9
9
Churn
Churn
Pour in 1 litre of heavy cream at about 15 °C, checked with the thermometer. Turn the handle steadily and time it with the stopwatch: the dashers rise and fall four times for each turn. When the butter comes, lift the lid and dashers out, pour off the buttermilk, wash the butter in cold water until it runs clear, work in a pinch of salt and weigh it.
Materiały do tego kroku:
 Śmietanka kremówka1 l
 Sól morska gruboziarnista1 sztuka
 Woda1 sztuka
Potrzebne narzędzia:
 Termometr z sondą pozostawianą w potrawie
 Stoper
 Cyfrowa waga kuchenna
 Duża misa ze stali nierdzewnej
10
10
Troubleshooting
Troubleshooting
Rack-and-segment churn troubleshooting.
Flow
Loading...
11
11
History and honest limits
History and honest limits
**G. S. Rarey** of Columbus, Franklin County, Ohio, US 20,089, 27 April 1858. His case was a wooden box of any proper size, its lid hooked down to it; the frame could be cast of metal in one piece. His dasher was two plates or boards notched to form projecting arms. He claimed working the dasher up and down from the wheel through the pinion, crank pulley, connecting rod, segment and rack bar. Our pot, sizes, gear counts and printed parts are ours. FDM prints hold food in their layer lines, so wash well and replace when worn.
Materiały
11- 1 sztukaZastępnik
- 1 sztukaZastępnik
- 1 sztukaZastępnik
- 3 sztukZastępnik
- 2 sztukZastępnik
- Zastępnik
- 1 sztukaZastępnik
- 1 sztukaZastępnik
- Zastępnik
- 1 sztukaZastępnik
- 1 sztukaZastępnik
Wymagane narzędzia
9- Zastępnik
- Zastępnik
- Zastępnik
- Zastępnik
- Zastępnik
- Zastępnik
- Zastępnik
- Zastępnik
Pliki projektowe
1Powiązane blueprinty
Te blueprinty dzielą się wiedzą — technikami, materiałami lub zasadami



CC0 Domena publiczna
Ten plan jest udostępniany na licencji CC0. Możesz go swobodnie kopiować, modyfikować, rozpowszechniać i wykorzystywać do dowolnych celów, bez konieczności uzyskiwania zgody.
Wesprzyj Makera kupując produkty przez jego plan, za co zarabia Prowizja Makera ustalony przez sprzedawców, lub stwórz nową iterację tego planu i dołącz go jako połączenie w swoim własnym planie, aby dzielić się przychodami.