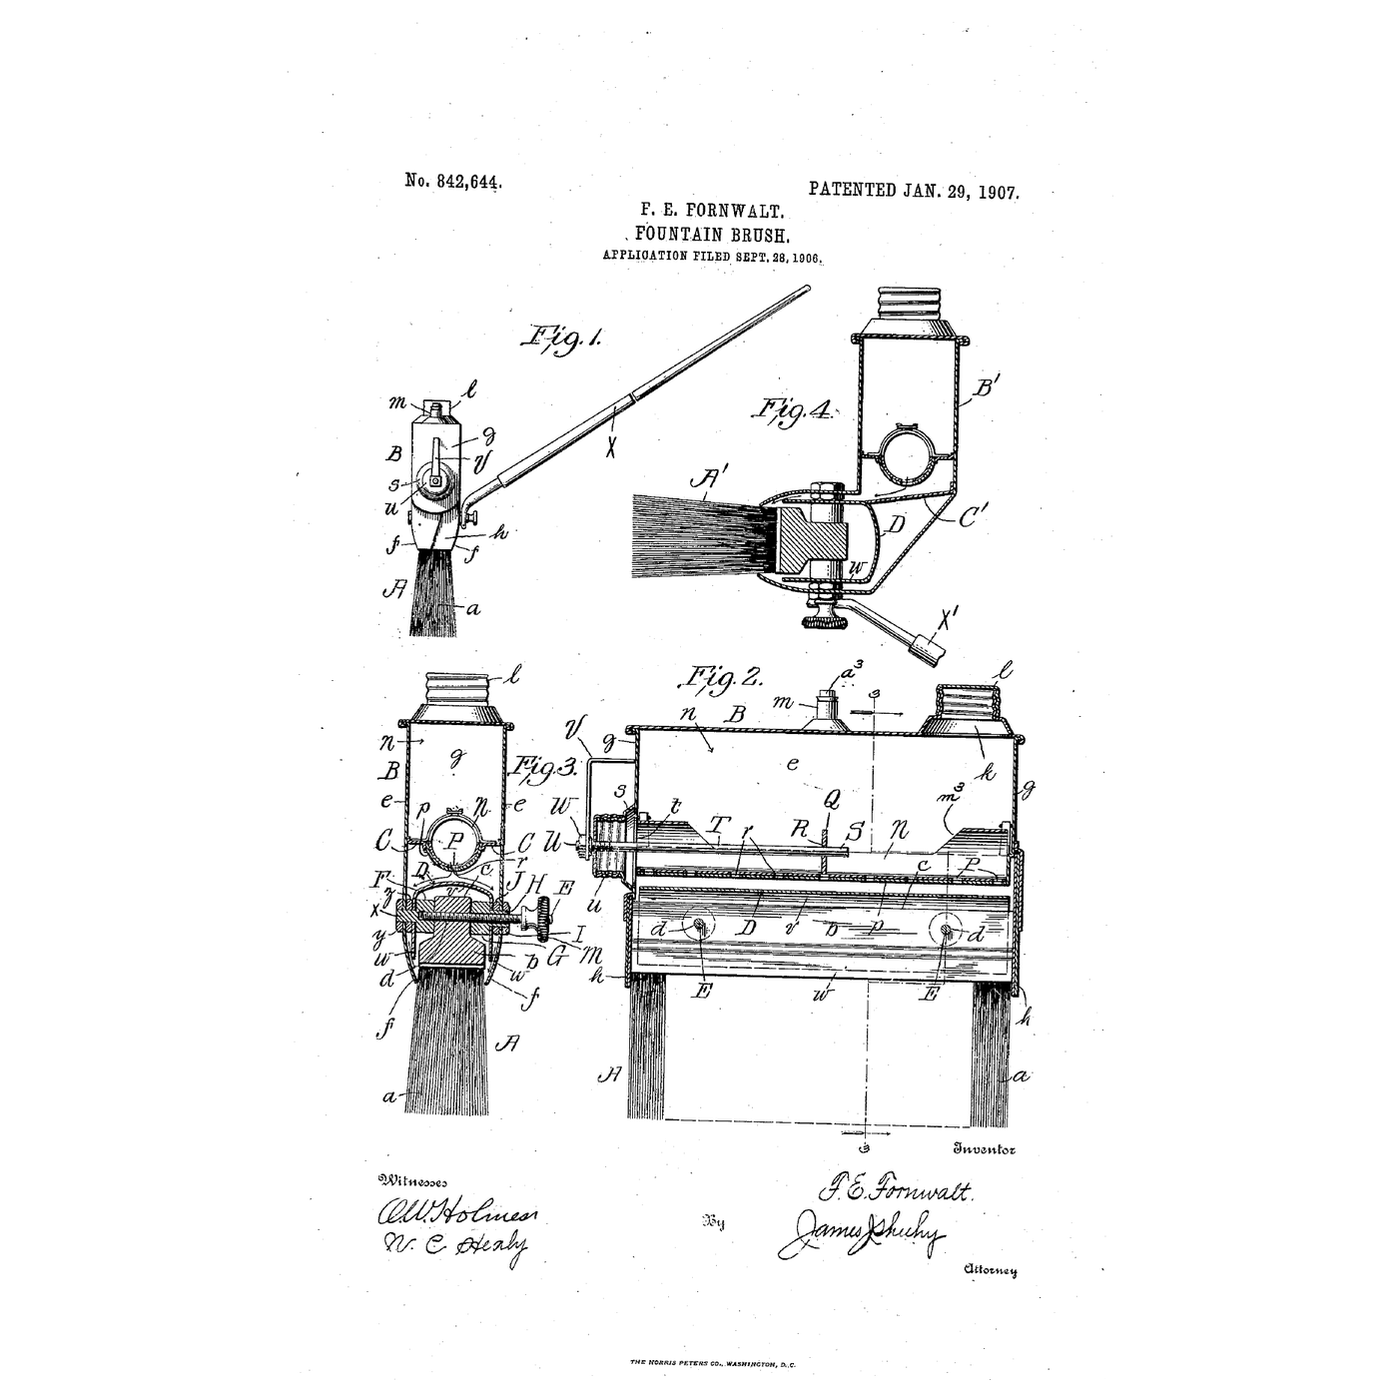

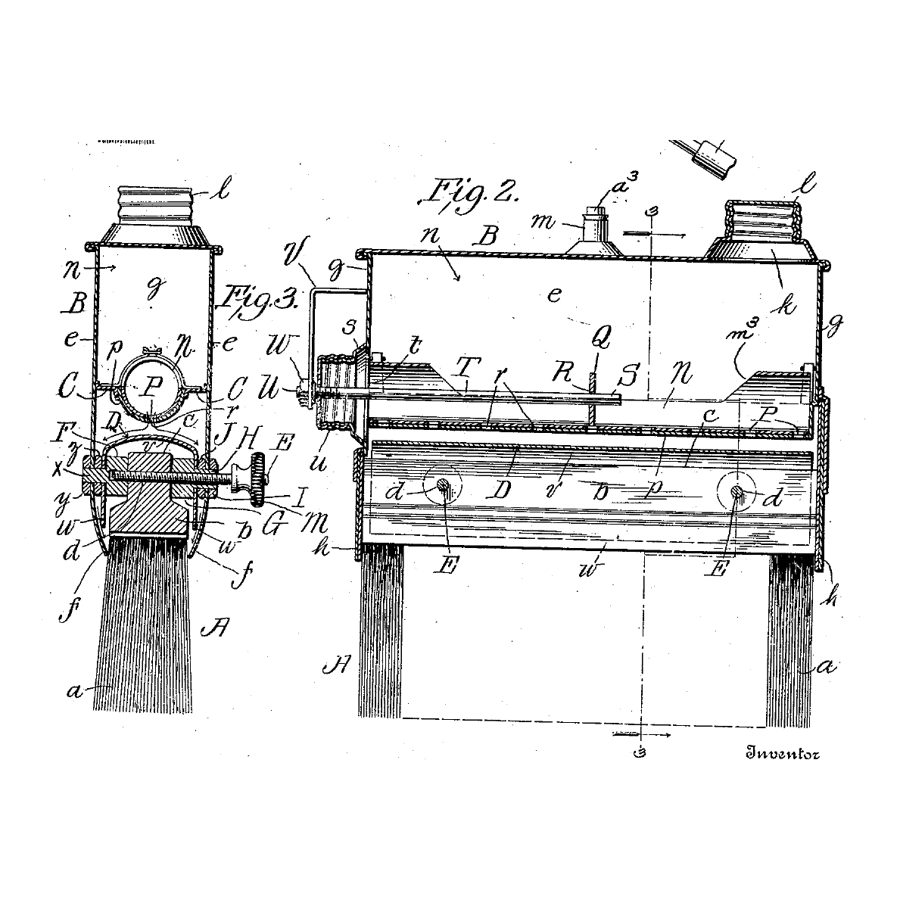
The Hooded Fountain Paint Brush: A Dome Shares the Paint Between Both Sides
Instrukcje
Paint the brush needs
Paint the brush needs
A turned perforated tube before it
A turned perforated tube before it
Read US 842,644
Read US 842,644
Fold the tank
Fold the tank
Materiały do tego kroku:
 Blacha aluminiowa1 sztuka
 Nity jednostronne1 sztuka
 Uszczelniacz silikonowy1 sztuka
Potrzebne narzędzia:
 Nożyce do blachy
 Szczypce płaskie
 Imadło warsztatowe
 Zestaw nitownicy jednostronnej
 Wiertarko-wkrętarka akumulatorowa
 Zestaw wierteł
 Zestaw otwornic
 Skórzane rękawice robocze
Drill the floor
Drill the floor
Potrzebne narzędzia:
Wiertarko-wkrętarka akumulatorowaZestaw wierteł Marker permanentny
 Linijka
Make the turning valve
Make the turning valve
Materiały do tego kroku:
 Rurka miedziana 10 mm1 sztuka
Potrzebne narzędzia:
 Piła do metaluWiertarko-wkrętarka akumulatorowaZestaw wierteł
 Pilniki (pilnik ręczny)Imadło warsztatowe
Fold the hood
Fold the hood
Materiały do tego kroku:
Blacha aluminiowa1 sztukaNity jednostronne1 sztukaPotrzebne narzędzia:
Imadło warsztatoweZestaw nitownicy jednostronnejClamp on the brush
Clamp on the brush
Materiały do tego kroku:
 Zestaw pędzli1 sztuka
 Zestaw śrub sześciokątnych1 sztuka
 Nakrętka sześciokątna1 sztuka
 Podkładka płaska1 sztukaNity jednostronne1 sztuka
Potrzebne narzędzia:
Wiertarko-wkrętarka akumulatorowaZestaw wierteł Klucz nastawny
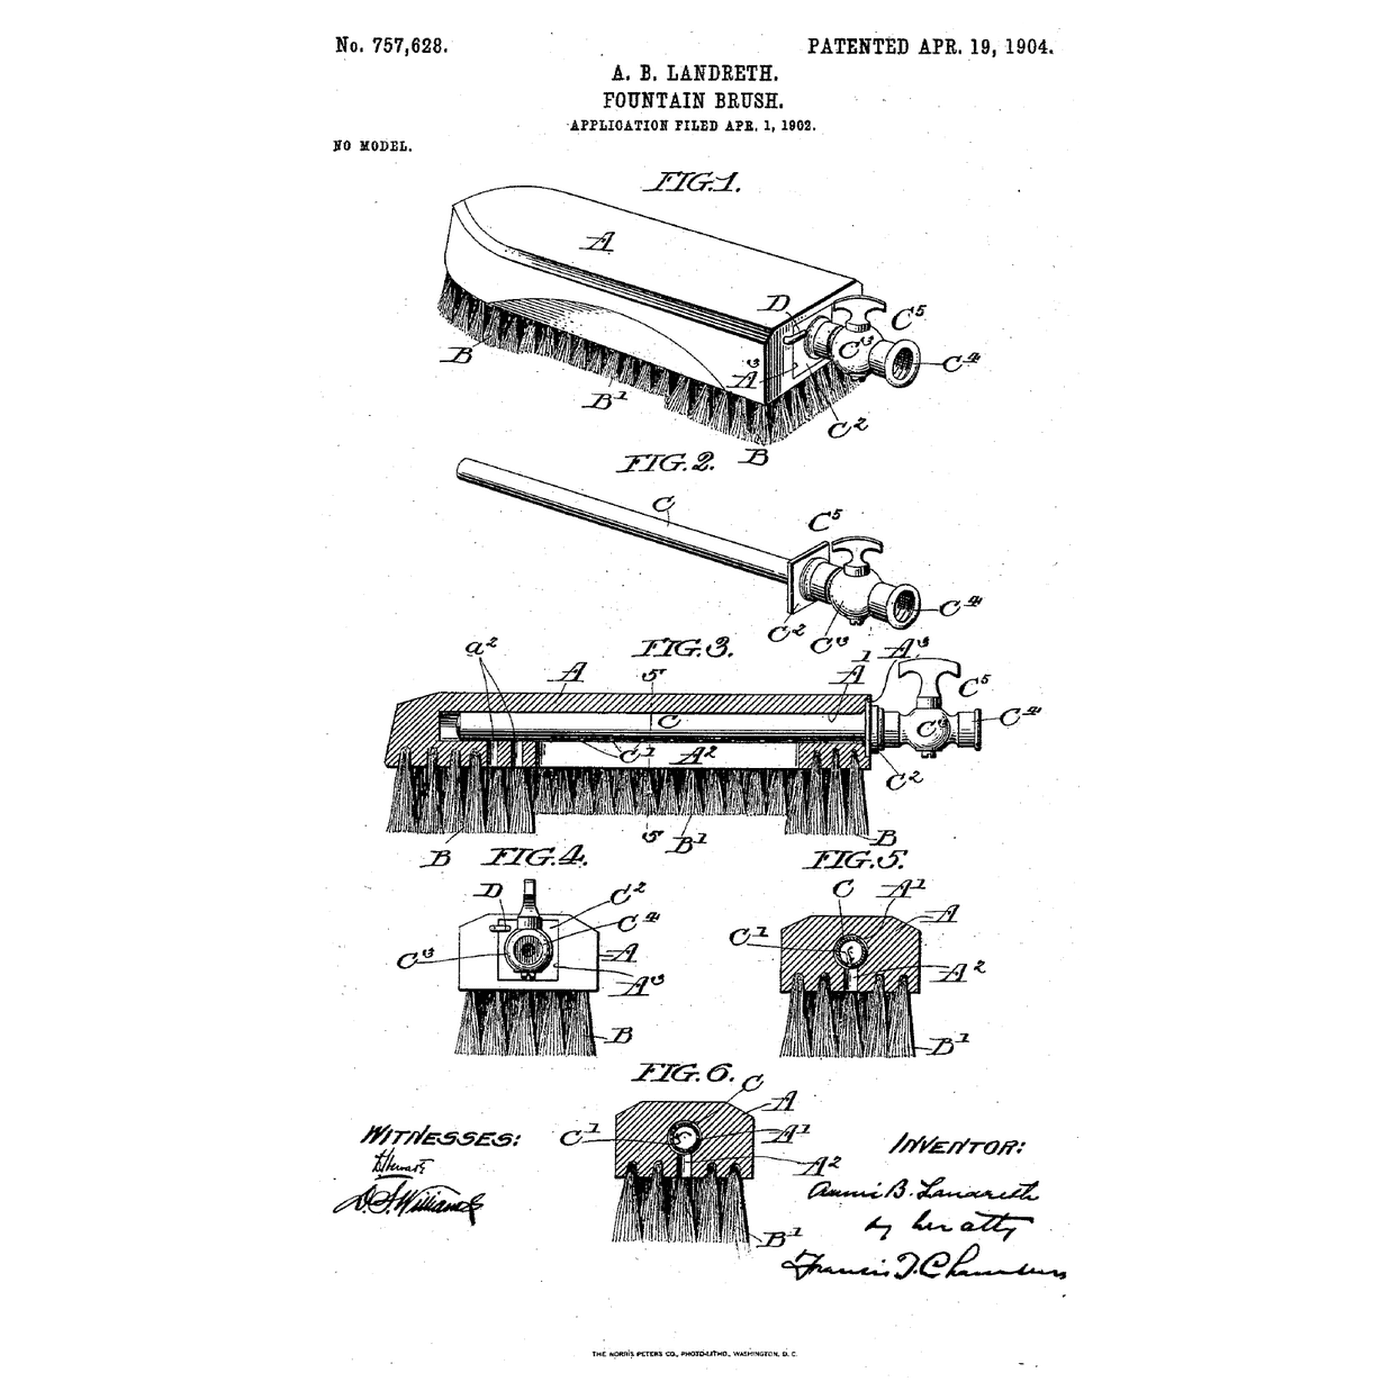
The patent drawing
The patent drawing
Paint and weigh
Paint and weigh
Materiały do tego kroku:
 Zestaw farb akrylowych1 sztuka
 Woda1 sztuka
 Płyta sklejkowa1 sztuka
Potrzebne narzędzia:
 Cyfrowa waga kuchenna
 Miara zwijana
 Stoper
A brush that clogs, floods or paints one side
A brush that clogs, floods or paints one side
Flow
History and honest limits
History and honest limits
Materiały
11- 1 sztukaZastępnik
- 3 sztukZastępnik
- 1 sztukaZastępnik
- 1 sztukaZastępnik
- 1 sztukaZastępnik
- 1 sztukaZastępnik
- 1 sztukaZastępnik
- 1 sztukaZastępnik
- 1 sztukaZastępnik
- 1 sztukaZastępnik
- 1 sztukaZastępnik
Wymagane narzędzia
16- Zastępnik
- Zastępnik
- Zastępnik
- Zastępnik
- 1 vendor sell this, none ship to you yetZastępnik
- Zastępnik
- Zastępnik
- Zastępnik
- Zastępnik
- Zastępnik
- Zastępnik
- Zastępnik
- Zastępnik
- Zastępnik
- 1 vendor sell this, none ship to you yetZastępnik
- Zastępnik
Powiązane blueprinty
Te blueprinty dzielą się wiedzą — technikami, materiałami lub zasadami
The Tube-in-the-Back Fountain Brush: Turn the Tube and the Jets Become a Soak
autor: YourGrandma
Mechanika
Making Hide Glue Distemper — The Traditional Ceiling and Wall Paint of Europe
autor: Charlie
SZTUKA
The Long-Handled Fountain Brush: A Ring of Holes Wets the Bristles From the Ground
autor: Martin
Mechanika
CC0 Domena publiczna
Ten plan jest udostępniany na licencji CC0. Możesz go swobodnie kopiować, modyfikować, rozpowszechniać i wykorzystywać do dowolnych celów, bez konieczności uzyskiwania zgody.
Wesprzyj Makera kupując produkty przez jego plan, za co zarabia Prowizja Makera ustalony przez sprzedawców, lub stwórz nową iterację tego planu i dołącz go jako połączenie w swoim własnym planie, aby dzielić się przychodami.