Współpraca
SZTUKA
Piękno i dobre samopoczucie
RZEMIOSŁO
KULTURA I HISTORIA
ROZRYWKA
ŚRODOWISKO
JEDZENIE I NAPOJE
INŻYNIERIA ODWROTNA
NAUKI
LEKKOATLETYKA
TECHNOLOGIA
URZĄDZENIA DO NOSZENIA
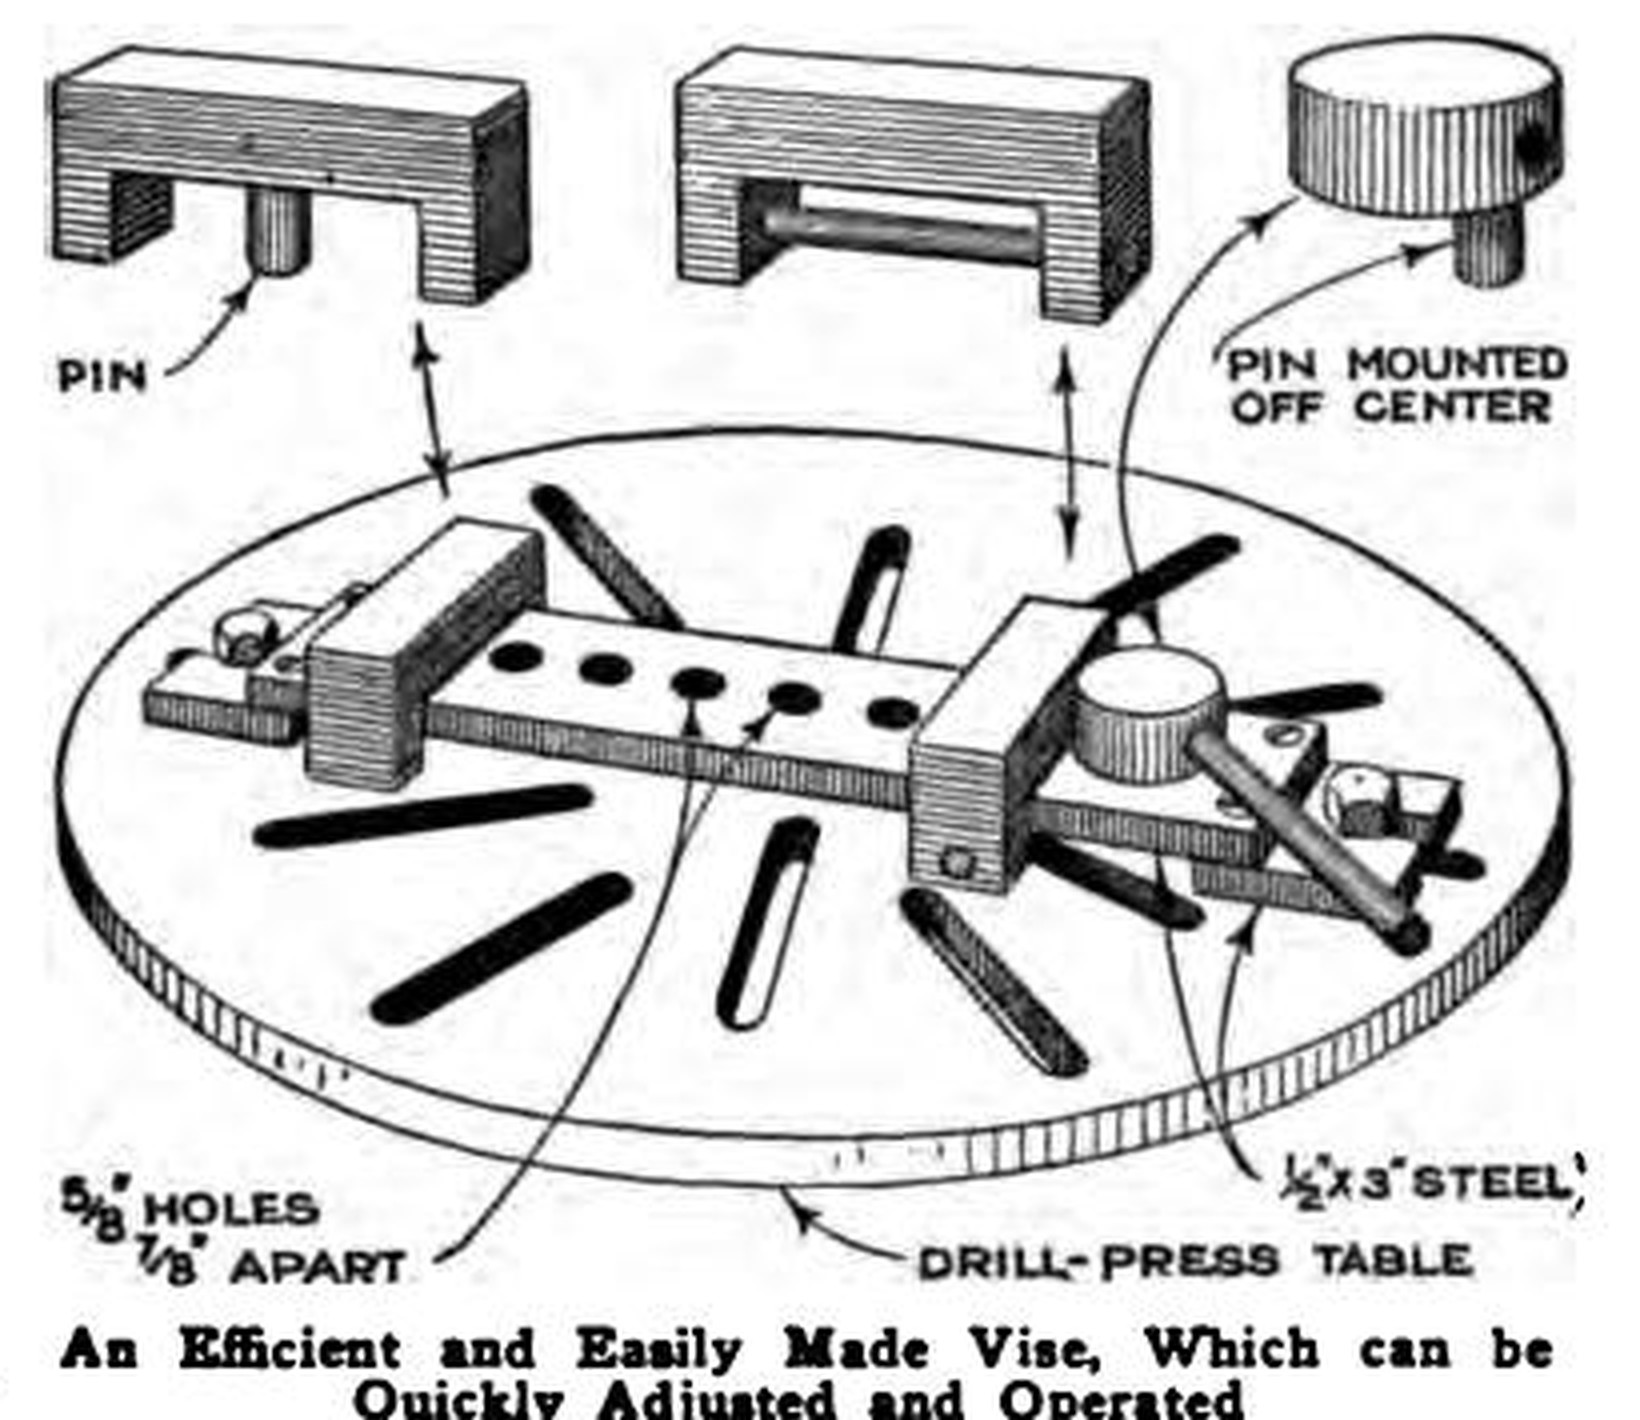


Cam-Lock Drill-Press Vise: Holed Steel Bed, Pinned Jaws and an Eccentric Cam (Popular Mechanics, 1920)
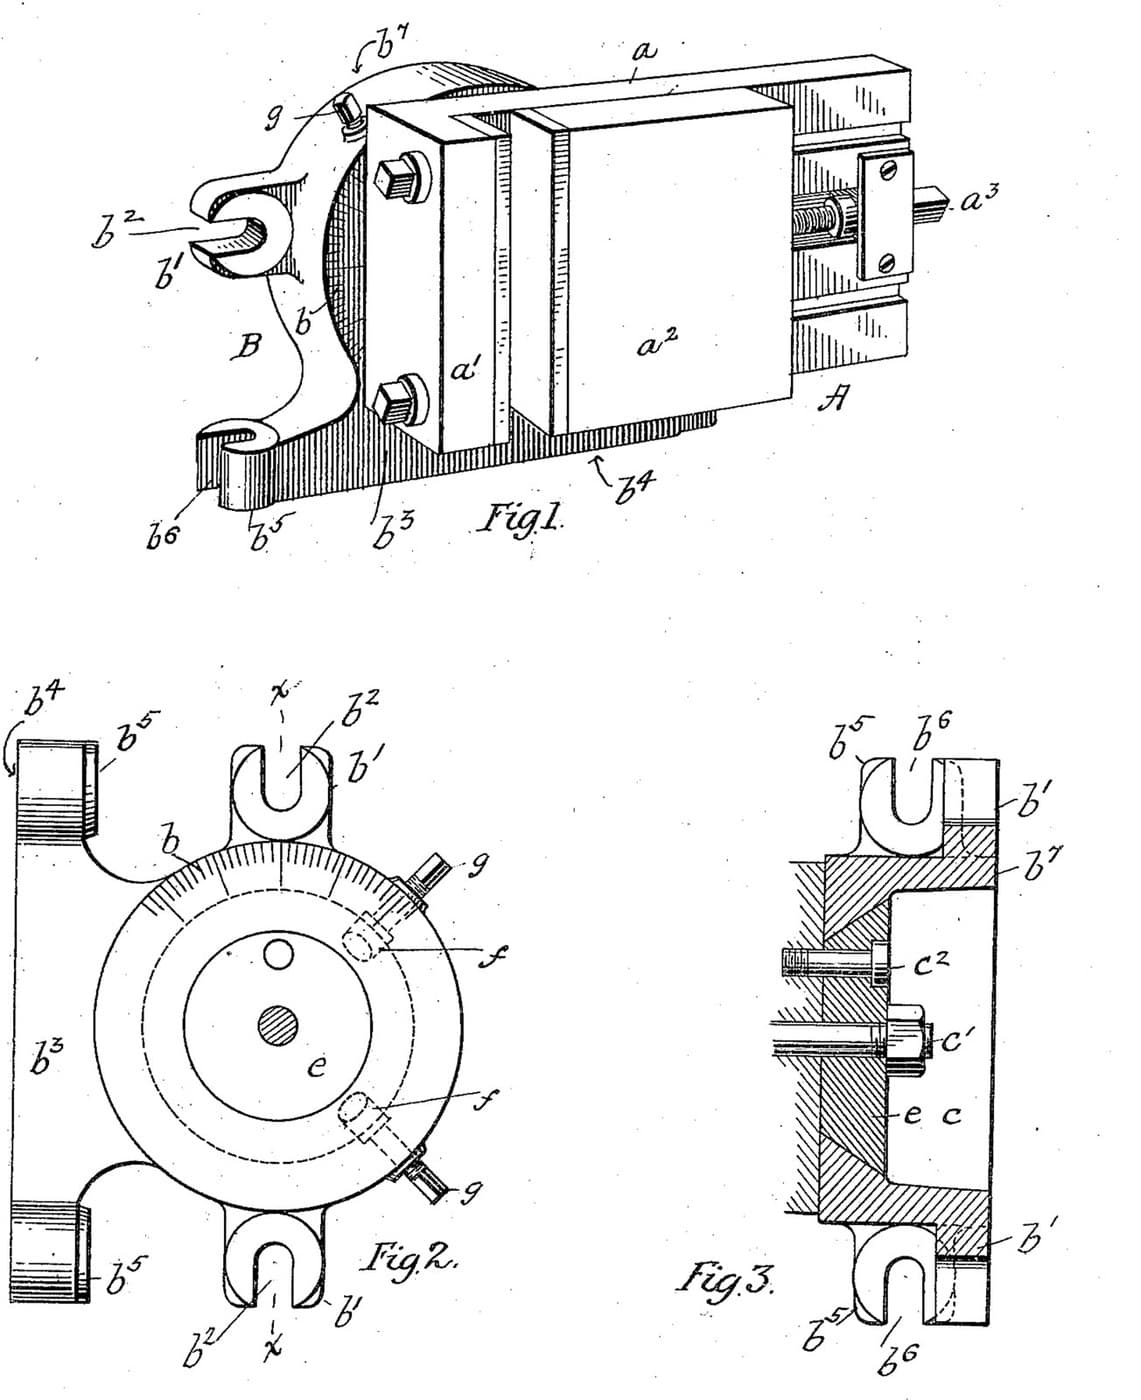
C. H. Willey's quick-acting vise for the drill-press table (Popular Mechanics, 1920): a 1/2 x 3 in. steel bed drilled with 5/8 in. holes 7/8 in. apart and bolted down on slotted end pieces, a fixed jaw pinned into any hole, a sliding jaw kept on the bar by a riveted cross pin, and an eccentric cam on a handle that locks the work.
Średniozaawansowany
A day
Instrukcje
1
1
The steps
The steps
Wczytywanie notatnika Jupyter…
2
2
Read Willey
Read Willey
"A very efficient, quick-opening and closing vise for the drill-press table."
3
3
Make the bed
Make the bed
Cut a bed bar from 1/2 x 3 in. (13 x 76 mm) steel to suit your table (length ours). Drill a row of 5/8 in. (16 mm) holes 7/8 in. (22 mm) apart along its middle.
Materiały do tego kroku:
 Płaskownik ze stali miękkiej1 sztuka
Potrzebne narzędzia:
 Piła do metalu
 Punktak
 Wiertarka stołowa
 Zestaw wierteł
4
4
Make the end supports
Make the end supports
Cut two short pieces of the same stock, slot them for bolts to the drill-press table and fix one under each end of the bed (ours: bolted), so the bed stands clear of the table.
Materiały do tego kroku:
Płaskownik ze stali miękkiej1 sztuka Zestaw śrub sześciokątnych1 sztuka
Potrzebne narzędzia:
Piła do metaluWiertarka stołowaZestaw wierteł Pilniki (pilnik ręczny)
5
5
Make the fixed jaw
Make the fixed jaw
Cut out a steel block underneath so it straddles the bed (stock and size ours). Drive a pin into it, downward, that fits the 5/8 in. holes.
Materiały do tego kroku:
Płaskownik ze stali miękkiej1 sztuka Pręt ze stali niskowęglowej1 sztuka
Potrzebne narzędzia:
Piła do metaluPilniki (pilnik ręczny)Wiertarka stołowaZestaw wierteł Młotek ślusarski z kulistym rąbem
6
6
Make the sliding jaw
Make the sliding jaw
Cut a second block the same way. Pass a horizontal pin across the opening below the bed and rivet it to the jaw's sides, so the jaw slides along the bar but cannot lift off.
Materiały do tego kroku:
Płaskownik ze stali miękkiej1 sztukaPręt ze stali niskowęglowej1 sztukaPotrzebne narzędzia:
Piła do metaluPilniki (pilnik ręczny)Wiertarka stołowaZestaw wiertełMłotek ślusarski z kulistym rąbem Imadło warsztatowe
7
7
Make the cam
Make the cam
Saw a disk off steel shafting. Drive a pin that fits the 5/8 in. holes into one face, off centre. At right angles to it, drill a hole in the rim and fit a handle.
Materiały do tego kroku:
 Wał stalowy1 sztukaPręt ze stali niskowęglowej1 sztuka
Potrzebne narzędzia:
Piła do metaluWiertarka stołowaZestaw wiertełMłotek ślusarski z kulistym rąbem8
8
Use it
Use it
Bolt the bed to the table. Set the fixed jaw's pin in the hole that suits the work, slide the jaw up, drop the cam pin into the hole behind it and swing the handle to lock the work.
Materiały do tego kroku:
Zestaw śrub sześciokątnych1 sztukaPotrzebne narzędzia:
Wiertarka stołowa9
9
Troubleshooting
Troubleshooting
Drill vise troubleshooting.
Flow
Loading...
10
10
History and honest limits
History and honest limits
From C. H. Willey, "A Simple Drill Vise", **Popular Mechanics** vol. 34 (November 1920), p. 3340 (checked on the archive.org scan of Popular Mechanics Shop Notes, popularmechanic00unkngoog). He gives only the bed section and the hole size and spacing; jaw and cam sizes, the bar length, how the end pieces are fixed and the cam offset are ours.
Materiały
4- 1 sztukaZastępnik
- 2 sztukZastępnik
- 1 sztukaZastępnik
- 1 sztukaZastępnik
Według tego planu powstaje
Powiązane blueprinty
Te blueprinty dzielą się wiedzą — technikami, materiałami lub zasadami
CC0 Domena publiczna
Ten plan jest udostępniany na licencji CC0. Możesz go swobodnie kopiować, modyfikować, rozpowszechniać i wykorzystywać do dowolnych celów, bez konieczności uzyskiwania zgody.
Wesprzyj Makera kupując produkty przez jego plan, za co zarabia Prowizja Makera ustalony przez sprzedawców, lub stwórz nową iterację tego planu i dołącz go jako połączenie w swoim własnym planie, aby dzielić się przychodami.