Designing a Roman Bathhouse (Thermae) — The Engineering of Public Bathing
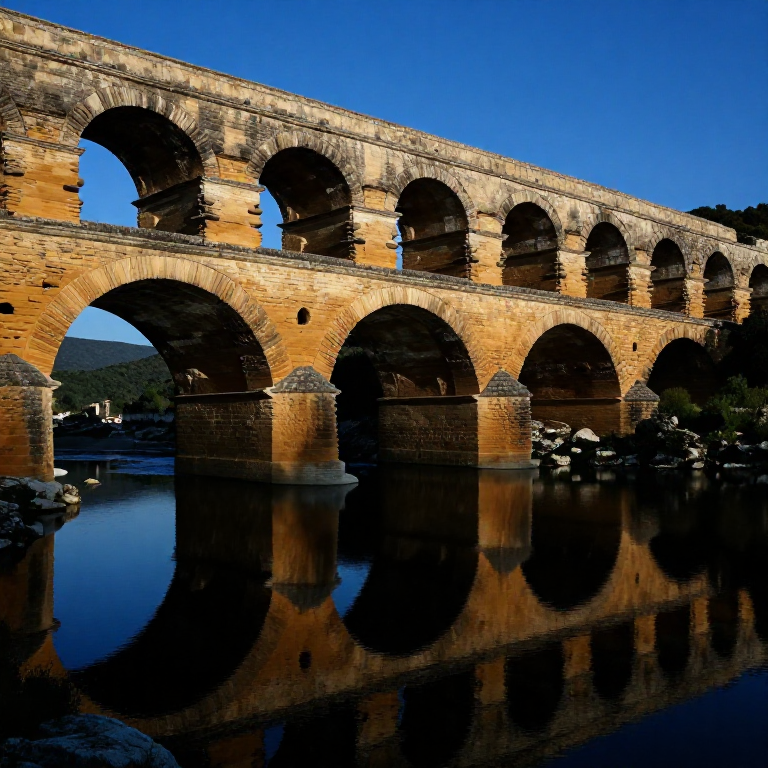
The Roman public bathhouse — the thermae for large imperial complexes, balneae for smaller neighbourhood baths — was simultaneously a feat of hydraulic engineering, thermal engineering, and social infrastructure. At their peak in the 4th century AD, Rome had over 900 public baths, ranging from small neighbourhood balneae serving a few hundred customers daily to the immense imperial thermae such as those of Caracalla (completed 216 AD, covering 27 hectares, with a main building 228 × 116 metres) and Diocletian (completed 306 AD, accommodating 3,000 bathers simultaneously). These were not merely washing facilities — they were community centres, libraries, exercise halls, and gardens, all powered by sophisticated heating and water supply systems.
The engineering genius of the Roman bathhouse lies in two systems working together: the hypocaust underfloor heating system and the aqueduct-fed water distribution. The hypocaust circulates hot combustion gases beneath a raised floor (suspended on ceramic pilae stackings) and through hollow wall tiles (tubuli), heating both floor and walls from the inside. This radiant heating system maintains different bath rooms at different temperatures — the frigidarium (cold room), tepidarium (warm room), caldarium (hot room), and laconicum (sweat room, like a sauna) — all from a single or small number of furnaces (praefurnia) stoked continuously.
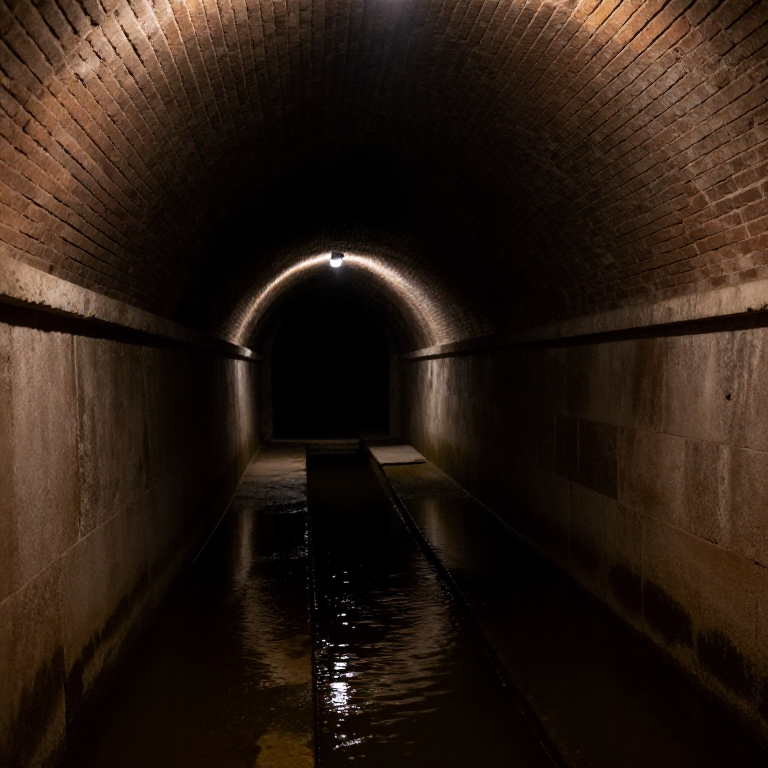
The water supply was equally sophisticated. Aqueducts delivered fresh water continuously to a header cistern above the bath building. Lead pipes (fistulae plumbeae) distributed cold water to the frigidarium pools and to the lead boilers (miliaria) in the furnace room, where water was heated to 80–100°C and piped to the hot plunge baths. Waste water drained through the hypocaust floor void and through stone-lined drains to the city sewer. The continuous water flow meant Roman baths were self-cleaning to a degree — unlike static tank baths.
التعليمات
Plan the room sequence and orientation
Plan the room sequence and orientation
Orient the bathhouse with the caldarium (hot room) on the south-facing side to maximise solar heat gain through the large south-facing windows — Roman baths had large glass-paned windows, the first systematic use of window glass in architecture. Plan the room sequence for the bather's journey: apodyterium (changing room) → frigidarium (cold plunge, unheated) → tepidarium (warm room, 30–35°C) → caldarium (hot room, 40–45°C) → optionally laconicum (dry sweat room, 55–60°C). Arrange the rooms so that the furnace (praefurnium) is adjacent to the caldarium — the heat source must be closest to the hottest room. Plan for the hypocaust floor structure to run continuously through tepidarium and caldarium, with the frigidarium having a normal floor.
Excavate and prepare the sub-floor void for the hypocaust
Excavate and prepare the sub-floor void for the hypocaust
In the heated rooms (tepidarium and caldarium), excavate the floor area to a depth of 60–80 cm below the intended finished floor level. The sub-floor void must be continuous across each room — no internal walls interrupt the hot gas circulation. Compact the excavated base and lay a concrete sub-base 15 cm thick. This sub-base must be sealed against ground moisture — apply a coat of opus signinum hydraulic render (lime and crushed brick) to the top surface. Any moisture penetrating up through the hypocaust void cools the air and causes condensation on the underside of the raised floor — a critical design failure in Roman bath engineering.
المواد لهذه الخطوة:
 Calcium Carbonate (Crushed Limestone)50 كغ
 Coarse Sand30 كغ
الأدوات المطلوبة:
 Shovel
Stack the pilae (hypocaust pillar tiles)
Stack the pilae (hypocaust pillar tiles)
Build the hypocaust pillar stacks (pilae) at regular intervals of 60–70 cm across the sub-floor. Each pila consists of a square ceramic tile base (approximately 20 × 20 cm, 4 cm thick), a stack of round or square ceramic pillar tiles 20 cm in diameter (the mammatae tiles, so-called for their nipple-like projections that aided in centring each tile on the next), topped by a spreading capital tile that supports the suspended floor above. Stack height should be 60 cm to allow sufficient hot gas volume and to allow crawl access for stoking. All pilae are built dry — no mortar — so they can thermally expand and contract without cracking. Space them in a regular grid to provide even floor support.
المواد لهذه الخطوة:
 Clay100 كغ
Lay the suspended floor (suspensura) in ceramic and concrete
Lay the suspended floor (suspensura) in ceramic and concrete
Over the pila capitals, lay large rectangular bipedalis tiles (approximately 60 × 60 cm × 6 cm) spanning between the pilae to form the suspended floor surface. Mortar these tiles to the pila capitals. Over the tile layer, apply a thick concrete screed (40–50 mm of lime mortar and brick aggregate) to create a level, smooth, thermally massive floor. The mass of the floor stores heat during peak furnace stoke and releases it slowly — preventing temperature spikes and allowing the room to stay at constant temperature between stokings. Top the screed with an opus signinum finish coat for waterproofing and a smooth bathing surface. The total suspended floor assembly is approximately 15 cm thick.
Install hollow wall tiles (tubuli) for wall heating
Install hollow wall tiles (tubuli) for wall heating
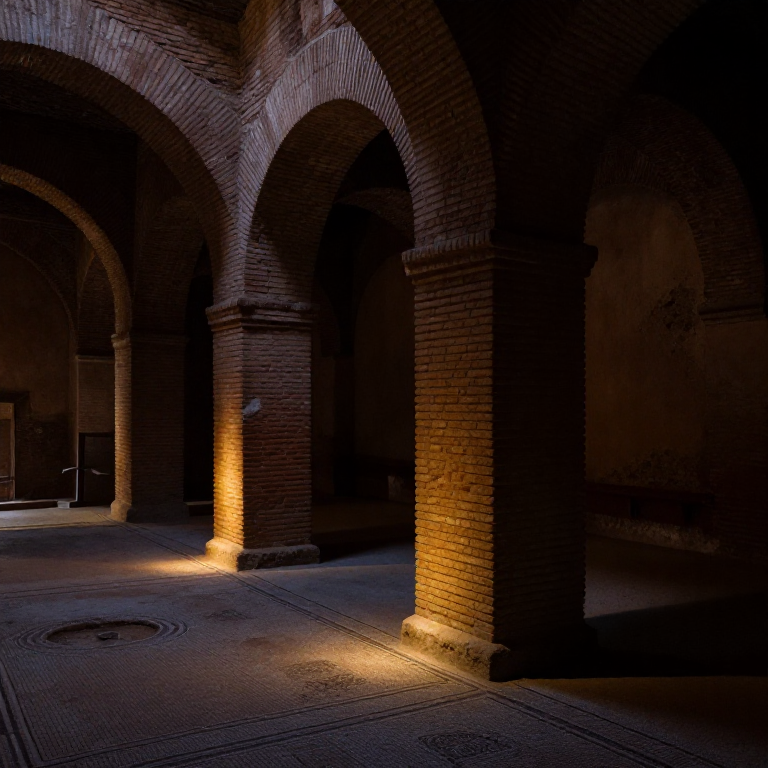
Line the interior walls of the caldarium and tepidarium with tubuli — square-section hollow ceramic tiles (approximately 20 × 20 cm externally, 12 × 12 cm internally, 30 cm long) that clip together to form vertical flue channels within the wall construction. Set the first row of tubuli on the suspended floor slab at the wall base, with their hollow cores aligned vertically. The hot gases from the hypocaust flow up through these wall channels (driven by convection as hot gas rises) and exit through outlets in the wall or ceiling, heating the walls radially inward. Wall heating is critical for comfort — without it, bathers would feel chilled by cold wall radiation even if the floor and air were warm.
Build the praefurnium (furnace) stoking pit adjacent to the caldarium
Build the praefurnium (furnace) stoking pit adjacent to the caldarium
The praefurnium is a below-grade stoking pit located at the end wall of the caldarium, connected to the hypocaust void through a low arched opening approximately 80 cm wide × 60 cm high. The fireman (hypocaustum) works in the stoking pit, feeding wood or charcoal into the mouth of the praefurnium with long iron forks. The fire is not inside the building — the combustion space is entirely below and outside the caldarium, with only the hot flue gases entering the hypocaust. This is an important safety and air quality feature: combustion gases never enter the bathing rooms (in theory — partial combustion could allow carbon monoxide ingress if the draught is poor). Build the praefurnium walls in heat-resistant fired brick.
المواد لهذه الخطوة:
 Charcoal50 كغ
Install the lead water boiler (miliarum) over the praefurnium
Install the lead water boiler (miliarum) over the praefurnium
Mount a lead boiler (miliarum — so named because it could heat a thousand sextarii of water, approximately 540 litres) directly above the praefurnium firebox, where it receives maximum heat. The miliarum is a large lead vessel (lead melts at 327°C but is safe in continuous service up to approximately 280°C with water cooling keeping it well below that temperature). Cold water enters from the aqueduct supply at the base; hot water exits at the top to feed the hot plunge bath through lead fistulae pipework. The caldarium hot pool (alveus) maintains approximately 40–45°C. A second boiler provides tepid water (tepidarium temperature, 35–38°C) for the tepidarium basin, supplied from a secondary outlet partway up the miliarum.
Lay the lead pipe distribution network (fistulae)
Lay the lead pipe distribution network (fistulae)
Connect the aqueduct supply (cold water) and miliarum outputs (hot and warm water) to each bath room using lead fistulae — pipes cast or sheet-rolled from lead, soldered with a tin-lead solder along a longitudinal seam. Roman lead pipes are identified by their characteristic almond-shaped cross-section (from rolling flat sheet over a mandrel) and are stamped with the fistularius's (plumber's) name and the customer's name. Pipe size is specified by the Roman libra (pound) weight of lead per foot of pipe — a 10-libra fistula carries a bore of approximately 25 mm. Run the cold supply pipe in a trench to the frigidarium pool and the aqueduct cistern. Run hot pipes through or alongside the wall structure to protect them from thermal cycling stress.
Construct the plunge bath pools in waterproof opus signinum
Construct the plunge bath pools in waterproof opus signinum
Build the plunge bath pools (piscinae) as masonry boxes — concrete walls and floor, lined inside with 30 mm of opus signinum hydraulic render (lime mortar mixed with crushed terra cotta at 1:2 ratio). Apply the opus signinum in two coats; the second coat must be applied while the first is still green (partially cured) to form a monolithic bond. Round all internal corners with a thick cove fillet of opus signinum — sharp corners crack under thermal cycling and allow water to penetrate the masonry behind. After applying the final coat, burnish the surface while still pliable by rubbing with a smooth stone — this closes surface pores and produces a semi-polished, water-resistant finish. The frigidarium pool needs no heating; the caldarium alveus is supplied with continuous hot water from the miliarum.
Build the vault or dome roof over the caldarium
Build the vault or dome roof over the caldarium
Roof the caldarium with a concrete barrel vault or cross vault — not timber, which would warp, rot, and potentially ignite over the hot room. Build the vault in pozzolanic concrete over timber centring, using the lightest available aggregate (pumice) to minimise roof dead load and thermal mass. The vault geometry concentrates hot air at the crown, creating the hot steam environment needed for the caldarium experience. Fit the vault with small semi-circular windows (lunettes) in the side walls — with a south or south-west orientation to maximise winter sun — fitted with panes of blown glass (vitrum) approximately 5–8 mm thick. Roman window glass was translucent rather than clear but passed sufficient light to make the caldarium usable without oil lamps in daylight hours.
Plaster and marble-face the interior walls
Plaster and marble-face the interior walls
Apply a base render coat of lime and sand plaster to all interior wall surfaces over the tubuli cladding, bridging the uneven tile surface. Follow with a finish coat of fine lime and marble dust plaster, pressed smooth with a straight edge. For premium installations, apply marble veneer panels cut 2–3 cm thick and bedded in lime mortar — Roman bathhouses were lavishly decorated with coloured marble (crusta) from quarries across the empire: white Carrara, green cipollino, yellow Numidian marble, and red porphyry. Apply waterproof opus signinum to the lowest 60 cm of wall in all rooms — splash zones where water contact is certain.
Test the heating system with a 48-hour test stoke
Test the heating system with a 48-hour test stoke
Before opening the baths to users, run the praefurnium continuously for 48 hours. This initial firing drives out all residual moisture from the new concrete and plaster — if moisture is present, thermal shock can spall the plaster off the walls when steam forms inside the render. During the test stoke, measure the temperature difference between the frigidarium (ambient), tepidarium, caldarium, and laconicum using a bronze rod heated in each room for 10 minutes (by touch: ambient = no warming, tepidarium = pleasantly warm, caldarium = uncomfortably hot to hold, laconicum = too hot to hold for more than 2 seconds). Adjust the furnace damper and stoking rate to achieve the correct temperature gradient between rooms. A successful 48-hour test with stable temperatures across all rooms confirms the system is ready for operation.
المواد
4- عنصر نائب
- عنصر نائب
مواد المخططات المرتبطة
المخططات ذات الصلة
هذه المخططات تشارك المعرفة مع هذا — التقنيات والمواد والمبادئ
Related blueprints
Other builds that share materials, tools, or techniques with this one.

CC0 ملكية عامة
هذا المخطط مُصدر بموجب CC0. يحق لك نسخه وتعديله وتوزيعه واستخدامه لأي غرض، دون طلب إذن.
ادعم الصانع بشراء منتجات عبر مخططه حيث يكسب عمولة الصانع يحددها البائعون، أو أنشئ نسخة جديدة من هذا المخطط وضمّنه كرابط في مخططك لمشاركة الإيرادات.