التعاون
فنون
الجمال والعناية
حِرَف
الثقافة والتاريخ
ترفيه
البيئة
الطعام والمشروبات
الهندسة العكسية
العلوم
رياضة
التقنية
الأجهزة القابلة للارتداء
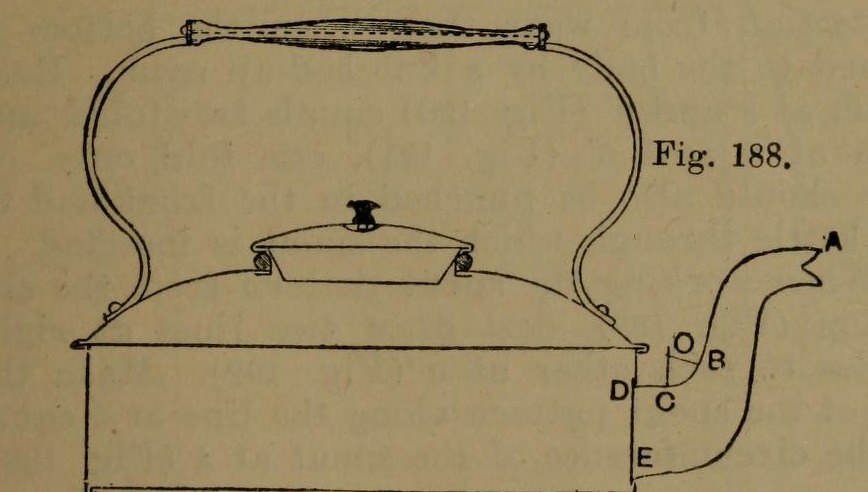


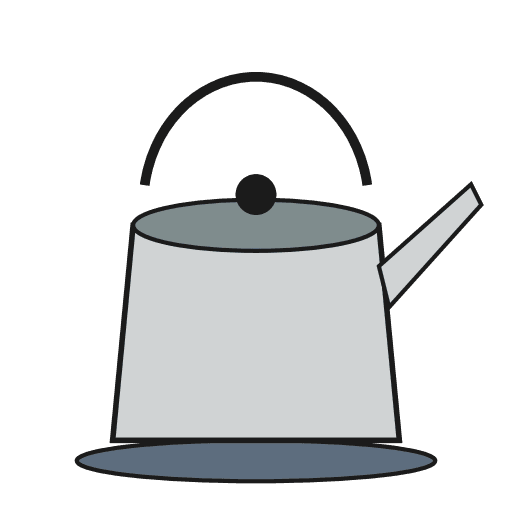
Stovetop Kettle: a Square Copper Kettle (Hasluck, 1907)
A tinsmith's square kettle in sheet copper, 9 x 9 in and 3 5/8 in deep: a box body with folded corner seams, a hollowed top pened on, a brazed and bent spout, a small cover, and a wooden handle on brass uprights.
Hasluck prefers copper; tinplate also works and is a separate route.
Source: Paul N. Hasluck, Tinplate Work (1907), pp. 91-98. Unknown: copper gauge, solder. Picture: Figs. 188-189 of the book.
متقدم
Unknown
التعليمات
1
1
Cut the patterns
Cut the patterns
For a body 9 x 9 x 3 5/8 in, cut two ends 9 1/2 x 4 in and two sides 9 1/4 x 4 in, notched for box seams at the corners (Figs. 190-191), with allowances to fold at top and bottom. Punch the spout hole in the front. Cut the bottom 9 1/2 in square, notched for a 1/4 in edge. Set out the top as a 10 1/2 in square with curved allowances for hollowing and a 4 in circle for the cover hole (Fig. 193); set out the spout from the elevation (Fig. 192), the cover and its cone-shaped rim (Figs. 194-195).
المواد لهذه الخطوة:
 صفيحة نحاس1 body, bottom, top, spout, cover
الأدوات المطلوبة:
 فرجار سنّي
 مخطاط
 مقصّ صفائح
2
2
Braze and shape the spout
Braze and shape the spout
Thin the long edges by hammering. Set in the throat with a stretching hammer on a beak iron, bend the spout round until the edges overlap, bind it with wire, lay spelter and borax along the inside of the seam and braze it; then close and braze the under seam. Fill it with lead and bend the neck with a round-faced hammer on the hollowing block; file off spare spelter and smooth it. Run out the lead, throw off a seating round the large end, trim the top with snips and tin the inside.
المواد لهذه الخطوة:
 معدن غير معروف1 spelter
 قصدير1 tinning
الأدوات المطلوبة:
 مطرقة التسوية
 وتد
 سلك حديدي
 مسحوق البوراكس
 شعلة لحام بالنحاس
 الرصاص
 مِغرفة مثقّبة
 كتلة خشب صلب
 مبرد معادنمقصّ صفائح
3
3
Fold and seam the body
Fold and seam the body
Fold the top edges square, the front and back outwards and the sides likewise; fold the bottom edges right over inwards to take the bottom (Fig. 188). Hook each side's end over the front's and work the corner seam on a straight-edged tool (Figs. 198-199). Turn up the bottom's 1/4 in edge, push it edge-down into the bottom folds, and solder the bottom and seams.
المواد لهذه الخطوة:
 لحام قصدير-رصاص1 قطعة
الأدوات المطلوبة:
 مطرقة خشبيةوتد
 كاوية لحام كهربائية
 مساعد صهر
4
4
Hollow the top and make the cover
Hollow the top and make the cover
Hollow the top on the block: sink the four sides a little, hollow the corners with a bullet-faced hammer, flatten each side along the block edge, even the shoulder and smooth it all over. Pare the edges, mark the flange with an edging machine, set it down square with a hatchet stake and mallet, and take up an edge to fit over the body. Cut the cover hole with circular snips and fit a narrow wired rim, worked over inside. Make the cover: solder its cone rim to fit the wired rim, throw off a flange, hollow the cover disc and seam it on, and fix the knob.
المواد لهذه الخطوة:
سلك حديدي1 rimلحام قصدير-رصاص1 قطعةمعدن غير معروف1 cover knobالأدوات المطلوبة:
مطرقة التسويةكتلة خشب صلبوتدمطرقة خشبيةمقصّ صفائحكاوية لحام كهربائيةمساعد صهر5
5
Handle, top and spout
Handle, top and spout
Cut two handle uprights from stout brass or copper band (Fig. 196), drill them for rivets and for the spindle that carries the wooden handle, and bend them to shape. Rivet them to the top and solder over the rivet heads inside. Pene the top down onto the body and solder along each edge. Push the spout through its hole from inside until its large end butts against the front, and solder it strongly from inside.
المواد لهذه الخطوة:
 صفيحة نحاس أصفر1 handle uprights
 قضيب نحاس أصفر1 spindle
 مقبض1 wood
 برشام نحاسي1 number not givenلحام قصدير-رصاص1 قطعة
الأدوات المطلوبة:
 مثقب يدوي
 مطرقة برشمةمطرقة خشبيةكاوية لحام كهربائيةمساعد صهر
المواد
9- 1 body, bottom, top, spout, coverعنصر نائب
- 1 cover knobعنصر نائب
- 1 tinningعنصر نائب
- 3 قطععنصر نائب
- 1 rimعنصر نائب
- 1 handle uprightsعنصر نائب
- 1 spindleعنصر نائب
- 1 woodعنصر نائب
- 1 number not givenعنصر نائب
الأدوات المطلوبة
17- عنصر نائب
- عنصر نائب
- عنصر نائب
- عنصر نائب
- عنصر نائب
- عنصر نائب
- عنصر نائب
- عنصر نائب
- عنصر نائب
- عنصر نائب
- عنصر نائب
- عنصر نائب
- عنصر نائب
- عنصر نائب
- عنصر نائب
- عنصر نائب
- عنصر نائب
مواد المخططات المرتبطة


هذا المخطط يصنع
CC0 ملكية عامة
هذا المخطط مُصدر بموجب CC0. يحق لك نسخه وتعديله وتوزيعه واستخدامه لأي غرض، دون طلب إذن.
ادعم الصانع بشراء منتجات عبر مخططه حيث يكسب عمولة الصانع يحددها البائعون، أو أنشئ نسخة جديدة من هذا المخطط وضمّنه كرابط في مخططك لمشاركة الإيرادات.