การทำงานร่วมกัน
ศิลปะ
ความงามและสุขภาพ
งานฝีมือ
วัฒนธรรมและประวัติศาสตร์
ความบันเทิง
สิ่งแวดล้อม
อาหารและเครื่องดื่ม
วิศวกรรมย้อนรอย
วิทยาศาสตร์
กีฬา
เทคโนโลยี
อุปกรณ์สวมใส่


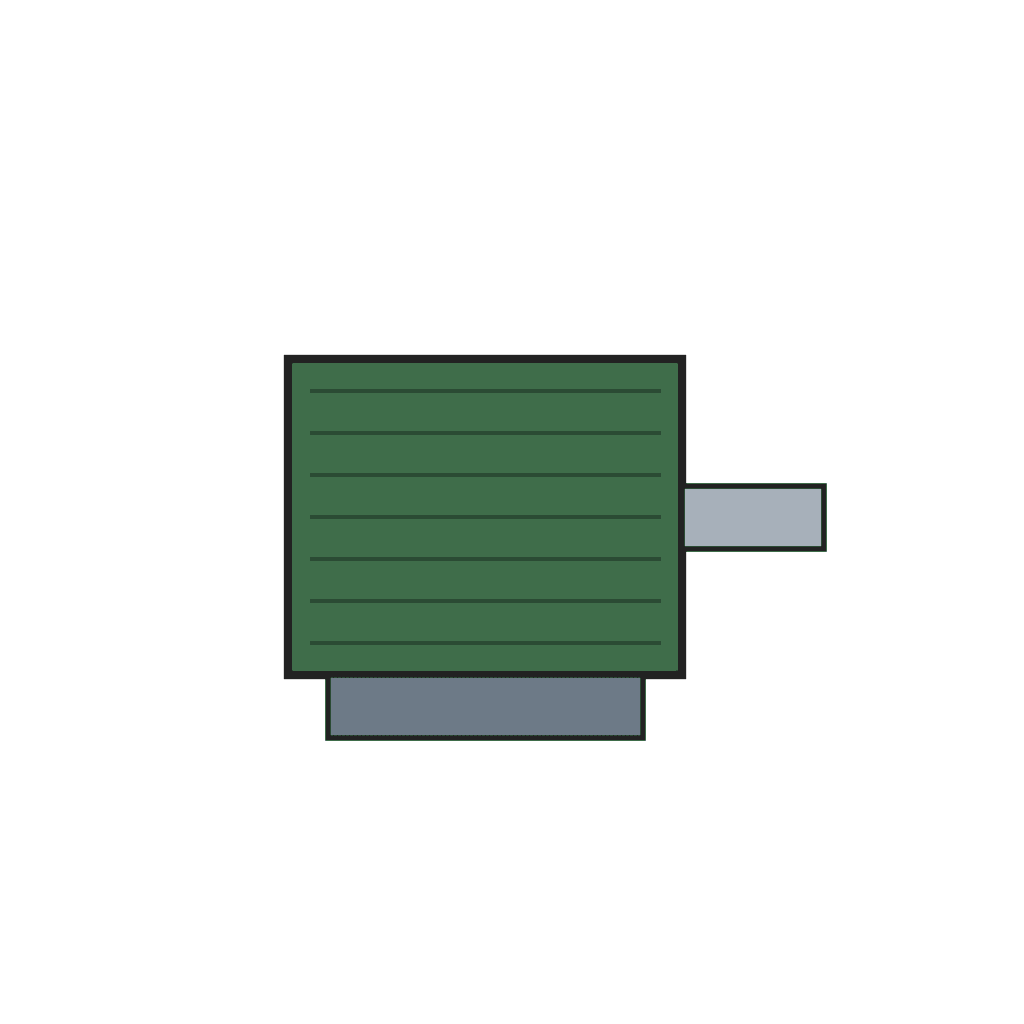
Small Series-Wound Electric Motor with Laminated Field and 12-Slot Ring Armature (Robertson, Boy Mechanic 1913)
A real workshop-built DC motor: a field of riveted sheet-iron plates bored to 2-3/4 in, a 12-slot laminated ring armature on a brass spider, a 12-segment brass commutator insulated with mica, gauze brushes, and series windings of cotton-covered magnet wire.
ขั้นสูง
Several weekends
คำแนะนำ
1
1
Read the Boy Mechanic
Read the Boy Mechanic
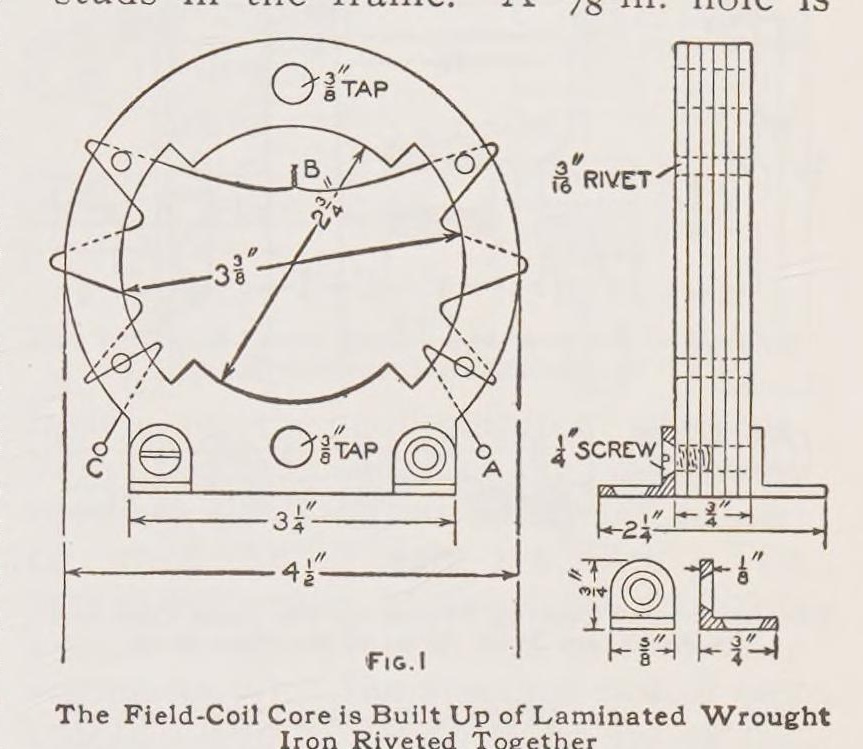
"The field frame of the motor, Fig. 1, is composed of wrought sheet iron."
2
2
Field frame
Field frame
Mark a template 1/16 in larger than Fig. 1, cut enough sheet-iron plates to make 3/4 in, drill four rivet holes and rivet them. Mark the bore with dividers set at 1/8 in, drill 1/4 in holes round it and file to shape. Bore to 2-3/4 in on a lathe; mark the field core at 3-3/8 in and the outside at 4-1/2 in and finish to the marks.
วัสดุสำหรับขั้นตอนนี้:
 แผ่นเหล็กกล้าละมุน1 ชิ้น
 หมุดย้ำเหล็กกล้า1 ชิ้น
เครื่องมือที่ต้องใช้:
 เหล็กขีด
 วงเวียนปลายแหลมสองขา
 สว่านมือ
 ตะไบ (ตะไบมือ)
 เครื่องกลึงโลหะ
 ค้อน
3
3
Studs, lugs and bearings
Studs, lugs and bearings
Drill and tap two 3/8 in holes 3-5/8 in apart for the bearing studs (Fig. 2) and 1/4 in holes for feet bent from 1/8 in brass or iron. Make the bearing supports from 1/8 in brass with a 5/8 in hole and a 5/8 in brass rod soldered in and drilled for the shaft. Fit them after the armature is made: wrap paper round the armature, set it in the field, slip the bearings on and solder them, then check it turns freely.
วัสดุสำหรับขั้นตอนนี้:
 แผ่นทองเหลือง1 ชิ้น
 แท่งทองเหลือง1 ชิ้น
 เหล็กเส้นกลมเหล็กกล้าละมุน1 ชิ้น
 ตะกั่วบัดกรีดีบุก-ตะกั่ว1 ชิ้น
เครื่องมือที่ต้องใช้:
 ชุดต๊าปและดายทำเกลียวเครื่องกลึงโลหะ
 หัวแร้งบัดกรีสว่านมือ
4
4
Armature core
Armature core
Cut two 1/8 in wrought-iron outer plates and enough No. 24 sheet iron to make over 3/4 in (Fig. 5), drill six 1/8 in holes and rivet. Anneal at cherry red and cool in ashes. Bore to 1-11/16 in, fit a brass spider turned from 3/4 in brass on the machine-steel shaft with a setscrew, solder, turn the outside and face it to 3/4 in. File 12 slots 1/4 in deep and 7/16 in wide.
วัสดุสำหรับขั้นตอนนี้:
แผ่นเหล็กกล้าละมุน1 ชิ้นหมุดย้ำเหล็กกล้า1 ชิ้นแท่งทองเหลือง1 ชิ้นเหล็กเส้นกลมเหล็กกล้าละมุน1 ชิ้นเครื่องมือที่ต้องใช้:
 เตาตีเหล็กของช่างตีเหล็กเครื่องกลึงโลหะตะไบ (ตะไบมือ)สว่านมือ
5
5
Commutator
Commutator
Turn a piece of 3/4 in i.d. brass pipe to 3/4 in long, chamfer both ends at 60 deg, divide into 12, drill and tap a 1/8 in hole in each segment for a brass pin, turn the pins to 1-1/4 in outside and slit them for the wires. Saw it into 12 bars, fit them on turned fibre ends with 12 mica strips between, clamp with the nut and true up.
วัสดุสำหรับขั้นตอนนี้:
 ท่อทองเหลือง1 ชิ้นแท่งทองเหลือง1 ชิ้น
 แผ่นไฟเบอร์วัลคาไนซ์1 ชิ้น
 แผ่นไมกา1 ชิ้น
เครื่องมือที่ต้องใช้:
เครื่องกลึงโลหะชุดต๊าปและดายทำเกลียว เลื่อยตัดเหล็ก
6
6
Brushes
Brushes
Make the brush holder of fibre (Fig. 8) and studs of 5/16 in brass rod (Fig. 9). Roll brass or copper wire gauze and flatten it to 1/8 x 1/4 in, solder one end, and fit the holder on the bearing with a setscrew.
วัสดุสำหรับขั้นตอนนี้:
แผ่นไฟเบอร์วัลคาไนซ์1 ชิ้นแท่งทองเหลือง1 ชิ้น ตาข่ายลวด1 ชิ้นตะกั่วบัดกรีดีบุก-ตะกั่ว1 ชิ้น
เครื่องมือที่ต้องใช้:
หัวแร้งบัดกรีตะไบ (ตะไบมือ)7
7
Wind the field
Wind the field
Insulate the field cores with 1/64 in fibre and end washers 1-1/8 x 1-1/2 in (softened in warm water, then glued). Wind each side with four layers (about 50 ft) of No. 18 double-cotton-covered wire, A to B and C to B, and join the ends at B.
วัสดุสำหรับขั้นตอนนี้:
แผ่นไฟเบอร์วัลคาไนซ์1 ชิ้น ลวดทองแดงอาบน้ำยา1 ชิ้น
 กาวไม้1 ชิ้น
8
8
Wind the armature
Wind the armature
Line the ring and spider with 1/16 in fibre and the slots with 1/64 in fibre channels. Wind each slot with about 12 ft of No. 21 wire, 40 turns in four layers of 10, shellacking each layer, leaving 2 in ends. Join each coil's start to the next coil's finish and solder the joints to the commutator pins.
วัสดุสำหรับขั้นตอนนี้:
แผ่นไฟเบอร์วัลคาไนซ์1 ชิ้นลวดทองแดงอาบน้ำยา1 ชิ้น น้ำมันเคลือบเชลแล็ก1 ชิ้นตะกั่วบัดกรีดีบุก-ตะกั่ว1 ชิ้น
เครื่องมือที่ต้องใช้:
หัวแร้งบัดกรี9
9
Mount and wire
Mount and wire
Screw the motor to a wood base 8 x 6 x 1 in with two terminals and a switch. Wire it in series: field end A to a terminal, field end C to one brush stud, the other brush through the switch to the other terminal.
วัสดุสำหรับขั้นตอนนี้:
 แผ่นไม้เนื้อแข็ง1 ชิ้น
 ขั้วต่อแบบไบดิงโพสต์1 ชิ้น
 สวิตช์โยก1 ชิ้น
 สกรูไม้1 ชิ้น
เครื่องมือที่ต้องใช้:
 สว่านมือหมุนพร้อมดอก
10
10
Troubleshooting
Troubleshooting
Motor troubleshooting.
Flow
Loading...
11
11
History and honest limits
History and honest limits
From W. A. Robertson in **The Boy Mechanic, Book 1** (Popular Mechanics, 1913), pp. 345-347 (checked on the archive.org scan boymechanic0000unse_n5a8). Sizes not in the text are in his Figs. 1-9; enamelled wire for cotton-covered and the low-voltage advice are ours.
วัสดุ
17- 1 ชิ้นตัวยึดตำแหน่ง
- 1 ชิ้นตัวยึดตำแหน่ง
- 1 ชิ้นตัวยึดตำแหน่ง
- 1 ชิ้นตัวยึดตำแหน่ง
- ตัวยึดตำแหน่ง
- 3 ชิ้นตัวยึดตำแหน่ง
- 1 ชิ้นตัวยึดตำแหน่ง
- 1 ชิ้นตัวยึดตำแหน่ง
- 1 ชิ้นตัวยึดตำแหน่ง
- 1 ชิ้นตัวยึดตำแหน่ง
- 1 ชิ้นตัวยึดตำแหน่ง
- 1 ชิ้นตัวยึดตำแหน่ง
- 1 ชิ้นตัวยึดตำแหน่ง
- 1 ชิ้นตัวยึดตำแหน่ง
- ตัวยึดตำแหน่ง
- ตัวยึดตำแหน่ง
- 1 ชิ้นตัวยึดตำแหน่ง
เครื่องมือที่จำเป็น
11- ตัวยึดตำแหน่ง
- ตัวยึดตำแหน่ง
- ตัวยึดตำแหน่ง
- ตัวยึดตำแหน่ง
- ตัวยึดตำแหน่ง
- ตัวยึดตำแหน่ง
- ตัวยึดตำแหน่ง
- 2 vendors sell this, none ship to you yetตัวยึดตำแหน่ง
- ตัวยึดตำแหน่ง
- ตัวยึดตำแหน่ง
- ตัวยึดตำแหน่ง
พิมพ์เขียวนี้สร้าง
บลูพริ้นท์ที่เกี่ยวข้อง
บลูพริ้นท์เหล่านี้แบ่งปันความรู้ — เทคนิค วัสดุ หรือหลักการ

CC0 สาธารณสมบัติ
พิมพ์เขียวนี้เผยแพร่ภายใต้ CC0 คุณสามารถคัดลอก แก้ไข แจกจ่าย และใช้งานผลงานนี้เพื่อวัตถุประสงค์ใดก็ได้ โดยไม่ต้องขออนุญาต
สนับสนุนเมกเกอร์โดยซื้อสินค้าผ่านพิมพ์เขียวของพวกเขา ซึ่งพวกเขาจะได้รับ ค่าคอมมิชชันเมกเกอร์ ที่ผู้ขายกำหนด หรือสร้างเวอร์ชันใหม่ของพิมพ์เขียวนี้และรวมเป็นการเชื่อมต่อในพิมพ์เขียวของคุณเพื่อแบ่งรายได้