การทำงานร่วมกัน
ศิลปะ
ความงามและสุขภาพ
งานฝีมือ
วัฒนธรรมและประวัติศาสตร์
ความบันเทิง
สิ่งแวดล้อม
อาหารและเครื่องดื่ม
วิศวกรรมย้อนรอย
วิทยาศาสตร์
กีฬา
เทคโนโลยี
อุปกรณ์สวมใส่
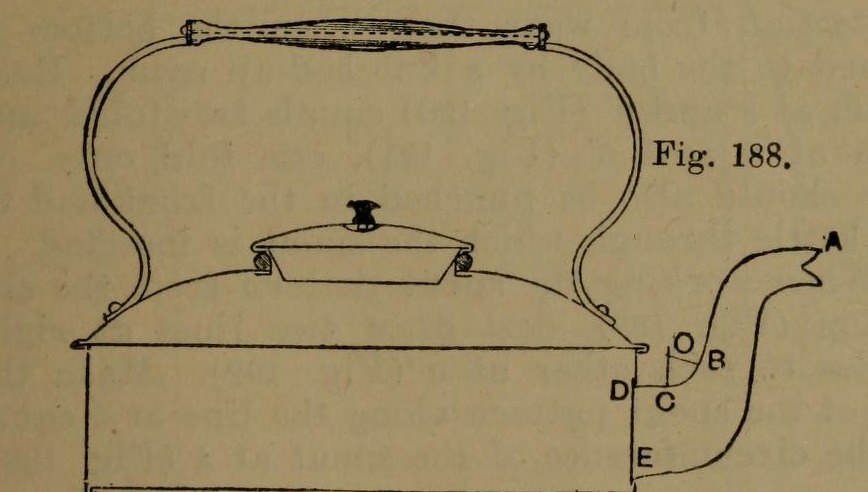


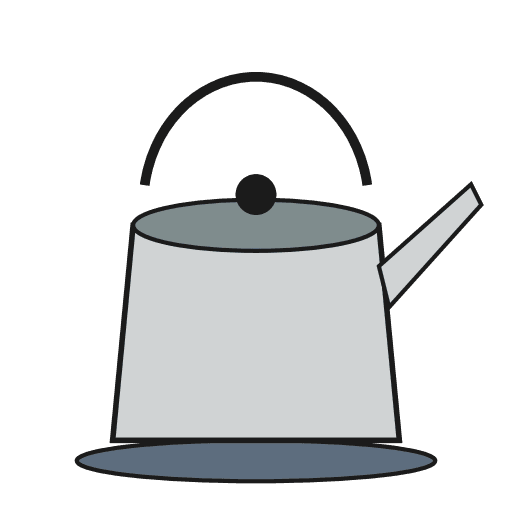
Stovetop Kettle: a Square Copper Kettle (Hasluck, 1907)
A tinsmith's square kettle in sheet copper, 9 x 9 in and 3 5/8 in deep: a box body with folded corner seams, a hollowed top pened on, a brazed and bent spout, a small cover, and a wooden handle on brass uprights.
Hasluck prefers copper; tinplate also works and is a separate route.
Source: Paul N. Hasluck, Tinplate Work (1907), pp. 91-98. Unknown: copper gauge, solder. Picture: Figs. 188-189 of the book.
ขั้นสูง
Unknown
คำแนะนำ
1
1
Cut the patterns
Cut the patterns
For a body 9 x 9 x 3 5/8 in, cut two ends 9 1/2 x 4 in and two sides 9 1/4 x 4 in, notched for box seams at the corners (Figs. 190-191), with allowances to fold at top and bottom. Punch the spout hole in the front. Cut the bottom 9 1/2 in square, notched for a 1/4 in edge. Set out the top as a 10 1/2 in square with curved allowances for hollowing and a 4 in circle for the cover hole (Fig. 193); set out the spout from the elevation (Fig. 192), the cover and its cone-shaped rim (Figs. 194-195).
วัสดุสำหรับขั้นตอนนี้:
 แผ่นทองแดง1 body, bottom, top, spout, cover
เครื่องมือที่ต้องใช้:
 วงเวียนปลายแหลมสองขา
 เหล็กขีด
 กรรไกรตัดแผ่นโลหะ
2
2
Braze and shape the spout
Braze and shape the spout
Thin the long edges by hammering. Set in the throat with a stretching hammer on a beak iron, bend the spout round until the edges overlap, bind it with wire, lay spelter and borax along the inside of the seam and braze it; then close and braze the under seam. Fill it with lead and bend the neck with a round-faced hammer on the hollowing block; file off spare spelter and smooth it. Run out the lead, throw off a seating round the large end, trim the top with snips and tin the inside.
วัสดุสำหรับขั้นตอนนี้:
 โลหะที่ไม่ทราบ1 spelter
 ดีบุก1 tinning
เครื่องมือที่ต้องใช้:
 ค้อนเกลาผิว
 หลัก
 ลวดเหล็กดัด
 ผงบอแรกซ์
 หัวเป่าเชื่อมทองเหลือง
 ตะกั่ว
 กระชอนเจาะรู
 ท่อนไม้เนื้อแข็ง
 ตะไบโลหะกรรไกรตัดแผ่นโลหะ
3
3
Fold and seam the body
Fold and seam the body
Fold the top edges square, the front and back outwards and the sides likewise; fold the bottom edges right over inwards to take the bottom (Fig. 188). Hook each side's end over the front's and work the corner seam on a straight-edged tool (Figs. 198-199). Turn up the bottom's 1/4 in edge, push it edge-down into the bottom folds, and solder the bottom and seams.
วัสดุสำหรับขั้นตอนนี้:
 ตะกั่วบัดกรีดีบุก-ตะกั่ว1 ชิ้น
เครื่องมือที่ต้องใช้:
 ค้อนไม้หลัก
 หัวแร้งไฟฟ้า
 ฟลักซ์
4
4
Hollow the top and make the cover
Hollow the top and make the cover
Hollow the top on the block: sink the four sides a little, hollow the corners with a bullet-faced hammer, flatten each side along the block edge, even the shoulder and smooth it all over. Pare the edges, mark the flange with an edging machine, set it down square with a hatchet stake and mallet, and take up an edge to fit over the body. Cut the cover hole with circular snips and fit a narrow wired rim, worked over inside. Make the cover: solder its cone rim to fit the wired rim, throw off a flange, hollow the cover disc and seam it on, and fix the knob.
วัสดุสำหรับขั้นตอนนี้:
ลวดเหล็กดัด1 rimตะกั่วบัดกรีดีบุก-ตะกั่ว1 ชิ้นโลหะที่ไม่ทราบ1 cover knobเครื่องมือที่ต้องใช้:
ค้อนเกลาผิวท่อนไม้เนื้อแข็งหลักค้อนไม้กรรไกรตัดแผ่นโลหะหัวแร้งไฟฟ้าฟลักซ์5
5
Handle, top and spout
Handle, top and spout
Cut two handle uprights from stout brass or copper band (Fig. 196), drill them for rivets and for the spindle that carries the wooden handle, and bend them to shape. Rivet them to the top and solder over the rivet heads inside. Pene the top down onto the body and solder along each edge. Push the spout through its hole from inside until its large end butts against the front, and solder it strongly from inside.
วัสดุสำหรับขั้นตอนนี้:
 แผ่นทองเหลือง1 handle uprights
 แท่งทองเหลือง1 spindle
 ด้าม1 wood
 หมุดย้ำทองแดง1 number not givenตะกั่วบัดกรีดีบุก-ตะกั่ว1 ชิ้น
เครื่องมือที่ต้องใช้:
 สว่านมือ
 ค้อนย้ำหมุดค้อนไม้หัวแร้งไฟฟ้าฟลักซ์
วัสดุ
9- 1 body, bottom, top, spout, coverตัวยึดตำแหน่ง
- 1 cover knobตัวยึดตำแหน่ง
- 1 tinningตัวยึดตำแหน่ง
- 3 ชิ้นตัวยึดตำแหน่ง
- 1 rimตัวยึดตำแหน่ง
- 1 handle uprightsตัวยึดตำแหน่ง
- 1 spindleตัวยึดตำแหน่ง
- 1 woodตัวยึดตำแหน่ง
- 1 number not givenตัวยึดตำแหน่ง
เครื่องมือที่จำเป็น
17- ตัวยึดตำแหน่ง
- ตัวยึดตำแหน่ง
- ตัวยึดตำแหน่ง
- ตัวยึดตำแหน่ง
- ตัวยึดตำแหน่ง
- ตัวยึดตำแหน่ง
- ตัวยึดตำแหน่ง
- ตัวยึดตำแหน่ง
- ตัวยึดตำแหน่ง
- ตัวยึดตำแหน่ง
- ตัวยึดตำแหน่ง
- ตัวยึดตำแหน่ง
- ตัวยึดตำแหน่ง
- ตัวยึดตำแหน่ง
- ตัวยึดตำแหน่ง
- ตัวยึดตำแหน่ง
- ตัวยึดตำแหน่ง
วัสดุจากพิมพ์เขียวที่เชื่อมต่อ


พิมพ์เขียวนี้สร้าง
CC0 สาธารณสมบัติ
พิมพ์เขียวนี้เผยแพร่ภายใต้ CC0 คุณสามารถคัดลอก แก้ไข แจกจ่าย และใช้งานผลงานนี้เพื่อวัตถุประสงค์ใดก็ได้ โดยไม่ต้องขออนุญาต
สนับสนุนเมกเกอร์โดยซื้อสินค้าผ่านพิมพ์เขียวของพวกเขา ซึ่งพวกเขาจะได้รับ ค่าคอมมิชชันเมกเกอร์ ที่ผู้ขายกำหนด หรือสร้างเวอร์ชันใหม่ของพิมพ์เขียวนี้และรวมเป็นการเชื่อมต่อในพิมพ์เขียวของคุณเพื่อแบ่งรายได้