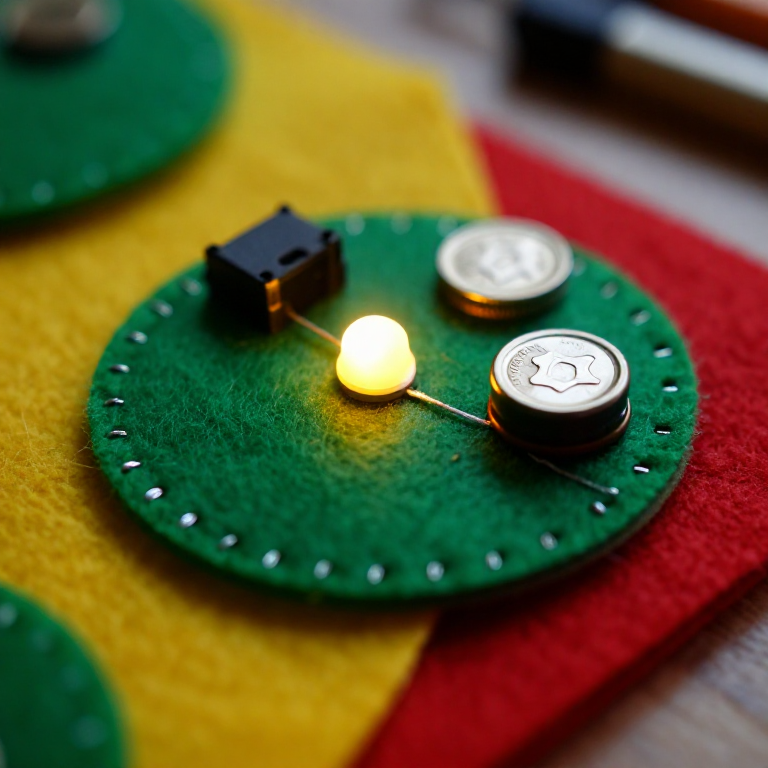


Sewing a LilyPad LED Circuit
Sewable electronics — 'e-textiles' — build circuits into fabric with conductive thread instead of wires. This first project sews a LilyPad LED to a coin-cell battery so it lights up, teaching the two rules of e-textiles: connect + to + and - to -, and never let the two thread lines cross. The 'hello world' of wearable electronics.
Talimatlar
Plan the circuit on fabric
Plan the circuit on fabric
Pin a LilyPad LED and a LilyPad coin-cell battery holder a few centimetres apart on a piece of felt. Find each board's + and - sew tabs, and plan two thread paths — one joining the + tabs, one joining the - tabs — that never cross.
Bu adım için malzemeler:
 LilyPad LED - 5 pcs1 paket
 LilyPad Coin Cell Battery Holder - w/Switch - 20mm1 adet
 Yün keçe levha1 yaprak
Sew the positive line
Sew the positive line
Thread a needle with conductive stainless-steel thread. Stitch from the + tab of the battery holder to the + tab of the LED, looping 3–4 times through each tab hole for firm electrical contact. Knot tightly and trim the tail short — stray strands cause shorts.
Bu adım için malzemeler:
 Conductive Thread - 60g (Stainless Steel)1 makara
 El dikiş iğneleri1 paket
Sew the negative line
Sew the negative line
With a fresh length of thread, stitch the - tab of the battery holder to the - tab of the LED the same way. Keep this line clear of the + line everywhere — if the two conductive paths touch, the circuit shorts and the LED won't light.
Power it up
Power it up
Slide a CR2032 coin cell into the holder, + side up, and switch it on. The LED lights — no separate resistor is needed, because the 3 V coin cell can't push enough current to harm it. If it stays dark, check the battery direction, loose knots, or threads touching.
Bu adım için malzemeler:
 CR2032 düğme pil1 adet
Secure the knots
Secure the knots
Dab a little clear nail polish or fabric glue on each knot so it can't work loose or fray. Use the holder's switch to turn your LED on and off — your first wearable circuit is done.
Malzemeler
6- LilyPad LED - 5 pcs%10 komisyon1 paket$4.10
- 1 adet$4.94
- 1 yaprakYer Tutucu
- Conductive Thread - 60g (Stainless Steel)%10 komisyon1 makara$39.24
- 1 paketYer Tutucu
- 1 adetYer Tutucu
Gerekli Aletler
1- Yer Tutucu
İlgili Blueprint'ler
Bu blueprint'ler bilgi paylaşır — teknikler, malzemeler veya ilkeler


CC0 Kamu Malı
Bu plan CC0 lisansıyla yayınlanmıştır. İzin almadan kopyalayabilir, değiştirebilir, dağıtabilir ve herhangi bir amaçla kullanabilirsiniz.
Planı üzerinden ürün satın alarak Maker'ı destekleyin, böylece Maker Komisyonu Satıcılar tarafından belirlenen komisyonu kazanırlar veya bu Planın yeni bir versiyonunu oluşturun ve gelir paylaşımı için kendi Planınıza bağlantı olarak ekleyin.