
МИСТЕЦТВО
КРАСА ТА ЗДОРОВ'Я
РЕМЕСЛО
КУЛЬТУРА ТА ІСТОРІЯ
РОЗВАГИ
СЕРЕДОВИЩЕ
ЇЖА ТА НАПІЇ
ЗБОРНА ІНЖЕНЕРІЯ
НАУК
СПОРТ
ТЕХНОЛОГІЯ
НОСИМО
Battery Holder: Four C Cells in Two Sprung Compartments with a Z-Shaped Retainer (Lund 1979)
Ed

Створено

Ed

28. жовтень 2026FI
0
0
0
0
0

Battery Holder: Four C Cells in Two Sprung Compartments with a Z-Shaped Retainer (Lund 1979)

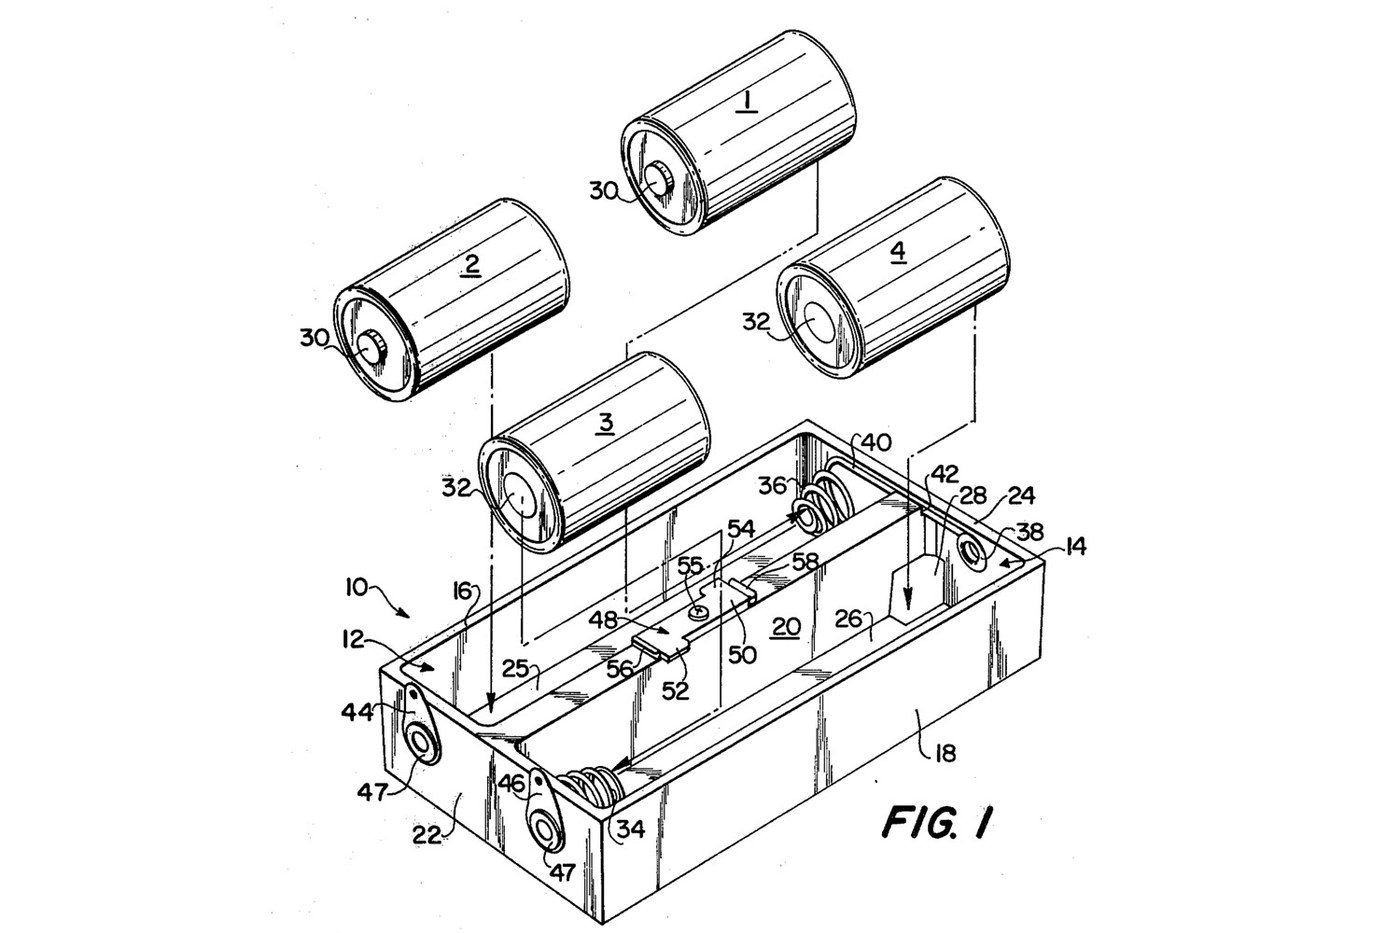
A tray for four C cells in series, made for an instrument that gets knocked about. Each compartment holds two cells end to end, pressed together by a cone-shaped coil spring. The cells can shift a little under a blow and spring back without losing contact. A small Z-shaped retainer holds down one cell in each row and still lets every cell be taken out. Source: John Lund, US 4,161,568 (Schonstedt Instrument Co., 1979), with all sizes. Unknown: the plastic, the metals and the spring wire size. Lund names none of them, and nothing makes a self-tapping screw yet, so these are linked to unknown heads. The tools are ours. Picture: the patent's Fig. 1.
Середній
1 day

Інструкції

1

Mould the tray

Mould a tray 4.325 × 2.500 × 0.875 in (109.9 × 63.5 × 22.2 mm) with two parallel open-top compartments, each 4.125 in long, 1.025 in wide and 0.800 in deep inside (104.8 × 26.0 × 20.3 mm). The middle wall is 0.300 in (7.6 mm) thick, with a notch at one end. Mould two small abutments on the middle wall, 1.000 in (25.4 mm) apart. Unknown: the plastic.

Матеріали для цього кроку:

Невідомий ізоляційний матеріалНевідомий ізоляційний матеріал1 as required

Необхідні інструменти ({count})
Компресійна прес-формаКомпресійна прес-форма
ШтангенциркульШтангенциркуль
2

Wind the two spring contacts

Wind two cone-shaped coil springs: 0.562 in (14.3 mm) outside diameter at the large end, 0.312 in (7.9 mm) inside at the small end, 1/2 in (12.7 mm) long free, closing to 1/8 in (3.2 mm). Each has three active turns, and the end turns are wound flat. Leave one spring with a long straight tail. Unknown: the metal and the wire size.

Матеріали для цього кроку:

Невідомий металНевідомий метал1 as required

Необхідні інструменти ({count})
КруглогубціКруглогубці
ПлоскогубціПлоскогубці
ШтангенциркульШтангенциркуль
3

Fit the contacts and terminals

Put one spring at the far end of the first compartment, with its straight tail, and the other at the near end of the second. Set an eyelet contact in the end wall opposite each spring. Run the tail through the notch in the middle wall to the eyelet contact at the far end of the second compartment. Fix two terminals to the near end wall with eyelets, each holding its contact.

Матеріали для цього кроку:

Невідомий металНевідомий метал1 as required

Необхідні інструменти ({count})

Ножиці по металуНожиці по металу
ПлоскогубціПлоскогубці
Ручні напилкиРучні напилки
4

Make and fix the retainer

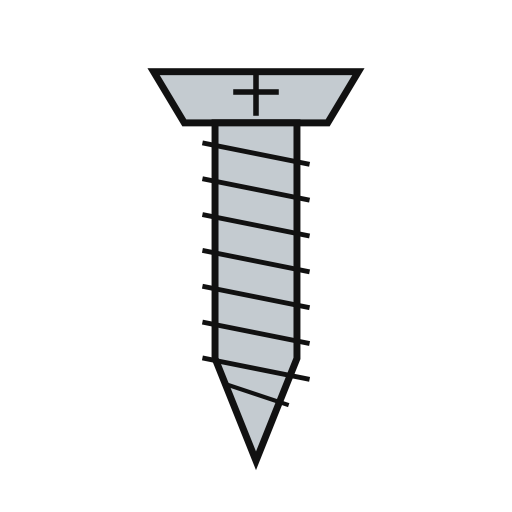
Cut a flat Z-shaped retainer of plastic, 0.062 in (1.6 mm) thick and 0.980 in (24.9 mm) long. It is 0.430 in (10.9 mm) wide at each branched end. Each branch sticks out 0.130 in (3.3 mm) from the stem and runs 0.365 in (9.3 mm) along it. Screw it with a single self-tapping screw through the middle of the stem onto the top of the middle wall, between the abutments, so it cannot turn. Each branch reaches over one compartment.

Матеріали для цього кроку:

Невідомий ізоляційний матеріалНевідомий ізоляційний матеріал1 as required
СаморізСаморіз1 pc

Необхідні інструменти ({count})

Ножиці по металуНожиці по металу
Ручні напилкиРучні напилки
Набір викрутокНабір викруток
ШтангенциркульШтангенциркуль
5

Wire it

Solder lead wires to the two terminals. With the cells in, the four make one series supply between these terminals.

Матеріали для цього кроку:

Монтажний провідМонтажний провід1 as required
Дріт припоюДріт припою1 as required

Необхідні інструменти ({count})

ПаяльникПаяльник
6

Load the cells

Put cell 1 into the free end of the first compartment, slide it along under the retainer until it meets the spring, then drop cell 2 in behind it, pressing the spring a little. Load the second compartment from its other end the same way. To unload, lift out the two free cells, then slide the held cells along into their places and lift them out. Ours: check the voltage across the terminals with a meter.

Необхідні інструменти ({count})

МультиметрМультиметр

Матеріали

5

Необхідні інструменти

9

За цим кресленням виготовляють

Пов'язані креслення

Ці креслення діляться знаннями — техніки, матеріали або принципи
CC0 Суспільне надбання

Це креслення випущено під ліцензією CC0. Ви можете вільно копіювати, змінювати, поширювати та використовувати цю роботу для будь-яких цілей без запиту дозволу.

Підтримайте мейкера, купуючи продукти через його креслення, де він отримує Комісію мейкера встановлену вендорами, або створіть нову ітерацію цього креслення та включіть його як зв'язок у власне креслення для розподілу доходу.

Обговорення

(0)

Увійти щоб приєднатися до обговорення

Завантаження коментарів...