МИСТЕЦТВО
КРАСА ТА ЗДОРОВ'Я
РЕМЕСЛО
КУЛЬТУРА ТА ІСТОРІЯ
РОЗВАГИ
СЕРЕДОВИЩЕ
ЇЖА ТА НАПІЇ
ЗБОРНА ІНЖЕНЕРІЯ
НАУК
СПОРТ
ТЕХНОЛОГІЯ
НОСИМО
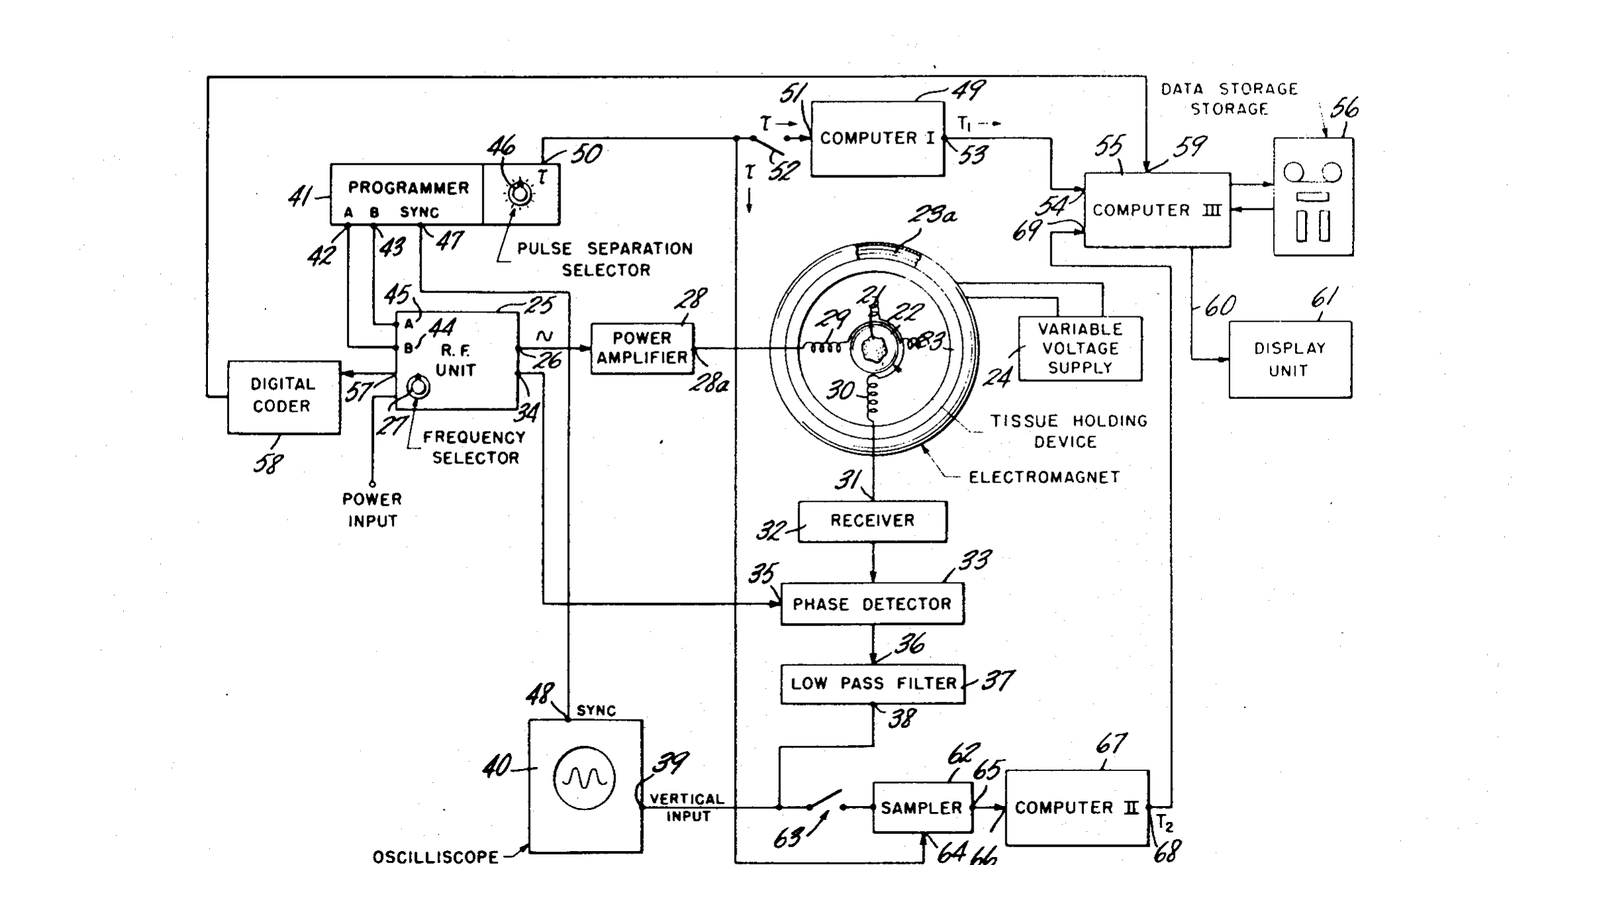


Damadian NMR Body Scanner
Nine blueprints into this batch, everything has been done with radiation that ionises - X-rays that knock electrons off atoms and gammas emitted from inside the patient - or with sound. This one uses neither. It puts the body in a strong magnetic field, tips its hydrogen nuclei with a radio pulse, and listens to them settle back.
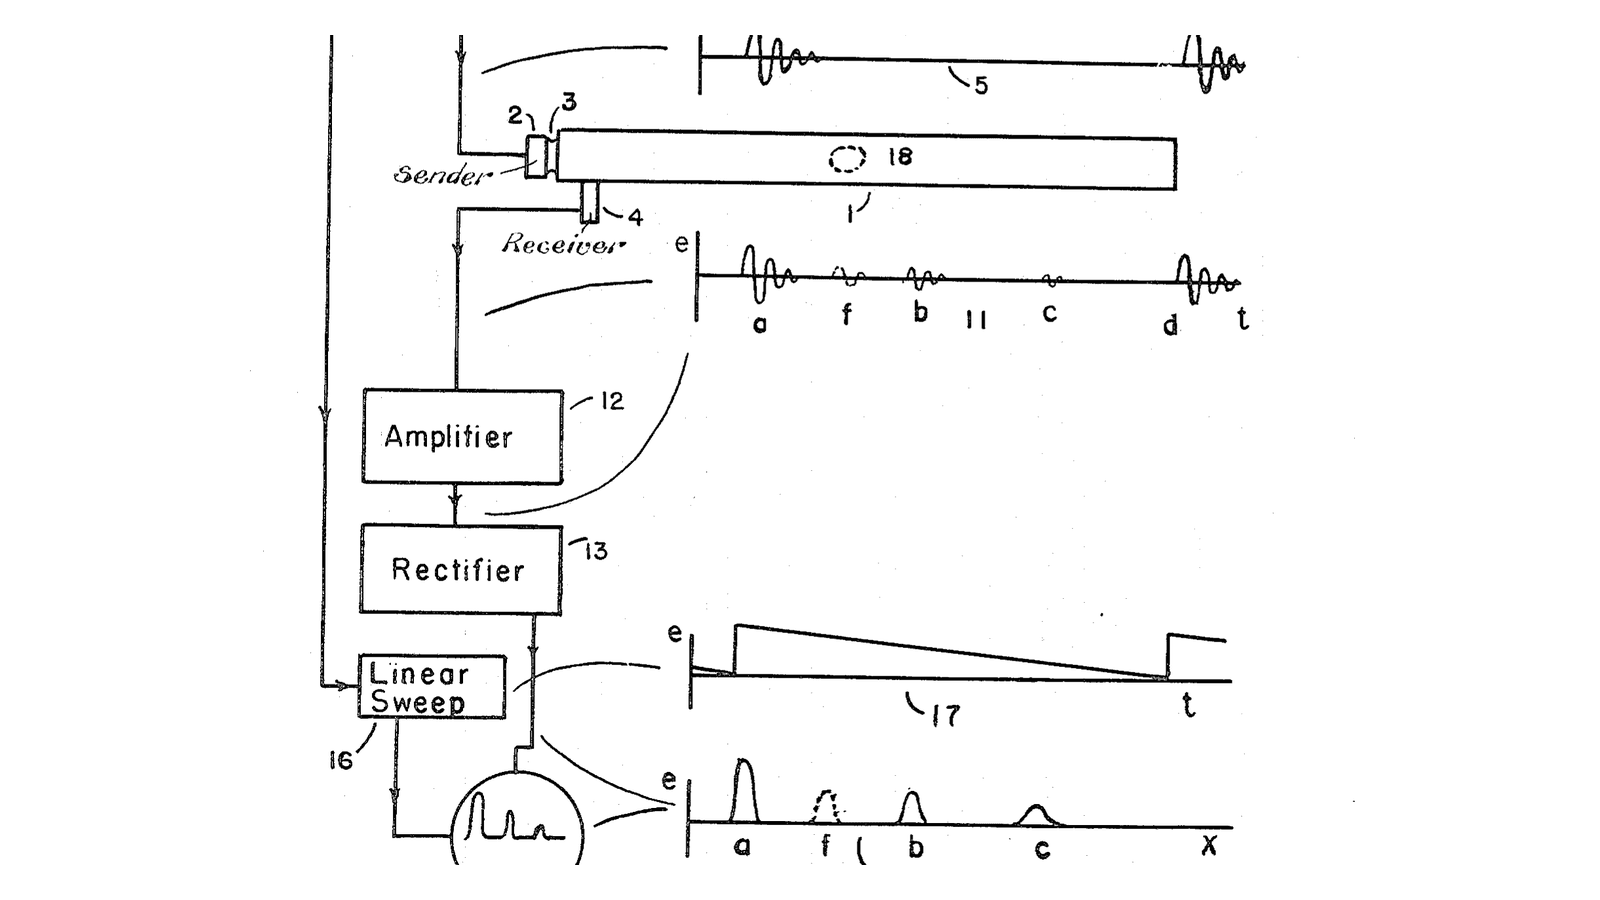
**US 3,789,832**, "Apparatus and Method for Detecting Cancer in Tissue", Raymond V. Damadian, filed 17. March 1972 and granted 5. February 1974. The drawing on this blueprint is his apparatus: a programmer and RF unit at the left, an electromagnet with a tissue holding device at the centre, then receiver, phase detector, low-pass filter, sampler and three computers.
**Read the title again, because it matters.** The claim is a method of DETECTING CANCER: measure the spin-lattice and spin-spin relaxation times of a suspect tissue, compare them against known values for normal and malignant tissue of that type, and infer malignancy. It is a point measurement and a comparison. It is not an imaging claim, and this blueprint does not call it the MRI patent - the batch's PICK file records that distinction deliberately.
**What was missing was one idea: the gradient.** Damadian's apparatus measures one region at a time. Paul Lauterbur's contribution was to deliberately make the magnetic field UNEVEN - stronger at one end than the other - so that a nucleus's resonant frequency depends on where it is. Then a single coil hearing everything at once produces a spectrum in which frequency IS position, and no scanning is required at all. Peter Mansfield developed the mathematics and the fast acquisition that made it practical.
That is the single most elegant idea in this batch and you can demonstrate it with sound in an afternoon, which is exactly what you will do here: a row of buzzers, each pitched by its own position, one microphone, and a Fourier transform that recovers which positions were occupied. No magnet, no radio, no shielding - the encoding is the invention, and the encoding does not care what is oscillating.
**On the credit, stated plainly and without taking a side.** The 2003 Nobel Prize in Physiology or Medicine went to Paul Lauterbur and Peter Mansfield. Damadian was not included, though a prize may be shared by three; he had published in *Science* in 1971, filed this patent in 1972, and produced an image of a whole human body in 1977. His supporters bought full-page newspaper advertisements protesting the omission. The dispute is real, it is documented, and it is not this blueprint's place to settle it.
Середній
3 hours
Інструкції
1
1
Precession you can see: a gyroscope is not a metaphor
Precession you can see: a gyroscope is not a metaphor
A nucleus with spin in a magnetic field precesses - its axis sweeps a cone rather than tipping over - and the rate is proportional to the field strength. That is the Larmor relation and it is the foundation of everything here.
A spinning gyroscope in gravity does exactly the same thing for exactly the same reason: a torque applied to angular momentum produces precession rather than a fall. It is not an analogy dressed up for teaching; it is the same equation with different symbols.
Spin a gyroscope up hard, hang it from a string at one end of its axle, and time how long one full precession takes. Then increase the torque - hang a small weight further out, or use a longer axle - and time it again.
**Precession rate rises with torque, and falls as the spin slows down.** Torque here plays the part that magnetic field plays for a nucleus. Plot rate against torque over four or five values; the straight line you get is the shape of the Larmor relation, measured with a stopwatch.
Keep the plot. It is the reason a 3 tesla scanner works at roughly twice the frequency of a 1.5 tesla one, which the notebook step puts numbers to.
Матеріали для цього кроку:
 Гіроскоп1 штука
 Бавовняна нитка1 штука
 Плоска шайба6 штук
Необхідні інструменти ({count})
 Секундомір
 Цифрові кухонні ваги
 Лінійка
2
2
Build the gradient: six sources, six frequencies, one position each
Build the gradient: six sources, six frequencies, one position each
Line up six small buzzers on a ruler at 20 mm intervals and note each one's position. Wire each to its own pin on a microcontroller.
The next step's sketch drives each buzzer at a frequency determined by **where it is**: f = F0 + G × position. In a scanner that relation is produced by a gradient coil making the magnetic field vary along the axis; here it is produced in software. The physics differs, the encoding is identical, and the encoding is the invention.
Set some buzzers sounding and leave others silent. That pattern is your phantom - the object you are about to image - and you are the only one who knows it.
Keep the spacing even and measure it, because you will be checking recovered positions against real ones. And keep the buzzers well separated from the microphone: you want each contributing comparably, not one dominating because it happens to be closest.
Матеріали для цього кроку:
 П'єзовипромінювач6 штук
 Arduino Uno R31 штука
 З'єднувальний провід (тато-тато)20 штук
 Макетна плата1 штука
 Лист фанери1 штука
Необхідні інструменти ({count})
Лінійка Цифровий мультиметр лабораторного класу
 Паяльна станція
 Цифровий штангенциркуль 6 дюймів
3
3
The sketch: position becomes pitch
The sketch: position becomes pitch
Flash this. It prints the position, frequency and on/off state of every buzzer, then sounds them all at once and leaves them running so you can record.
The single line that matters is **f = F0 + GRAD × position**. F0 stands in for the Larmor frequency at zero offset, and GRAD is the gradient strength in hertz per millimetre. Change PRESENT to change the object.
When the first recording works, halve GRAD and re-flash. The peaks crowd together and adjacent sources become hard to separate - which is precisely what a weak gradient costs a real scanner, and precisely why gradient coils are the loud, heavy, water-cooled and expensive part of an MRI machine. The banging you hear during a scan is those coils being switched hard against the main field.
frequency_encoding.inocpp
Необхідні інструменти ({count})
 Настільний комп'ютер
 Кабель USB-B
4
4
Record everything at once, and read the positions back
Record everything at once, and read the positions back
Record a few seconds with a single microphone, from one position, with no scanning and no directionality of any kind. That recording contains every source at once, superimposed - which sounds like a mess and is not one.
Take an FFT of the recording. Each sounding buzzer appears as a peak, and each peak's frequency tells you the position of the source that made it: invert f = F0 + G × position to get the millimetres back.
Write down the positions you recovered and compare with the arrangement you built. **You have located several objects with one non-directional sensor and no moving parts**, and that is the whole trick of magnetic resonance imaging.
Notice what you did NOT need. No collimator throwing away 99 per cent of the signal, as in the gamma camera. No rotation through many angles, as in CT. No grid, no fulcrum, no mask. The gradient does the locating, and it does it to every point simultaneously.
Then try two buzzers very close together, and find the spacing at which their peaks merge. That distance is your resolution, and it is set by the gradient strength and the length of your recording - exactly as it is in a scanner.
Необхідні інструменти ({count})
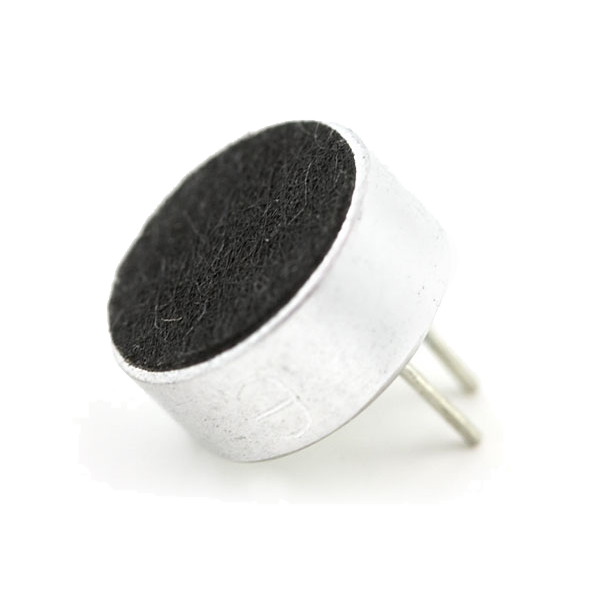 Electret MicrophoneНастільний комп'ютерЛінійка
5
5
Larmor, relaxation, and k-space
Larmor, relaxation, and k-space
Завантаження блокнота Jupyter…
6
6
When the spectrum is wrong
When the spectrum is wrong
Three faults, and the first is the one that teaches you what a gradient is for.
Flow
Loading...
Необхідні інструменти ({count})
Electret Microphone7
7
Compendium: what MRI costs, and how this batch ends
Compendium: what MRI costs, and how this batch ends
**Where the contrast comes from.** Not density - hydrogen concentration barely varies between soft tissues. It comes from the relaxation times, and those differ between tissues by FACTORS where X-ray absorption differs by a per cent or two. That is why MRI sees a tumour margin, a torn ligament and grey matter against white, and why it is the modality of choice for brain, cord and joints.
**Why it takes so long.** A scanner acquires k-space line by line, and must wait between lines for the spins to recover - a wait set by T1, which is measured in seconds. As the notebook shows, every part of k-space contributes to the whole image, so a patient who moves halfway through corrupts the entire picture rather than a strip of it. That is a completely different failure mode from CT.
**Why it is loud.** Gradient coils carry large currents inside a strong field, so they experience large forces, and switching them rapidly makes them move. The banging is the gradients doing the work you demonstrated with buzzers.
**The real dangers, which are not radiation.** No ionising radiation is involved at all. The hazards are the magnet, which is always on and will pull a steel object across a room hard enough to kill; heating from the RF; and implants that may move or malfunction. Screening before an MRI is about ferromagnetism, not dose.
**And how the batch ends.** Look back at what the ten answers have in common. The screen made the invisible visible. The grid, the fulcrum and the mask each threw something away so the rest could be read. The intensifier made a faint image bright enough to use. The camera let the source be inside the patient. CT stopped discarding and solved for the object. And this one changes the question the instrument asks - measuring a magnetic property rather than an absorption - which is why it sees things the other nine cannot, and misses things they catch easily.
Not one of them replaced its predecessors. Every instrument in this batch is still in use in hospitals today, including the fluorescent screen and the scatter grid. That is the honest shape of a solution space, and it is why the catalogue records approaches rather than winners.
Матеріали
8- 1 штукаЗаповнювач
- 1 штукаЗаповнювач
- 6 штукЗаповнювач
- 6 штукЗаповнювач
- Заповнювач
- Заповнювач
- Заповнювач
- 1 штукаЗаповнювач
Необхідні інструменти
9- Заповнювач
- Заповнювач
- Заповнювач
- Заповнювач
- Заповнювач
- Заповнювач
- Заповнювач
- 1 vendor sell this, none ship to you yetЗаповнювач
- Electret Microphone10% комісія$1.17
Пов'язані креслення
Ці креслення діляться знаннями — техніки, матеріали або принципи

CC0 Суспільне надбання
Це креслення випущено під ліцензією CC0. Ви можете вільно копіювати, змінювати, поширювати та використовувати цю роботу для будь-яких цілей без запиту дозволу.
Підтримайте мейкера, купуючи продукти через його креслення, де він отримує Комісію мейкера встановлену вендорами, або створіть нову ітерацію цього креслення та включіть його як зв'язок у власне креслення для розподілу доходу.