Співпраця
МИСТЕЦТВО
КРАСА ТА ЗДОРОВ'Я
РЕМЕСЛО
КУЛЬТУРА ТА ІСТОРІЯ
РОЗВАГИ
СЕРЕДОВИЩЕ
ЇЖА ТА НАПІЇ
ЗБОРНА ІНЖЕНЕРІЯ
НАУК
СПОРТ
ТЕХНОЛОГІЯ
НОСИМО
Friction Plunger Churn: Cream Pumped Through Openings You Close a Little More as It Thickens
Buttercup

Створено

Buttercup

10. листопад 2026IE
6
0
0
0
0

Friction Plunger Churn: Cream Pumped Through Openings You Close a Little More as It Thickens

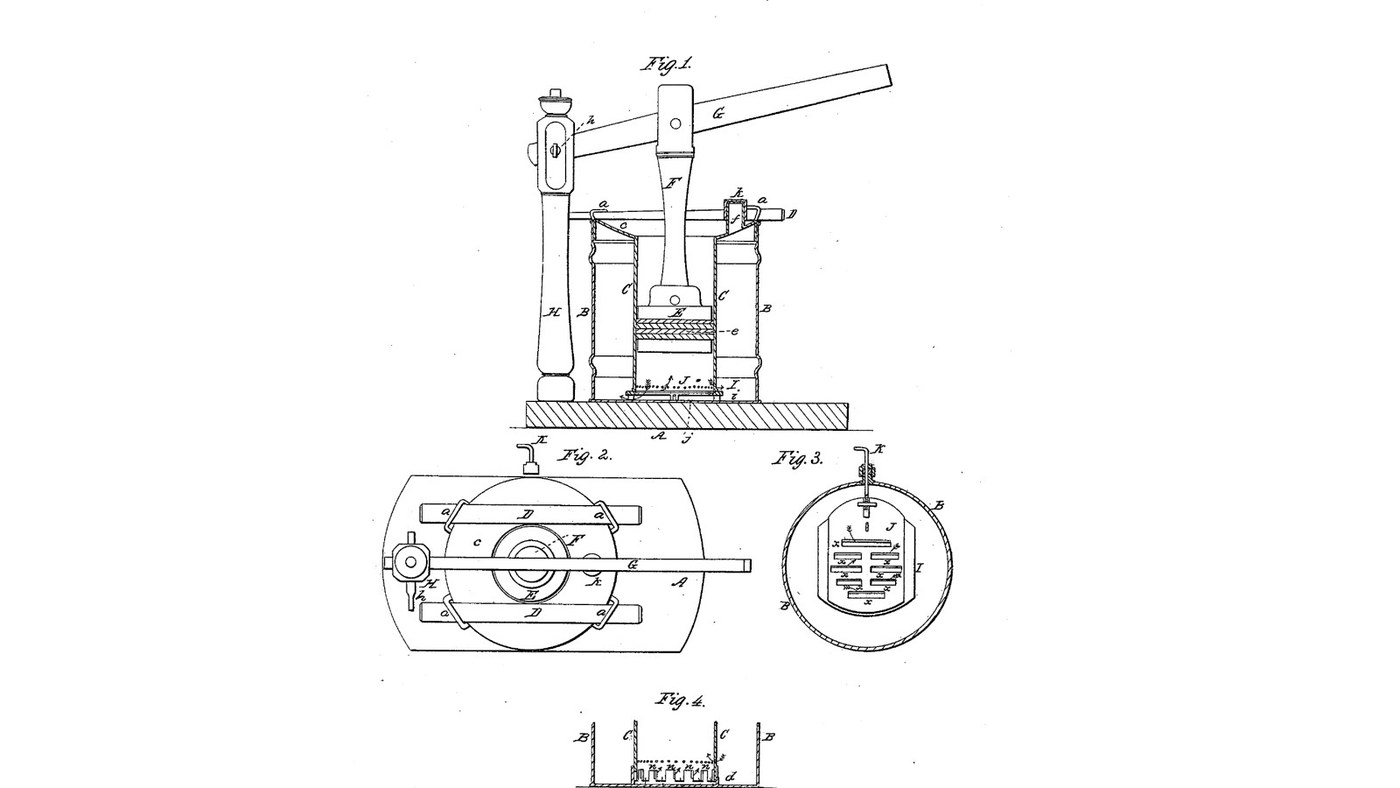
John J. Lehaye of Reading, Pennsylvania, received US 25,162, dated 16 August 1859, for a churn that works by friction. A hollow cylinder stands inside the cream vessel on two slotted plates. A packed plunger, worked by a long lever, draws the cream from the vessel into the cylinder through the slots and drives it back. A screw rod through a stuffing box in the vessel's side slides the upper plate, so the openings can be narrowed as the churning goes on. Lehaye gives no sizes; every size here is ours.
Середній
About 2 days, plus printing

Інструкції

1

How hard the cream is rubbed through the openings

Завантаження блокнота Jupyter…
2

A piston that draws through a grate, the week before

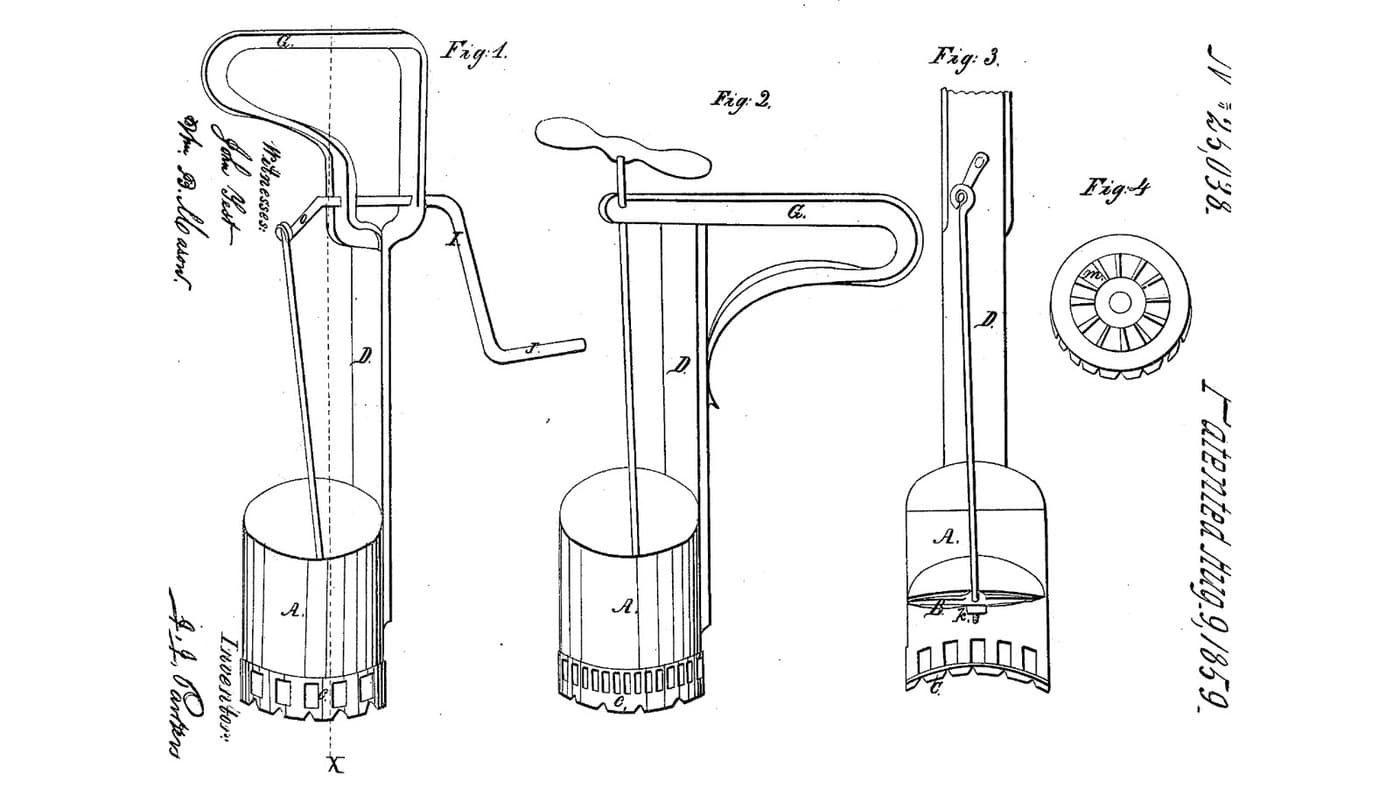
Parker's beater pumped eggs through fixed openings. Lehaye's openings close a little more as the cream thickens.
3

Read US 25,162

"By causing the cream to pass and repass through contracted openings, and with considerable force, the friction of the cream against the edges of the openings has the effect of rapidly separating the butter from the whey at the same time the constant change in the course of the cream agitates the latter as effectually as the ordinary dashers."
4

Print the plate I

The 200 mm lower plate on four 20 mm legs i, with six 8 x 50 mm openings 18 mm apart and two guide flanges for plate J. Print it legs up. PETG, 0.2 mm layers, 30 % infill, 4 walls.
Файл дизайнуSTLCC0 - Free
5

Print the plate J

The 116 x 64 mm sliding plate with six openings matching plate I's and a boss at one end for rod K's nut. PETG, 0.2 mm layers, 30 % infill, 4 walls.
Файл дизайнуSTLCC0 - Free
6

Print the cylinder rings

One 86.5 mm ring of the cylinder C, 160 mm across with a 3 mm wall and a spigot on top. Print three. PETG, 0.2 mm layers, 30 % infill, 4 walls.
Файл дизайнуSTLCC0 - Free
7

Print the bottom cylinder ring

The bottom ring, with an 18 mm notch in its lower edge for rod K. PETG, 0.2 mm layers, 30 % infill, 4 walls.
Файл дизайнуSTLCC0 - Free
8

Print the plunger's upper plate

A 152 mm plate with a hub bored 6.4 mm across for rod F's pin. PETG, 0.2 mm layers, 30 % infill, 4 walls.
Файл дизайнуSTLCC0 - Free
9

Print the plunger's lower plate

The plain 152 mm plate with a 6.4 mm hole in the middle. PETG, 0.2 mm layers, 30 % infill, 4 walls.
Файл дизайнуSTLCC0 - Free
10

Print the stuffing box's inner half

The flanged boss that sits inside the bucket, with an O-ring groove in its face and two 4.4 mm screw holes. PETG, 0.2 mm layers, 30 % infill, 4 walls.
Файл дизайнуSTLCC0 - Free
11

Print the stuffing box's outer half

The flanged boss outside the bucket, with a groove in its bore for a 6 mm O-ring round rod K. PETG, 0.2 mm layers, 30 % infill, 4 walls.
Файл дизайнуSTLCC0 - Free
12

Print the vent tube

The 20 mm tube through the flange that lets the gases out. PETG, 0.2 mm layers, 30 % infill, 4 walls.
Файл дизайнуSTLCC0 - Free
13

Print the vent's cover k

The push-on cover for the vent tube. PETG, 0.2 mm layers, 30 % infill, 4 walls.
Файл дизайнуSTLCC0 - Free
14

Base A and column H

Cut an 18 mm plywood base 750 x 400 mm. Stand a hardwood column 70 x 70 mm, 643 mm tall, on it 290 mm from where the bucket's middle will be, glued and screwed from under the base. Saw a slot 24 mm wide and 100 mm deep in its top and bore it 12.4 mm across 40 mm below the top for the pin h.

Матеріали для цього кроку:

Лист фанериЛист фанери1 штука
Дошка з твердої деревиниДошка з твердої деревини1 штука
Столярний клейСтолярний клей1 штука
Шурупи по деревуШурупи по дереву6 штук

Необхідні інструменти ({count})

ЕлектролобзикЕлектролобзик
Ручна пилкаРучна пилка
СтамескиСтамески
Акумуляторний дрильАкумуляторний дриль
Набір перових сверделНабір перових свердел
Набір сверделНабір свердел
Столярний косинецьСтолярний косинець
РулеткаРулетка
15

Bucket B and the stuffing box

Screw the bucket's floor to the base. Drill a 20.4 mm hole in its side 30 mm above the floor, facing away from the column, and two 4.4 mm holes 19 mm either side of it. Lay a 30 x 2 mm O-ring in the inner half's groove, fit the halves inside and outside the wall and draw them together with two stainless M4 screws and lock nuts. Fill the bucket with water to check the box does not leak, then empty it.

Матеріали для цього кроку:

Відро на 20 літрівВідро на 20 літрів1 штука
Шурупи по деревуШурупи по дереву4 штук
Ущільнювальне кільце круглого перерізуУщільнювальне кільце круглого перерізу2 штук

Машинні гвинтиМашинні гвинти2 штук
Самоконтрувальна гайка з нейлоновим кільцемСамоконтрувальна гайка з нейлоновим кільцем2 штук

Філамент PETGФіламент PETG1 штука

Необхідні інструменти ({count})

3D-принтер FDM3D-принтер FDM
Акумуляторний дрильАкумуляторний дриль
Набір перових сверделНабір перових свердел
Набір сверделНабір свердел
Набір викрутокНабір викруток
Розвідний ключРозвідний ключ
ВодаВода
16

Plates I and J, and rod K

Press an M6 nut into plate J's boss. Lay J on plate I between its flanges and stand I on its legs in the middle of the bucket's floor. Cut 170 mm of M6 stainless threaded rod, bend 40 mm of one end to an L for a handle, push the straight end in through the stuffing box with a 6 mm O-ring in its bore and screw it into J's nut. Turn K both ways: J slides until its openings line up with I's, and closes them after 8 mm.

Матеріали для цього кроку:

Шестигранна гайкаШестигранна гайка1 штука
Шпилька різьбоваШпилька різьбова1 штука
Ущільнювальне кільце круглого перерізуУщільнювальне кільце круглого перерізу1 штука

Необхідні інструменти ({count})

Ножівка по металуНожівка по металу
Слюсарні лещатаСлюсарні лещата
Розвідний ключРозвідний ключ
17

Cylinder C, flange c, staples and wedges

Stack the four rings on plate I, the notched one at the bottom over rod K. Cut the flange from 12 mm plywood, a ring 304 mm across with a 154 mm hole, and bore a 16 mm hole 125 mm from its middle for the vent. Set it on the bucket's rim over the cylinder's top. Fit four stainless U-bolts through the bucket wall just under the rim, two each side, and drive two tapered hardwood wedges, 340 x 30 mm and 16 mm at their thick end, through them over the flange so it presses the cylinder down on the plates. Push the vent tube into its hole and its cover on top.

Матеріали для цього кроку:

Лист фанериЛист фанери1 штука
Скоба-хомутСкоба-хомут4 штук
Дошка з твердої деревиниДошка з твердої деревини1 штука
Філамент PETGФіламент PETG1 штука

Необхідні інструменти ({count})

ЕлектролобзикЕлектролобзик
Набір перових сверделНабір перових свердел
Акумуляторний дрильАкумуляторний дриль
Набір сверделНабір свердел
Ручна пилкаРучна пилка
Розвідний ключРозвідний ключ
18

Plunger E, rod F and arm G

Cut two 153.9 mm discs of 3 mm food-grade silicone sheet and bolt them between the plunger plates through the middle, hub up; the silicone's edge is the packing e and should slide in the cylinder with a light drag. Saw a slot in each end of a 22 mm hardwood dowel 470 mm long between pin centres and pin its lower end to the plunger's hub with a 6 mm stainless bolt. Make the arm G from hardwood 40 x 22 mm, 930 mm long, bore it 12.4 mm 30 mm from one end for the pin h and 6.4 mm 290 mm from that for rod F, then bolt it into the column's slot with a 12 mm bolt and pin rod F to it.

Матеріали для цього кроку:

Аркуш силіконової гумиАркуш силіконової гуми1 штука
Набір шестигранних болтівНабір шестигранних болтів4 штук
Самоконтрувальна гайка з нейлоновим кільцемСамоконтрувальна гайка з нейлоновим кільцем4 штук

Плоска шайбаПлоска шайба4 штук
Шканти з твердої деревиниШканти з твердої деревини1 штука
Дошка з твердої деревиниДошка з твердої деревини1 штука

Необхідні інструменти ({count})

НожиціНожиці
Ручна пилкаРучна пилка
Акумуляторний дрильАкумуляторний дриль
Набір сверделНабір свердел
Розвідний ключРозвідний ключ
РулеткаРулетка
19

The build in 3D

FreeCAD model of this build, cut open: the bucket on its base, the slotted plates I and J with rod K through the stuffing box, the cylinder of four rings under the flange, the wedges and staples, the vent, and the plunger on rod F worked by the arm G from the column H. Checked over the lever's whole travel and with plate J slid fully.
Файл дизайнуBLENDCC0 - Free
20

Churn

With plate J slid so all the openings are open, pour about 10 litres of heavy cream at about 15 °C into the bucket, checked with the thermometer. Work the arm about once a second, timing it. As the cream thickens, give rod K a turn now and then to close the openings a little. Lift the vent's cover now and then to let the gas out. When the butter comes, knock the wedges out, lift out the flange, the cylinder and the plunger, pour off the buttermilk, wash the butter in cold water until it runs clear, work in a pinch of salt and weigh it.

Матеріали для цього кроку:

Жирні вершкиЖирні вершки10 l
Крупна морська сільКрупна морська сіль1 штука
ВодаВода1 штука

Необхідні інструменти ({count})

Термометр зі щупом, що лишається в стравіТермометр зі щупом, що лишається в страві

СекундомірСекундомір
Цифрові кухонні вагиЦифрові кухонні ваги
Велика миска з нержавкої сталіВелика миска з нержавкої сталі
21

Troubleshooting

Friction plunger churn troubleshooting.

Flow

Loading...
22

History and honest limits

**John J. Lehaye** of Reading, Pennsylvania, assignor to himself and John Tucker of Philadelphia, US 25,162, 16 August 1859, "Churn". He claimed the vessel B, cylinder C and plunger E in combination with means for enlarging or contracting the openings between the cylinder and the vessel. He gives no sizes, so every size here is ours; the U-bolts are his staples a, the O-ring box his stuffing box, and silicone his packing. His Fig. 4 alternative, projections on the cylinder's foot and on a ring in the vessel's bottom, turned to open or close the gaps, is not built. He also offered the machine as an egg beater and for mixing curds.

Матеріали

19

Необхідні інструменти

19

Файли дизайну

11

CC0 Суспільне надбання

Це креслення випущено під ліцензією CC0. Ви можете вільно копіювати, змінювати, поширювати та використовувати цю роботу для будь-яких цілей без запиту дозволу.

Підтримайте мейкера, купуючи продукти через його креслення, де він отримує Комісію мейкера встановлену вендорами, або створіть нову ітерацію цього креслення та включіть його як зв'язок у власне креслення для розподілу доходу.

Обговорення

(0)

Увійти щоб приєднатися до обговорення

Завантаження коментарів...