Making Charcoal in an Earth Mound — Pyrolysis in a Covered Burn
Інструкції
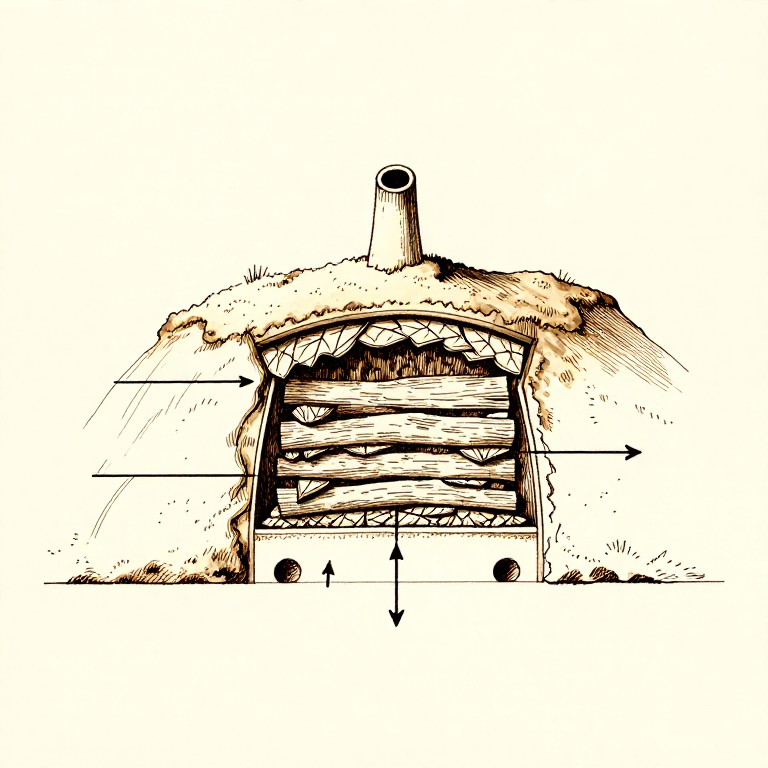
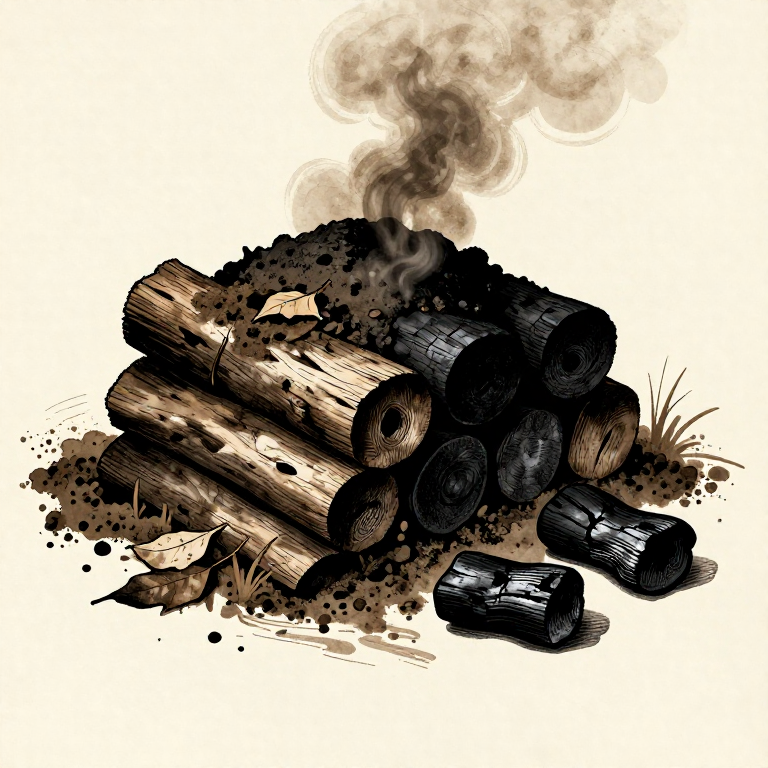
Prepare and Stack the Wood
Prepare and Stack the Wood
Select dense hardwood species — oak, beech, maple, or ash produce the best charcoal due to their high carbon density. Split the wood into uniform pieces roughly 5-10 cm in diameter. Stack the wood vertically in a dome-shaped mound approximately 1-1.5 metres in diameter and 1 metre tall, leaning pieces against a central stake. Leave a hollow chimney space at the centre for ignition. All wood must be well-seasoned and dry — green wood produces excessive smoke and yields poor-quality charcoal with high moisture content.
Матеріали для цього кроку:
 Organic Temperlarge armful for covering штука
 Dry Leaves & Kindling5 kg for ignition кг
Необхідні інструменти ({count})
 Digging Tool (Stone / Antler / Stick)
 Welding Fire Watch Kit
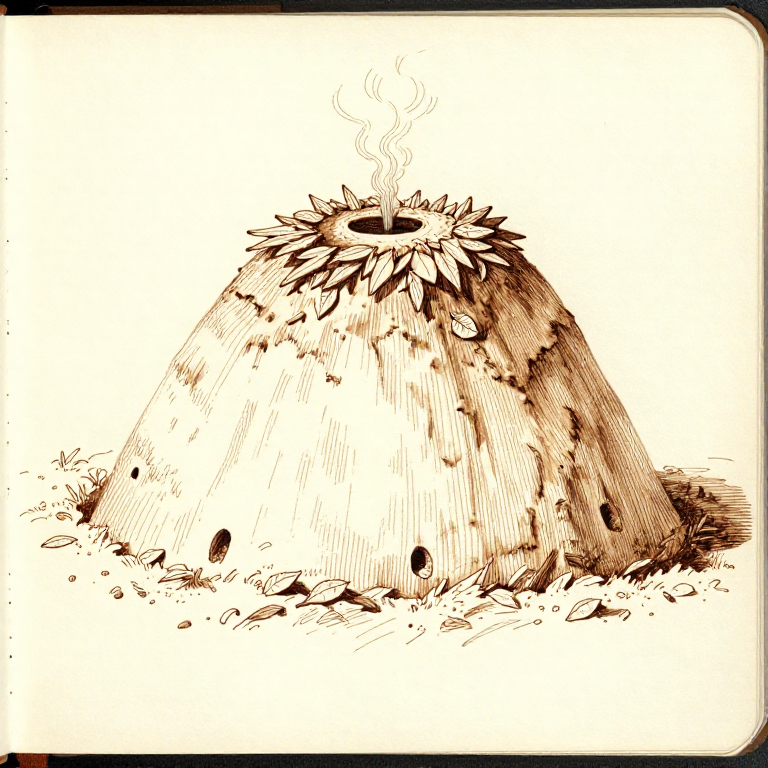
Cover the Mound
Cover the Mound
Cover the wood stack with a layer of green leaves, grass, or straw to prevent the earth covering from falling between the wood pieces. Then apply a layer of earth or clay 5-10 cm thick over the entire mound, packing it firmly. Leave the central chimney opening at the top uncovered, and poke 4-6 small air holes (about 5 cm diameter) around the base of the mound. These base holes allow limited air intake that sustains smouldering combustion while the earth seal restricts oxygen enough to prevent the wood from burning completely to ash.
Ignite and Monitor
Ignite and Monitor
Drop burning kindling down the central chimney to ignite the wood at the core of the mound. Once the fire is established (visible flames at the chimney and smoke from base holes), partially close the chimney with a flat stone, leaving a gap for smoke to escape. The burn must proceed slowly — if flames appear through the earth covering, patch those spots immediately with more earth. White or blue-grey smoke indicates active pyrolysis and water vapour being driven off. Yellow or brown smoke suggests incomplete combustion. The burn progresses outward from the centre over 6-10 hours.
Control the Burn
Control the Burn
As the burn progresses, the mound settles and may develop cracks in the earth covering. Patch all cracks promptly to maintain the oxygen-restricted environment. When smoke from the base holes transitions from thick white to thin blue-grey and finally becomes nearly transparent, the pyrolysis is nearing completion. At this point, seal all base holes and the chimney completely with earth. This stops all combustion and allows the charcoal to cool without burning to ash. The sealed mound needs 8-12 hours to cool completely.
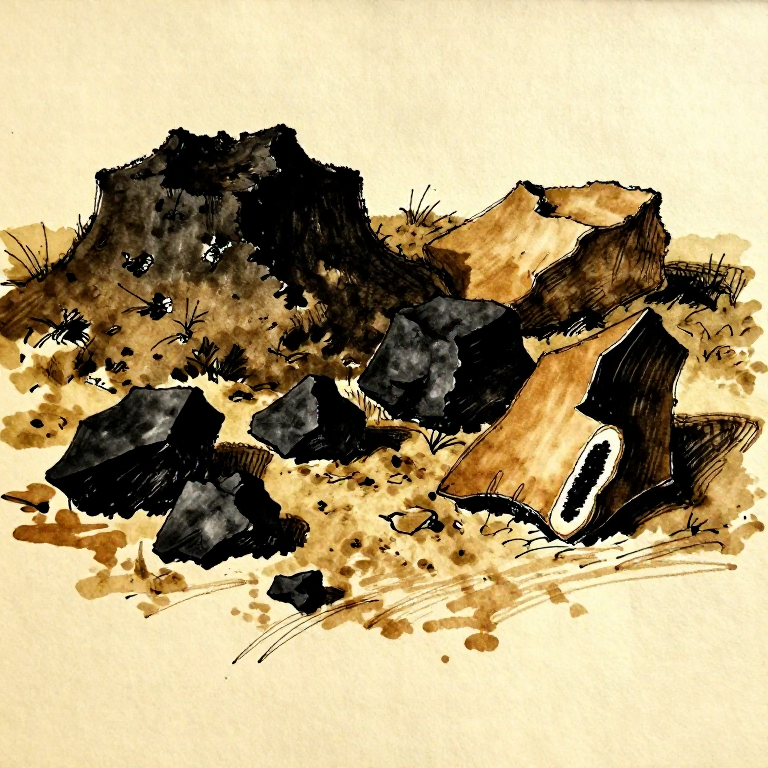
Break Open and Sort
Break Open and Sort
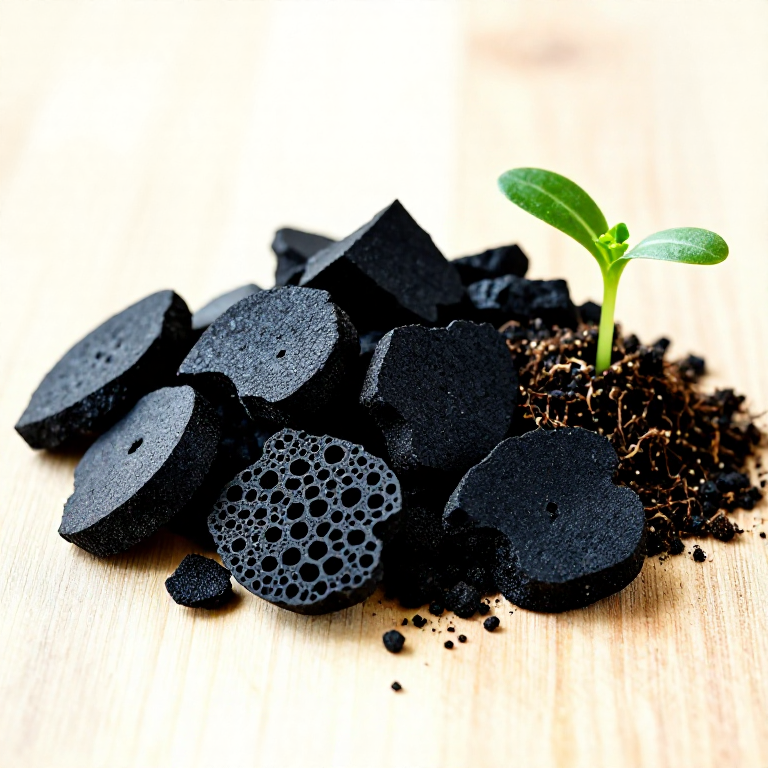
Once the mound is fully cool to the touch, carefully break open the earth shell. Well-made charcoal is jet black throughout, lightweight, and produces a metallic ring when pieces are tapped together. If pieces show brown or grey interiors, they are only partially carbonised (called brands) and should be placed in the next burn. Expect a yield of roughly 20-25 percent by weight of the original wood — 100 kg of oak produces about 20-25 kg of charcoal. Good hardwood charcoal burns at temperatures exceeding 1100 degrees C with a forced air supply, making it the essential fuel for copper and bronze smelting.
Матеріали
4- 50-100 kg штукаЗаповнювач
- large armful for covering штукаЗаповнювач
- enough to cover the mound штукаЗаповнювач
- 5 kg for ignition штукаЗаповнювач
Необхідні інструменти
3- Заповнювач
- Заповнювач
Пов'язані креслення
Ці креслення діляться знаннями — техніки, матеріали або принципи
Related blueprints
Other builds that share materials, tools, or techniques with this one.

CC0 Суспільне надбання
Це креслення випущено під ліцензією CC0. Ви можете вільно копіювати, змінювати, поширювати та використовувати цю роботу для будь-яких цілей без запиту дозволу.
Підтримайте мейкера, купуючи продукти через його креслення, де він отримує Комісію мейкера встановлену вендорами, або створіть нову ітерацію цього креслення та включіть його як зв'язок у власне креслення для розподілу доходу.