Співпраця
МИСТЕЦТВО
КРАСА ТА ЗДОРОВ'Я
РЕМЕСЛО
КУЛЬТУРА ТА ІСТОРІЯ
РОЗВАГИ
СЕРЕДОВИЩЕ
ЇЖА ТА НАПІЇ
ЗБОРНА ІНЖЕНЕРІЯ
НАУК
СПОРТ
ТЕХНОЛОГІЯ
НОСИМО
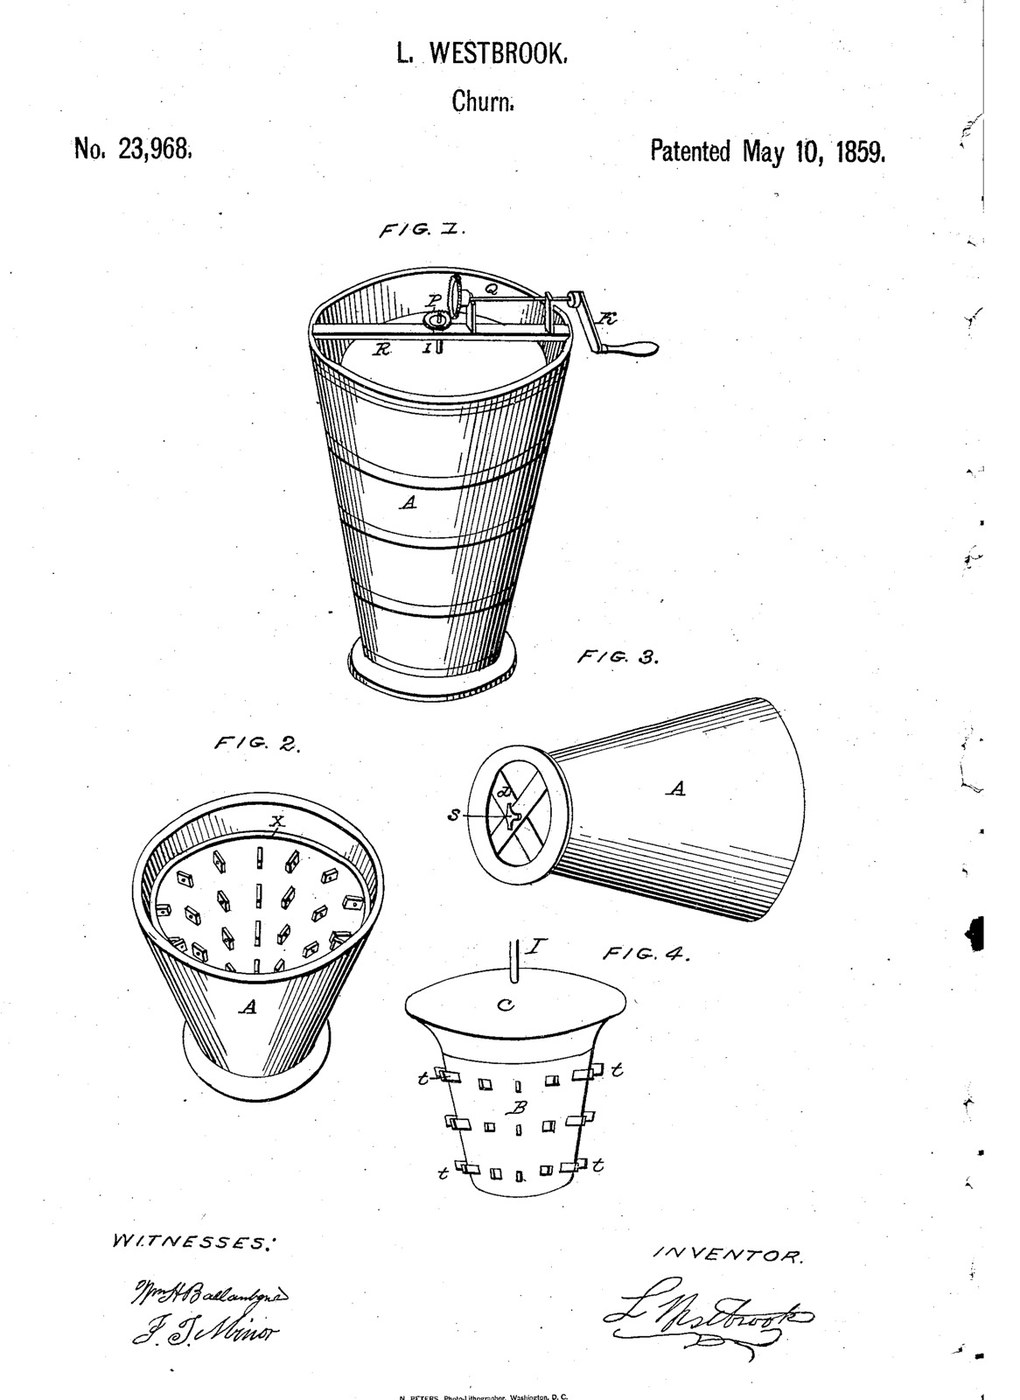


Rim-and-Disk Flow Churn: Cream Is Rubbed Past a Turning Disk, Then Falls Through Fixed and Turning Dashers
Leonardo Westbrook of New York received US 23,968, dated 10 May 1859, for a churn the cream passes through once. It stands over a pail. Cream poured on a turning disk at the top is rubbed between the disk's edge and a rounded rim inside the case, then falls through slats fixed to the case and dashers turning on the spindle, and runs out of the open bottom. A thumb screw under the spindle raises or lowers the disk on the rim.
This rung builds it in a 20-litre bucket with its floor cut out.
Середній
About 6 hours, plus printing
Інструкції
1
1
The gap at the rim, and the speeds
The gap at the rim, and the speeds
Завантаження блокнота Jupyter…
2
2
Cream rubbed in one pass, before it
Cream rubbed in one pass, before it
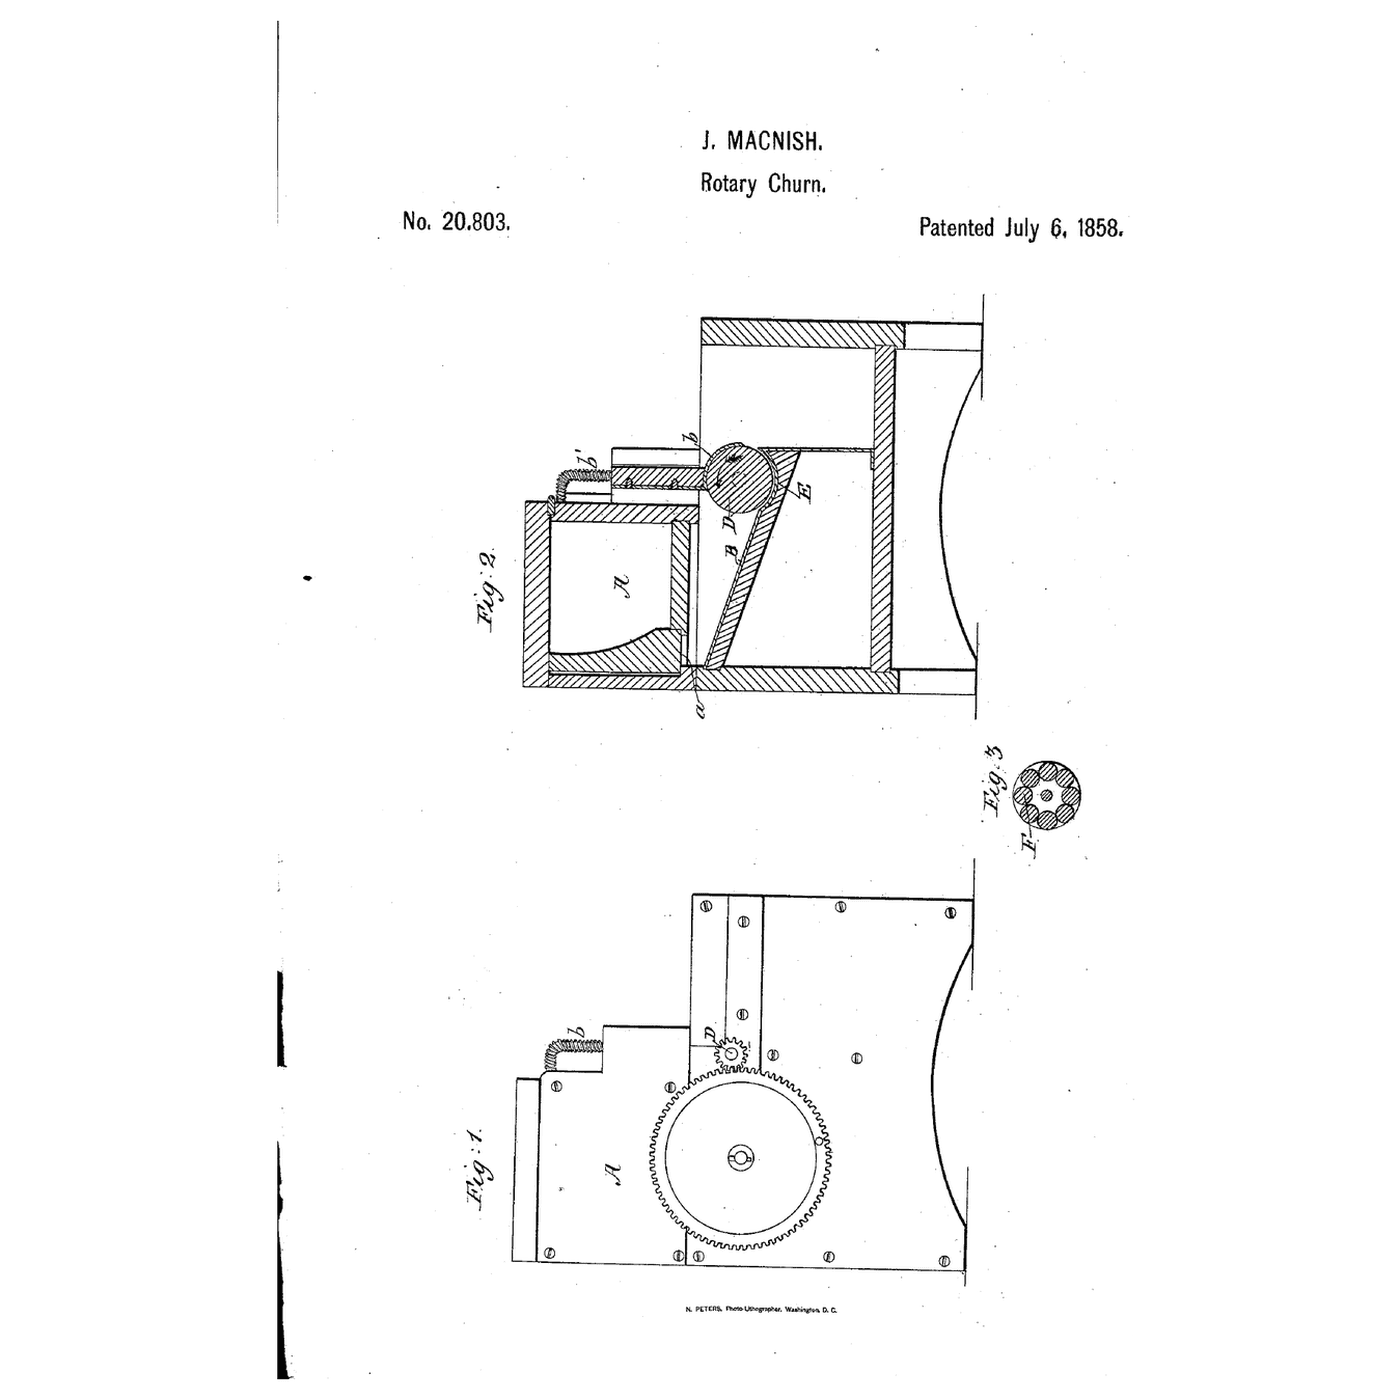
MacNish ran the cream once between a roller and a concave. Westbrook rubs it at a disk's edge, then beats it on the way down.
3
3
Read US 23,968
Read US 23,968
"The disk C, being slightly in contact with the rim X X X, as it revolves, rubs the milk or cream as it passes through ... then falling among the numerous dashers is thoroughly churned, before it passes out into the receiving vessel at the bottom."
4
4
Print the rim segment
Print the rim segment
A quarter of rim X, half-round, 16 mm wide. Print four. PETG, 0.2 mm layers, 40 % infill, 4 walls; wash before first use.
5
5
Print the pinion P
Print the pinion P
The 12-tooth pinion for spindle I's top. PETG, 0.2 mm layers, 40 % infill, 4 walls; wash before first use.
6
6
Print the crown wheel P'
Print the crown wheel P'
The 36-tooth wheel for shaft Q, teeth on its face. PETG, 0.2 mm layers, 40 % infill, 4 walls; wash before first use.
7
7
Print the thumb head
Print the thumb head
The wing head for the thumb screw. PETG, 0.2 mm layers, 40 % infill, 4 walls; wash before first use.
8
8
Case A, bars and thumb screw
Case A, bars and thumb screw
Cut the floor out of a food-grade 20-litre bucket, leaving a 25 mm flange round the edge (a 230 mm hole). Screw two hardwood bars d d' 340 x 30 x 20 mm across under the flange, halved where they cross, and drill the crossing 10.5 mm. Run an M10 threaded rod 123 mm long up through it with a nut on top of the bars, and glue the printed thumb head on its lower end.
Матеріали для цього кроку:
 Відро на 20 літрів1 штука
 Дошка з твердої деревини1 штука
 Шурупи по дереву8 штук
 Шпилька різьбова1 штука
 Шестигранна гайка1 штука
 Філамент PETG1 штука
 Столярний клей1 штука
Необхідні інструменти ({count})
 3D-принтер FDM
 Електролобзик
 Ручна пилка
 Стамески
 Акумуляторний дриль
 Набір свердел
 Ножівка по металу
 Набір викруток
 Рулетка
9
9
Rim X and fixed dashers o
Rim X and fixed dashers o
Screw the four rim segments inside the bucket 300 mm above the cut floor, round side inward, with stainless screws from outside. Cut 24 hardwood slats o 50 x 20 x 12 mm and screw them through the wall in three rings of eight, 80, 160 and 240 mm up, each ring turned half a space from the last.
Матеріали для цього кроку:
Дошка з твердої деревини1 штука Машинні гвинти32 штук
 Самоконтрувальна гайка з нейлоновим кільцем32 штук
Необхідні інструменти ({count})
Ручна пилкаАкумуляторний дрильНабір сверделНабір викрутокРулетка10
10
Spindle B, dashers t and disk C
Spindle B, dashers t and disk C
Cut a 40 mm hardwood dowel 290 mm long for spindle B and drill an 11 mm hole 10 mm deep in the middle of its foot (the indentation). Chisel twelve mortises and glue in hardwood dashers t 82 x 20 x 12 mm, four at each of 80, 160 and 230 mm above the foot, each ring turned an eighth from the last, so they pass between the slats' rings. Glue a 12 mm stainless rod 145 mm long 30 mm into the top as spindle I. Cut disk C from 12 mm plywood, 282 mm across, and glue it on the spindle 268 mm above the foot.
Матеріали для цього кроку:
 Шканти з твердої деревини1 штукаДошка з твердої деревини1 штукаСтолярний клей1 штука
 Пруток із нержавкої сталі1 штука
 Лист фанери1 штука
Необхідні інструменти ({count})
Ручна пилкаСтамескиАкумуляторний дриль Набір перових сверделЕлектролобзикНожівка по металу
 Наждачний папір
11
11
Beam R, shaft Q and crank K
Beam R, shaft Q and crank K
Lower the spindle in so its foot sits on the thumb screw and the disk on the rim. Cut a hardwood beam R 320 x 44 x 30 mm with a 13 mm hole in the middle, slip it over spindle I onto the rim and screw two cleats under its ends inside the bucket. Fix the pinion on spindle I. Screw two bearing blocks 95 mm tall on the beam, bore them 12.5 mm 70 mm above it, and run a 12 mm stainless rod through them as shaft Q, with the crown wheel meshing the pinion and a hardwood crank K with a dowel handle on the end beyond the bucket.
Матеріали для цього кроку:
Дошка з твердої деревини1 штукаШурупи по дереву8 штукПруток із нержавкої сталі1 штукаМашинні гвинти3 штукСамоконтрувальна гайка з нейлоновим кільцем3 штукШканти з твердої деревини1 штукаСтолярний клей1 штукаНеобхідні інструменти ({count})
Ручна пилкаАкумуляторний дрильНабір сверделНожівка по металуНабір викруток12
12
The build in 3D
The build in 3D
FreeCAD model of this build, the near half of the bucket and rim cut away: the bars and thumb screw, the three rings of slats, the spindle with its dashers and disk on the rim, the beam with spindle I and the pinion, and shaft Q with the crown wheel and crank.
13
13
Churn
Churn
Stand the churn on its bars over a clean pail or tub. Turn the thumb screw until the disk just touches the rim. Turn the crank and pour about 8 litres of heavy cream at about 15 °C slowly onto the disk, checked with the thermometer; it runs past the rim, through the dashers and into the pail. How many passes it needs is not given: pour it through again until the butter comes, timing it. Then pour off the buttermilk, wash the butter in cold water until it runs clear, work in a pinch of salt and weigh it.
Матеріали для цього кроку:
 Жирні вершки8 l
 Крупна морська сіль1 штука
 Вода1 штука
Необхідні інструменти ({count})
 Посудина для зберігання харчової якості
 Термометр зі щупом, що лишається в страві
 Секундомір
 Цифрові кухонні ваги
 Велика миска з нержавкої сталі
14
14
Troubleshooting
Troubleshooting
Rim-and-disk churn troubleshooting.
Flow
Loading...
15
15
History and honest limits
History and honest limits
**Leonardo Westbrook** of New York, US 23,968, 10 May 1859, "Churn". He did not claim friction, compression or level turning dashers among fixed ones as such, only the rim with the disk working over it, with the dashers and the thumb screw. His only size is the rim, 1/2 to 3/4 in. wide. We use the plain spindle he allows instead of his cone-shaped one, and a crown wheel and pinion for his two pinions; every other size and material is ours.
Матеріали
15- 1 штукаЗаповнювач
- 1 штукаЗаповнювач
- 16 штукЗаповнювач
- 1 штукаЗаповнювач
- 1 штукаЗаповнювач
- 1 штукаЗаповнювач
- 3 штукЗаповнювач
- 35 штукЗаповнювач
- Заповнювач
- 1 штукаЗаповнювач
- 1 штукаЗаповнювач
- 1 штукаЗаповнювач
- 8 lЗаповнювач
- 1 штукаЗаповнювач
- 1 штукаЗаповнювач
Необхідні інструменти
16- Заповнювач
- 1 vendor sell this, none ship to you yetЗаповнювач
- Заповнювач
- Заповнювач
- 1 vendor sell this, none ship to you yetЗаповнювач
- Заповнювач
- Заповнювач
- Заповнювач
- 1 vendor sell this, none ship to you yetЗаповнювач
- Заповнювач
- Заповнювач
- Заповнювач
- Заповнювач
- Заповнювач
- Заповнювач
Файли дизайну
5За цим кресленням виготовляють


Пов'язані креслення
Ці креслення діляться знаннями — техніки, матеріали або принципи



CC0 Суспільне надбання
Це креслення випущено під ліцензією CC0. Ви можете вільно копіювати, змінювати, поширювати та використовувати цю роботу для будь-яких цілей без запиту дозволу.
Підтримайте мейкера, купуючи продукти через його креслення, де він отримує Комісію мейкера встановлену вендорами, або створіть нову ітерацію цього креслення та включіть його як зв'язок у власне креслення для розподілу доходу.