ART
BEAUTY & WELLNESS
CRAFT
CULTURE & HISTORY
ENTERTAINMENT
ENVIRONMENT
FOOD & DRINKS
REVERSE ENGINEERING
SCIENCES
SPORTS
TECHNOLOGY
WEARABLES
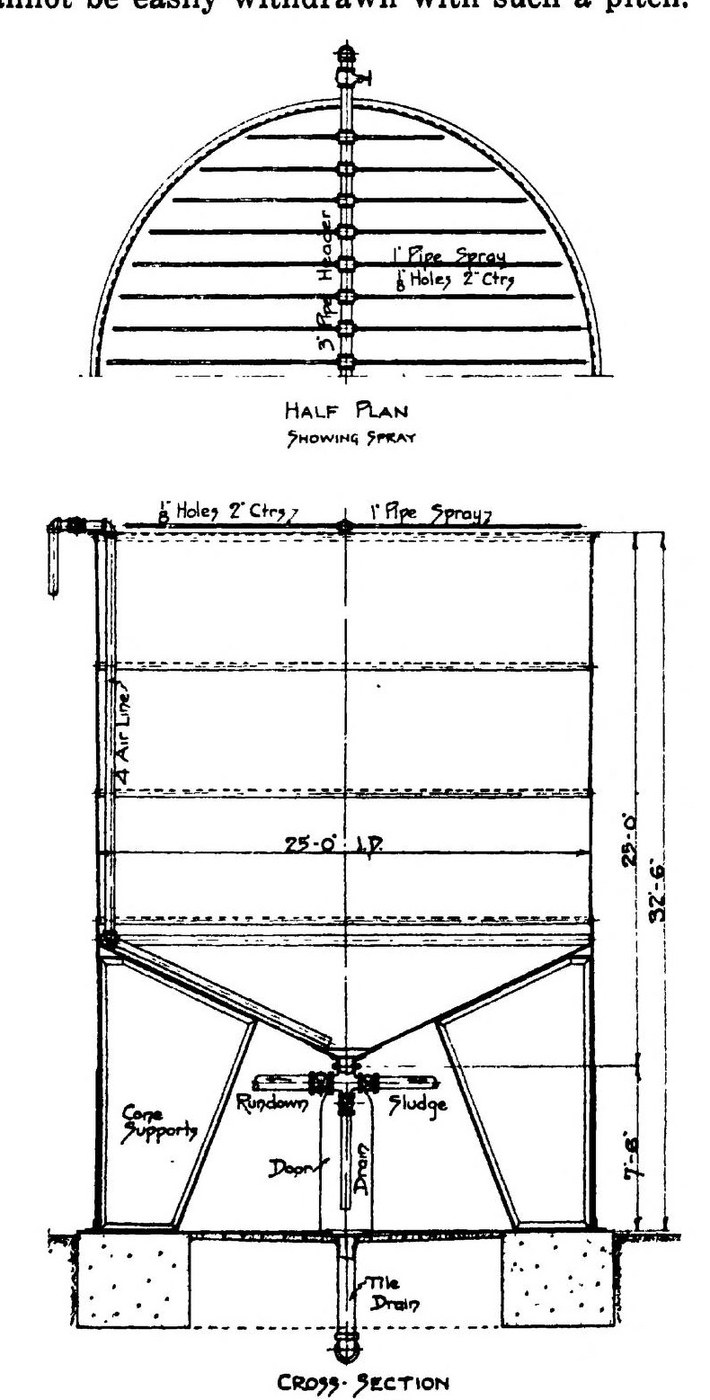


Agitated Mixing Tank: the Cone-Bottom Light-Oil Agitator (Bell, 1923)
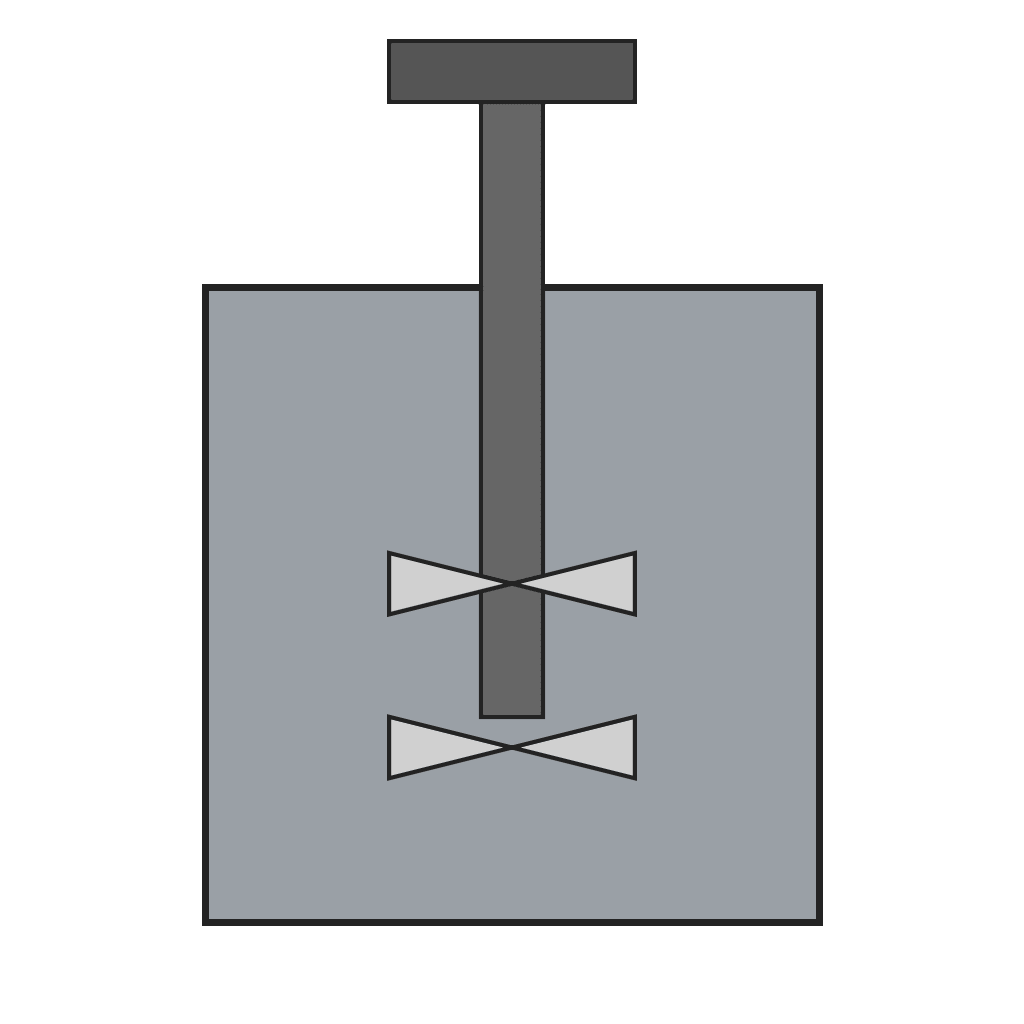
The refinery agitator for washing oil with acid, soda and water: a lead-lined riveted steel tank with a cone bottom, an air line that blows up through the charge to mix it, a spray header for wash water, and draw-offs at the tip of the cone for sludge and finished oil.
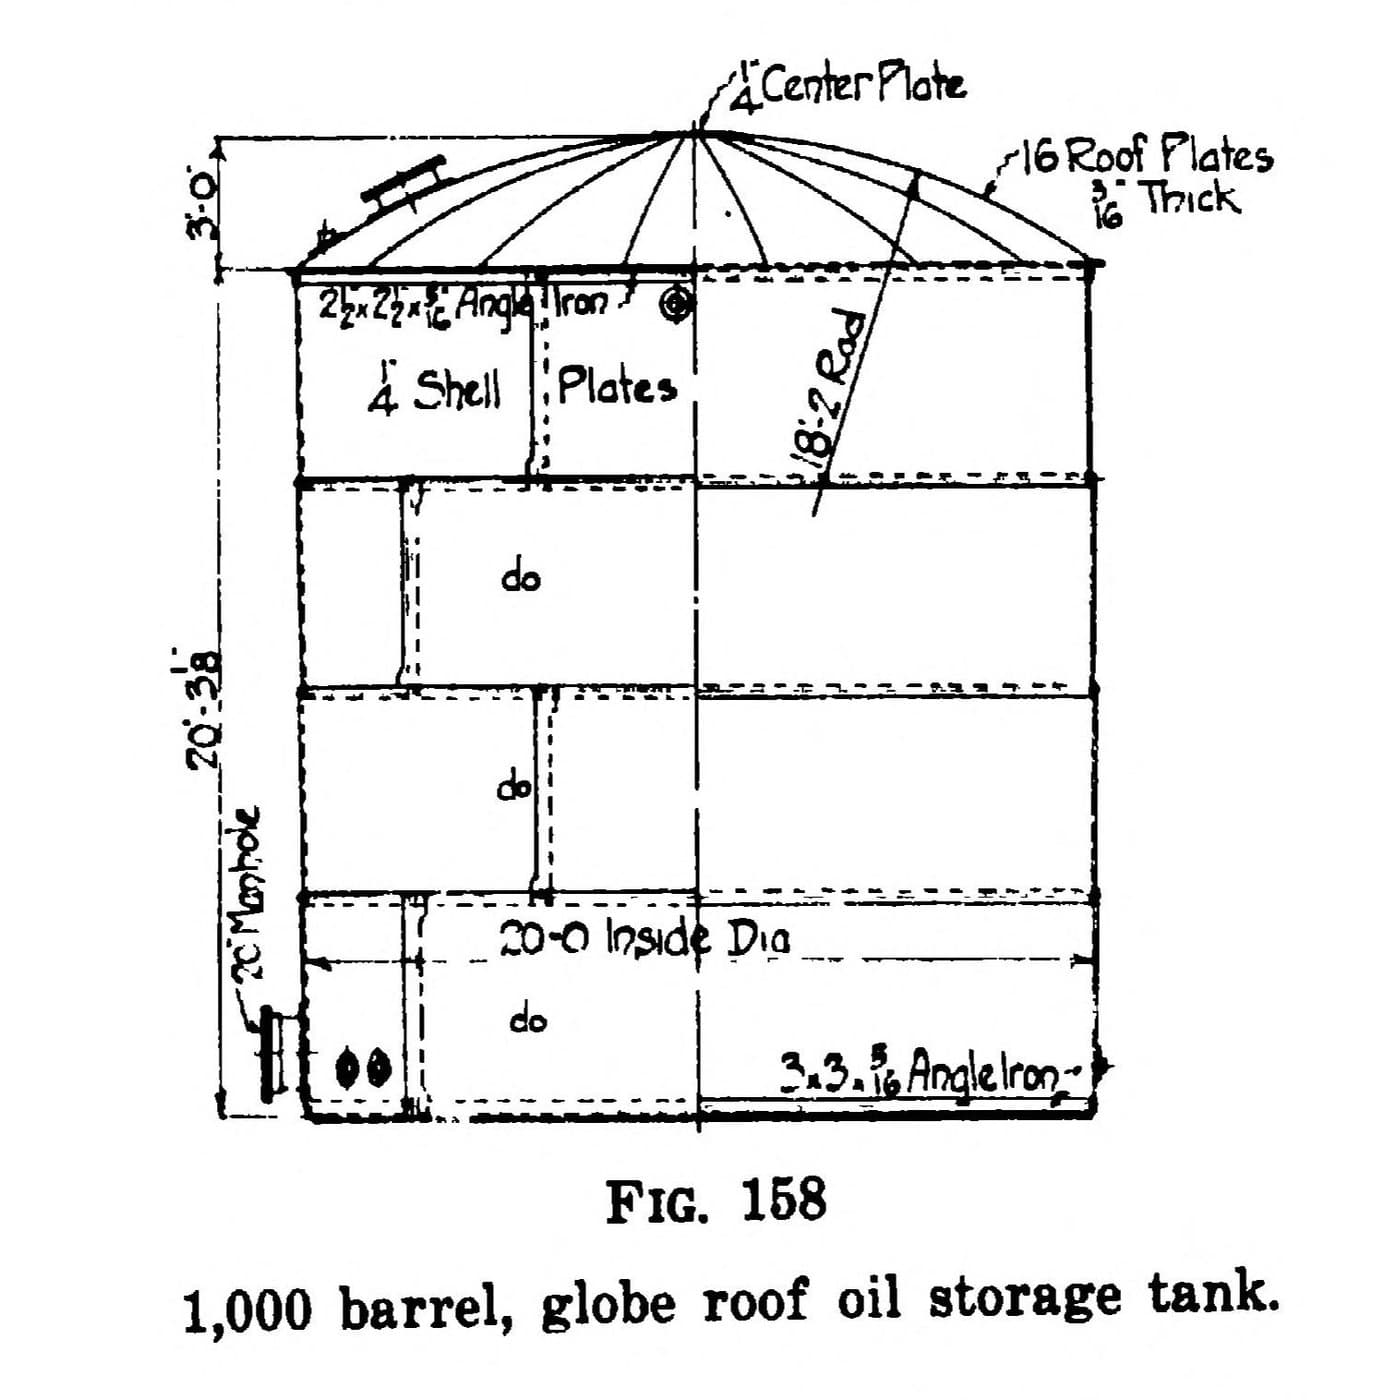
Variable: capacity, 160 to 5,000 barrels. Bell's Fig. 87 is 1,000 barrels: 25 ft inside diameter, 25 ft shell, 7 ft 6 in cone, 32 ft 6 in overall.
Source: H. S. Bell, American Petroleum Refining (1923), pp. 195-200. Unknown: plate thickness. Picture: Fig. 87 of the book.
Expert
Unknown
Instructions
1
1
Set the foundation and columns
Set the foundation and columns
Choose the capacity (160 to 5,000 barrels). Rest the tank on lugs on steel or concrete columns, fireproofing steel ones; the older way of extending the shell down with gussets under the cone is heavy. Fig. 87 stands on concrete footings with a tile drain under the cone tip.
Materials for this step:
 Concrete1 footings, columns
Tools needed:
 Unknown Dimensions
2
2
Build the shell and cone
Build the shell and cone
Rivet a cylindrical shell (Fig. 87: 25 ft inside, 25 ft high) onto a cone bottom pitched no more than 4 in per foot from the horizontal for light oils; sludge still runs out at that slope. With a tight lead lining the shell need not be caulked; leave out an occasional rivet so lining leaks show. Not given: plate thickness.
Materials for this step:
 Mild Steel Plate1 shell, cone
 Mild Steel Angle Iron1 top and cone angles
 Steel Rivets1 piece
Tools needed:
 Punch Press
 Riveting Hammer
3
3
Fit a low roof with relief
Fit a low roof with relief
Use a low globe roof, not the old hemispherical 'gas bag', with plenty of explosion hatches; even 10 % relief area has not always saved a roof. Bell's preferred form (Fig. 89) has two roof segments that lift in an explosion and fall back to smother the fire.
Materials for this step:
Mild Steel Plate1 roofSteel Rivets1 pieceTools needed:
Riveting Hammer4
4
Pipe the air, spray and draw-offs
Pipe the air, spray and draw-offs
Run a 4 in air line down to the cone tip; the blast needs at least 200 to 250 cu ft of free air per minute per 1,000 barrels, at just enough pressure to beat the oil head. Across the top fit a 3 in header with 1 in spray pipes drilled with 1/8 in holes at 2 in centres. At the cone tip fit valved rundown, sludge and drain lines.
Materials for this step:
 Steel Pipe (thick-walled, threaded ends)1 4 in air, 3 in header, 1 in sprays
 Gate Valve3 rundown, sludge, drain
Tools needed:
 Hand Drill
 Air Blower
5
5
Line it with lead
Line it with lead
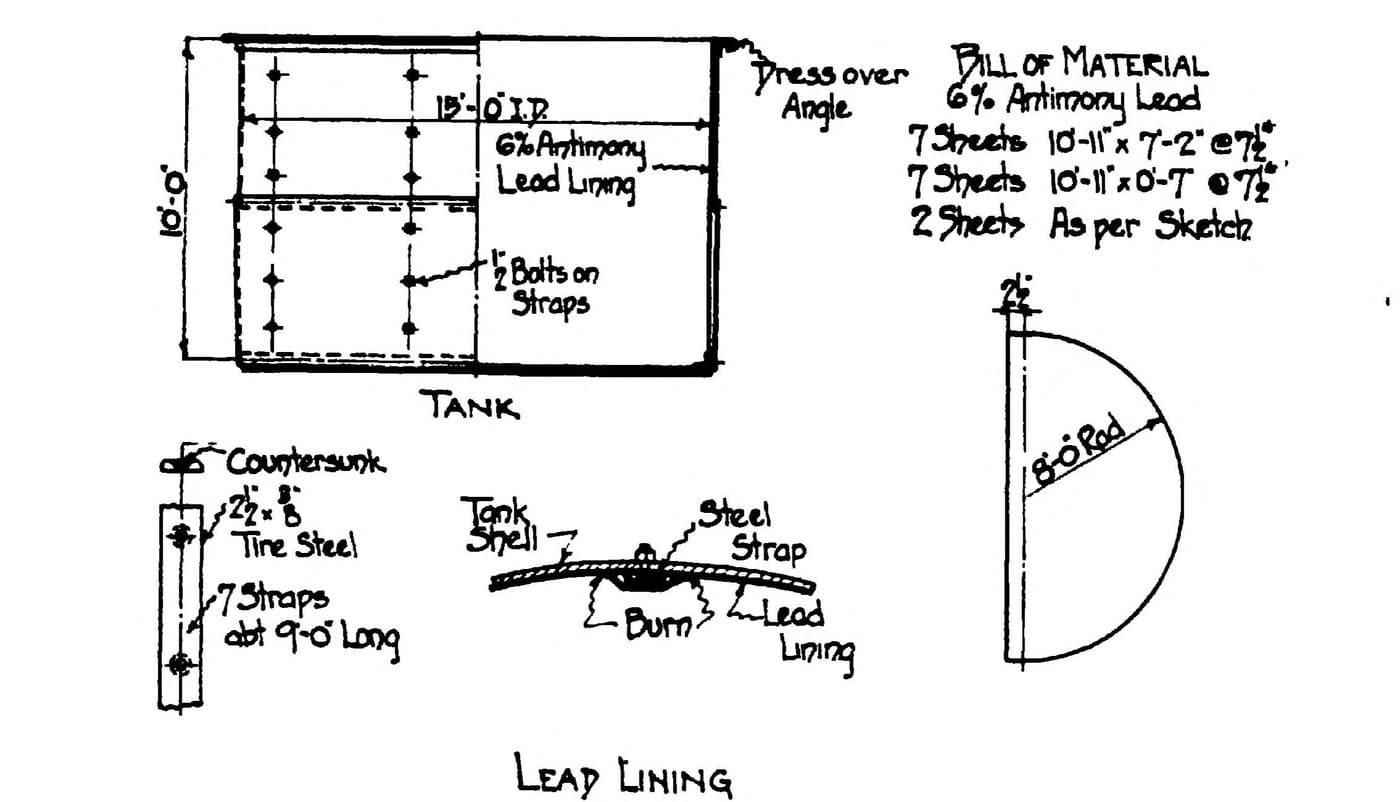
Weak acid from the washes eats steel, so line it with lead: 8 lb per sq ft on the shell, 10 lb on the cone, or 6 % antimony lead half a pound lighter. Don't just hang it from the top angle: agitation makes a loose lining creep and crack. Hold it with lead-covered steel straps about 8 ft apart, bolted through the shell, and bring the lining out through the draw-off neck.
Materials for this step:
 Lead Sheet1 8 lb shell, 10 lb cone
 Mild Steel Flat Bar1 straps
 Hex Bolt - Grade 8.81 piece
Tools needed:
 Wooden Mallet
 Torch
Materials
9- 1 footings, columnsPlaceholder
- 1 roofPlaceholder
- 1 top and cone anglesPlaceholder
- 1 piecePlaceholder
- 1 4 in air, 3 in header, 1 in spraysPlaceholder
- 3 rundown, sludge, drainPlaceholder
- 1 8 lb shell, 10 lb conePlaceholder
- 1 strapsPlaceholder
- 1 piecePlaceholder
Tools Required
7- Placeholder
- Placeholder
- Placeholder
- Placeholder
- Placeholder
- Placeholder
- Placeholder
Connected Blueprint Materials
This blueprint makes
CC0 Public Domain
This blueprint is released under CC0. You are free to copy, modify, distribute, and use this work for any purpose, without asking permission.
Support the Maker by purchasing products through their Blueprint where they earn a Maker Commission set by Vendors, or create a new iteration of this Blueprint and include it as a connection in your own Blueprint to share revenue.