Collaboration
ART
BEAUTY & WELLNESS
CRAFT
CULTURE & HISTORY
ENTERTAINMENT
ENVIRONMENT
FOOD & DRINKS
REVERSE ENGINEERING
SCIENCES
SPORTS
TECHNOLOGY
WEARABLES


Pigeon House for 20 Birds: Swastika Compartments, Sliding Shutters and a Gable Roof on a Post (Boy Mechanic, 1919)
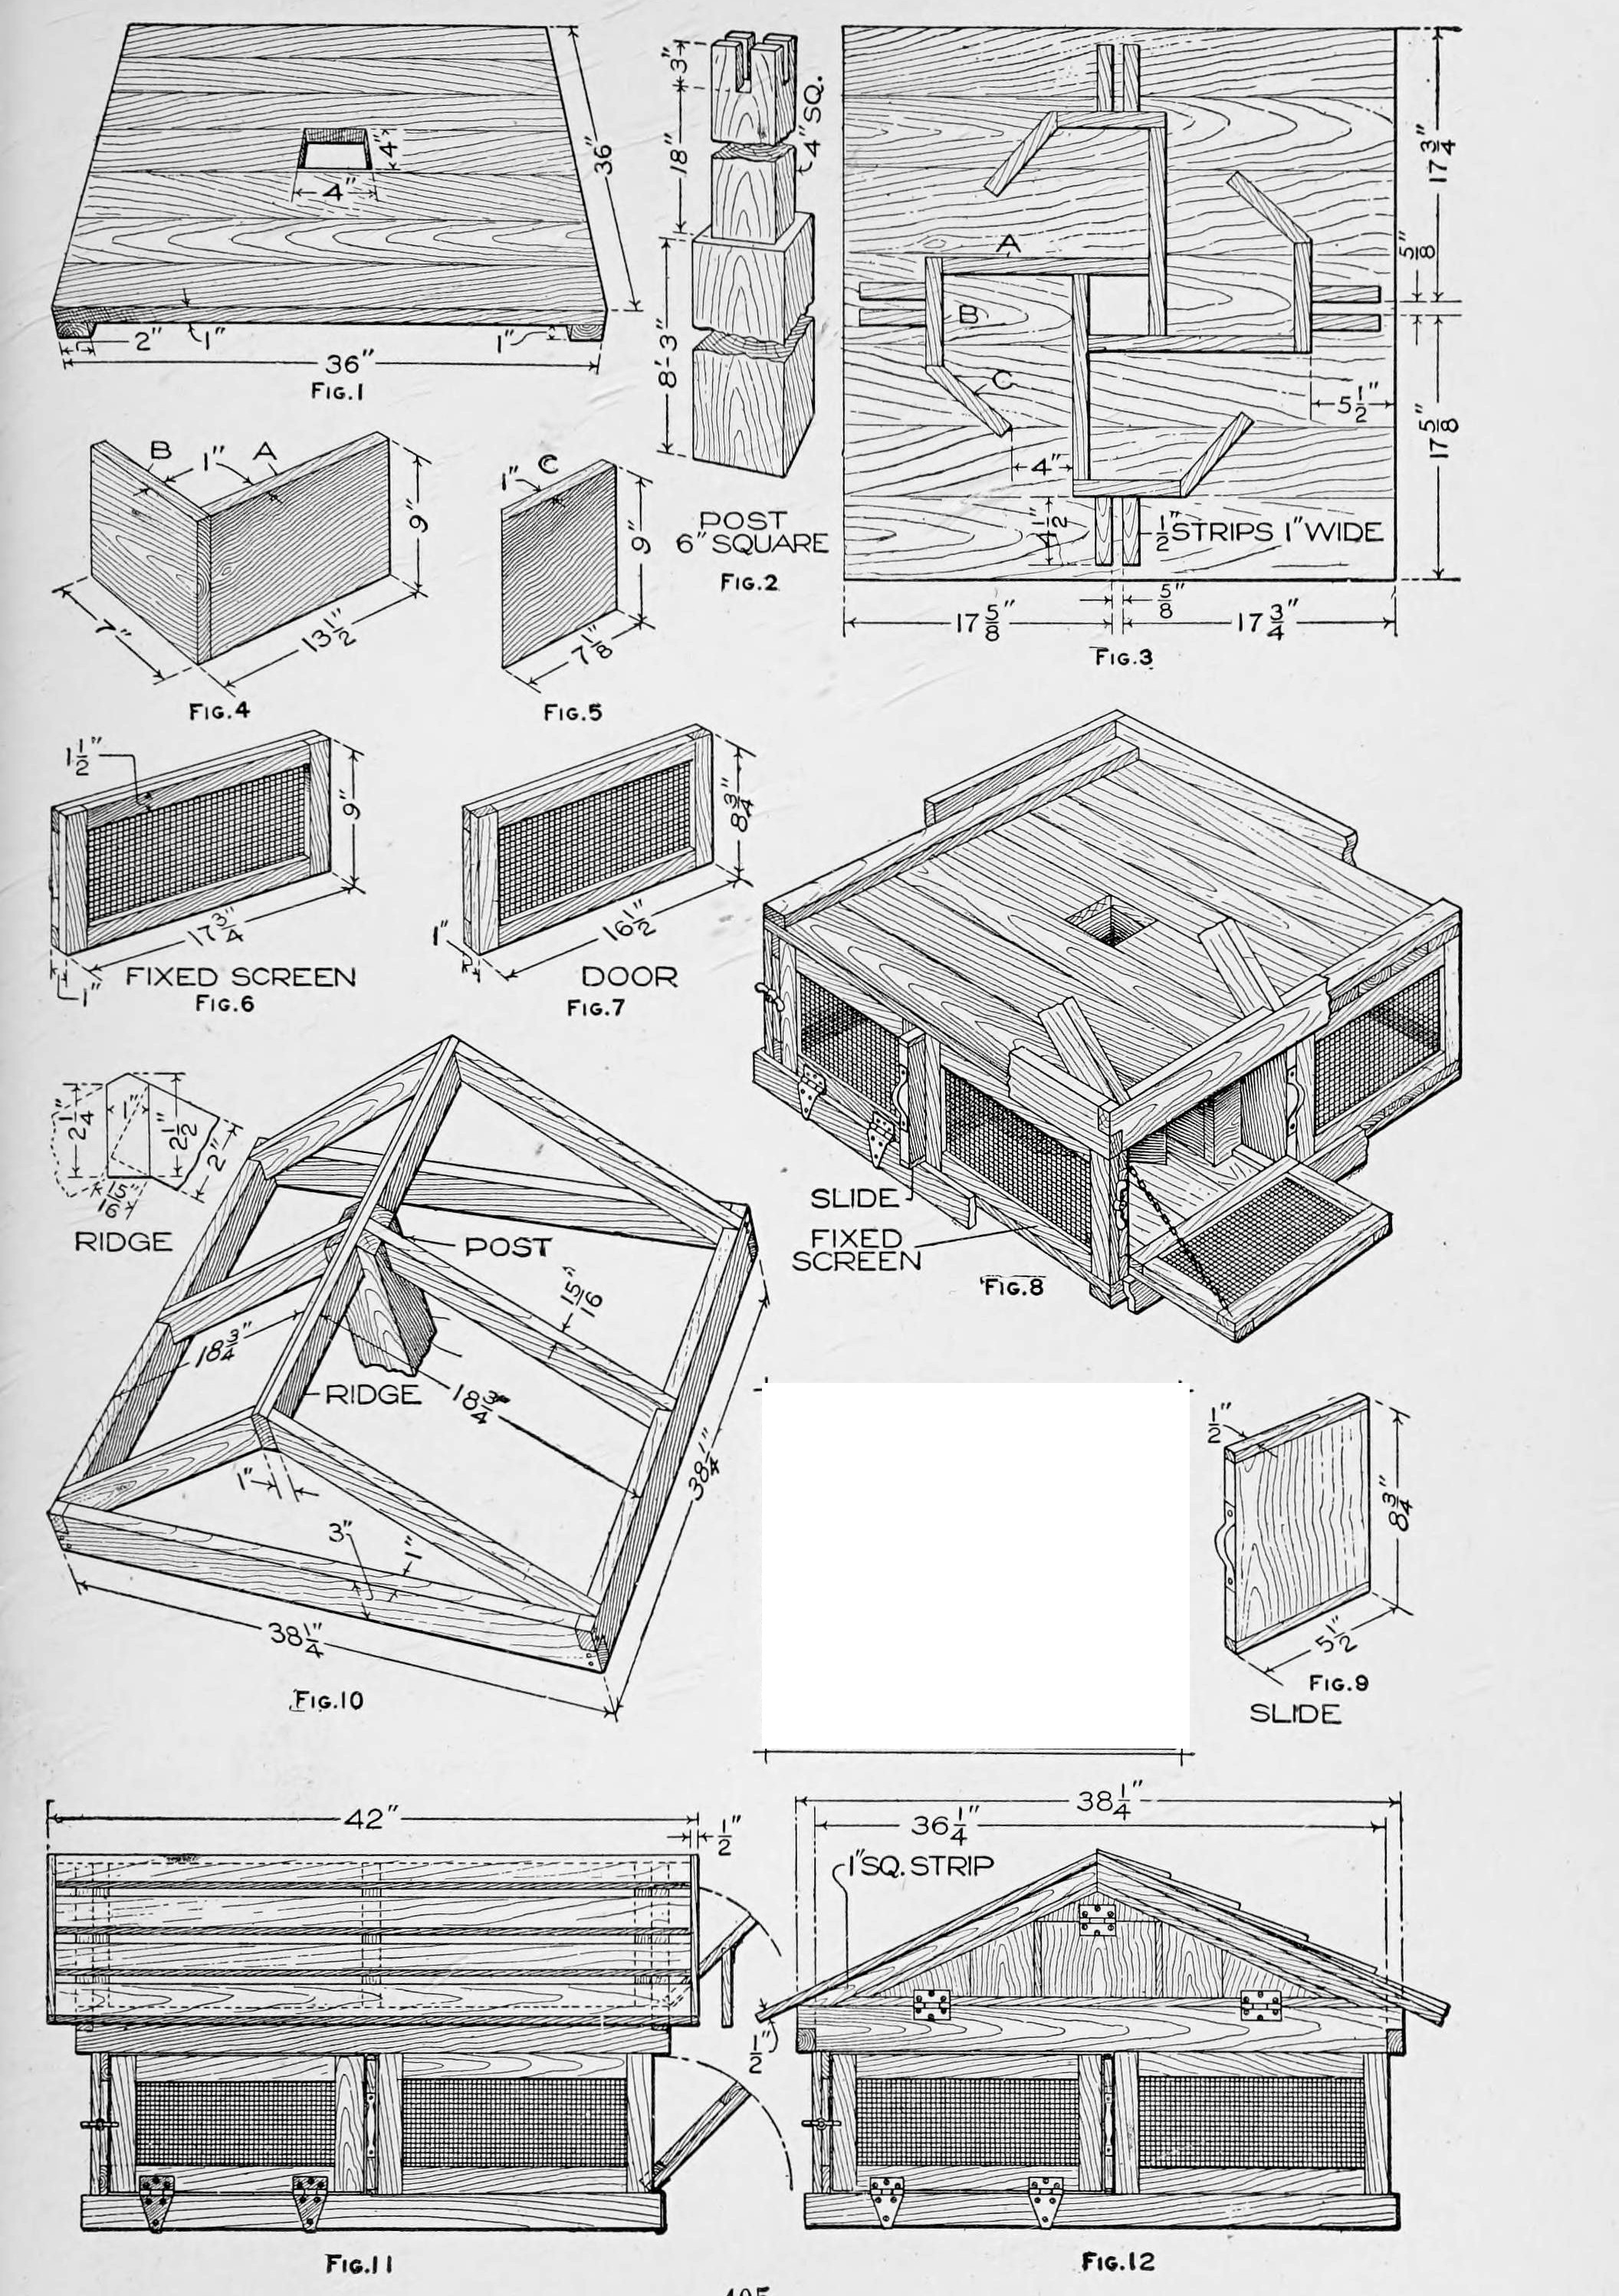
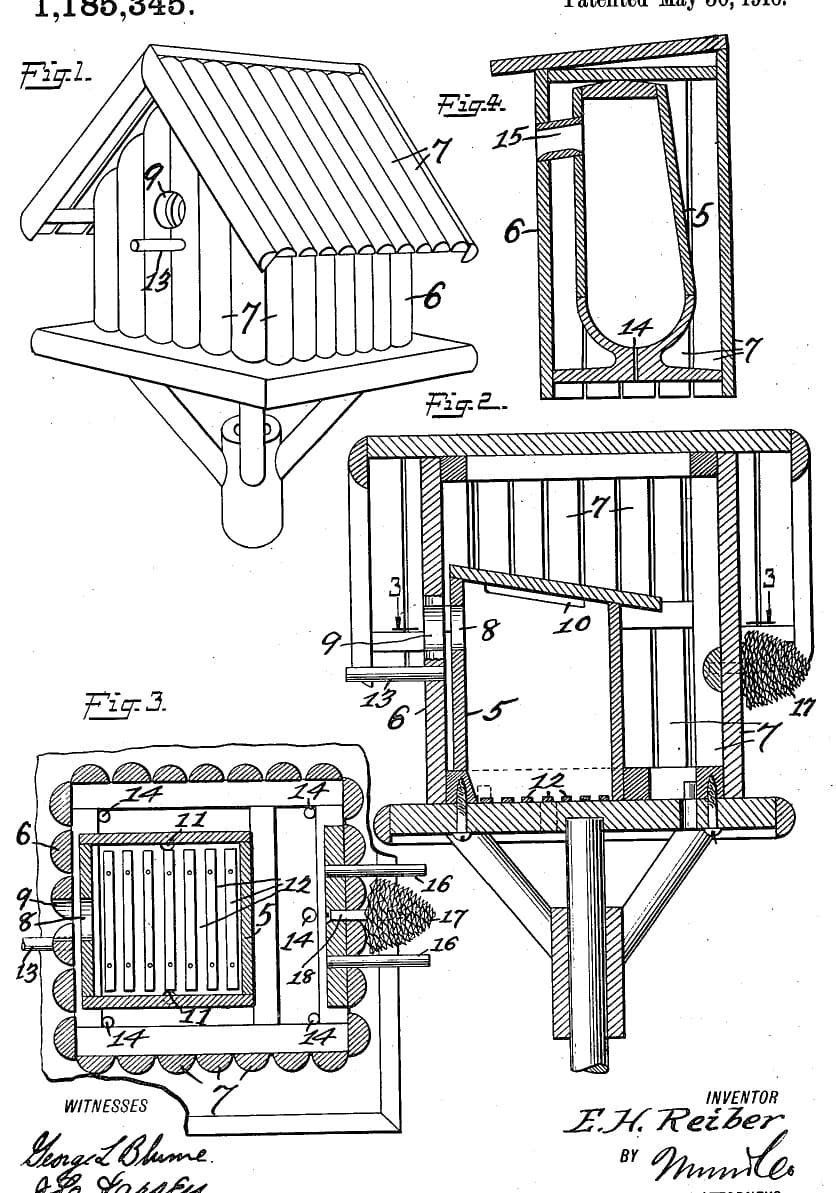
Robert Baker's pigeon house from The Boy Mechanic, Book 3 (1919), mostly from box wood: a 36 in square lower story on a 6 in post, divided into four compartments by pinwheel (swastika-pattern) partitions, with wire-mesh screens, hinged doors and sliding shutters, under a removable framed and shingled gable roof. It houses 20 pigeons.
Intermediate
Several days
Instructions
1
1
Parts in centimetres
Parts in centimetres
Loading Jupyter Notebook...
2
2
Read The Boy Mechanic, Book 3
Read The Boy Mechanic, Book 3
"The house described will accommodate 20 pigeons, and additional stories of the same type may be added to provide for more."
3
3
Make the floor, ceiling and post
Make the floor, ceiling and post
Make floor and ceiling alike, 36 in square of boards on cleats screwed on (or nails clinched), each with an accurate 4 in square centre hole (Fig. 1). Cut the post 6 in square, about 9 ft long, with a 4 in square shoulder at the top to fit the holes (Fig. 2); cut the notches for the ridge and centre rafters only when the roof boards are ready.
Materials for this step:
 Pine Board6 pieces
 Pine Lumber1 piece
 Wood Screws1 piece
Tools needed:
 Hand Saw
 Chisels
 Brace and Bit
 Coping Saw
 Try Square
 Tape Measure
4
4
Build the compartments
Build the compartments
Make four each of the pieces A, B and C, 9 in high of 1 in stuff, exactly to Figs. 4 and 5 (A/B legs 13-1/2 and 7 in, C 7-1/8 in). Mark 4 in from one end of each A, pair the pieces with the line even with the end of the other and nail, then fit the pairs into a 4 in square at the centre. Fit each C to a B at an angle, trim the corners, nail, and nail B-C to the ends of A to complete the pattern (Fig. 3). Fix it over the floor hole with nails or screws through the floor, and nail two strips exactly 4-1/2 in long beside each opening to guide the slides. Fix the ceiling on top, cleats up, with its strips the same way.
Materials for this step:
Pine Board3 pieces Nails1 piece
Tools needed:
Hand Saw HammerTry Square
 Pencil
5
5
Make screens, doors and slides
Make screens, doors and slides
Build fixed screens (17-3/4 by 9 in) and doors (16-1/2 by 8-3/4 in) of 1/2 in wood with 1/2 in square-mesh wire grating fixed between the pieces; screens stand 1/4 in higher than the doors and are fastened between ceiling and floor as braces. Hang the doors on combination strap hinges bent over the baseboard (or butts covered by it) with catches and chains; nail on 2-1/2 in baseboards. Make each slide of three pieces so it will not warp: a 7-3/4 in main piece with 1/2 in square strips on the ends (8-3/4 by 5-1/2 in), with a band-iron handle drilled for screws.
Materials for this step:
Pine Board2 pieces Galvanised Wire Mesh1 piece
 Iron Strap Hinge4 pieces
 Hook and Eye4 pieces
 Fine Chain1 piece
 Mild Steel Flat Bar1 pieceNails1 pieceWood Screws1 piece
Tools needed:
Hand SawHammer Scissors
 Hand Drill
 Bench Vise
 Screwdriver - Flat
6
6
Frame and cover the roof
Frame and cover the roof
Build the plate of pieces 3 in wide, 1/4 in larger inside than the ceiling so it fits snugly over it, with halved corners nailed both ways (Fig. 10). Lay out the end rafters full size on paper or a board, fit them first, then the others and the ridge. Nail rough boards 1/2 in apart, projecting 2 in past the plate ends, with a 1/2 in strip over their ends, and shingle or cover with tar paper. Nail a 1 in strip under each roof end and fit the gables, one with a door, the other with a screened opening the same size.
Materials for this step:
Pine Board4 pieces Wooden Shingles1 pieceNails1 pieceGalvanised Wire Mesh1 pieceIron Strap Hinge2 pieces
Tools needed:
Hand SawHammerTry SquarePencil7
7
Set it up
Set it up
Set the post, put the lower story over its shoulder, cut the post-top notches to the ridge and centre rafters and seat the roof story on the lower one. The roof story lifts off for cleaning; for added stories put a post at each corner.
Tools needed:
 ShovelHand SawChisels
8
8
Troubleshooting
Troubleshooting
Pigeon house troubleshooting.
Flow
Loading...
9
9
History and honest limits
History and honest limits
From "A Pigeon House" by Robert Baker, in **The Boy Mechanic, Book 3**, Popular Mechanics, 1919 (Project Gutenberg 71856; checked on the archive.org scan boymechanic0003unse, pp. 403-405). The text calls the post about 9 ft; Fig. 2 marks 8 ft 3 in, 18 in and 3 in. The tools and metric figures are ours.
Materials
10- 6 piecesPlaceholder
- 1 piecePlaceholder
- 2 piecesPlaceholder
- 3 piecesPlaceholder
- 2 piecesPlaceholder
- 4 piecesPlaceholder
- 4 piecesPlaceholder
- 1 piecePlaceholder
- 1 piecePlaceholder
- 1 piecePlaceholder
Tools Required
13- Placeholder
- Placeholder
- Placeholder
- Placeholder
- Placeholder
- 1 vendor sell this, none ship to you yetPlaceholder
- Placeholder
- 1 vendor sell this, none ship to you yetPlaceholder
- Placeholder
- Placeholder
- Placeholder
- Placeholder
- Placeholder
This blueprint makes
Related Blueprints
These blueprints share knowledge with this one — techniques, materials, or principles that connect them in the learning graph.
CC0 Public Domain
This blueprint is released under CC0. You are free to copy, modify, distribute, and use this work for any purpose, without asking permission.
Support the Maker by purchasing products through their Blueprint where they earn a Maker Commission set by Vendors, or create a new iteration of this Blueprint and include it as a connection in your own Blueprint to share revenue.