ART
BEAUTY & WELLNESS
CRAFT
CULTURE & HISTORY
ENTERTAINMENT
ENVIRONMENT
FOOD & DRINKS
REVERSE ENGINEERING
SCIENCES
SPORTS
TECHNOLOGY
WEARABLES
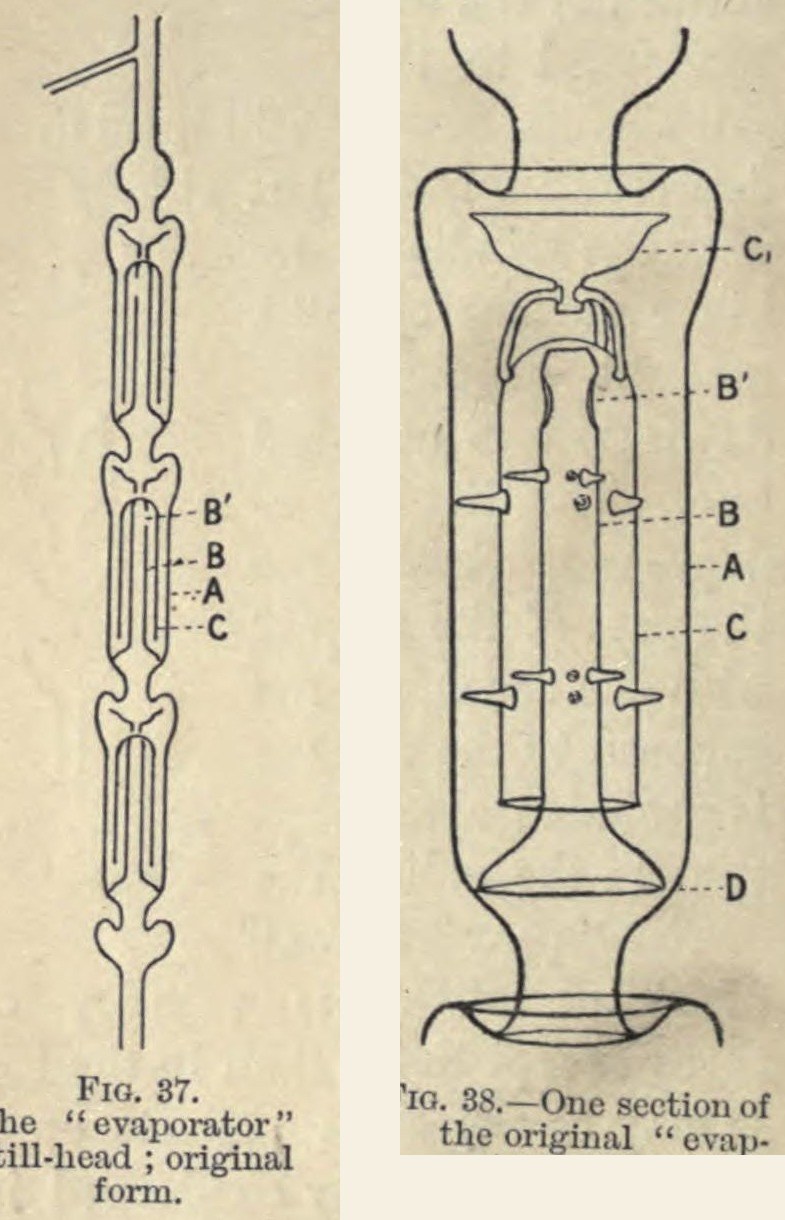


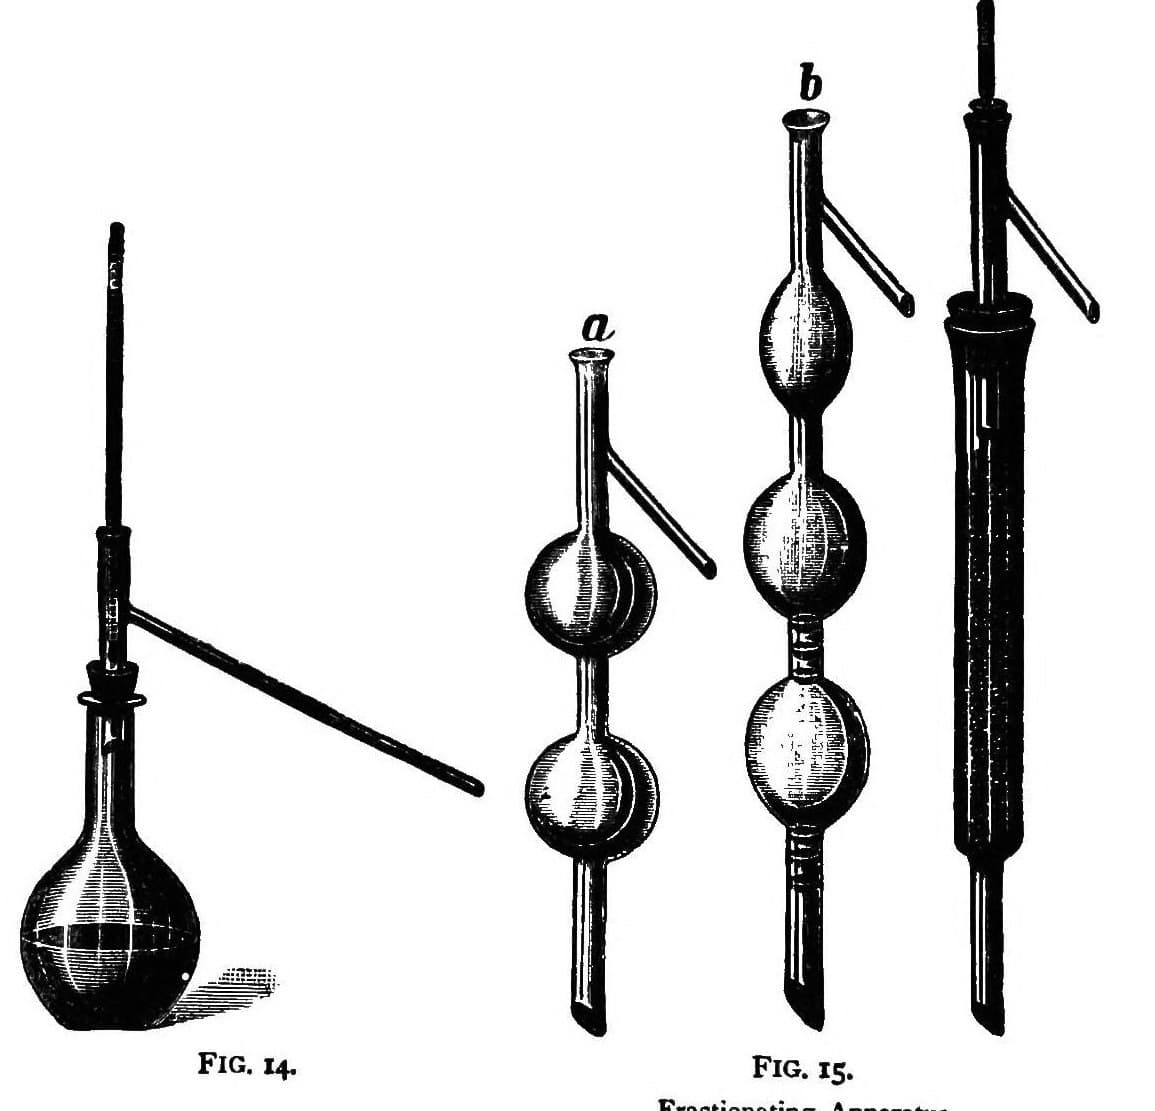
Distillation Column Assembly: Flask, "Evaporator" Still-Head, Liebig Condenser and Receivers (Young, 1903)
A complete fractional distillation set: a globular flask, Young and Thomas's 'evaporator' still-head built of stacked glass sections, a Liebig condenser and a row of receivers. In each section the rising vapour is forced through the liquid running back down, so the mixture separates better at each step.
Result: a fractionating apparatus for separating liquids by boiling point, the fractions caught in receivers changed at set temperatures.
Source: S. Young, Fractional Distillation (1903), pp. 4-7, 115-116, 166-168. Picture: Figs. 37 and 38 of the book.
Advanced
Unknown
Instructions
1
1
Choose the still
Choose the still
Use a globular flask, since a flat-bottomed one may crack over a naked flame, no larger than the amount of liquid needs. Fit it with a cork for the still-head. Ours: a round-bottom flask.
Materials for this step:
 Round-Bottom Flask1 still
 Corks1 still cork
Tools needed:
 Bunsen Burner
2
2
Blow the evaporator still-head
Blow the evaporator still-head
Build the still-head of sections joined end to end. Each outer tube is 22 to 24 mm inside and about 10 to 10.5 cm long, constricted at the bottom. In it stands a thin inner tube, 7.5 to 8 mm inside and 60 mm long, open at both ends, with two large holes near its top. Its lower end widens into a funnel resting on the constriction, with three or four tiny glass beads fused to the rim so it does not fit too tightly. Over it stands an intermediate tube about 14 mm inside and 50 mm long, like a small inverted test tube. A small funnel, slightly wider than the dip in the outer tube above, sits on top of it on three glass legs. Small glass projections centre the tubes. Make the head long enough that the thermometer's bulb and stem both sit in the vapour, with a side delivery tube at the top.
Materials for this step:
 Glass Tube1 sections, inner and intermediate tubes, delivery tube
Tools needed:
 Bench Glassblowing Torch
3
3
Fit the condenser
Fit the condenser
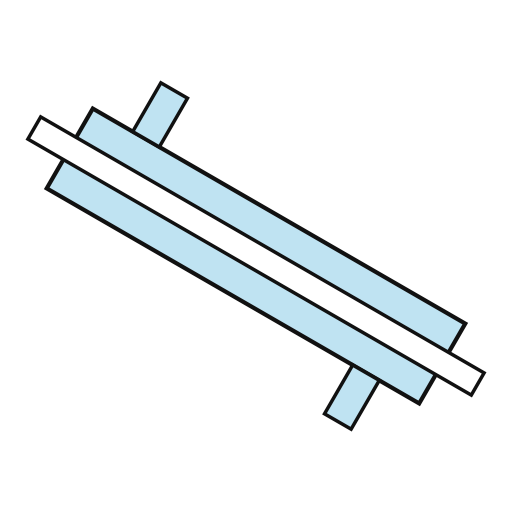
Use a Liebig condenser, about 7 or 8 mm inside for the inner tube and 15 mm for the outer, cooled by running water. Pass the delivery tube through a cork into it. Draw out the joint where the wide inlet meets the narrow tube so no pool of liquid lies there. Bend the narrow tube so the condenser can stand upright. Above about 170 °C use a long tube cooled by air instead of water.
Materials for this step:
 Water-Cooled Condenser1 condenserCorks1 condenser cork
Tools needed:
Bench Glassblowing Torch Cooling Water
4
4
Set the heat and the receivers
Set the heat and the receivers
Heat with a Bunsen burner, its top about 2 mm below the flask so the small flame touches the glass, shielded from draughts. Add a few pieces of porous porcelain (a broken clay pipe will do) or pumice if the liquid bumps. Set a thermometer in the still-head and a row of small flasks as receivers.
Materials for this step:
 Thermometer1 still-head thermometer
 Collection Flask10 receivers
Tools needed:
Bunsen Burner Unknown Material
5
5
Distil in fractions
Distil in fractions
Read the barometer and correct the set temperatures for it. Distil steadily. In each section, condensed liquid seals the narrow passage, so the vapour rises up the inner tube, down between the tubes and up again, while liquid drips from section to section back to the still. Collect the distillate in fractions, changing the receiver each time the temperature reaches one of the values fixed beforehand.
Tools needed:
 Mercury BarometerBunsen BurnerCooling Water
Materials
6- 1 stillPlaceholder
- 1 condenser corkPlaceholder
- 1 sections, inner and intermediate tubes, delivery tubePlaceholder
- 1 condenserPlaceholder
- 1 still-head thermometerPlaceholder
- 10 receiversPlaceholder
Tools Required
5- Placeholder
- Placeholder
- Placeholder
- Placeholder
- Placeholder
Connected Blueprint Materials

This blueprint makes

Related Blueprints
These blueprints share knowledge with this one — techniques, materials, or principles that connect them in the learning graph.
CC0 Public Domain
This blueprint is released under CC0. You are free to copy, modify, distribute, and use this work for any purpose, without asking permission.
Support the Maker by purchasing products through their Blueprint where they earn a Maker Commission set by Vendors, or create a new iteration of this Blueprint and include it as a connection in your own Blueprint to share revenue.