ART
BEAUTY & WELLNESS
CRAFT
CULTURE & HISTORY
ENTERTAINMENT
ENVIRONMENT
FOOD & DRINKS
REVERSE ENGINEERING
SCIENCES
SPORTS
TECHNOLOGY
WEARABLES

Fast-and-Loose Bucket Churn: One Way the Buckets Cross to Churn, the Other They Close to Gather
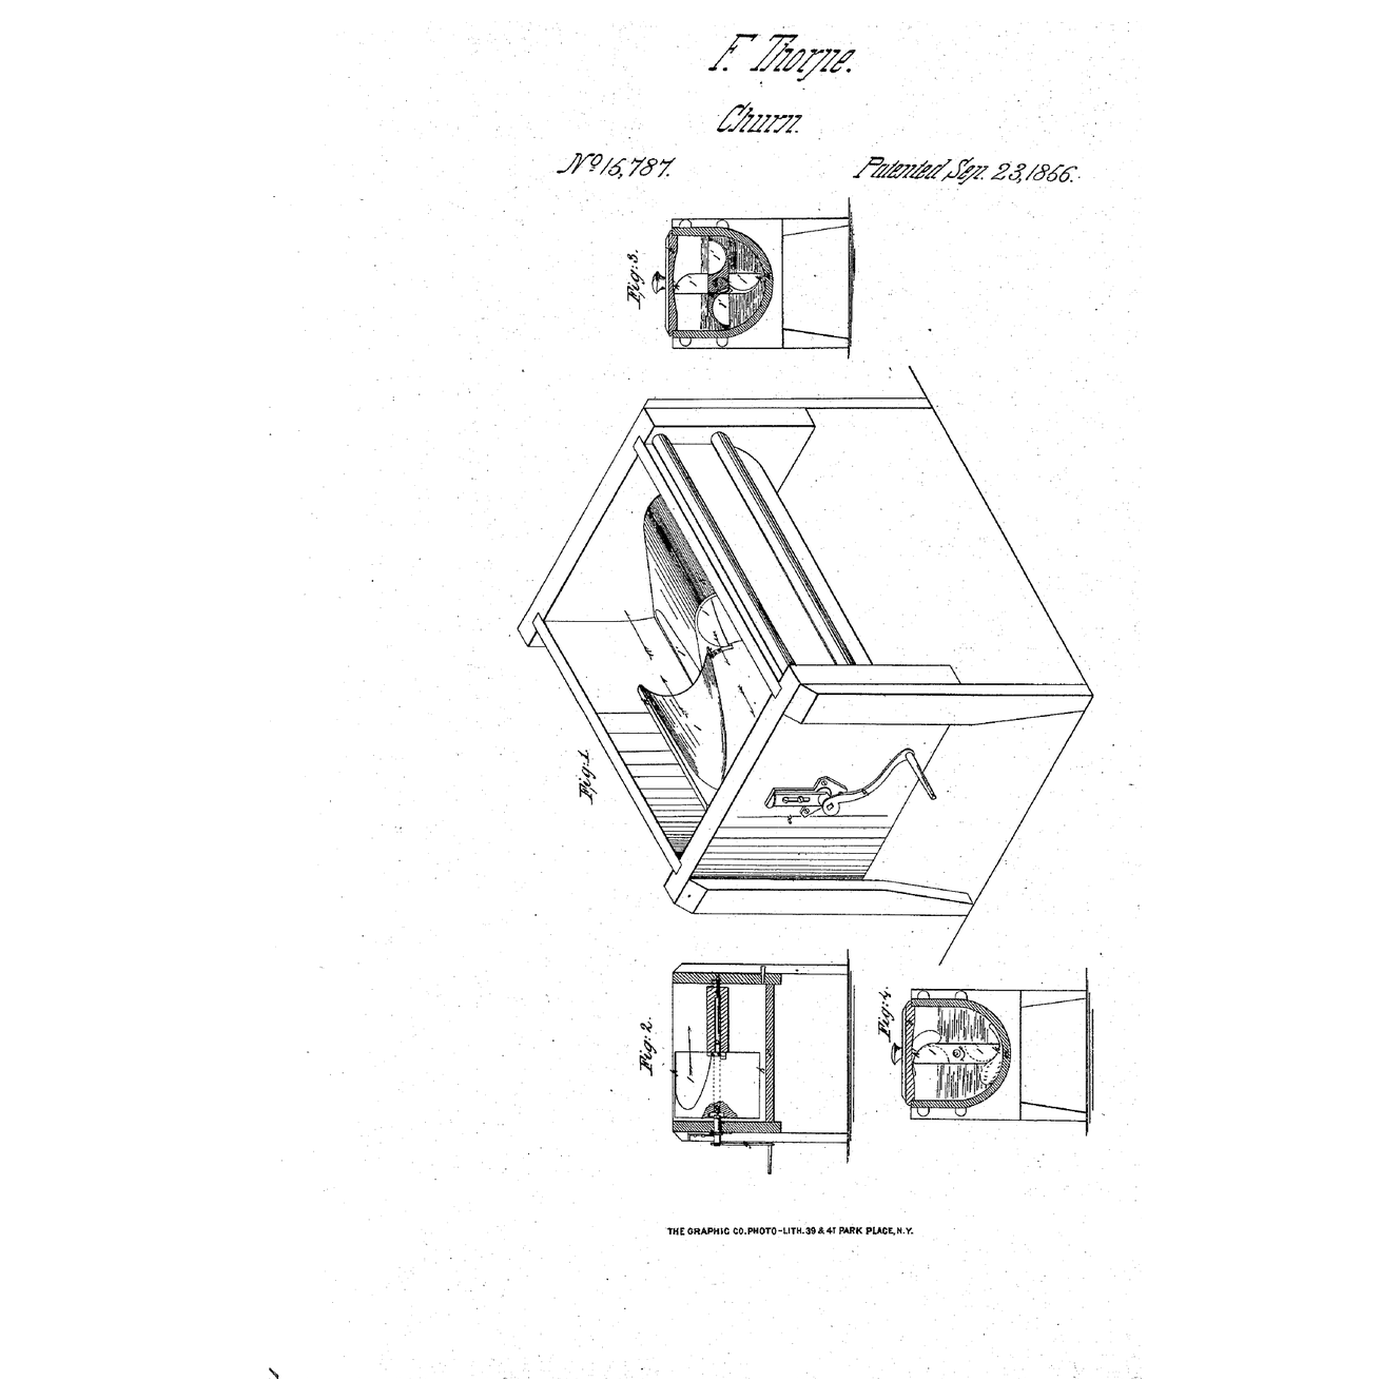
Franklin Thorpe of Shelbyville, Illinois, received US 15,787, dated 23 September 1856, for a dasher of a fast bucket and a loose one on a screw: turned one way they cross and squirt the milk against the tub's ends; turned back, the loose one screws up "tightly against the other" in line, to gather the butter.
This rung prints both buckets and the bushings, builds the churn on a threaded rod and makes butter.
Intermediate
About 3 hours, plus printing
Instructions
1
1
A quarter turn on a screw
A quarter turn on a screw
Loading Jupyter Notebook...
2
2
A dasher that changes when reversed, before it
A dasher that changes when reversed, before it
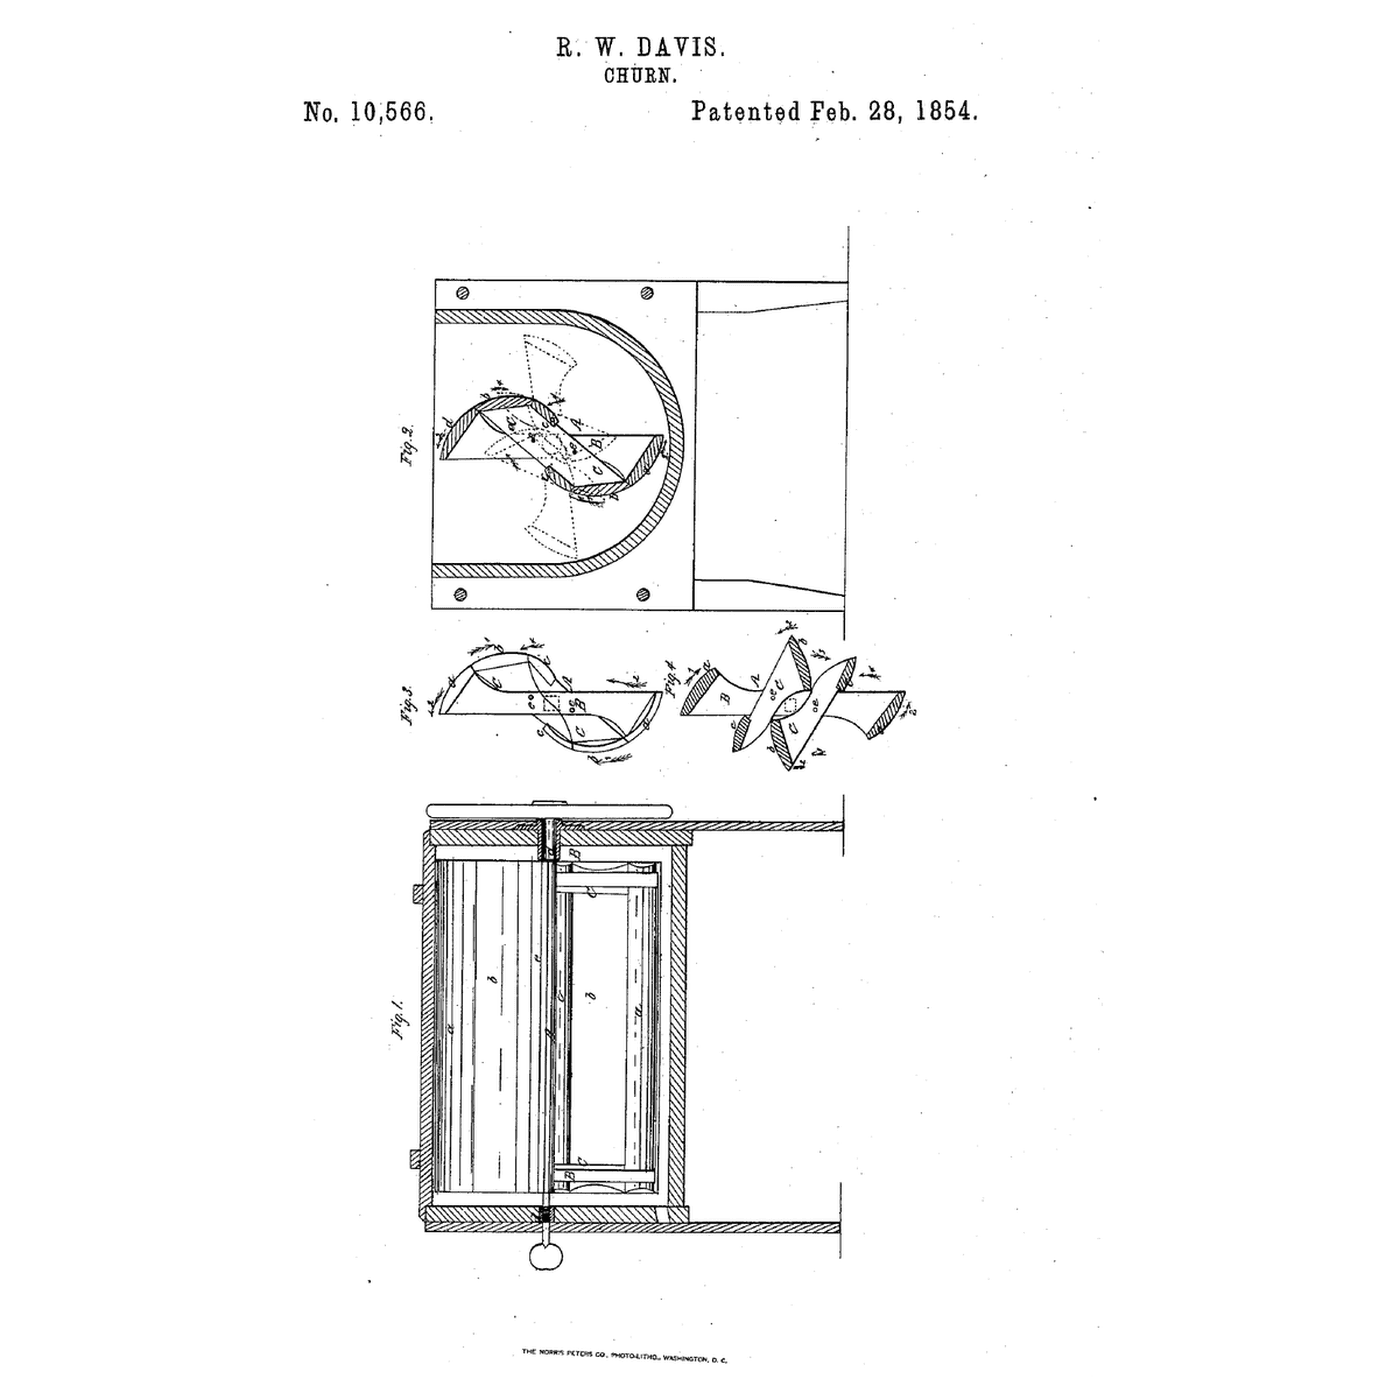
Davis's sections fold on pins; Thorpe's loose bucket on a screw.
3
3
Read US 15,787
Read US 15,787
"The loose bucket working by its nut on the left hand screw on the spindle brings the end of the said bucket tightly against the other as they get into line."
4
4
Print the parts
Print the parts
Print the fast bucket (/uploads/blueprints/fast-and-loose-bucket-churn-fast-bucket.stl), the loose bucket with its nut slot (/uploads/blueprints/fast-and-loose-bucket-churn-loose-bucket.stl) and two bushings (/uploads/blueprints/fast-and-loose-bucket-churn-bushing.stl). Print in PETG at 0.2 mm layers, 30 % infill, 4 walls; wash before first use.
Materials for this step:
 PETG Filament1 piece
Tools needed:
 FDM 3D Printer
5
5
Spindle and buckets
Spindle and buckets
Press an M10 nut into each end trap of the fast bucket and screw it onto an M10 stainless threaded rod near one end, locked. Drop an M10 nut into the loose bucket's slot and screw it on beside the fast one. Fit a short pin in the fast bucket's hole so the loose bucket's lug can turn only a quarter turn.
Materials for this step:
 Threaded Rod1 piece
 Hex Nut3 pieces
 Mild Steel Rod1 piece
 Two-Part Epoxy1 piece
Tools needed:
 Adjustable Spanner
 Hacksaw
6
6
Tub and crank
Tub and crank
Lay a round food-grade container about 180 mm across on its side in a pine cradle and cut a lid opening in its top. Seal a bushing in each end on the axis, pass the rod through, and fit a pine crank arm and handle with nuts.
Materials for this step:
 Food-Grade Storage Container1 piece
 Silicone Sealant1 piece
 Pine Board1 piece
 Hardwood Dowels1 pieceHex Nut2 pieces
Tools needed:
 Cordless Drill
 Drill Bit Set
 Coping SawAdjustable Spanner
7
7
The build in 3D
The build in 3D
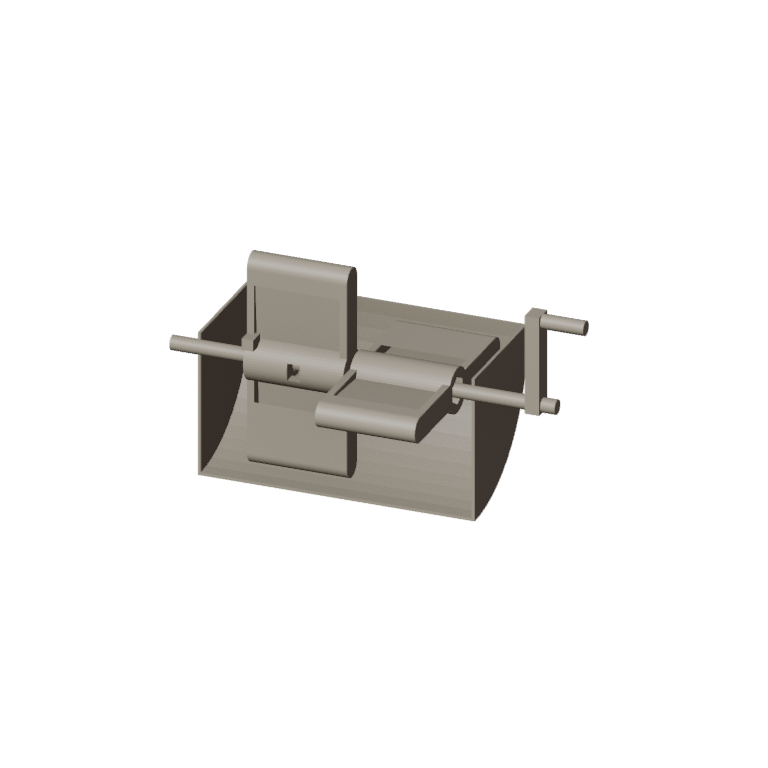
FreeCAD model of this build: the half-round tub cut open, the threaded rod with the fast bucket and the loose bucket turned across it, and the crank.
8
8
Churn one way, gather the other
Churn one way, gather the other
Let the heavy cream stand until it reaches about 15 °C, checked with the thermometer. Pour in 1.5 litres. Turn the crank the way that opens the loose bucket across the fast one; time until the butter comes. Turn it back so the buckets close in line and roll the butter together. Pour off the buttermilk, add cold water, churn a little and pour off again until it runs clear; work in a pinch of salt and weigh the butter.
Materials for this step:
 Heavy Cream1500 ml
 Coarse Sea Salt1 piece
 Water1 piece
Tools needed:
 Leave-In Probe Thermometer
 Stopwatch
 Digital Kitchen Scale
 Stainless Steel Mixing Bowl (Large)
9
9
Troubleshooting
Troubleshooting
Fast-and-loose bucket troubleshooting.
Flow
Loading...
10
10
History and honest limits
History and honest limits
**Franklin Thorpe** of Shelbyville, Shelby County, Illinois, US 15,787, 23 September 1856. He claimed the fast and loose buckets, the loose one slackened and tightened by "the screw upon the spindle; or equivalent devices." His screw was left-handed; a common right-hand M10 rod simply swaps which way of the crank churns and which gathers. A container, a threaded rod and printed parts stand in for his tub and spindle. FDM prints hold food in their layer lines, so wash well and replace when worn.
Materials
12- 1 piecePlaceholder
- 1 piecePlaceholder
- 5 piecesPlaceholder
- 1 piecePlaceholder
- 1 piecePlaceholder
- 1 piecePlaceholder
- 1 piecePlaceholder
- 1 piecePlaceholder
- 1 piecePlaceholder
- 1500 mlPlaceholder
- 1 piecePlaceholder
- 1 piecePlaceholder
Tools Required
10- Placeholder
- Placeholder
- Placeholder
- 1 vendor sell this, none ship to you yetPlaceholder
- Placeholder
- Placeholder
- Placeholder
- Placeholder
- Placeholder
- Placeholder
Design Files
1Related Blueprints
These blueprints share knowledge with this one — techniques, materials, or principles that connect them in the learning graph.
Self-Folding Blade Dasher Churn: Six Blades to Churn, Reverse and They Fold to Two That Gather
by Woody
Woodworking
5
0
0
0
0
0
Stopped Auxiliary Dasher Churn: A Loose Dasher Held Still by a Stop, One Turning Below It
by Millie
FOOD & DRINKS
2
0
0
0
0
0

Churning Butter from Cream — The 5,000-Year-Old Fat Separation
by TheChef
CRAFT
47
0
0
0
0
0
CC0 Public Domain
This blueprint is released under CC0. You are free to copy, modify, distribute, and use this work for any purpose, without asking permission.
Support the Maker by purchasing products through their Blueprint where they earn a Maker Commission set by Vendors, or create a new iteration of this Blueprint and include it as a connection in your own Blueprint to share revenue.