Collaboration
ART
BEAUTY & WELLNESS
CRAFT
CULTURE & HISTORY
ENTERTAINMENT
ENVIRONMENT
FOOD & DRINKS
REVERSE ENGINEERING
SCIENCES
SPORTS
TECHNOLOGY
WEARABLES
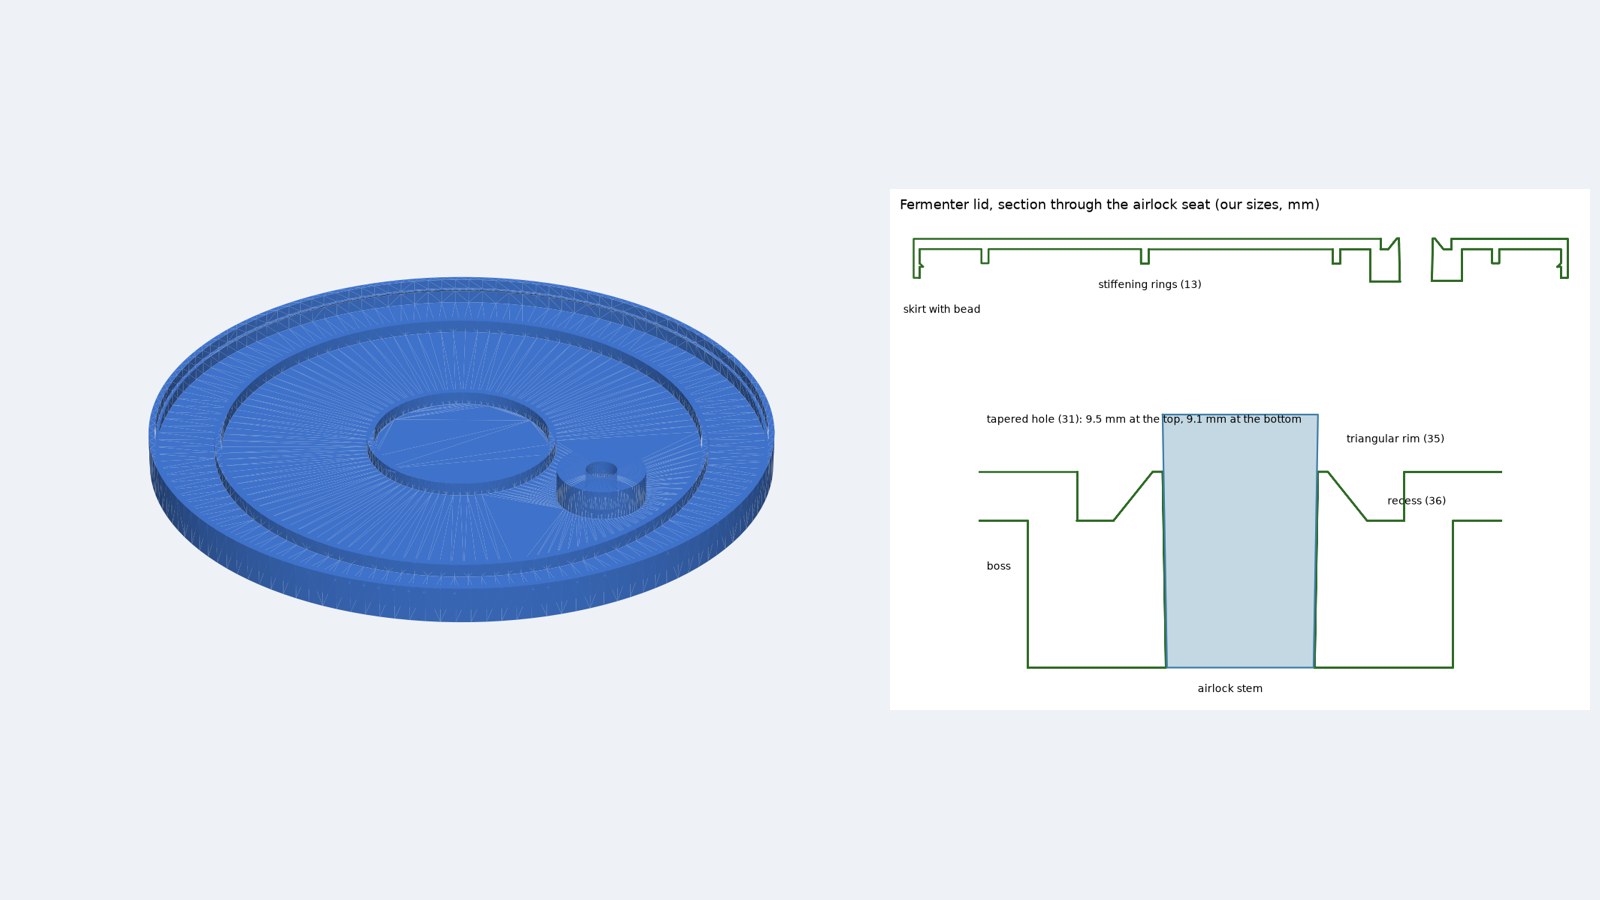


Fermenter Lid with Airlock Seat, 3D Printed in PETG
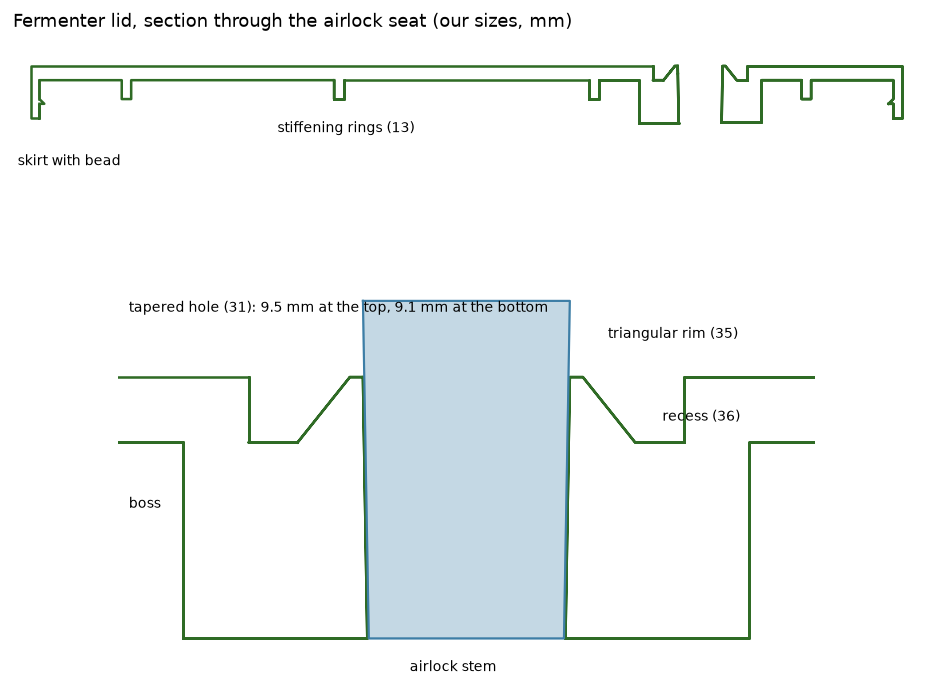
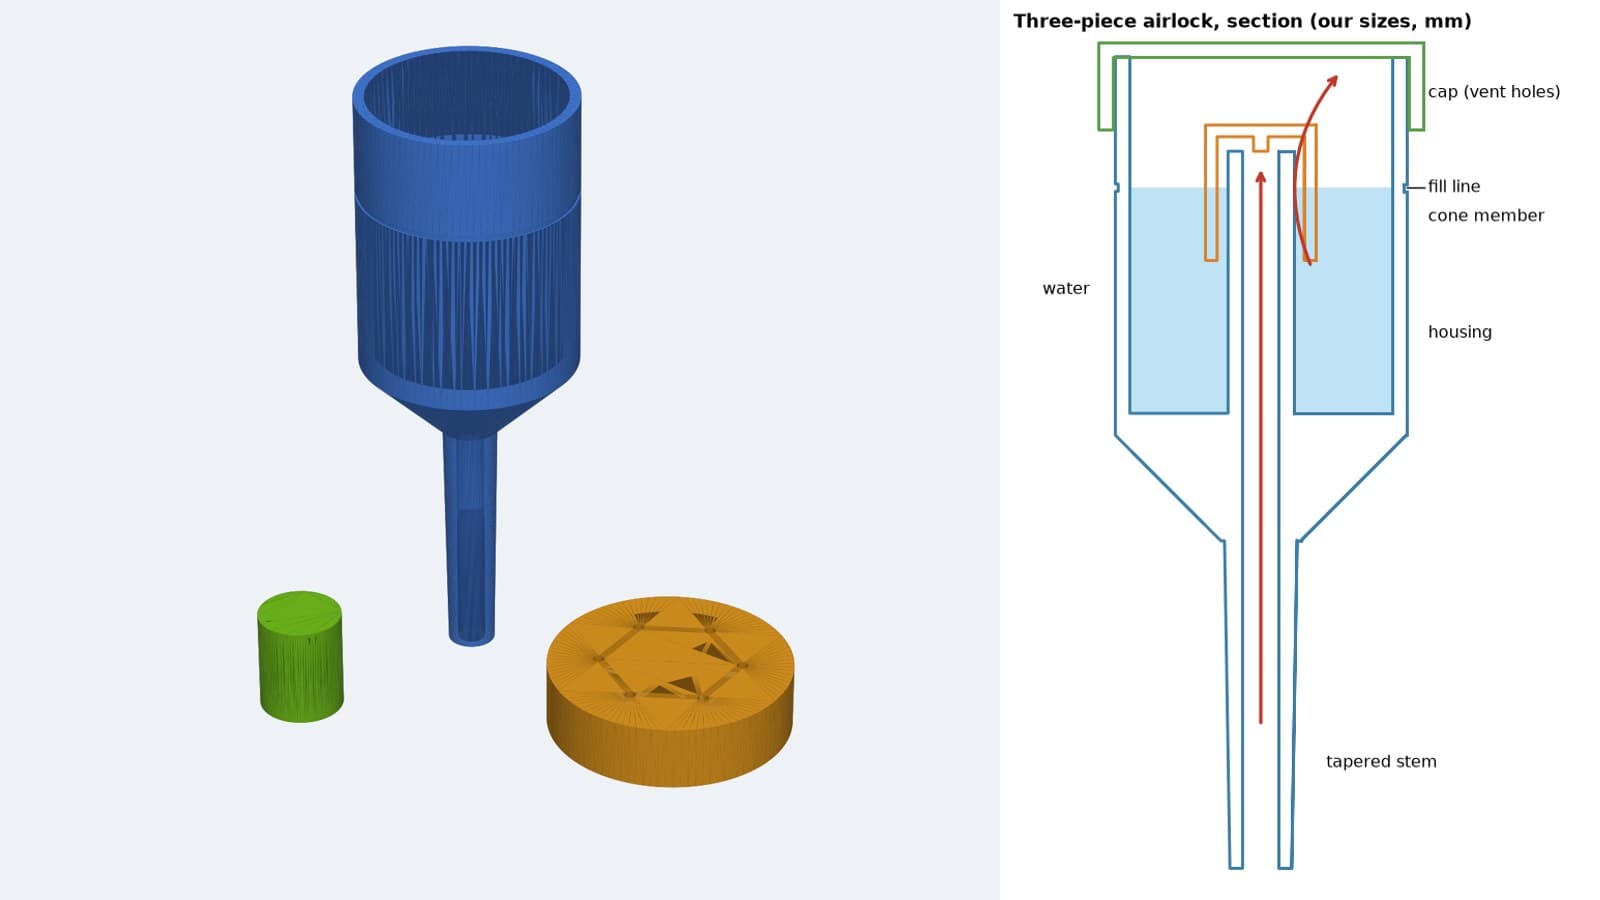
A snap-on lid that turns a small food-grade pail into a fermenter. It follows L. P. Beadle's 1980 US patent 4,218,964: an off-centre tapered hole that matches the airlock stem's taper, a triangular rim set in a groove so it flexes round the stem, stiffening rings, and a snap-fit edge. You measure your pail's rim and make the file for it. All sizes are ours, and we have not printed or tested it yet.
Beginner
About 10 hours, mostly printing
Instructions
1
1
Lid size, stem depth and gas force
Lid size, stem depth and gas force
Loading Jupyter Notebook...
2
2
Read US 4,218,964
Read US 4,218,964
"The stem support structure 30 includes a tapered hole the depth and slope of which are adapted to conform to the taper of stem 26 and to provide a resilient, gripping action ... annular rim portion 35 is defined by depressed circular groove 36 which provides the annular rim 35 with a type of hinge action." He put the hole off centre so the lid would not crack. The picture is our section.
3
3
Measure the pail
Measure the pail
Use a food-grade plastic pail with a rim lip all round. Measure the lip's outside diameter, and from the pail's top edge to the underside of the lip.
Tools needed:
 Digital Caliper 6-Inch
 Fermenting Bucket
4
4
Make the lid for your pail
Make the lid for your pail
Run it in FreeCAD with your two measurements: OUT=. LIP_D= LIP_H= freecadcmd build_all.py
build_all.pypython
Tools needed:
 Desktop Computer
 CAD Software
5
5
Print the lid
Print the lid
Print it top face down on the bed, no supports: the skirt and stiffening rings grow upwards. PETG sold for food contact, a stainless steel nozzle (brass nozzles can contain lead), 0.2 mm layers, at least 4 walls. The file here is for a 180 mm lip.
Materials for this step:
 PETG Filament125 g
Tools needed:
 FDM 3D Printer
 3D Printer Nozzle Set
6
6
Fit the airlock
Fit the airlock
Push the airlock's stem down into the hole by hand until it wedges, about 30 mm for our airlock. Do not force it further.
Tools needed:
 Airlock
7
7
Leak test
Leak test
Fill the airlock to its line with water. Snap the lid on the empty pail. Press the middle of the lid gently: gas must bubble through the airlock, with no hiss at the rim or stem.
Tools needed:
Fermenting BucketAirlock Water
8
8
Sanitise
Sanitise
Wipe or soak the lid in no-rinse sanitiser mixed as its label says. Do not boil it: PETG softens at about 80 °C.
Tools needed:
 SanitiserWater
9
9
Close the fermenter
Close the fermenter
Start the bead under the lip at one side and press the lid down all round until it snaps on.
Tools needed:
Fermenting Bucket10
10
Troubleshooting
Troubleshooting
Lid problems and fixes.
Flow
Loading...
11
11
History and honest limits
History and honest limits
**Leigh P. Beadle**, US 4,218,964, filed 21 May 1979, issued 26 August 1980, assigned to Specialty Products International Ltd. His lids were moulded in flexible plastic, and he noted that drilling a plain hole in the middle of a lid led to cracks and to gas escaping round the stem. He gives no sizes. Ours: every size, PETG, the bead and the fit to a measured pail. One change: his rim rises above the lid's top; ours stands in a recess with its top level with the lid, so the lid prints flat. PETG is stiffer than his plastic, so the grip comes more from the matched taper than from the rim. Checked in CAD; not yet printed or brewed with by us.
Materials
1- 125 gPlaceholder
Tools Required
9- Placeholder
- Placeholder
- Placeholder
- Placeholder
- Placeholder
- Placeholder
- Placeholder
- Placeholder
- Placeholder
Design Files
1Connected Blueprint Materials
This blueprint makes
Related Blueprints
These blueprints share knowledge with this one — techniques, materials, or principles that connect them in the learning graph.

CC0 Public Domain
This blueprint is released under CC0. You are free to copy, modify, distribute, and use this work for any purpose, without asking permission.
Support the Maker by purchasing products through their Blueprint where they earn a Maker Commission set by Vendors, or create a new iteration of this Blueprint and include it as a connection in your own Blueprint to share revenue.