ART
BEAUTY & WELLNESS
CRAFT
CULTURE & HISTORY
ENTERTAINMENT
ENVIRONMENT
FOOD & DRINKS
REVERSE ENGINEERING
SCIENCES
SPORTS
TECHNOLOGY
WEARABLES
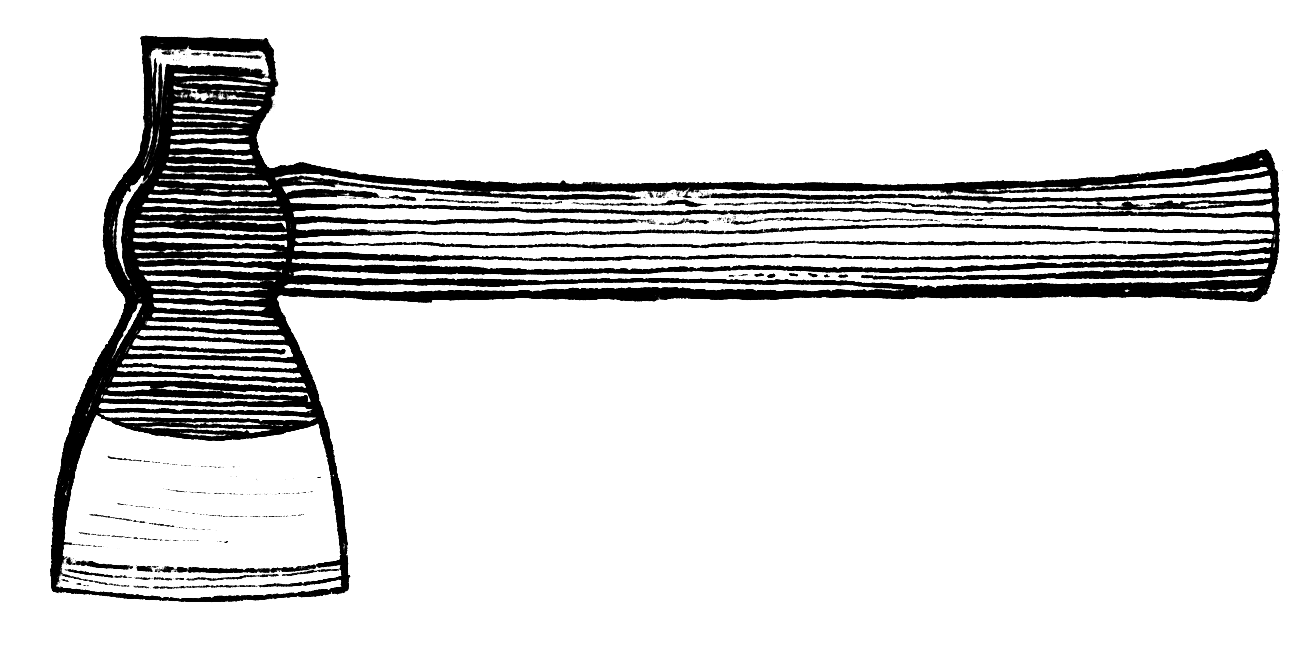


Forged Hunting Axe (Hatchet)
A small one-handed axe forged from a 7/8 × 2-inch bar of good tool steel, best made by two people; a 6¾-inch bar gives two heads. The eye, about 9/16 × 1½ inches, is punched at a yellow heat with an eye punch and opened with drifts, the blade drawn out to a 3-inch edge and the head cut to length. The axe is annealed in lime or ashes, ground and buffed, then hardened from the hardening heat in tepid water and tempered by two hot iron bars laid on either side at the centre: dark purple for the blade, blue for the head.
Advanced
4–6 hours
Instructions
1
1
Mark and punch the eye
Mark and punch the eye
Mark the stock with chisel and centre punch. At a yellow heat, punch the eye with the narrow edge of the punch toward the blade; lift the punch after each blow to check it runs straight and to let it cool; a little fine coal in the hole stops it sticking. Punch nearly through, then finish from the other side.
Materials for this step:
 Flat Tool Steel Bar1 piece
Tools needed:
 Center Punch
 Blacksmith Forge
 Anvil
Anvil Hot Punch
 Sledgehammer
 Blacksmith Tongs
2
2
Drift and draw out
Drift and draw out
Drive in a tool-steel drift, hammer the bulges down to the bar's size and smooth with a flatter; take the drift out before each reheat. Use two drifts, the first 3/8 inch narrower. Draw out the blade, driving the drift back in as the eye stretches so no cold shut forms.
Tools needed:
 Drift
Drift Flatter
 Trip Hammer
3
3
Shape and trim
Shape and trim
Shape the blade with a heavy hammer and flatter and form its edge. Cut the head from the bar, draw it to size, cut it to length, then trim the blade to shape.
Tools needed:
 Forge HammerFlatter
 Hot Chisel
4
4
Anneal and grind
Anneal and grind
Heat to a full red and anneal in lime or ashes. When cold, grind on an emery wheel and finish on a buffing wheel.
Tools needed:
Blacksmith Forge Bench Grinder
5
5
Harden and temper
Harden and temper
Heat very slowly to the hardening heat and cool in tepid water. Draw the temper with two hot iron bars laid on either side at the centre; when the blade is dark purple and the head blue, cool quickly in water.
Tools needed:
Blacksmith Forge Quench BucketBlacksmith Tongs
6
6
Handle
Handle
Shave the handle stock to fit the eye tightly, drive the head on, saw a kerf in the handle's top and drive a glued hardwood wedge into it. Trim flush and oil the handle.
Materials for this step:
 Hardwood Handle Stock1 piece
 Hardwood Wedge1 piece
 Linseed Oil10 ml
Tools needed:
 Spokeshave
 Crosscut Saw
 Bench Vise
Materials
4- 1 piecePlaceholder
- 1 piecePlaceholder
- 1 piecePlaceholder
- 10 mlPlaceholder
Tools Required
16- Placeholder
- Placeholder
- Placeholder
- Placeholder
- Placeholder
- Placeholder
- Placeholder
- Placeholder
- Placeholder
- Placeholder
- Placeholder
- Placeholder
- Placeholder
- Placeholder
- Placeholder
- Placeholder
This blueprint makes

Related Blueprints
These blueprints share knowledge with this one — techniques, materials, or principles that connect them in the learning graph.
CC0 Public Domain
This blueprint is released under CC0. You are free to copy, modify, distribute, and use this work for any purpose, without asking permission.
Support the Maker by purchasing products through their Blueprint where they earn a Maker Commission set by Vendors, or create a new iteration of this Blueprint and include it as a connection in your own Blueprint to share revenue.