
Collaboration
ART
BEAUTY & WELLNESS
CRAFT
CULTURE & HISTORY
ENTERTAINMENT
ENVIRONMENT
FOOD & DRINKS
REVERSE ENGINEERING
SCIENCES
SPORTS
TECHNOLOGY
WEARABLES
Leader Harness Long Crupper: Folded Dock, Lay, Hip Straps, Carrier Straps and Tugs (Hasluck, Harness Making, 1904)
Tex

Created by

Tex

13. November 2026FO
2
0
0
0
0

Leader Harness Long Crupper: Folded Dock, Lay, Hip Straps, Carrier Straps and Tugs (Hasluck, Harness Making, 1904)

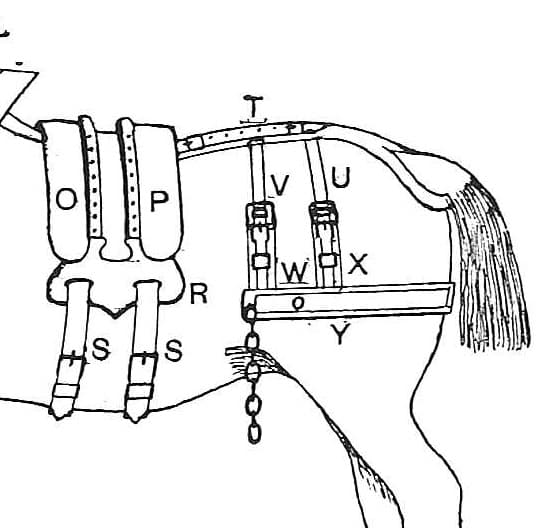
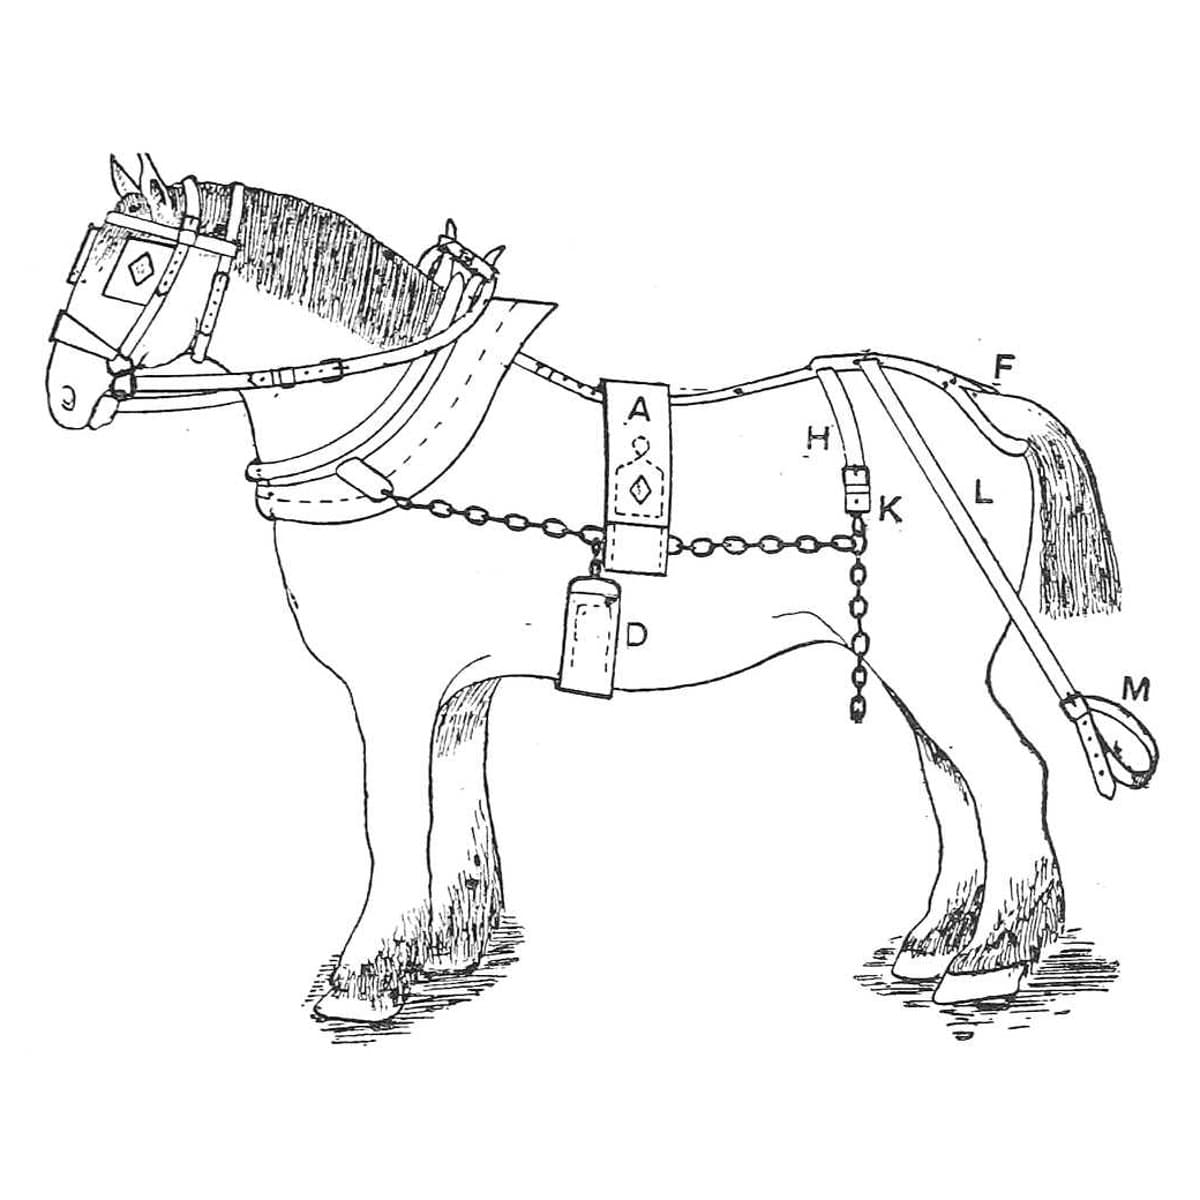
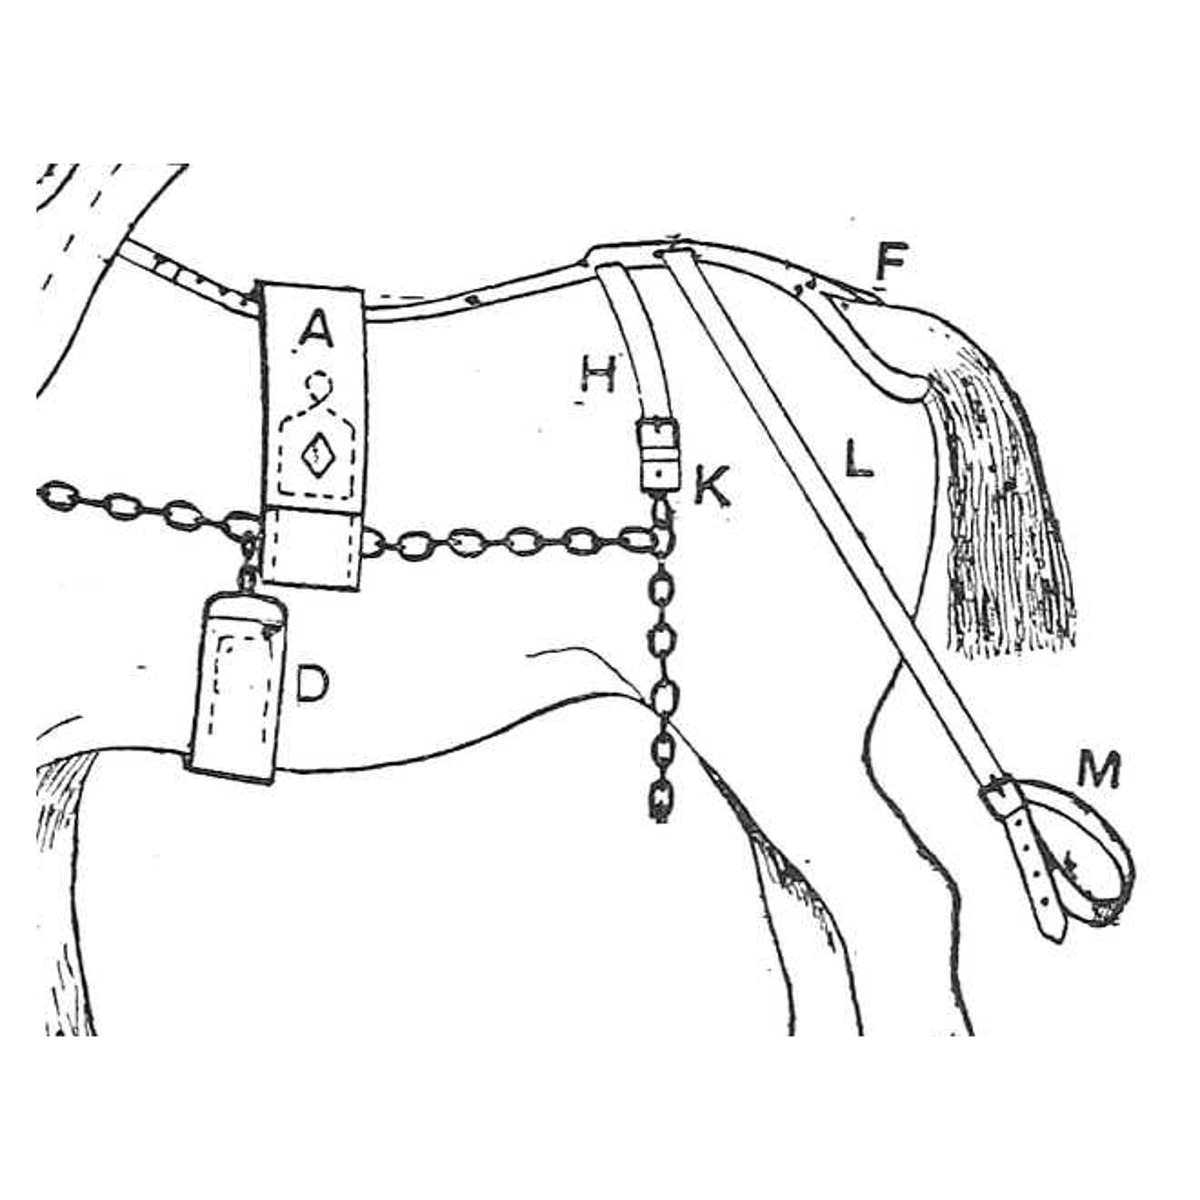
The leader horse's long crupper (F in Fig. 102) runs from the collar straps along the back to the tail, and carries the hip straps (H) that hold up the chain traces and the carrier straps (L) for the stretcher. This is the long crupper from Paul N. Hasluck's Harness Making (1904), with its folded dock, lay, 3 in dee, hip-strap tugs (K) and stretcher strap (M). Every size is his.
Advanced
About 1-2 days

Instructions

1

His sizes in centimetres

Loading Jupyter Notebook...
2

Read Harness Making, ch. VIII

"Cut the crupper from good leather 3 ft. 8 in. long and 5 in. wide, and make a split 9 in. long at the light end and another, 7 in. long, at the tail end."
3

Cut the body

Cut the crupper 3 ft 8 in by 5 in. Slit the light end 9 in and the tail end 7 in, leaving the points of the slits the full width in front and only cutting a little out of the corners. Narrow the tail-end points gradually to about 1-1/8 in and cut a little from the sides of each slit. Cut a lining for a foot or so of the tail end.

Materials for this step:

Harness LeatherHarness Leather1 piece

Tools needed:

Leather KnifeLeather Knife
Tape MeasureTape Measure
4

Fold the dock

Cut soft leather 16 in by 3-1/2 in for the dock and shave the ends thin. Damp it well and turn both edges down so they overlap deeply along the centre. Bring both ends together, sides meeting flat but not flat sides together; holding the piece flat in the centre, turn the lower edge inwards and upwards, keeping the points together with the other hand. Nail each point to a board and keep it in shape until dry, when the dock will be firm.

Materials for this step:

Basil LeatherBasil Leather1 piece
NailsNails1 piece

Tools needed:

Leather KnifeLeather Knife

SpongeSponge
HammerHammer
Pine BoardPine Board
5

Finish the body and put in the dock

Edge, crease and black the body, making two rows all round; rub the edges well and hot-crease the lines. At the tail end prick the second line as far as the double runs. When the dock is dry, put it between the lining and body at each end of the slit, tack it down round the lining and stitch. A few egg-shaped stitches inside the outer stitches, through the body and dock points, keep the dock in place. Trim the edges and black, rub and tallow them, and the inside edges of the slits too.

Materials for this step:

Leather DyeLeather Dye1 piece
TallowTallow1 piece
Lasting TacksLasting Tacks1 piece
Leather ThreadLeather Thread1 piece
BeeswaxBeeswax1 piece

Tools needed:

Edge BevellerEdge Beveller
Creasing ToolCreasing Tool
Propane TorchPropane Torch
Edge SlickerEdge Slicker
Pricking IronPricking Iron
HammerHammer
AwlAwl
Two Harness NeedlesTwo Harness Needles
Stitching PonyStitching Pony
6

Fit the front buckles

Cut two chapes to hold the buckles in front that fasten the crupper to the collar straps; bend them down about 4 in, shave one end and point the other, and cut a hole for the buckle. Tack two loops about 1-1/2 in wide in place, keeping the outside of each buckle exactly level with the end of its slit and the chapes right in the centre. Stitch them down, put a cross stitch on each side of the buckle, and shape and crease the loops.

Materials for this step:

Harness LeatherHarness Leather1 piece
Iron Buckle with TongueIron Buckle with Tongue2 pieces
Leather ThreadLeather Thread1 piece
BeeswaxBeeswax1 piece

Tools needed:

Leather KnifeLeather Knife
Loop StickLoop Stick
Creasing ToolCreasing Tool
Propane TorchPropane Torch
AwlAwl
Two Harness NeedlesTwo Harness Needles
Stitching PonyStitching Pony
7

Make the lay, hip straps and carrier straps

Cut the lay 1 ft 3 in by 3 in, turn it down for about 1 ft at the good end, shave the end of the short turn thin and round the other end; edge, crease and black it. Cut two hip straps 2 ft by 1-1/2 in, turn them down 3 in at the heavy end, shave the turn-down, point the buckle end, and crease and black them. Attach them to a 3 in japanned or tinned dee, one on each side, with four rows of stitching in the double of each; rub and finish the edge. Make two carrier straps the same way, each 2 ft 10 in by 1-1/4 in, and stitch them in the middle round part of the dee between the hip straps.

Materials for this step:

Harness LeatherHarness Leather1 piece
Harness DeeHarness Dee1 piece
Leather DyeLeather Dye1 piece
Leather ThreadLeather Thread1 piece
BeeswaxBeeswax1 piece

Tools needed:

Leather KnifeLeather Knife
Edge BevellerEdge Beveller
Creasing ToolCreasing Tool
Propane TorchPropane Torch
Edge SlickerEdge Slicker
AwlAwl
Two Harness NeedlesTwo Harness Needles
Stitching PonyStitching Pony
Tape MeasureTape Measure
8

Stitch the dee and lay to the body

Put the straight part of the dee in the bend of the lay and place it on the centre of the crupper body, the same distance from each side, with the extreme point of the dee within 8 in of the points of the tail slits. Tack down and stitch two rows 1/4 in apart all round, eight per inch, with three-cord thread; then stitch the lay coarse, or spot it across just to the dee. Some makers put a pad under the crupper, as on the cart-saddle crupper, from the end of the tail slit to 1 in beyond the point of the lay.

Materials for this step:

Lasting TacksLasting Tacks1 piece
Leather ThreadLeather Thread1 piece
BeeswaxBeeswax1 piece

Tools needed:

HammerHammer
Pricking IronPricking Iron
AwlAwl
Two Harness NeedlesTwo Harness Needles
Stitching PonyStitching Pony
9

Make the hip-strap tugs and stretcher strap

With a pair of 1-1/2 in hip-strap chains, cut the tugs 10 in by 1-1/2 in; bend them so the points meet in the centre, cut a hole for the buckle in one end, stitch the points together and put in two narrow loops (one hides the joint) or one broad loop. Stitch a safe underneath. For the stretcher carrier tug, cut a strap 1-1/4 in by 1 ft 2 in, bend a chape in it and cut a hole for the buckle; stitch the buckle on with a loop, and make a running loop and a hole 1 in from the point of the strap.

Materials for this step:

Iron ChainIron Chain2 pieces
Harness LeatherHarness Leather1 piece
Iron Buckle with TongueIron Buckle with Tongue3 pieces
Leather ThreadLeather Thread1 piece
BeeswaxBeeswax1 piece

Tools needed:

Leather KnifeLeather Knife
Loop StickLoop Stick
Leather Hole PunchLeather Hole Punch
AwlAwl
Two Harness NeedlesTwo Harness Needles
Stitching PonyStitching Pony
10

Put the gear together

Fix a loop on each end of the stretcher and nail its ends, leaving room for the strap to pass. Put the runner loop on the strap, run the strap down through the stretcher loop and back through the runner to the buckle; secure the carrier straps to the same buckle, their points down in the loop, and keep the runner down by the stretcher. Buckle the hip straps into the tug buckles, hook the chain traces on, and buckle the collar straps into the front buckles. The dock under the tail is optional: the hip straps fastened in the dee keep the crupper in place.

Materials for this step:

Harness LeatherHarness Leather1 piece
NailsNails1 piece

Tools needed:

HammerHammer
Leather KnifeLeather Knife
11

Troubleshooting

Long crupper troubleshooting.

Flow

Loading...
12

History and honest limits

From **Harness Making**, edited by Paul N. Hasluck, Cassell, 1904 (Project Gutenberg 70169), chapter VIII, "Fore Gear or Leader Harness", pp. 101-104, Figs. 102-104; every fraction was checked on the archive.org scan (harnessmaking00hasl). The stretcher (the bar that keeps the traces apart) is not made here. Basil for the "soft leather" dock, the buckle count in the list, the tools and metric figures are ours.

Materials

11

Tools Required

15

This blueprint makes

CC0 Public Domain

This blueprint is released under CC0. You are free to copy, modify, distribute, and use this work for any purpose, without asking permission.

Support the Maker by purchasing products through their Blueprint where they earn a Maker Commission set by Vendors, or create a new iteration of this Blueprint and include it as a connection in your own Blueprint to share revenue.

Discussion

(0)

Log in to join the discussion

Loading comments...