Making Venetian Filigree Glass (Latticino) — Twisting White Canes into Lace Patterns
Filigree glass — known in Italian as vetro a filigrana — is a family of Venetian decorative glass techniques developed on Murano in the early 16th century. The simplest form, vetro a fili ('thread glass'), embeds parallel white opaque glass threads in a clear glass matrix. More complex forms twist these threads into spirals (vetro a retortoli) or cross two layers of opposing spirals to create a fine net pattern with trapped air bubbles at each intersection (vetro a reticello). The generic term latticino (from latte, milk) refers to the milky white glass threads that define the technique.
The process requires making opaque white glass canes (using tin oxide as the opacifier), embedding them in a gather of clear cristallo glass, and then manipulating the composite mass by blowing and twisting to create the decorative patterns. The white threads act as visible markers of the glassblower's skill — every twist, stretch, and rotation is permanently recorded in the pattern. Perfectly uniform spirals require extraordinary control of temperature, timing, and rotation speed.
Filigree glass was one of Venice's most closely guarded secrets and most imitated products. The technique spread to Spain, the Netherlands, and eventually all of Europe, but Murano filigree remained the benchmark. The air-trap reticello pattern — where two opposing spiral layers create a grid of tiny diamond-shaped air bubbles — is considered one of the most technically demanding feats in glassblowing.
Instructions
Prepare opaque white glass rods
Prepare opaque white glass rods
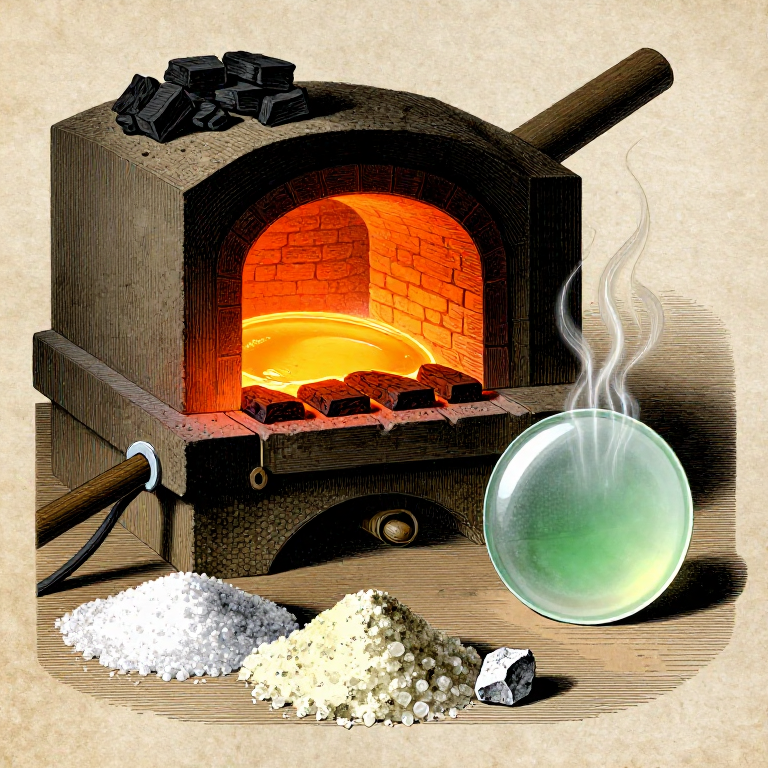
The filigree threads are made from opaque white glass — soda-lime glass with approximately 5–8% tin oxide (stannic oxide) added as an opacifier. Tin oxide creates a dense suspension of tiny white crystals throughout the glass, making it completely opaque and milky white. Venetian glassmakers called this lattimo glass. You need 6–12 white glass rods, each about 3–4 mm in diameter and 25–30 cm long. These can be drawn from a gather of lattimo glass using the same cane-drawing technique as millefiori work.
Materials for this step:
 Glass Rod (soda-lime, coloured)12 pieces
Arrange white canes on a flat steel plate
Arrange white canes on a flat steel plate
Lay the white glass rods parallel to each other on a flat steel plate (marver), spaced about 5 mm apart. The rods should all be the same length and perfectly straight. The spacing determines the thread density in the finished piece — closer spacing produces finer filigree but is harder to work. For a first attempt, 8 rods spaced evenly across a 10 cm width is a good starting density. Pre-heat the steel plate to about 150 °C to reduce thermal shock when hot glass contacts it.
Gather clear cristallo glass on the blowpipe
Gather clear cristallo glass on the blowpipe
Gather a large ball of clear cristallo glass on a pre-heated iron blowpipe — enough to eventually cover all the white rods. The gather should be roughly cylindrical and about 8 cm in diameter. The clear glass must be hot enough to be sticky but not so hot that it flows uncontrollably — approximately 1050–1100 °C at the surface. The clarity of the cristallo is important: any green tint in the clear glass dulls the contrast with the white threads.
Materials for this step:
 Glass Frit500 g
Tools needed:
 Glassblowing Blowpipe
Roll the hot gather over the white canes
Roll the hot gather over the white canes
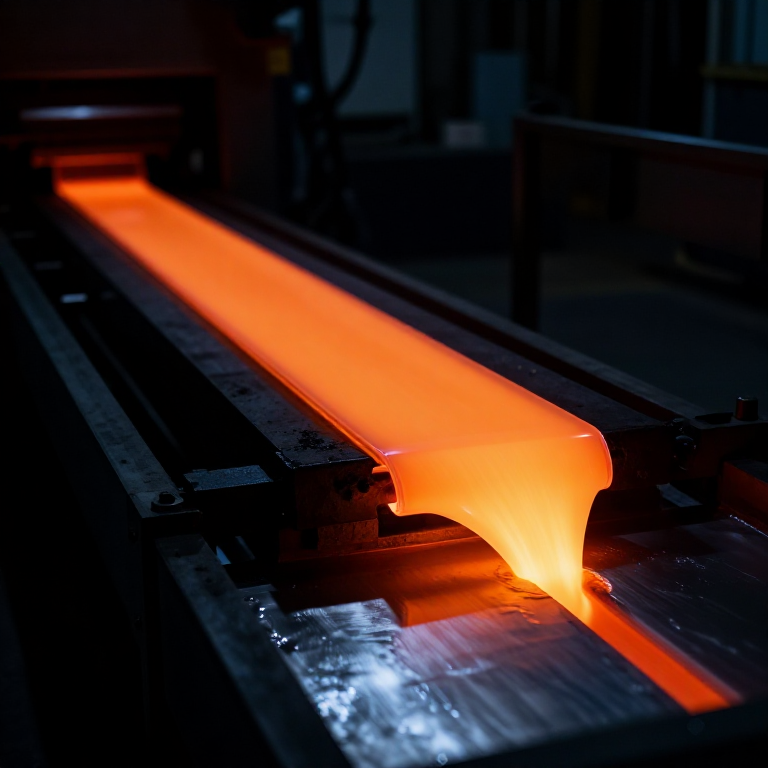
Roll the hot, sticky gather of clear glass over the arranged white rods on the marver. The heat of the gather softens the white rods enough for them to stick and sink into the surface of the clear glass. Roll in one smooth motion, picking up all the rods at once. The white rods should be evenly distributed around the circumference of the gather — no bunching or gaps. This is the critical moment: uneven pickup produces uneven filigree patterns in the finished piece.
Heat the composite gather to fuse the canes
Heat the composite gather to fuse the canes
Return the gather (now covered in white rods) to the glory hole furnace and heat until the white rods are fully embedded in the clear glass. Rotate slowly and continuously. The heat should be enough to smooth the surface — the ridges where the rods sit should flatten and the white threads become part of a single, smooth glass mass. At this stage the piece shows parallel white stripes running lengthwise in clear glass — vetro a fili, the simplest filigree pattern.
Materials for this step:
 Charcoal5 kg
Tools needed:
 Kiln
KilnTwist the gather to create spiral patterns
Twist the gather to create spiral patterns
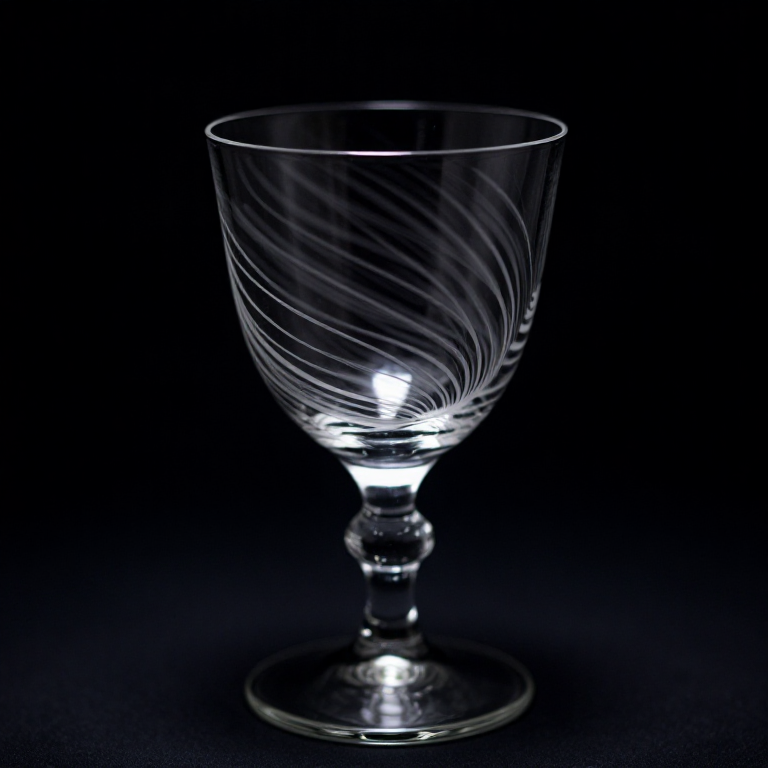
To create vetro a retortoli (twisted thread pattern), grip the far end of the gather with a pontil rod and twist the blowpipe and pontil in opposite directions while the glass is still soft. The parallel white stripes wrap into spirals — the more turns, the tighter the spiral. The twist must be applied evenly along the full length; twisting only at one end produces an uneven pattern that tapers from tight spirals to straight lines. Work quickly — you have about 20–30 seconds before the glass stiffens too much to twist smoothly.
Blow a small bubble to check the pattern
Blow a small bubble to check the pattern
Blow a gentle puff into the blowpipe to inflate a small test bubble. The expansion stretches the spiral pattern uniformly around the circumference. Look through the glass to verify the white spirals are evenly spaced and the twist rate is consistent. If the pattern is satisfactory, reheat and continue expanding. If the pattern is uneven, the piece can sometimes be reheated and re-twisted, but significant corrections are usually impossible — the glass remembers its thermal history.
Expand and shape the vessel
Expand and shape the vessel
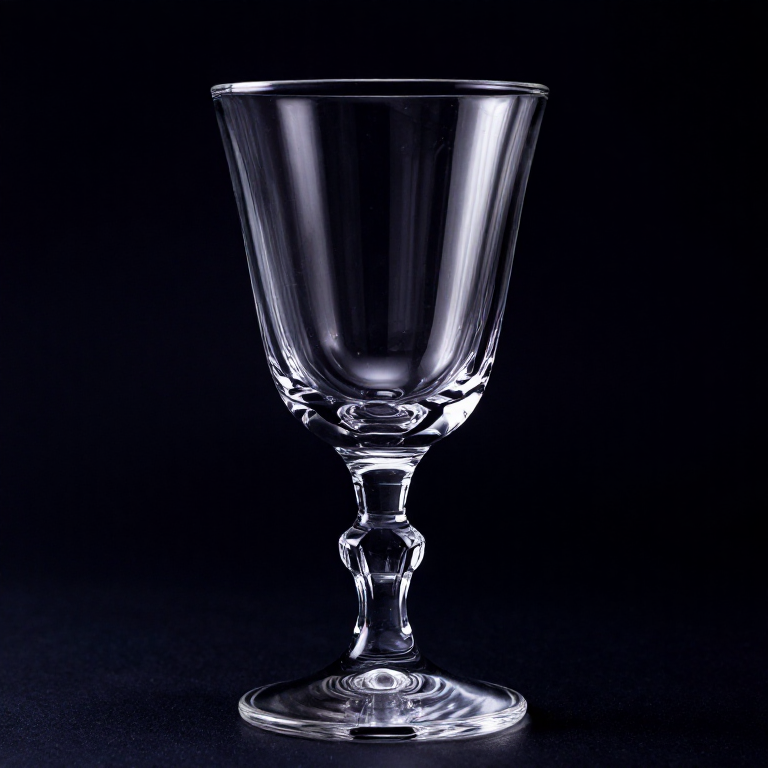
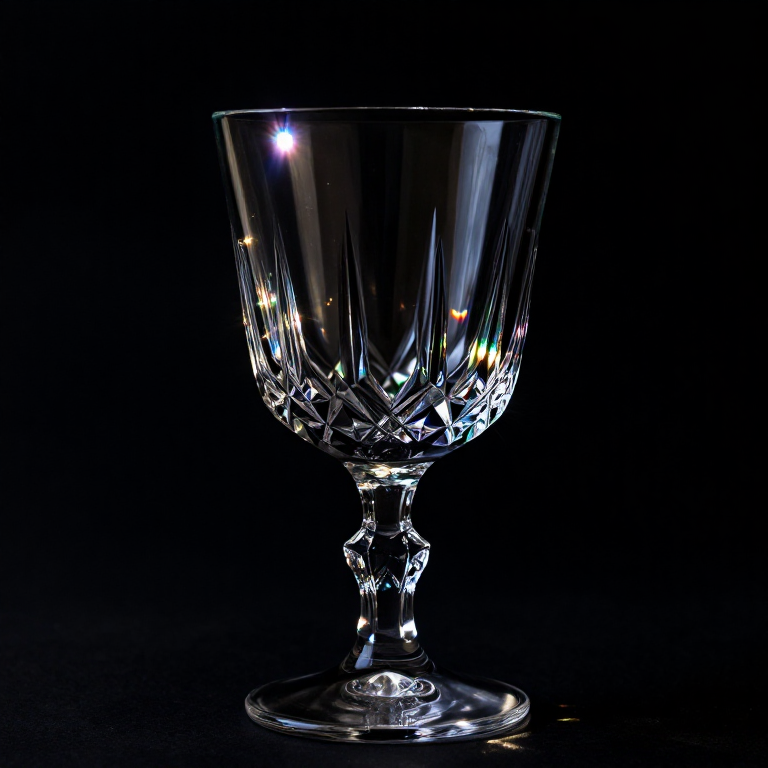
Reheat in the glory hole and blow to full size. Shape with jacks, wooden blocks, and tweezers as with any blown glass vessel. The filigree pattern stretches and thins with the glass — each white thread becomes a fine line only a fraction of a millimetre wide in the finished piece. For a goblet, open the top by transferring to a pontil, cracking off the blowpipe, and tooling the rim. Classic Venetian filigree forms include goblets, tumblers, and covered jars — shapes that display the spiral patterns on large, curved surfaces.
Tools needed:
 Crucible Tongs (long-handled)
Add a stem and foot for a goblet (optional)
Add a stem and foot for a goblet (optional)
For a stemmed goblet, gather a small amount of clear glass on a separate pontil rod and draw it into a solid stem. Attach the stem to the base of the cup while both are hot. Then flatten a disc of glass to form the foot. Venetian filigree goblets often have clear stems and feet to contrast with the patterned cup — the white thread decoration belongs to the drinking bowl, not the structural elements. Alternatively, form a simple tumbler with no stem.
Transfer to the annealing lehr
Transfer to the annealing lehr
Place the finished filigree vessel in the annealing oven at approximately 550 °C. Filigree glass has slightly higher internal stress than plain glass because the white lattimo threads have a slightly different coefficient of expansion from the clear cristallo matrix. This makes thorough annealing essential — cool over 10–12 hours to room temperature with the oven door closed. Venetian glassmakers learned through bitter experience that rushed annealing cracks filigree pieces along the thread boundaries.
Inspect the finished filigree for pattern quality
Inspect the finished filigree for pattern quality
Examine the cooled piece in strong transmitted light. The white threads should be crisp, thin, and evenly spaced in a uniform spiral pattern. The clear glass between threads should be perfectly transparent with no haze or devitrification. Common defects: irregular spacing (uneven pickup), varying twist rate (uneven rotation during twisting), blurred threads (overheating), and cracks along thread boundaries (insufficient annealing). A perfect vetro a retortoli goblet shows white spirals of mechanical precision embedded in water-clear glass — the visual record of a few minutes of intense, precise work frozen permanently in glass.
Materials
3- 12 piecesPlaceholder
- 500 gPlaceholder
Connected Blueprint Materials
Related Blueprints
These blueprints share knowledge with this one — techniques, materials, or principles that connect them in the learning graph.
Related blueprints
Other builds that share materials, tools, or techniques with this one.

CC0 Public Domain
This blueprint is released under CC0. You are free to copy, modify, distribute, and use this work for any purpose, without asking permission.
Support the Maker by purchasing products through their Blueprint where they earn a Maker Commission set by Vendors, or create a new iteration of this Blueprint and include it as a connection in your own Blueprint to share revenue.