Collaboration
ART
BEAUTY & WELLNESS
CRAFT
CULTURE & HISTORY
ENTERTAINMENT
ENVIRONMENT
FOOD & DRINKS
REVERSE ENGINEERING
SCIENCES
SPORTS
TECHNOLOGY
WEARABLES
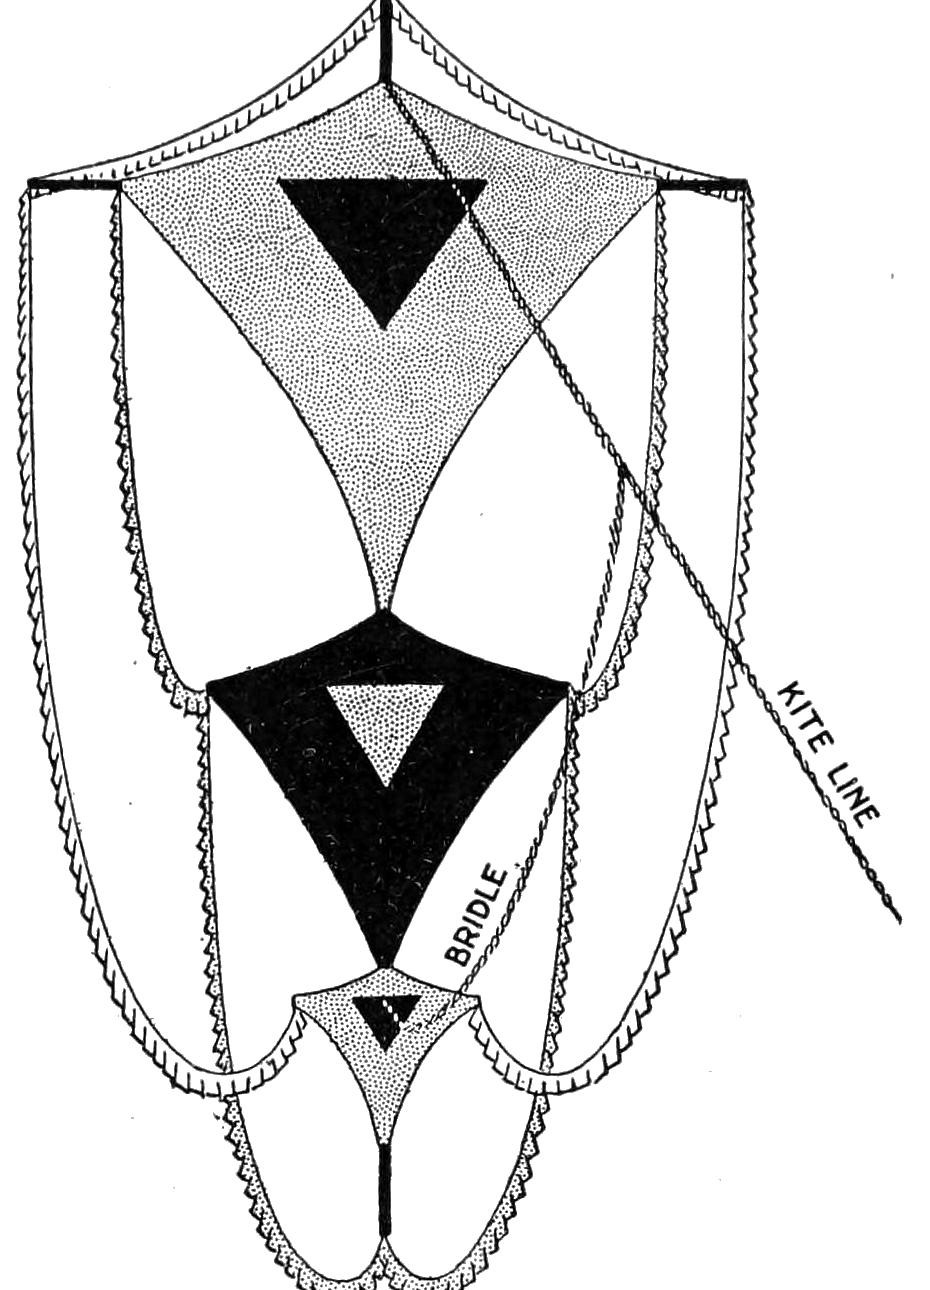


Festooned Kite: Three Tailless Kites on One 7 ft Spruce Spine With Tissue-Paper Fringes (Boy Mechanic, 1919)
C. M. Miller's compound kite from The Boy Mechanic, Book 3 (1919): three tailless kites, 3 ft, 2 ft and 1 ft wide, strung on one 7 ft spruce spine, covered in tissue paper and hung with fringed tissue festoons from the ends of the sticks. An 87 in bridle sets it to the wind.
Intermediate
About 1 day
Instructions
1
1
Spine stations and string lengths
Spine stations and string lengths
Loading Jupyter Notebook...
2
2
Read The Boy Mechanic, Book 3
Read The Boy Mechanic, Book 3
"More than one kite on the same framework is known as a compound kite. The one illustrated consists of three tailless kites on one long stick, called the spine."
3
3
Cut the sticks
Cut the sticks
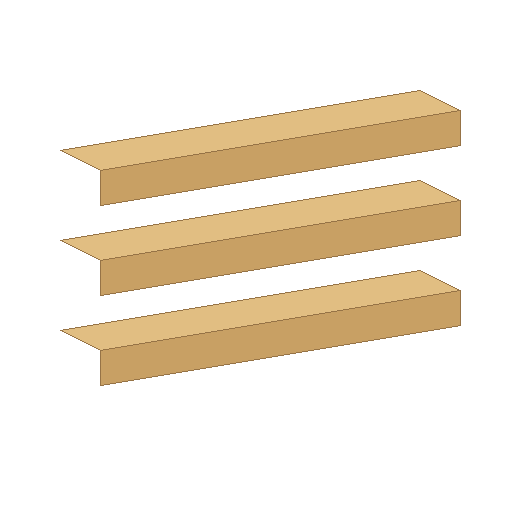
Cut the spine of straight-grained spruce (or pine or bass) without a twist, 7 ft long by 1/4 by 1/2 in; if the wood breaks easily make it 3/4 in wide, or 3/8 in thick. Cut the bows 4 ft by 1/4 by 1/2 in, 2 ft by 1/4 by 3/8 in, and 1 ft by 1/4 by 1/4 in. A twisted spine keeps the three kites out of one plane and makes the kite unsteady.
Materials for this step:
 Softwood Batten4 pieces
Tools needed:
 Hand Saw
 Hand Plane
 Tape Measure
 Pencil
4
4
Lash on the bows
Lash on the bows
Lash the upper bow 13 in from the top of the spine, its ends 6 in past the kite for the festoons; then the centre bow 5 in below D and the lower bow as in the drawing (6, 7, 29, 5, 19, 2, 10 and 6 in down the spine). Lash, do not nail: wind diagonally both left and right round the two sticks, then wind between them round the other windings to draw everything tight.
Materials for this step:
 Kite String1 piece
Tools needed:
Tape MeasurePencil Scissors
5
5
String the outlines
String the outlines
Drill small holes (or notch with a knife or saw) in the spine 6 in from the top at A, 6 in from each end of the upper bow at B and C, and 29 in below the upper bow at D. Tie the outline at A and pass it through C, D and B back to A; draw it tight without springing spine or bow. Check that AC equals AB and CD equals BD, shift the string until they do, and wind each point (E) so it cannot slip. String the centre and lower kites the same way.
Materials for this step:
Kite String1 pieceTools needed:
 Hand Drill
 Steel Pocket KnifeTape Measure
6
6
Cover and fringe
Cover and fringe
Cut the tissue about 1 in larger all round than each kite, turn over about half the allowance and paste it, leaving the cover loose. French tissue comes in fine colours and is stronger than common tissue; Chinese rice paper is strongest but only natural colour. For the festoons cut tissue strips 2-1/2 in wide, paste 1/2 in of one long edge over a string, and slit the loose edge every 1 in. Hang the festoons from the stick ends in easy curves, not tight, keeping both sides balanced.
Materials for this step:
 Tissue Paper5 sheets
 Wheat Paste1 pieceKite String1 piece
Tools needed:
Scissors Glue Brush
 Ruler
7
7
Bow the kites and bridle
Bow the kites and bridle
Tie a string from end to end of the upper and centre bows on the back and spring in short brace sticks to bend them, as usual for tailless kites. Tie the 87 in bridle at A and to the spine at F, and attach the kite line 30 in from A, leaving 57 in to F.
Materials for this step:
Kite String1 pieceSoftwood Batten1 pieceTools needed:
Steel Pocket KnifeTape Measure8
8
Flying and troubleshooting
Flying and troubleshooting
Festooned kite flying.
Flow
Loading...
9
9
History and honest limits
History and honest limits
From "How to Make Combined Kites, Part II: A Festooned Kite" by C. M. Miller, in **The Boy Mechanic, Book 3**, Popular Mechanics, 1919 (Project Gutenberg 71856; checked on the archive.org scan boymechanic0003unse, pp. 155-156). He does not name the string, the paste or the kite line. The tools and metric figures are ours.
Materials
4- 4 piecesPlaceholder
- 4 piecesPlaceholder
- 5 sheetsPlaceholder
- 1 piecePlaceholder
Tools Required
9- Placeholder
- Placeholder
- 1 vendor sell this, none ship to you yetPlaceholder
- 1 vendor sell this, none ship to you yetPlaceholder
- Placeholder
- Placeholder
- Placeholder
- Placeholder
- Placeholder
This blueprint makes
Related Blueprints
These blueprints share knowledge with this one — techniques, materials, or principles that connect them in the learning graph.

CC0 Public Domain
This blueprint is released under CC0. You are free to copy, modify, distribute, and use this work for any purpose, without asking permission.
Support the Maker by purchasing products through their Blueprint where they earn a Maker Commission set by Vendors, or create a new iteration of this Blueprint and include it as a connection in your own Blueprint to share revenue.