Collaboration
ART
BEAUTY & WELLNESS
CRAFT
CULTURE & HISTORY
ENTERTAINMENT
ENVIRONMENT
FOOD & DRINKS
REVERSE ENGINEERING
SCIENCES
SPORTS
TECHNOLOGY
WEARABLES
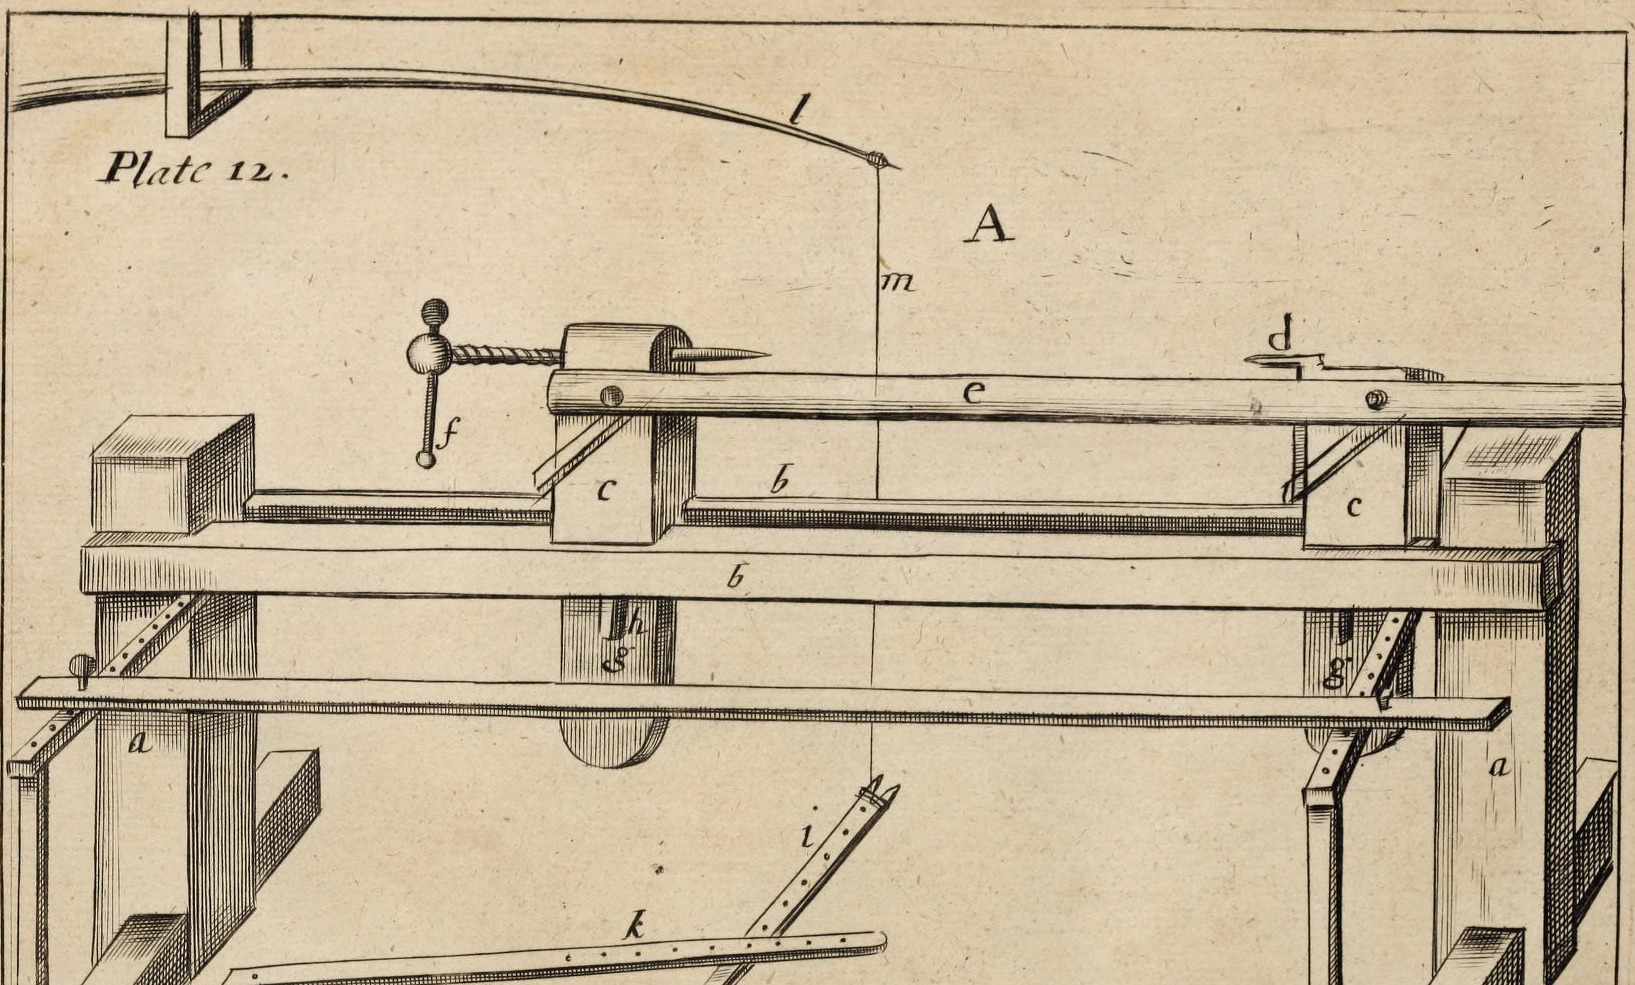


Turner's Pole Lathe with Puppets, Screw Centre and Treadle (Moxon, 1680)
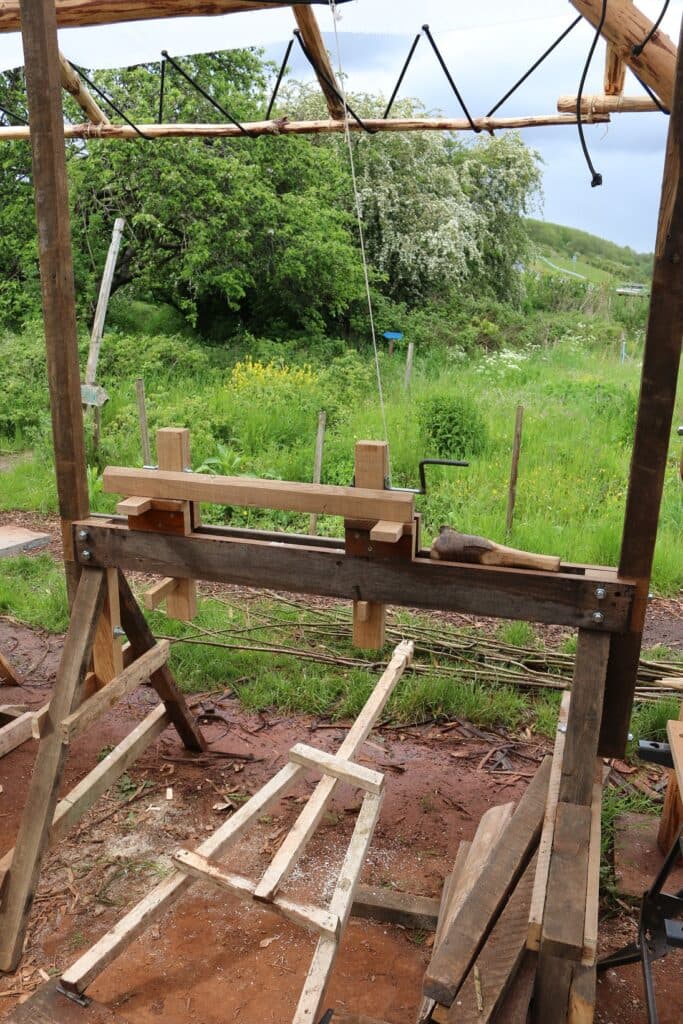
The workshop pole lathe of Joseph Moxon's Mechanick Exercises: legs and twin cheeks bolted square, sliding puppets wedged through the bed, a fixed steel-pointed pike and an adjustable screw centre, a hinged treadle with a cross-treadle, and a fir pole pinned to the ceiling for the spring.
Advanced
Two to three days
Instructions
1
1
His sizes
His sizes
Loading Jupyter Notebook...
2
2
Read Mechanick Exercises
Read Mechanick Exercises
"The Lathe is described in Plate 12. A. This Machine is so vulgarly known..."
3
3
Legs and cheeks
Legs and cheeks
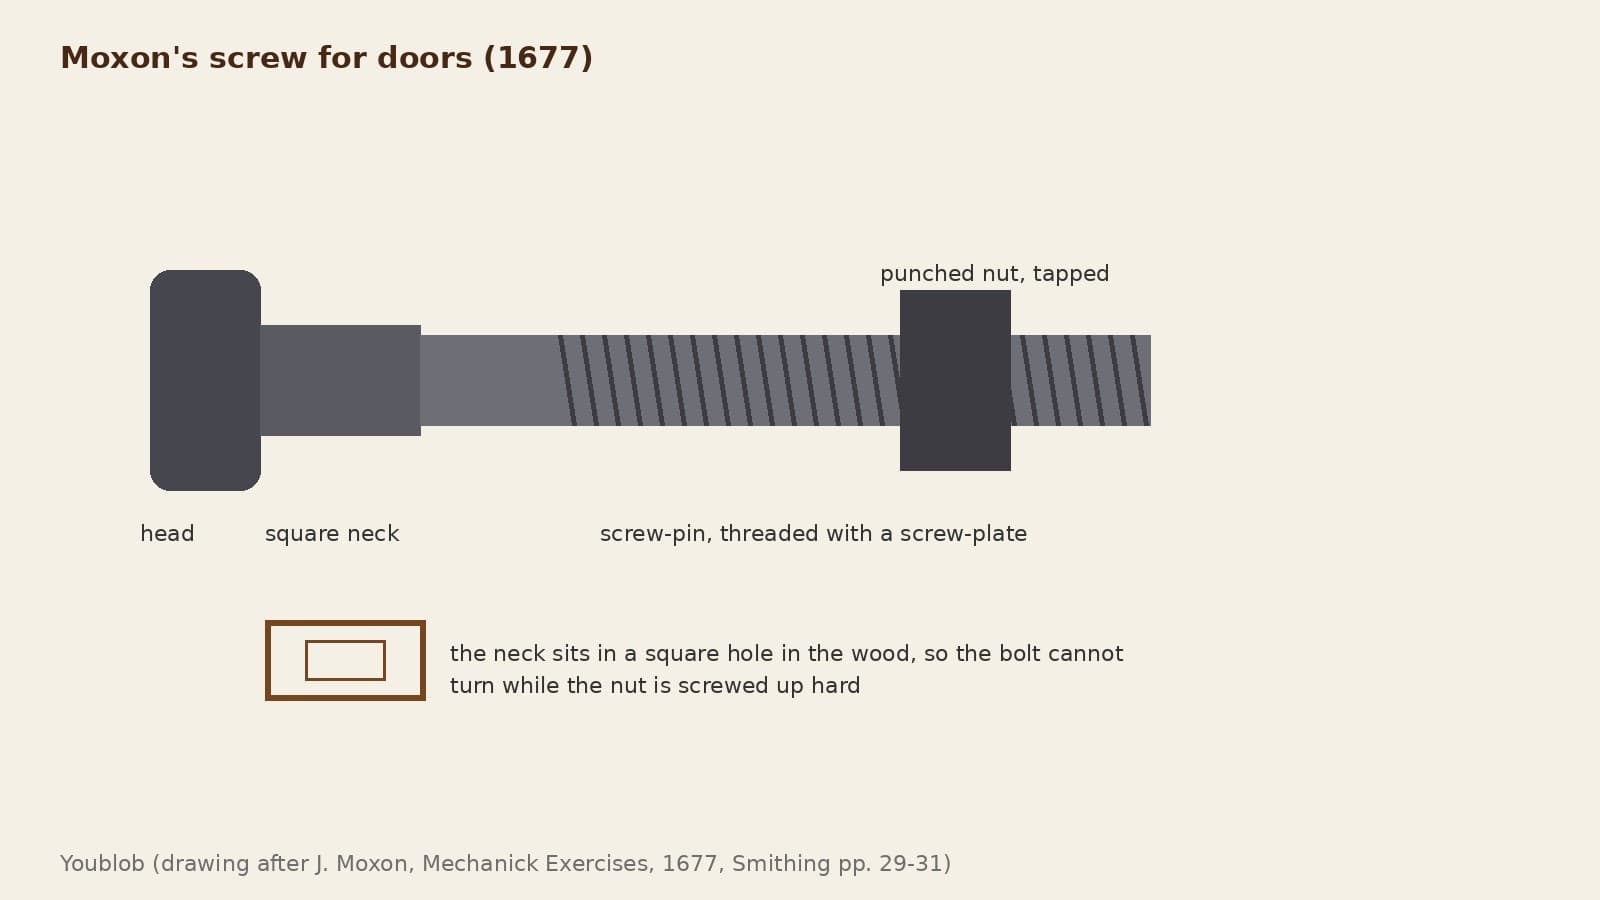
Set up two legs about 2 ft 10 in (86 cm) high, plumb, each with a tenon on top as thick as the gap you want between the two cheeks. Lay a cheek each side of the tenons, level, and fix them: pinned, or better with an iron bolt whose square neck sits in a square hole in the near cheek, drawn up by a nut. Brace legs and cheeks to the floor and walls so nothing trembles.
Materials for this step:
 White Oak Board1 piece
 Carriage Bolt1 piece
Tools needed:
 Hand Saw
 Mortise Chisel
 Wooden Mallet
 Brace and Bit
4
4
Puppets
Puppets
Make two (or two or three pairs of) square puppets, strong rather than weak and as short as your work allows: the centres must stand a little more than half the work's diameter above the cheeks. Give each a tenon at the foot that slides in the gap between the cheeks, with a mortise through it below the cheeks for a tapering wedge, driven with a mallet to clamp the puppet down.
Materials for this step:
White Oak Board1 piece Hardwood Wedge1 piece
Tools needed:
Hand SawMortise ChiselWooden Mallet5
5
Pike and screw centre
Pike and screw centre
Near the top of one puppet fix a strong iron pike with a tempered steel point. Through the other fit an iron screw in a nut in the puppet, also with a steel point, both points in one straight line facing each other. Put an iron handle 7-8 in long with a knob at each end through the screw head. Cut the puppets to square shoulders just below the pikes to carry the rest.
Materials for this step:
 Wrought Iron Bar1 piece
 Square Tool Steel Bar1 piece
Tools needed:
 Blacksmith Forge
 Anvil
 Tap and Die Set
 Quench Bucket
6
6
Rest and oil horn
Rest and oil horn
Make the rest a square piece 1-1.5 in thick, 2-2.5 in broad, a little longer than the gap between the puppets. Hang a horn tip down on the outside of the right-hand puppet near the top, filled with oil, with a wooden cover and button carrying an iron wire that reaches nearly to the bottom, to oil the centre holes.
Materials for this step:
White Oak Board1 piece Cattle Horn1 piece
 Iron Wire1 piece
 Machine Oil1 piece
Tools needed:
Hand SawBrace and Bit7
7
Treadle and cross-treadle
Treadle and cross-treadle
Make a treadle about 2.5 in broad, 1 in thick and 3 ft (up to 4 ft) long. Nail its back end to the floor with a piece of leather, 1-1.5 ft behind the lathe and midway between the legs, so the front reaches 1.5-2 ft past the front of the lathe. Cut a square notch 1.5 in wide and 2 in long in the far end for winding the string. Fix an iron pin about 0.5 in thick, standing 1.5-2 in up, in the middle; under the cheeks fix a cross-treadle with a row of holes 2-3 in apart to take the pin.
Materials for this step:
White Oak Board1 piece Leather Strap1 piece
 Iron Nails1 pieceWrought Iron Bar1 piece
Tools needed:
Hand Saw HammerBrace and Bit
8
8
Pole and string
Pole and string
Use a fir pole, thick or thin to suit the work; if it is too stiff, thin its upper and under sides with a draw-knife. Pin the thick end to a ceiling timber with one nail so it pivots. About a foot away nail two cheeks to the joists with a batten across their foot to carry the pole. Run the string from the pole's thin end, round the work, to the treadle.
Materials for this step:
 Wooden Pole1 piece
 Cord1 pieceIron Nails1 pieceWhite Oak Board1 piece
Tools needed:
 DrawknifeHammer
9
9
Troubleshooting
Troubleshooting
Pole lathe troubleshooting.
Flow
Loading...
10
10
History and honest limits
History and honest limits
From Joseph Moxon, **Mechanick Exercises**, Numb. X, Turning (1680), pp. 176-185 and Plate 12 (checked on the archive.org scan mechanickexercis00moxo). He gives no sizes for cheeks, puppets or pole; metric and the wood choices are ours.
Materials
12- 1 piecePlaceholder
- 1 piecePlaceholder
- 1 piecePlaceholder
- 1 piecePlaceholder
- 1 piecePlaceholder
- 1 piecePlaceholder
- 1 piecePlaceholder
- 1 piecePlaceholder
- 1 piecePlaceholder
- 2 piecesPlaceholder
- 1 piecePlaceholder
- 1 piecePlaceholder
This blueprint makes

Related Blueprints
These blueprints share knowledge with this one — techniques, materials, or principles that connect them in the learning graph.
CC0 Public Domain
This blueprint is released under CC0. You are free to copy, modify, distribute, and use this work for any purpose, without asking permission.
Support the Maker by purchasing products through their Blueprint where they earn a Maker Commission set by Vendors, or create a new iteration of this Blueprint and include it as a connection in your own Blueprint to share revenue.