ART
BEAUTY & WELLNESS
CRAFT
CULTURE & HISTORY
ENTERTAINMENT
ENVIRONMENT
FOOD & DRINKS
REVERSE ENGINEERING
SCIENCES
SPORTS
TECHNOLOGY
WEARABLES
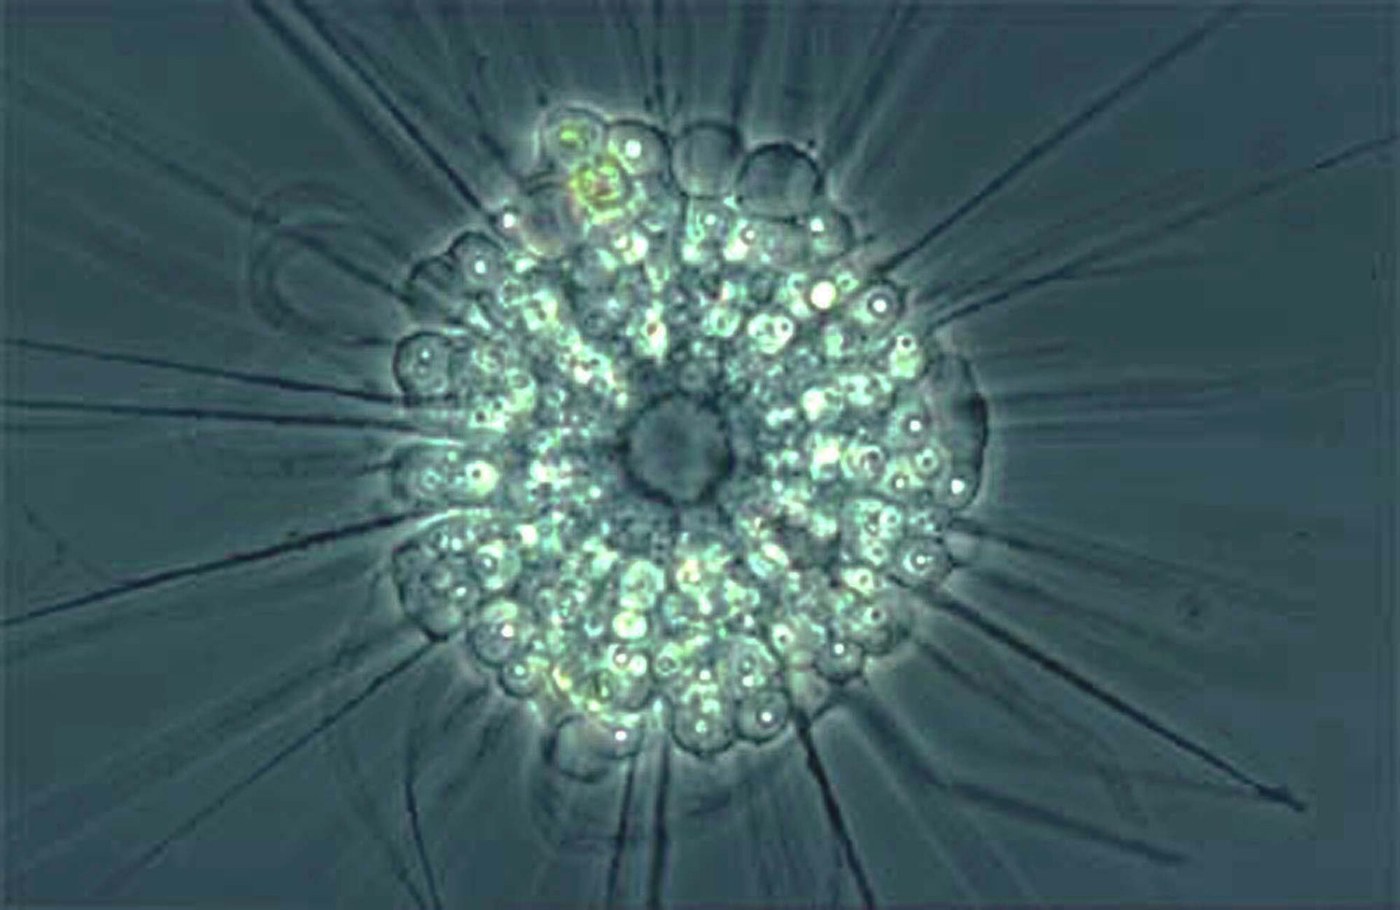


Phase Contrast: Seeing What Has No Colour
A living cell in water absorbs almost no light. It is a phase object: light passing through it is SLOWED slightly relative to light passing beside it, and arrives delayed by perhaps a quarter of a wavelength. The eye cannot see phase, only brightness, so the cell is invisible — and every technique so far has dealt with that by killing and staining it, or by lighting it obliquely.
Frits Zernike worked out in 1932 how to convert that phase delay into a brightness difference. Separate the light that passed straight through from the light the specimen scattered, shift one of them by a further quarter wavelength, and recombine them: they now interfere constructively or destructively, and an invisible delay becomes visible shading.
Zeiss were not interested. It took the Second World War and a Nobel Prize in 1953 before the method became standard, and it is still the reason anyone can watch a living cell divide.
Advanced
1 day
Instructions
1
1
See the problem first, so the solution means something
See the problem first, so the solution means something
Put a drop of yeast in water under a coverslip and view it in properly set-up bright-field with the condenser open. The cells are nearly invisible.
Now close the condenser diaphragm right down. They appear — but as high-contrast outlines with dark haloes, and the resolution has collapsed. That is the standard bad compromise everyone makes, and phase contrast exists to avoid it. Spend five minutes on this comparison; the rest of the blueprint only makes sense against it.
Materials for this step:
 Bread Yeast10 g
 Microscope Slides with Coverslips10 pieces
Tools needed:
 Microscope
2
2
Make the condenser annulus
Make the condenser annulus
Cut a thin transparent ring in black card — an annular slit — and mount it in the condenser's filter holder, so the specimen is lit by a hollow cone of light.
The annulus is what makes the separation possible. Undeviated light stays within the cone and lands as a ring in the objective's back focal plane; light scattered by the specimen spreads everywhere else. Two populations of light, now in different places — and once they are separated you can treat them differently.
Materials for this step:
 Black Card Stock6 pieces
Tools needed:
 Scalpel
 Metal Ruler
3
3
Find the back focal plane and match the ring to it
Find the back focal plane and match the ring to it
Remove the eyepiece and look down the tube, or use a phone camera focused into it. You will see the bright annulus projected in the objective's back focal plane.
Adjust the condenser height and the annulus size until that ring is sharp, round and centred. A commercial system has a dedicated centring telescope for exactly this view. Everything that follows depends on the phase plate sitting precisely on top of this ring, so measure its diameter here and write it down.
Tools needed:
MicroscopeMetal Ruler4
4
The phase plate — and an honest account of the hard part
The phase plate — and an honest account of the hard part
The phase plate is a thin transparent disc carrying a ring, matched to the annulus, that is thinner or thicker than its surroundings by a quarter wavelength — about 140 nanometres of glass — and usually also partly absorbing.
**This is the one component you cannot make well at home.** A quarter-wave step is a hundredth of the thickness of kitchen foil, and it is made by vacuum deposition. Be clear-eyed about it: with a home-made annulus alone you get a striking oblique-and-hollow-cone effect that is NOT true phase contrast. To go further you buy a phase objective, which is affordable second-hand, and the annulus you just made is what it needs.
5
5
Match the annulus to a bought phase objective
Match the annulus to a bought phase objective
A phase objective is marked Ph1, Ph2 or Ph3, and each needs its own annulus size. Make a set of card annuli to those diameters, fit each in turn, and look down the tube until the bright ring sits exactly on the darker phase ring inside the objective.
Concentric and the same width: that is the whole alignment. A ring that is off-centre or the wrong size leaks undeviated light into the wrong region and you get a weak, grey, haloed image that people usually blame on the objective. A card annulus costs nothing and is as good as the metal one for this.
Materials for this step:
Black Card Stock6 piecesTools needed:
ScalpelMicroscope6
6
Watch something alive
Watch something alive
Return to the yeast, or to pond water, or to a scraping of cheek cells in saline. Structures you could not see at all now have grey-scale shading: cell walls, vacuoles, nuclei, moving granules — in a living, unstained, unfixed specimen.
Note the bright halo around every object. That is not a defect in your alignment; it is inherent to the method, because the separation of scattered from undeviated light is never perfect at edges. Knowing it is inherent stops you chasing it, and stops you reading it as a real structure.
Materials for this step:
Bread Yeast10 gMicroscope Slides with Coverslips10 piecesTools needed:
Microscope7
7
How much phase a cell actually shifts
How much phase a cell actually shifts
Loading Jupyter Notebook...
Materials
3- 20 gPlaceholder
- 10 piecesPlaceholder
- 6 piecesPlaceholder
Related Blueprints
These blueprints share knowledge with this one — techniques, materials, or principles that connect them in the learning graph.
CC0 Public Domain
This blueprint is released under CC0. You are free to copy, modify, distribute, and use this work for any purpose, without asking permission.
Support the Maker by purchasing products through their Blueprint where they earn a Maker Commission set by Vendors, or create a new iteration of this Blueprint and include it as a connection in your own Blueprint to share revenue.