ART
BEAUTY & WELLNESS
CRAFT
CULTURE & HISTORY
ENTERTAINMENT
ENVIRONMENT
FOOD & DRINKS
REVERSE ENGINEERING
SCIENCES
SPORTS
TECHNOLOGY
WEARABLES
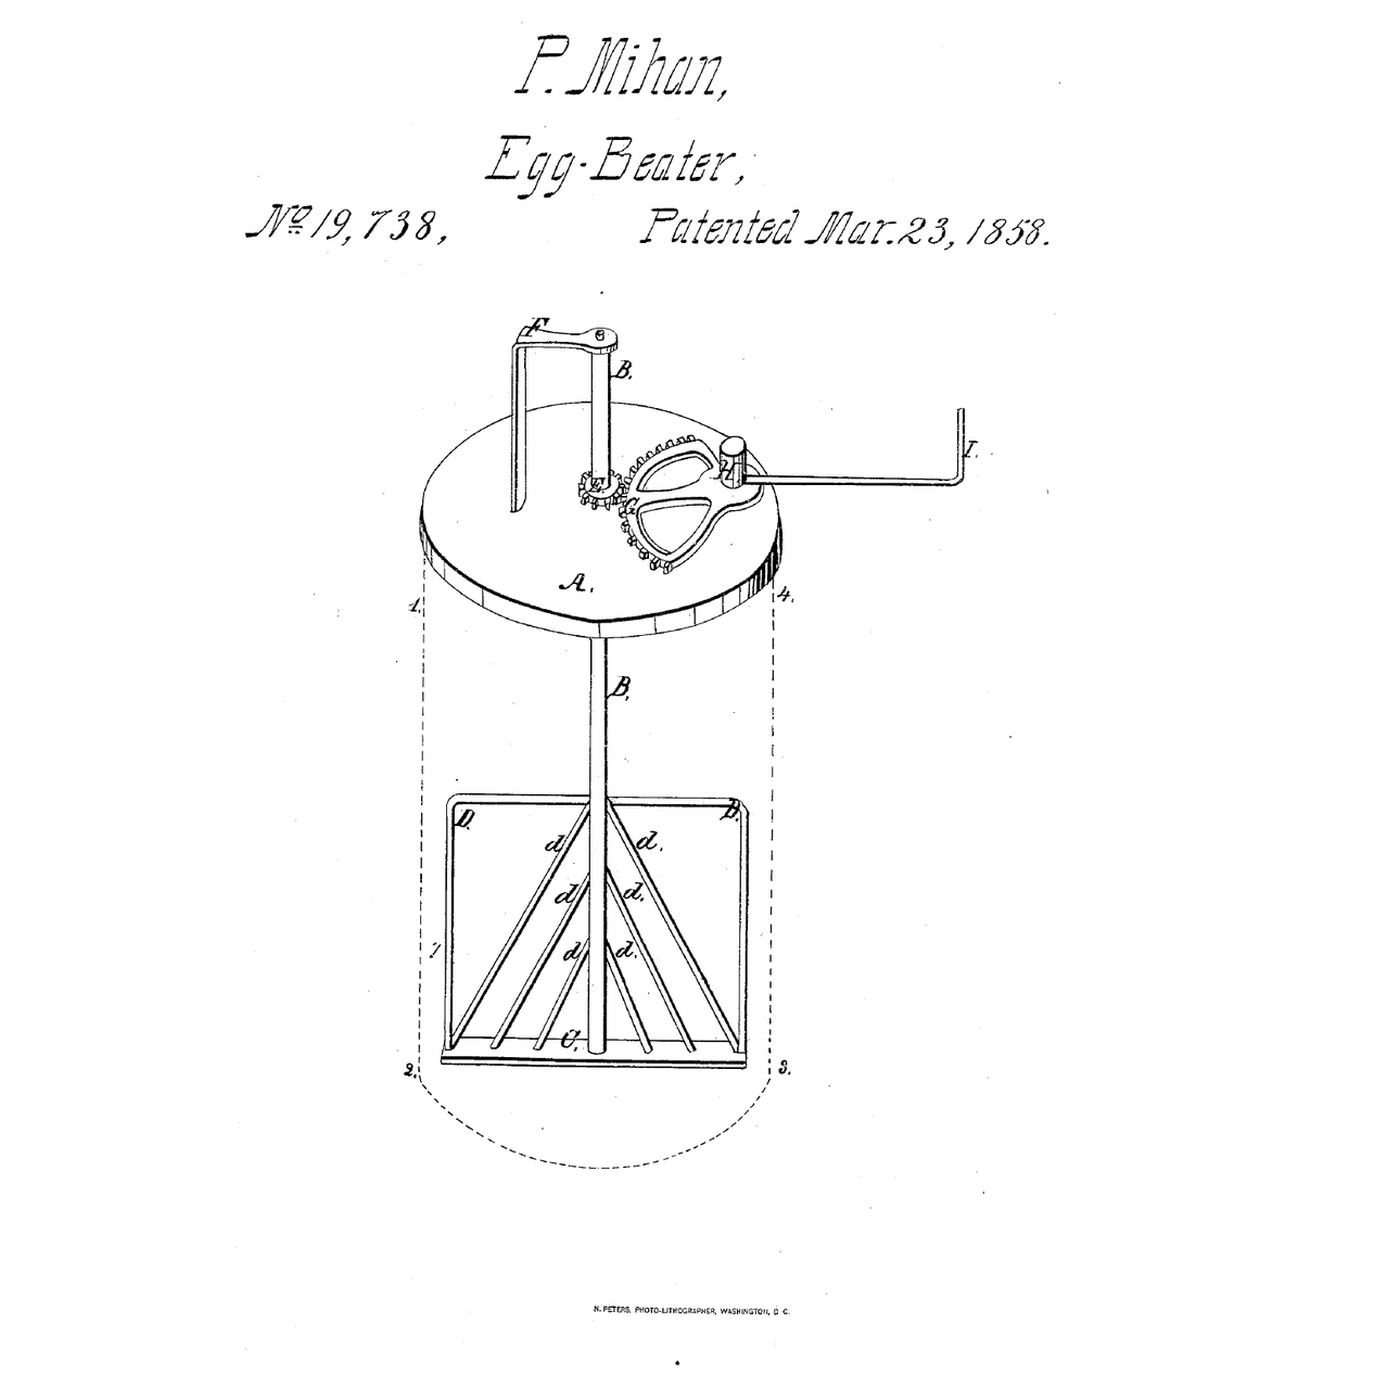


Sector-Pinion Egg Beater: A Short Swing of the Handle Whirls the Beaters Each Way
Patrick Mihan of Boston received US 19,738, dated 23 March 1858, for an egg beater on a round plate that rests on the vessel like a cover: a wire shaft with beaters below, turned by a pinion and a much larger sector swung by a wire handle.
This rung prints the plate, pinion, sector, foot and hub at his sizes and beats egg whites.
Intermediate
About 3 hours, plus printing
Instructions
1
1
A short swing, a fast shaft
A short swing, a fast shaft
Loading Jupyter Notebook...
2
2
Both ways, before it
Both ways, before it
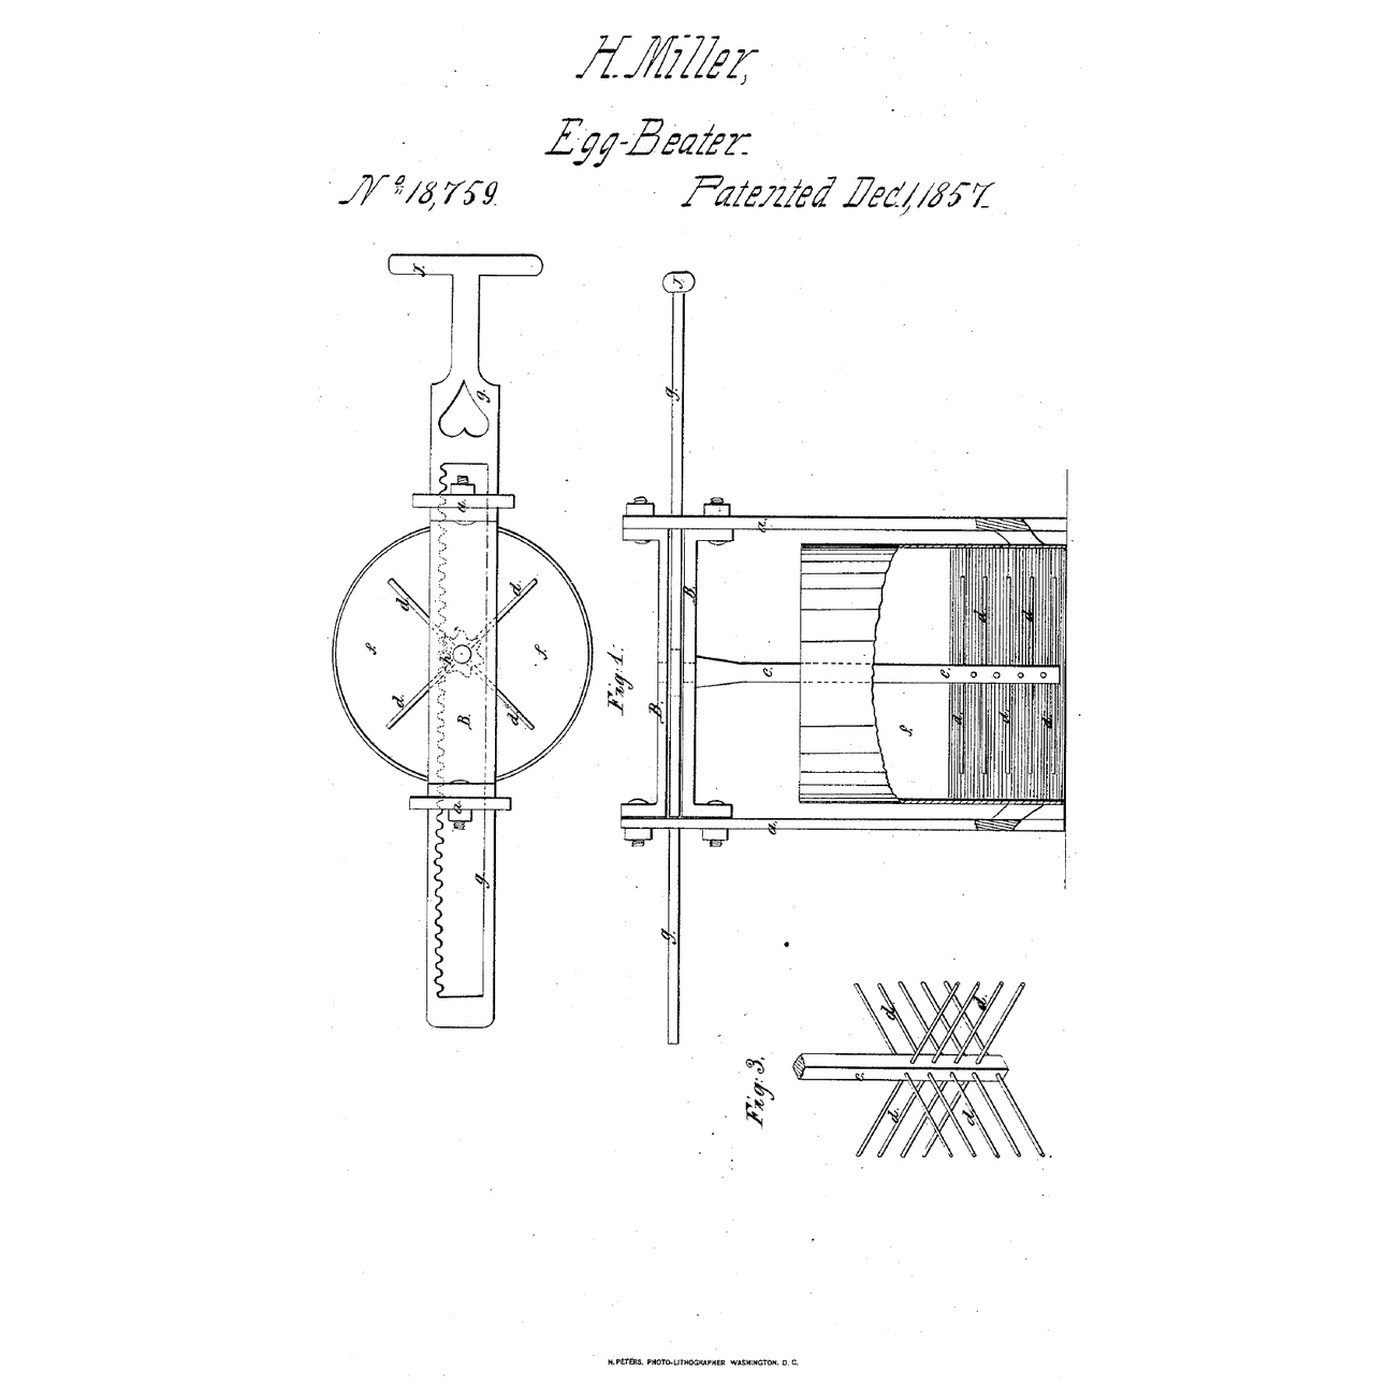
That beater spins its floats both ways by a rack; Mihan swings a sector.
3
3
Read US 19,738
Read US 19,738
"As the sector pinion, G, is so much larger than E, it is obvious that by vibrating the handle, I, a little distance, a rapid motion will be given to the shaft, B; and that by means of the beaters, D, d, striking the egg so rapidly first in one direction and then in the opposite, the whole mass will be completely cut and beaten, in a comparatively trifling period of time."
4
4
Print the parts
Print the parts
Print the plate with its bracket and axle (/uploads/blueprints/sector-pinion-egg-beater-plate.stl), the pinion (/uploads/blueprints/sector-pinion-egg-beater-pinion.stl), the sector (/uploads/blueprints/sector-pinion-egg-beater-sector.stl), the foot-piece (/uploads/blueprints/sector-pinion-egg-beater-foot.stl) and the hub (/uploads/blueprints/sector-pinion-egg-beater-hub.stl). Print in PETG at 0.2 mm layers, 30 % infill, 4 walls; wash before first use.
Materials for this step:
 PETG Filament1 piece
Tools needed:
 FDM 3D Printer
5
5
Shaft and beaters
Shaft and beaters
Cut a 6 in (152 mm) shaft of 3/16 in stainless rod and file its top end down a little to make a shoulder. Glue the foot-piece on its lower end and the hub 70 mm above. Bend stainless wire into the frame D and three V-shaped pairs d; thread their feet through the foot-piece and their tops through the hub; fix with epoxy.
Materials for this step:
 Stainless Steel Rod1 piece
 Stainless Steel Wire1 piece
 Two-Part Epoxy1 piece
Tools needed:
 Hacksaw
 Metal File
 Round-nose Pliers
 Flat-Nose Pliers
6
6
Plate, pinion and sector
Plate, pinion and sector
Pass the shaft up through the plate's centre hole into the bracket's hole and glue the pinion on it just above the plate. Set the sector on the axle with its teeth in the pinion, and fix a bent stainless wire handle in its boss.
Materials for this step:
Stainless Steel Wire1 pieceTwo-Part Epoxy1 pieceTools needed:
Round-nose PliersFlat-Nose Pliers7
7
The build in 3D
The build in 3D
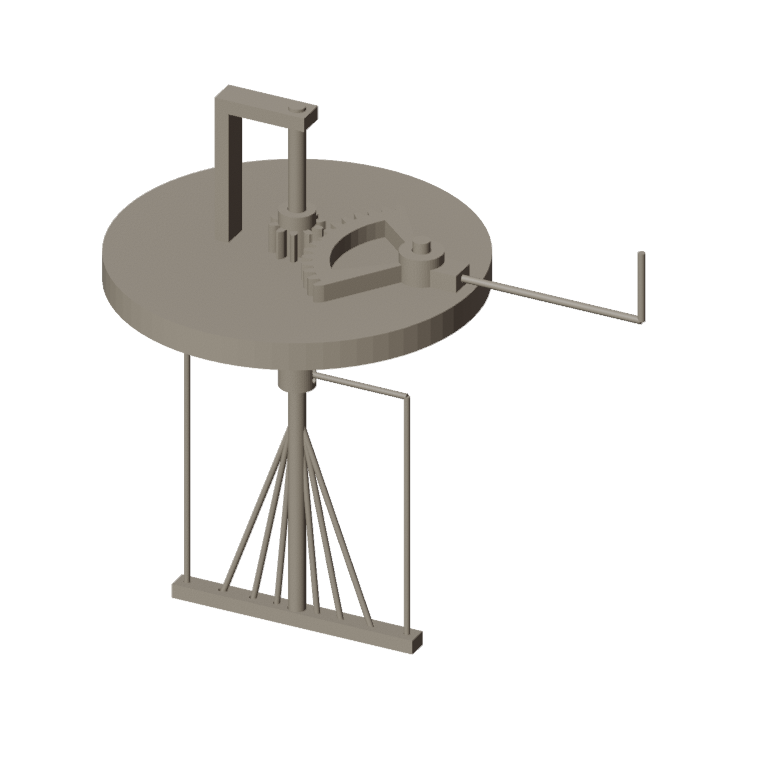
FreeCAD model of this build at his sizes: the 4 in plate with its bracket, the pinion and sector with the wire handle, and the shaft carrying the beater wires D and d on the foot-piece.
8
8
Beat egg whites
Beat egg whites
Separate two egg whites into a glass jar about 4 in across. Rest the plate on it, hold it in one hand and swing the handle to and fro with the other. Time until they hold stiff peaks.
Materials for this step:
 Egg2 pieces
Tools needed:
 Glass Jar
 Stopwatch
9
9
Troubleshooting
Troubleshooting
Sector-pinion egg beater troubleshooting.
Flow
Loading...
10
10
History and honest limits
History and honest limits
**Patrick Mihan** of Boston, Massachusetts, US 19,738, 23 March 1858, assignor to P. Mihan & G. Davis. He made the plate of tin with its edge turned down, and soldered the beaters and handle. He claimed the beating apparatus with the portable plate, held in the hand or set on a vessel, and wrote that, large enough, it would work well as a churn. The plate and shaft are his sizes; the tooth counts are ours. FDM prints hold food in their layer lines, so wash well and replace when worn.
Materials
5- 1 piecePlaceholder
- 1 piecePlaceholder
- 2 piecesPlaceholder
- 2 piecesPlaceholder
- 2 piecesPlaceholder
Tools Required
7- Placeholder
- Placeholder
- Placeholder
- Placeholder
- Placeholder
- Placeholder
- Placeholder
Design Files
1Related Blueprints
These blueprints share knowledge with this one — techniques, materials, or principles that connect them in the learning graph.


CC0 Public Domain
This blueprint is released under CC0. You are free to copy, modify, distribute, and use this work for any purpose, without asking permission.
Support the Maker by purchasing products through their Blueprint where they earn a Maker Commission set by Vendors, or create a new iteration of this Blueprint and include it as a connection in your own Blueprint to share revenue.