
ART
BEAUTY & WELLNESS
CRAFT
CULTURE & HISTORY
ENTERTAINMENT
ENVIRONMENT
FOOD & DRINKS
REVERSE ENGINEERING
SCIENCES
SPORTS
TECHNOLOGY
WEARABLES
Stamp Mill: California Five-Stamp Battery (Richards, Ore Dressing 1903)
Forge

Created by

Forge

3. November 2026NO
0
0
0
0
0

Stamp Mill: California Five-Stamp Battery (Richards, Ore Dressing 1903)

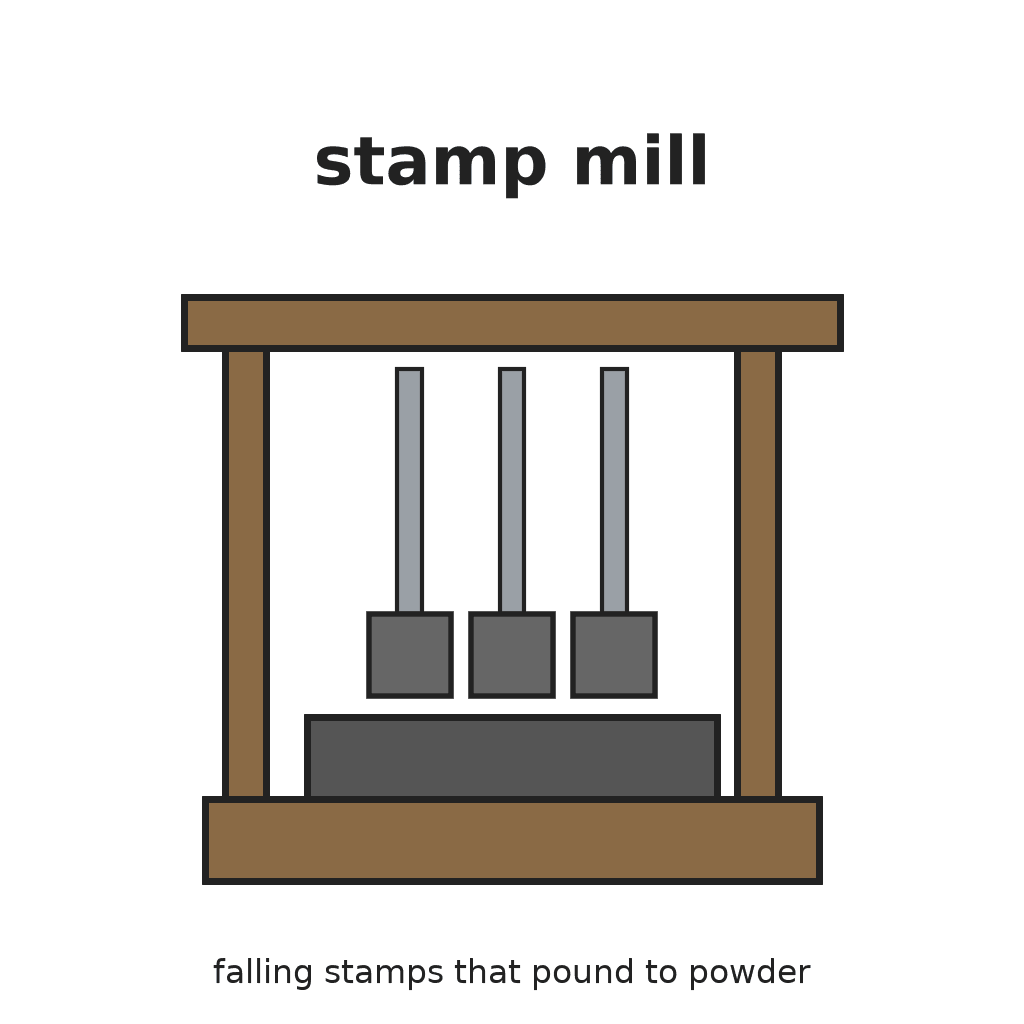
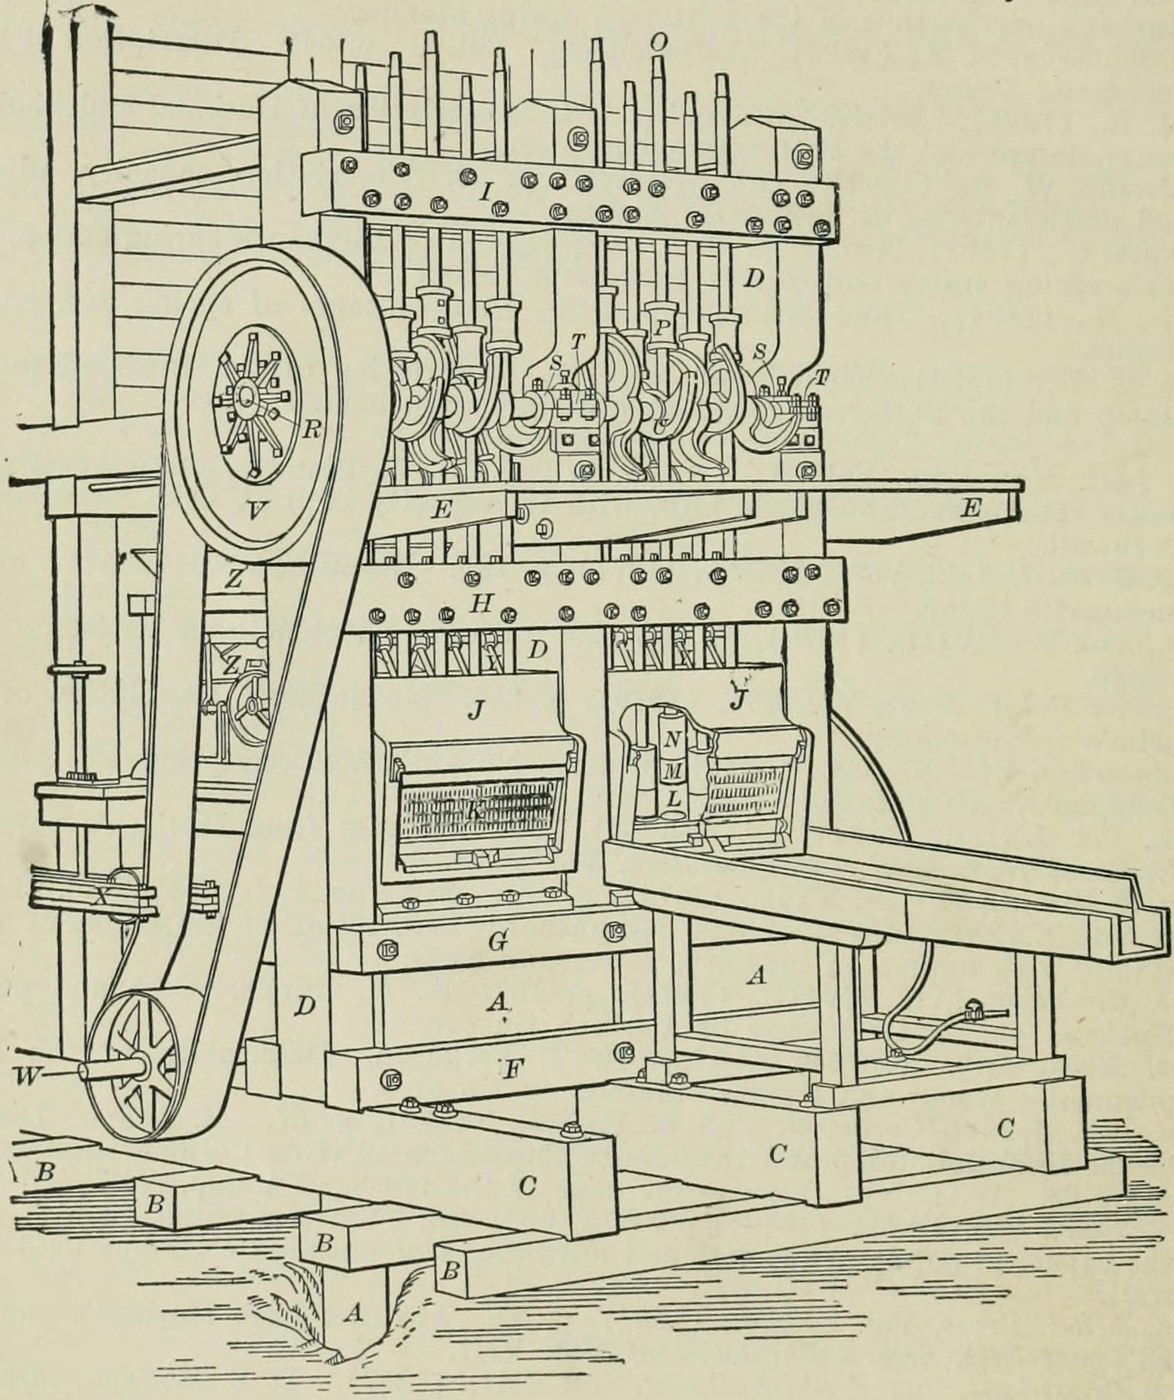
The gravity stamp mill: five heavy iron stamps stand in a cast-iron mortar on a timber block. Cams on a turning shaft lift each stamp by its tappet and let it fall by its own weight onto the ore on a die. Water washes the crushed ore out through a screen. Result: a stamp battery that pounds ore to sand, at 80 to 110 drops a minute. Source: R. H. Richards, Ore Dressing, vol. I (1903), Chapter V, Gravity Stamps. Unknown: one complete set of sizes; Richards gives the range found in the mills. Picture: Fig. 90 of the book.
Advanced
Unknown

Instructions

1

Dig and level the foundation

Dig a trench in gravel, or blast one in rock, about 2 feet longer than the mortar block at each end and about 2 feet wider at each side. Level the bottom with tamped concrete, sand or clay. Concrete should be at least 30 inches thick, or it may crumble. Two layers of 2-inch plank spiked together may go on top.

Materials for this step:

ConcreteConcrete1 levelling layer
Timber PlankTimber Plank1 two layers of 2-inch plank

Tools needed:

SpadeSpade
HammerHammer
2

Stand the mortar block

Stand timbers or planks on end in the trench as the mortar block, sized for one five-stamp mortar. The mills used everything from 30 x 30 inch squared timbers to 2 x 12 inch planks bolted together. Set vertical bolts 3 to 4 feet long into the block to hold the mortar down. Not given: the bolts' metal.

Materials for this step:

Squared TimberSquared Timber1 mortar block
Unknown MetalUnknown Metal1 hold-down bolts

Tools needed:

Spanner SetSpanner Set
Unknown DimensionsUnknown Dimensions
3

Build the frame

On mud sills and cross sills, stand the posts (end posts 12 x 24 inches in most mills) with buckstaves, a platform, and lower and upper guide timbers. The guides keep the stamp stems vertical. Fit finger bars on a jack shaft between the posts, so each stamp can be propped up under its tappet. The frame carries the cam shaft and the drive.

Materials for this step:

Squared TimberSquared Timber1 sills, posts, guide timbers, platform
Unknown MetalUnknown Metal1 bolts and jack shaft

Tools needed:

Spanner SetSpanner Set
Unknown DimensionsUnknown Dimensions
4

Set the mortar, dies and screen

Bed the cast-iron mortar on tarred blankets or sheet rubber on the mortar block, for an even bearing, and bolt it down. Put the dies in its bottom: cylinders on square foot plates that fill the floor of the mortar. Mount a screen of punched Russia sheet iron in a wooden frame over the opening in front.

Materials for this step:

Iron CastingsIron Castings1 mortar and five dies
Natural Rubber SheetNatural Rubber Sheet1 packing
Russia Iron SheetRussia Iron Sheet1 screen

Tools needed:

Spanner SetSpanner Set
5

Make the five stamps

Each stamp has four parts. The shoe is chilled cast iron, its butt cast in heavy chills and its shank in sand. The boss is tough cast iron, the shoe's diameter and often 18 inches long, with sockets for the shoe shank and the stem and two keyways for knock-out wedges. The stem is solid wrought iron or mild steel, turned true and tapered at both ends so it can be reversed. The tappet is cast iron, with a flange above and below, locked on the stem by a gib and keys. Put the extra weight in the boss. Louis designs for 11 to 14 pounds of stamp per square inch of die; the mills used stamps of 650 to 1,100 pounds.

Materials for this step:

Iron CastingsIron Castings1 shoes, bosses, tappets
Wrought Iron BarWrought Iron Bar1 stems, gibs, keys

Tools needed:
Metal LatheMetal Lathe
Unknown DimensionsUnknown Dimensions
6

Fit the cam shaft and drive

Turn a wrought-iron or steel cam shaft true, with a key seat, and key on five cams. Each cam usually has two arms with spiral lifting faces, cast iron with chilled faces or cast steel. Drive the shaft by a rubber belt from the main shaft, over a pulley of wood built on a cast-iron hub and flanges, with a tightener. Not given: the engine or wheel that turns the main shaft.

Materials for this step:

Wrought Iron BarWrought Iron Bar1 cam shaft
Iron CastingsIron Castings1 cams, pulley hub and flanges
Timber PlankTimber Plank1 pulley rim
Drive BeltDrive Belt1 rubber belt

Tools needed:

Metal LatheMetal Lathe
Spanner SetSpanner Set
7

Add the water and the feed

Run one or two 1-inch water pipes into the back of the mortar, each with a plug cock that stays where it is set. Feed ore from the bin by a chute to an automatic feeder. One stamp trips the feeder when the ore layer on its die gets too thin, and a hand screw adjusts the point where it trips. Ore can also be fed by hand with a shovel.

Materials for this step:

Water PipeWater Pipe1 water pipes
Unknown ValveUnknown Valve1 plug cocks
Unknown MetalUnknown Metal1 feeder and chute

Tools needed:

Spanner SetSpanner Set
ShovelShovel
8

Set up each stamp

Lay a 3-inch plank on the dies and set the bosses on it. Lower the stems into them and tap each stem down with a hammer, a board guarding its top, then drop it a few times at a very low drop. Hoist the stamp, put the shoe in place with wooden staves around its shank, and drop it on the plank to drive the shoe home; the staves swell when wet and hold it. Swap the plank for a block as high as the drop. Slip the tappet on, turn the cam until the tappet rests on its point, drive the keys home and drop the stamp gently a few times.

Materials for this step:

Wooden WedgesWooden Wedges1 staves

Tools needed:

Timber PlankTimber Plank
HammerHammer
Block and TackleBlock and Tackle
9

Run the battery

Drop the stamps in order 1, 3, 5, 2, 4 (numbered from the left, standing behind the battery), so no two neighbours fall one after the other. The California practice is 80 to 110 drops a minute with a 5 to 9 inch drop. The cams turn the stamps as they lift, which evens out wear on shoes and dies. Lubricate the cams; soft soap with graphite is best. As shoes and dies wear, reset the tappets to restore the drop, and keep the height of discharge, from die to screen, the same.

Tools needed:

Graphite PowderGraphite Powder
Unknown MaterialUnknown Material
Spanner SetSpanner Set

Materials

12

Tools Required

10

This blueprint makes

Related Blueprints

These blueprints share knowledge with this one — techniques, materials, or principles that connect them in the learning graph.
CC0 Public Domain

This blueprint is released under CC0. You are free to copy, modify, distribute, and use this work for any purpose, without asking permission.

Support the Maker by purchasing products through their Blueprint where they earn a Maker Commission set by Vendors, or create a new iteration of this Blueprint and include it as a connection in your own Blueprint to share revenue.

Discussion

(0)

Log in to join the discussion

Loading comments...