ART
BEAUTY & WELLNESS
CRAFT
CULTURE & HISTORY
ENTERTAINMENT
ENVIRONMENT
FOOD & DRINKS
REVERSE ENGINEERING
SCIENCES
SPORTS
TECHNOLOGY
WEARABLES
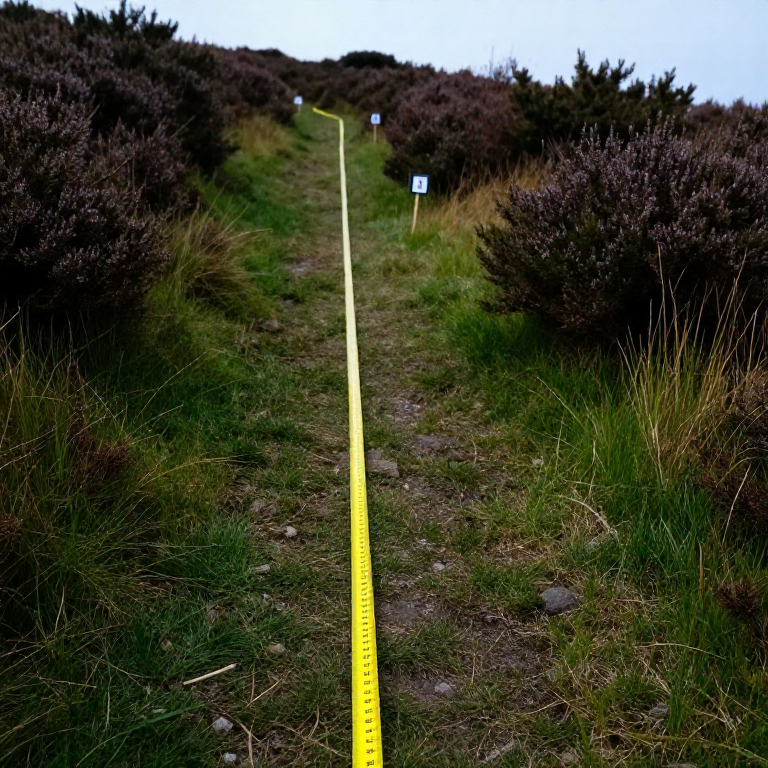


The Line Transect: Recording How a Community Changes
Random quadrats answer 'how much is there'. They are the wrong tool for 'how does it change as you walk from the stream to the hilltop', because scattering samples at random throws away the very ordering you are asking about.
A transect is a line laid deliberately ACROSS a gradient — a shoreline, a path edge, a slope, a woodland margin — with records taken at intervals along it. The result is a profile: which species give way to which, and where the change happens.
Zonation on a rocky shore is the classic example, and the same method reads a hedge bank, a trampled path, or the edge of a mulched bed. It is the cheapest way to turn 'the plants are different over there' into a diagram with distances on it.
Beginner
1 day
Instructions
1
1
Choose the line to cross the gradient squarely
Choose the line to cross the gradient squarely
Run the tape at right angles to whatever is changing — straight up the slope, straight out from the water, straight across the path — not along it.
A line laid along a contour samples one zone many times and tells you nothing about the sequence. Fix both ends with stakes and record a compass bearing, so the exact line can be re-laid next year. If the gradient is not obvious, walk it first and look before committing the tape.
Materials for this step:
 Wooden Stake4 pieces
Tools needed:
 Measuring Tape
 Compass
 Claw Hammer
 Survey Flags and Pin Kit
2
2
Choose continuous, interrupted, or belt
Choose continuous, interrupted, or belt
A CONTINUOUS line transect records everything touching the tape. An INTERRUPTED one records only at fixed intervals — every metre, say. A BELT transect places a quadrat at each interval and records everything inside it.
Continuous is thorough and slow. Interrupted is fast and misses rare species between the points. Belt is the usual compromise and gives you quantities rather than presence alone. Choose deliberately and write down which you used, because the three are not comparable with one another.
Tools needed:
 Field Notebook
3
3
Record the physical gradient too
Record the physical gradient too
At every sampling point, record the physical variables as well as the species: height above the datum, soil pH, depth of litter, how wet the ground is, how much light reaches it.
Without them you have a description of a change and no candidate for its cause. With them you can plot species against the variable and see which one the distribution actually tracks — and often it is not the one you assumed. Levelling the line, using the method from the surveying batch, is what turns 'uphill' into metres.
Tools needed:
 pH Test Strips
 Metal RulerField Notebook
4
4
Run more than one line
Run more than one line
Lay three or more parallel transects, separated by a sensible distance, rather than one very detailed line.
A single transect might have crossed a badger sett, an old bonfire site or a buried wall, and you would never know. Replicate lines let you tell a genuine gradient from a local accident — if all three show the same sequence, it is real. This is the commonest weakness in amateur transect work and it costs only time to fix.
Materials for this step:
Wooden Stake8 piecesTools needed:
Measuring TapeClaw Hammer5
5
Plotting the profile and finding the boundaries
Plotting the profile and finding the boundaries
Loading Jupyter Notebook...
Tools needed:
 Graph Paper
6
6
Mark the ends so it can be repeated
Mark the ends so it can be repeated
Drive permanent markers at both ends, record their positions and the bearing, and photograph the line from each end.
A transect re-run in five or ten years is worth many times a single survey, because zonation MOVES — up a shore as sea level changes, out from a path as trampling changes, across a field as grazing changes. The photographs alone often show a change that the species list does not.
Materials for this step:
Wooden Stake4 piecesTools needed:
CompassField NotebookRelated Blueprints
These blueprints share knowledge with this one — techniques, materials, or principles that connect them in the learning graph.


CC0 Public Domain
This blueprint is released under CC0. You are free to copy, modify, distribute, and use this work for any purpose, without asking permission.
Support the Maker by purchasing products through their Blueprint where they earn a Maker Commission set by Vendors, or create a new iteration of this Blueprint and include it as a connection in your own Blueprint to share revenue.