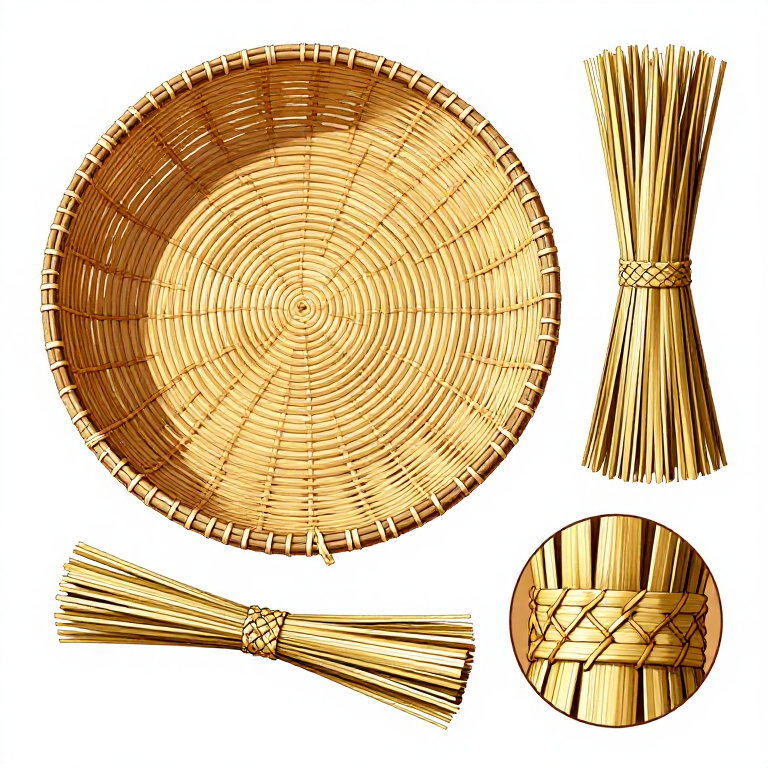


Egyptian Reed Basket — Weaving a Coiled Reed Basket
Imiyalelo
Prepare the Reed Materials
Prepare the Reed Materials
Soak dried reeds or stiff grass stems in water for at least 30 minutes until pliable. Egyptian basket makers used a variety of local plant materials including date palm leaves, dom palm, halfa grass (Desmostachya bipinnata), and papyrus. Sort the materials into two groups: thicker, stiffer stems for the coil core, and thinner, more flexible strips for the stitching (wrapping) element. The core material should be straight and uniform in diameter, approximately 3-5 mm thick. The stitching material must be thin, flat, and flexible enough to wrap tightly without snapping. Trim all materials to remove any dried leaves, knots, or irregularities that would create lumps in the finished basket.
Izinto zokwakha zalesi sinyathelo:
 Intambo300-400 g g
 Amanzienough to fill a basin ucezu
Amathuluzi adingekayo:
 Usungulo
 Ubhavu omkhulu wepulasitiki
Start the Base Coil
Start the Base Coil
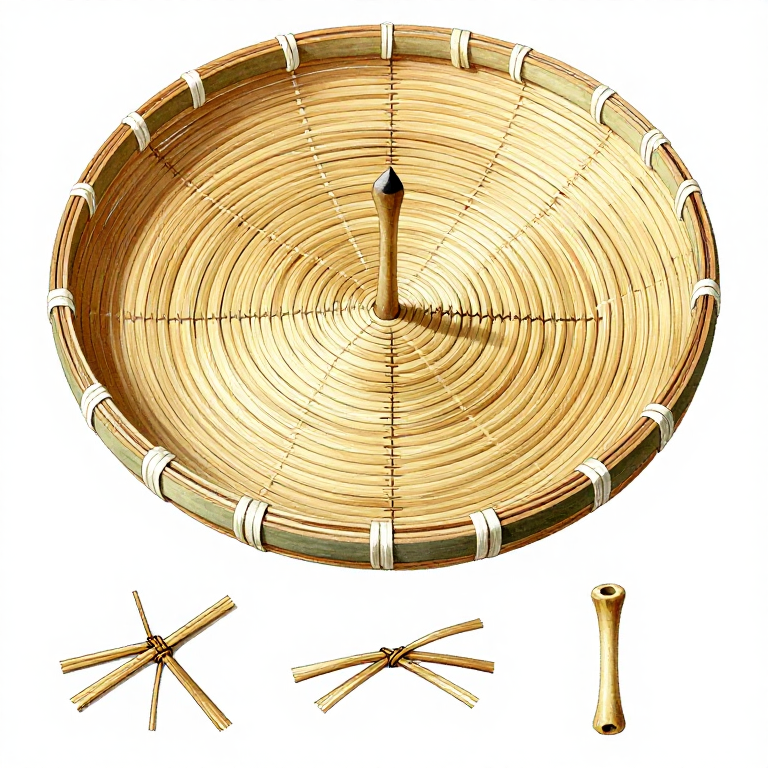
Gather a small bundle of 4-6 core reeds and bind the ends tightly together by wrapping the flexible stitching material around them in a tight spiral for approximately 3-4 cm. Bend this wrapped section into a tight spiral to form the center of the basket base. Secure the spiral by passing the stitching material through the adjacent coil using a bone awl or blunt needle, creating a figure-eight stitch that wraps around the working coil and catches the previous coil. This center spiral is the most critical part — if it is loose or uneven, the entire basket will be lopsided. Ancient Egyptian baskets in museum collections show remarkably tight, even center spirals that indicate highly practiced technique.
Build Up the Base in a Flat Spiral
Build Up the Base in a Flat Spiral
Continue adding core reeds to the working bundle as needed to maintain a consistent coil diameter of approximately 1-2 cm. Stagger the joins so that new reeds are added at different points along the coil — adding all new material at the same point creates a visible bump. Wrap and stitch each successive coil to the previous one, keeping the work flat on a table surface to ensure the base remains level. Use the simple wrap stitch (also called lazy stitch) for the base — wrap the stitching material around the working coil 2-3 times, then pass it under and around the previous coil to lock the rows together. Continue the flat spiral until the base reaches the desired diameter, typically 15-25 cm for a medium storage basket.
Izinto zokwakha zalesi sinyathelo:
Amanzienough to fill a basin ucezuShape the Walls Upward
Shape the Walls Upward
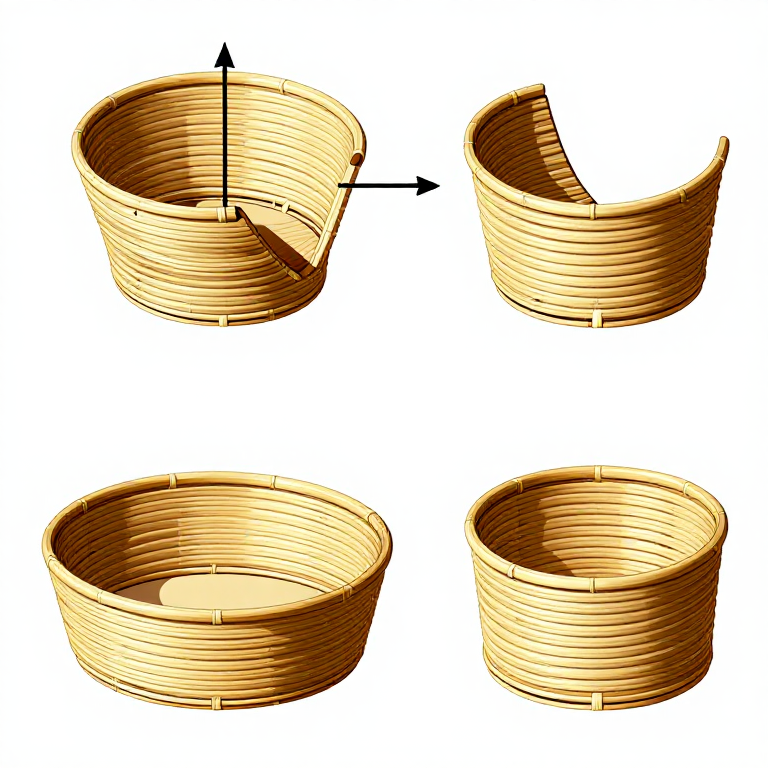
To transition from the flat base to the vertical walls, begin placing each new coil slightly on top of (rather than beside) the previous coil. This gradual displacement angles the work upward. For straight vertical walls, stack coils directly above each other. For a bowl shape, continue the slight outward displacement. For a vessel that curves inward at the rim, place each coil slightly inside the previous one. Maintain consistent coil size and stitch tension as you build the walls — uneven tension causes the basket to lean or bulge. Keep the stitching material damp as you work to maintain its flexibility. Re-soak it in water if it begins to dry out and crack, which is common in warm, dry conditions.
Finish the Rim and Secure the Ends
Finish the Rim and Secure the Ends
When the walls reach the desired height, gradually taper the core bundle by trimming out individual reeds one at a time over the final 5-8 cm of the coil, so the coil thins to a point rather than ending abruptly. Wrap the tapering end tightly and stitch it securely to the previous coil, then tuck the tail of the stitching material back under several previous stitches to lock it in place. For a reinforced rim, some Egyptian baskets feature a final coil of thicker, stiffer material that provides structural rigidity at the opening. Trim any protruding ends with scissors or a sharp knife. The finished basket should sit flat without rocking and have a symmetrical profile. Surviving Egyptian coiled baskets from Deir el-Medina and the Valley of the Kings demonstrate that this technique produced containers durable enough to last over 3,000 years.
Izinto
5- Dried reeds or stiff grass (for core bundles)large bundle, approx 500 g g
- 300-400 g gIsibambeli
- enough to fill a basin ucezuIsibambeli
- large bundle, approx 500 g ucezuIsibambeli
- 300-400 g ucezuIsibambeli
Amathuluzi Adingekayo
6- Isibambeli
- Sharp scissors or knife
- Isibambeli
- Isibambeli
- Isibambeli
- Isibambeli
Le blueprint yenza

CC0 Isizinda Somphakathi
Le blueprint ikhishwe ngaphansi kwe-CC0. Ukhululekile ukukopisha, ukuguqula, ukusabalalisa, nokusebenzisa ngaphandle kwemvume.
Sekela uMenzi ngokuthenga imikhiqizo nge-Blueprint yabo IKhomishane Yomenzi kumiswe ngabathengisi, noma dala inguqulo entsha yale Blueprint bese uyifaka njengoxhumaniso ku-Blueprint yakho ukuze wabelane ngemali engenayo.