ARTE
BELEZA E BEM-ESTAR
ARTESANATO
CULTURA E HISTÓRIA
ENTRETENIMENTO
MEIO AMBIENTE
COMIDA E BEBIDAS
ENGENHARIA REVERSA
CIÊNCIAS
ESPORTES
TECNOLOGIA
TECNOLOGIA VESTÍVEL
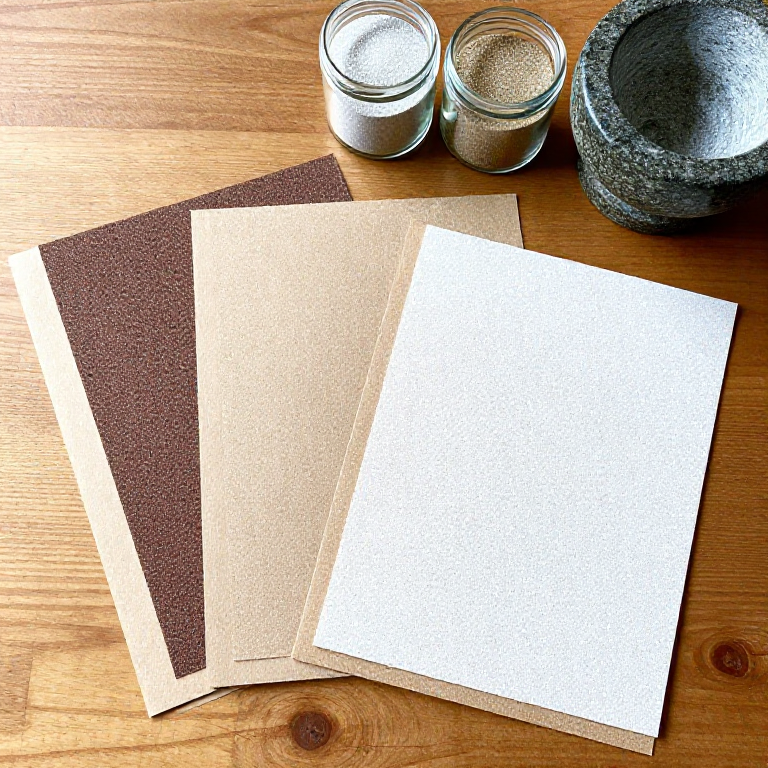


Sandpaper from Sand, Hide Glue and Paper
A coated abrasive is grit glued to a backing. The first recorded one, in 13th-century China, bonded crushed shells, seeds and sand to parchment with natural gum. Here clean quartz sand is crushed, sieved into grades and scattered on paper brushed with warm hide glue.
Sieve mesh only roughly matches a shop grit number: real P grades are set by ISO 6344. Quartz grit on hide glue wears faster than garnet or aluminium oxide paper, and water softens the glue, so use it dry.
Iniciante
1 hour, plus a day drying
Instruções
1
1
Crush the sand
Crush the sand
With a dust mask on, crush clean quartz sand in the mortar, a few spoonfuls at a time.
Materiais para este passo:
 Areia de quartzo300 g
Ferramentas necessárias:
 Almofariz e pilão
 Máscara antipoeiras
2
2
Sieve into grades
Sieve into grades
Sieve through the 60, 80 and 120 mesh sieves stacked coarse on top. Keep what each sieve holds in its own labelled jar: coarse, medium and fine.
Ferramentas necessárias:
 Peneira de 60 mesh
 Peneira de malha 80
 Peneira de 120 malhas
 Frascos de vidro com tampaMáscara antipoeiras
3
3
Warm the glue
Warm the glue
Soak hide glue granules in water, then warm them in a double boiler to about 60 °C until runny. Do not let it boil.
Materiais para este passo:
 Cola de pele animal50 g
 Água0.1 litro
Ferramentas necessárias:
 Banho-maria
 Placa de aquecimento
 Termómetro de sonda permanente
4
4
Glue the paper
Glue the paper
Brush a thin, even coat of glue over one face of a sheet of strong paper, edge to edge.
Materiais para este passo:
 Papel3 folhas
Ferramentas necessárias:
 Pincel para cola
5
5
Scatter the grit
Scatter the grit
While the glue is wet, sprinkle one grade of grit thickly over it, press it in with a rolling pin over a clean sheet, and let it set for a minute.
Ferramentas necessárias:
 Rolo da massa
6
6
Shake off and dry
Shake off and dry
Tip the sheet on edge and tap off the loose grit back into its jar. Dry it flat for a day, then label the back with its grade.
Ferramentas necessárias:
Frascos de vidro com tampa7
7
Test it
Test it
Sand a scrap of softwood ten strokes and look at the scratches. Cut sheets to size.
Ferramentas necessárias:
 Tesoura
8
8
Troubleshooting
Troubleshooting
Home-made sandpaper troubleshooting.
Flow
Loading...
Materiais
4- 300 gReferência
- Referência
- 0.1 litroReferência
- 3 folhasReferência
Ferramentas necessárias
12- Referência
- Referência
- Referência
- Referência
- Referência
- Referência
- Referência
- Referência
- Referência
- Referência
- Referência
- Referência
Este projeto faz


Blueprints relacionados
Estes blueprints compartilham conhecimento — técnicas, materiais ou princípios

CC0 Domínio Público
Este blueprint é liberado sob CC0. Você é livre para copiar, modificar, distribuir e usar este trabalho para qualquer finalidade, sem pedir permissão.
Apoie o Maker comprando produtos através do Blueprint, onde ele ganha uma Comissão Maker definida pelos vendedores, ou crie uma nova versão deste Blueprint e inclua-o como conexão no seu próprio Blueprint para compartilhar receita.