Colaboração
ARTE
BELEZA E BEM-ESTAR
ARTESANATO
CULTURA E HISTÓRIA
ENTRETENIMENTO
MEIO AMBIENTE
COMIDA E BEBIDAS
ENGENHARIA REVERSA
CIÊNCIAS
ESPORTES
TECNOLOGIA
TECNOLOGIA VESTÍVEL
Hooked Breaker-Frame Churn: Breakers Held Still From the Lid, Then Hooked to the Dasher to Gather
Buttercup

Criado por

Buttercup

10. novembro 2026IE
4
0
0
0
0

Hooked Breaker-Frame Churn: Breakers Held Still From the Lid, Then Hooked to the Dasher to Gather

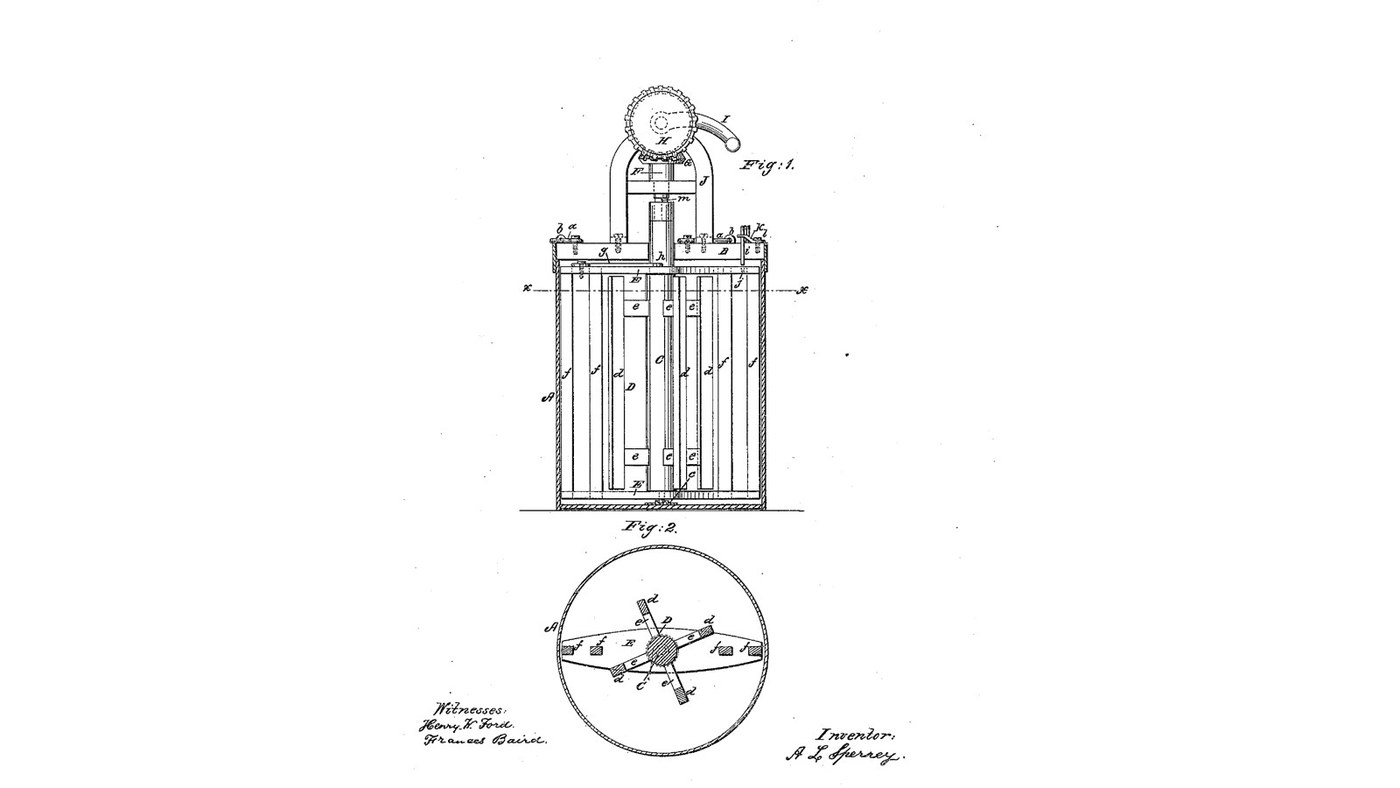
A. L. Sperry of Auburn, Indiana, received US 25,285, dated 30 August 1859, for a dasher churn whose breakers can stand still or turn with the dasher, both worked from the top. A spring hook pressed through the lid and held by a button stops the breaker frame while the four-paddle dasher churns. After the butter comes, a hook on the frame is pushed into the dasher's shaft and the button is turned back, so the whole sweep turns together and gathers the butter as the crank goes back and forth. Sperry gives no sizes; every size here is ours.
Intermediário
About 2 days, plus printing

Instruções

1

Paddles past the breakers

A carregar o notebook Jupyter…
2

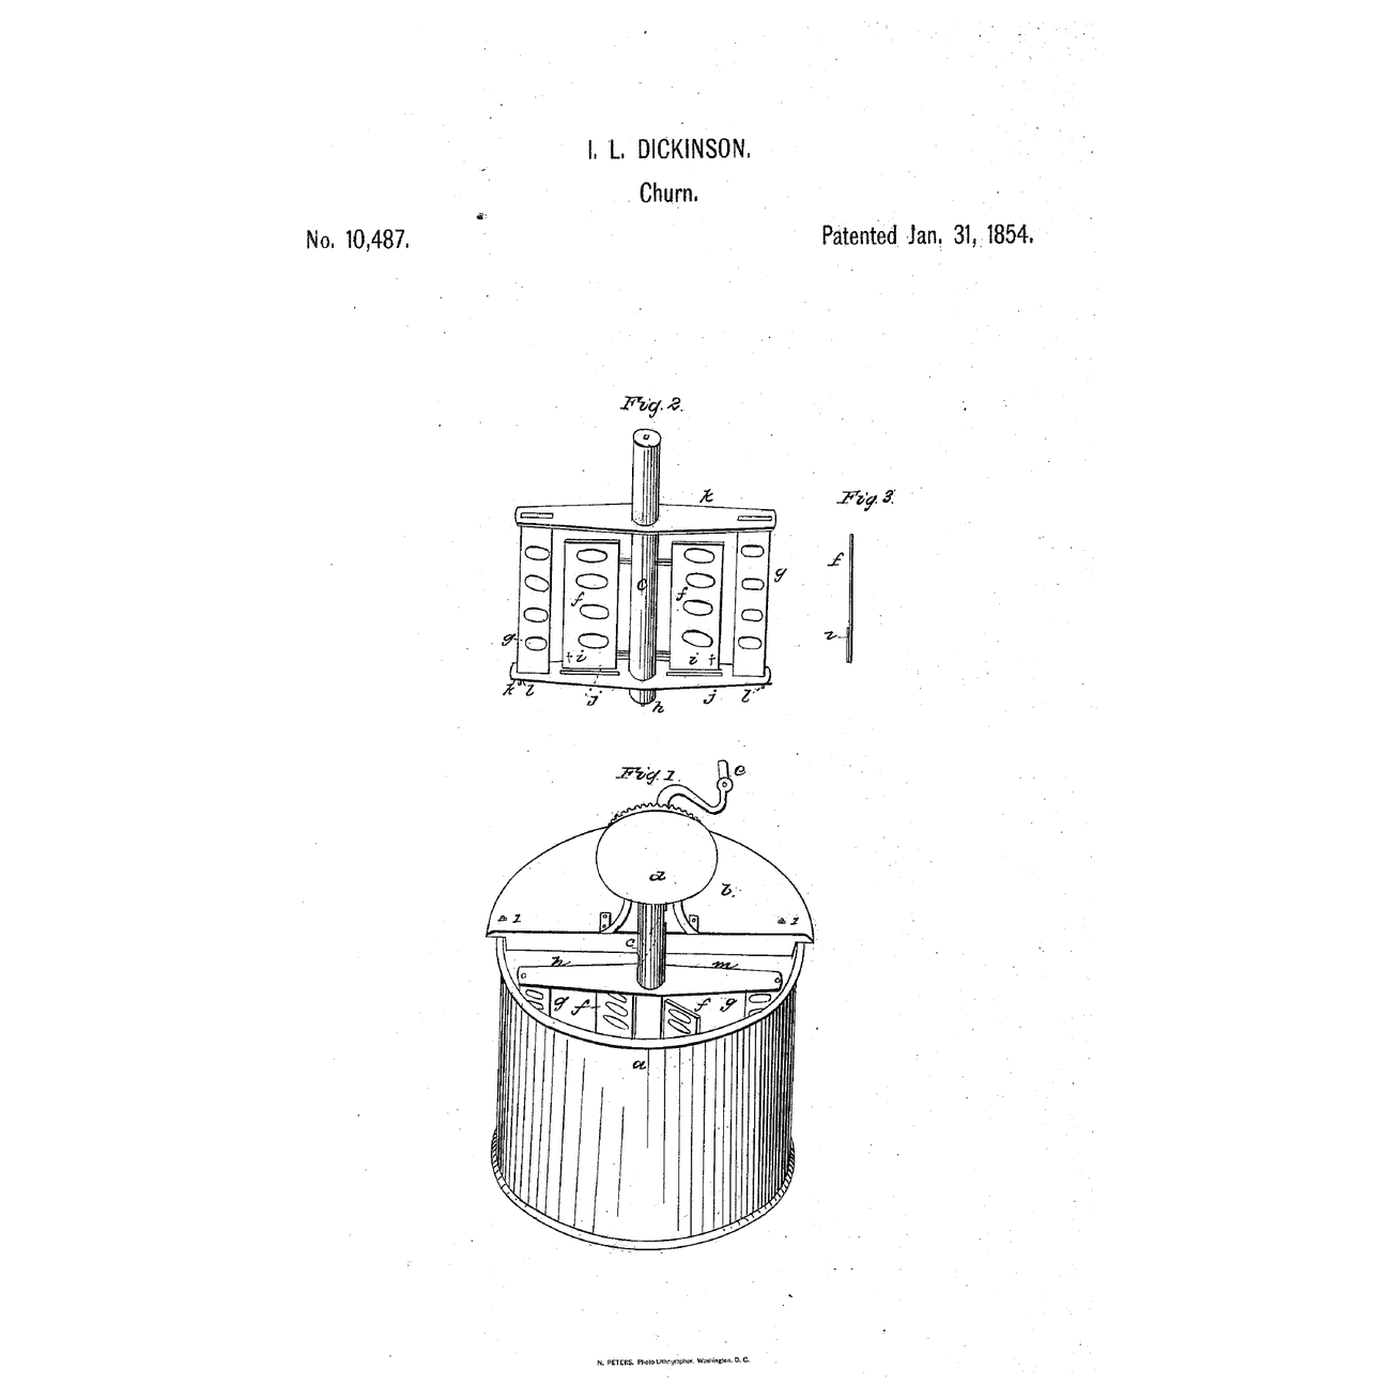
Dickinson's churn, which Sperry names

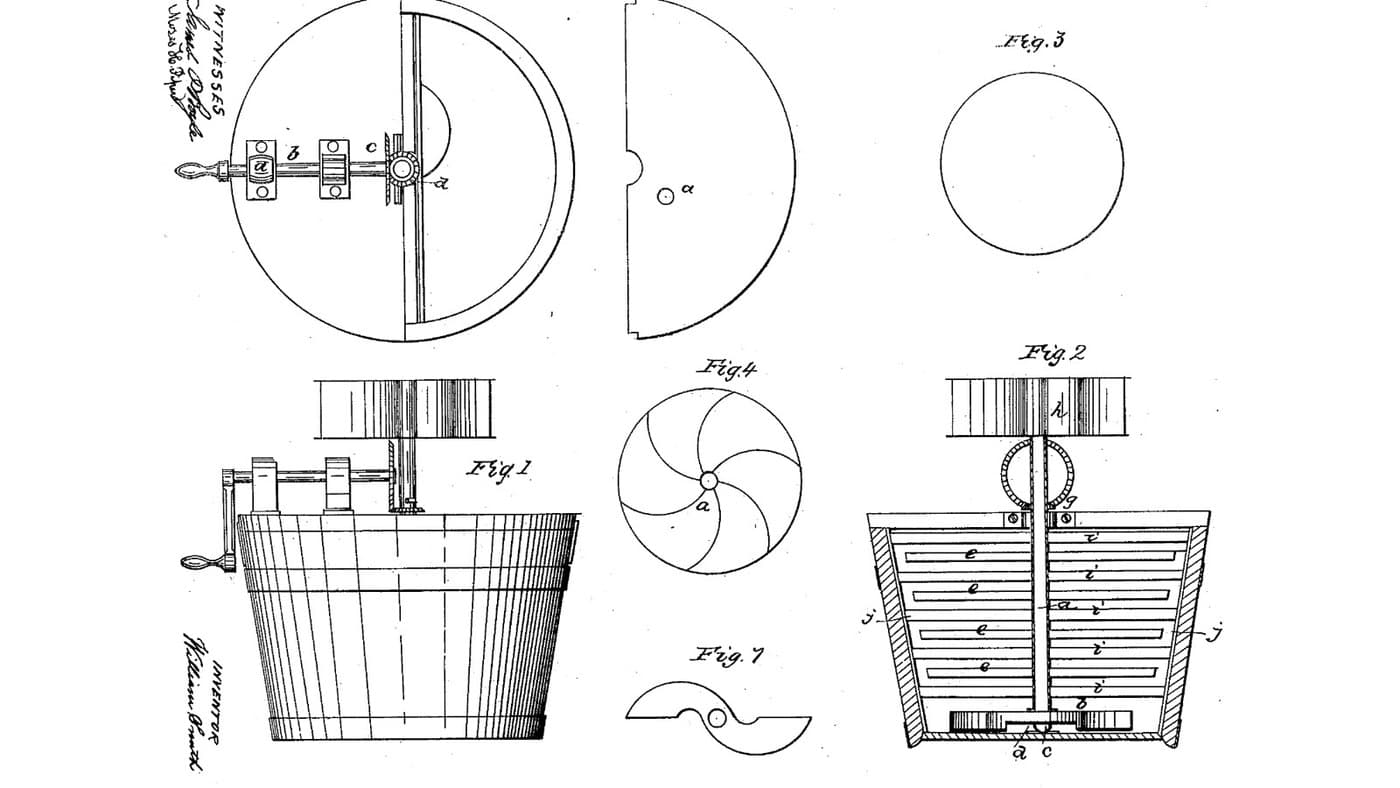
Dickinson's breakers were freed and caught by pins and spring catches at the bottom of the churn. Sperry moved both to the top.
3

Read US 25,285

"In order to break the cream, the breakers are arrested by depressing the spring hook i, and the dasher is rotated independent from the breaker frame, the hook g, being disconnected from the hole h, in the dasher shaft. After the butter has been separated from the milk, the hook g is pressed into the hole h, in the shaft, thereby connecting the breaker frame and the dasher, and the button k, is turned back, releasing the spring hook i".
4

Print the socket c

The 60 mm cup with a cone recess for the shaft's point, an M6 nut trap underneath and an O-ring groove. PETG, 0.2 mm layers, 40 % infill, 4 walls.
Arquivo de designSTLCC0 - Free
5

Print the wheel G

The 12-tooth spur pinion (module 2) for shaft F, bored 12.4 mm and cross-drilled for a pin. PETG, 0.2 mm layers, 40 % infill, 4 walls.
Arquivo de designSTLCC0 - Free
6

Print the wheel H

The 36-tooth crown wheel (module 2) for the crank shaft n, bored 12.4 mm and cross-drilled for a pin. Print it teeth up. PETG, 0.2 mm layers, 40 % infill, 4 walls.
Arquivo de designSTLCC0 - Free
7

Socket c in the tub's floor

Drill a 6.5 mm hole in the middle of the bucket's floor. Push an M6 nut into the cup's trap, lay an O-ring in its groove and bolt the cup over the hole from underneath with a stainless M6 x 16 bolt and a washer. Fill the bucket with water to check it does not leak, then empty it.

Materiais para este passo:

Balde de 20 litrosBalde de 20 litros1 peça
Sortido de parafusos sextavadosSortido de parafusos sextavados1 peça
Porca sextavadaPorca sextavada1 peça
Anilha planaAnilha plana1 peça
O-ringO-ring1 peça
Filamento PETGFilamento PETG1 peça

Ferramentas necessárias:

Impressora 3D de filamento (FDM)Impressora 3D de filamento (FDM)
Berbequim sem fiosBerbequim sem fios
Jogo de brocasJogo de brocas
Chave inglesa ajustávelChave inglesa ajustável
ÁguaÁgua
8

Shaft C and dasher D

Cut a 32 mm hardwood dowel 357 mm long. Whittle 14 mm of its foot to a point that sits in the cup and chisel a 16.4 mm square socket 15 mm deep in its top. Bore a 9 mm hole h across it 20 mm below the top. Mortise two hardwood arms 16 x 24 mm through it at 70 and 300 mm above the floor's level, at right angles, so they reach 88 mm from the middle, and screw four hardwood paddles 30 x 12 mm, 270 mm long, upright across their ends.

Materiais para este passo:

Cavilhas de madeira duraCavilhas de madeira dura1 peça
Tábua de madeira de leiTábua de madeira de lei1 peça
Cola de madeiraCola de madeira1 peça
Parafusos para madeiraParafusos para madeira16 peças

Ferramentas necessárias:

SerroteSerrote
FormõesFormões
Berbequim sem fiosBerbequim sem fios
Conjunto de brocas de páConjunto de brocas de pá
Jogo de brocasJogo de brocas
Esquadro fixoEsquadro fixo
Fita métricaFita métrica
9

Breaker frame E and hook g

Cut two hardwood bars 60 x 15 mm, rounded at the ends to fit inside the bucket at 30 and 332 mm up, and bore each 35 mm in the middle so they turn loosely on the shaft. Join them with four hardwood breakers 20 x 20 mm, two each side, their middles 102 and 124 mm from the shaft. Bore an 8 mm hole j in the top bar 115 mm from the middle. Bend a hook g from 6 mm stainless rod and pivot it on the top bar so it swings into hole h.

Materiais para este passo:

Tábua de madeira de leiTábua de madeira de lei1 peça
Cola de madeiraCola de madeira1 peça
Parafusos para madeiraParafusos para madeira8 peças
Varão de aço inoxidávelVarão de aço inoxidável1 peça
Sortido de parafusos sextavadosSortido de parafusos sextavados1 peça
Porca de segurança com anel de nylonPorca de segurança com anel de nylon1 peça

Ferramentas necessárias:

SerroteSerrote

Serra tico-ticoSerra tico-tico
Berbequim sem fiosBerbequim sem fios
Conjunto de brocas de páConjunto de brocas de pá
Jogo de brocasJogo de brocas
Torno de bancadaTorno de bancada
Serra de arco para metaisSerra de arco para metais
Limas (lima de mão)Limas (lima de mão)
10

Lid B, framing J, gearing and spring hook i

Cut a 320 mm disc of 12 mm plywood, saw it in half and notch both halves for a 34 mm hole in the middle. Screw a hardwood block 80 x 56 x 30 mm on the front half over the middle, bored 13 mm, and two bearing blocks 44 x 30 mm, 114 mm tall, bored 12.6 mm through 94 mm up. Shape a 16 mm square pin m on the end of a 12 mm stainless shaft F, drop it through the block into C's socket and pin the wheel G on it above the block. Slide the crank shaft n through the bearing blocks, pin the wheel H on its inner end meshing with G, and fit a crank and handle. Drill a 9 mm hole through the lid over hole j, rivet a spring-steel strip with a 7 mm pin over it so the pin can be pressed into j, and pivot a hardwood button k beside it to hold it down. Fit hooks and eyes to hold the lid halves to the bucket.

Materiais para este passo:

Placa de contraplacadoPlaca de contraplacado1 peça
Tábua de madeira de leiTábua de madeira de lei1 peça
Varão de aço inoxidávelVarão de aço inoxidável1 peça
Fita de aço-molaFita de aço-mola1 peça
Arame de aço inoxidávelArame de aço inoxidável1 peça
Colchete (macho e fêmea)Colchete (macho e fêmea)4 peças
Sortido de parafusos sextavadosSortido de parafusos sextavados2 peças
Parafusos para madeiraParafusos para madeira12 peças
Filamento PETGFilamento PETG1 peça

Ferramentas necessárias:

Impressora 3D de filamento (FDM)Impressora 3D de filamento (FDM)
Serra tico-ticoSerra tico-tico
Berbequim sem fiosBerbequim sem fios
Conjunto de brocas de páConjunto de brocas de pá
Jogo de brocasJogo de brocas
Serra de arco para metaisSerra de arco para metais
Limas (lima de mão)Limas (lima de mão)
Tesoura de chapaTesoura de chapa
Alicate de bicos redondosAlicate de bicos redondos
Conjunto de chaves de fendasConjunto de chaves de fendas
Chave inglesa ajustávelChave inglesa ajustável
11

The build in 3D

FreeCAD model of this build, cut open: the cup in the floor, the dasher's four paddles inside the breaker frame, hook g into hole h, the spring hook i and button k on the lid, the framing with shaft F, wheels G and H and the crank. The dasher was turned alone and with the frame through 16 angles.
Arquivo de designBLENDCC0 - Free
12

Churn, then gather

Pour about 8 litres of heavy cream at about 15 °C into the bucket, checked with the thermometer. With hook g out of hole h, press the spring hook i into hole j and turn the button over it. Turn the crank steadily, timing it. When the butter comes, take off the back half of the lid, push hook g into h, turn the button back to free the spring hook, and turn the crank back and forth to gather the butter. Lift it out, wash it in cold water until it runs clear, work in a pinch of salt and weigh it.

Materiais para este passo:

Natas para baterNatas para bater8 l
Sal marinho grossoSal marinho grosso1 peça
ÁguaÁgua1 peça

Ferramentas necessárias:

Termómetro de sonda permanenteTermómetro de sonda permanente
CronómetroCronómetro
Balança digital de cozinhaBalança digital de cozinha
Taça grande de aço inoxidávelTaça grande de aço inoxidável
13

Troubleshooting

Hooked breaker-frame churn troubleshooting.

Flow

Loading...
14

History and honest limits

**A. L. Sperry** of Auburn, Indiana, US 25,285, 30 August 1859, "Churn". He claimed the arrangement of the hook i and button k with the dasher D and breaker frame E. He named Dickinson's churn of 31 January 1854 and T. B. Harper's of 27 April 1858 and disclaimed what they claimed. He gives no sizes, so every size here is ours. He calls his wheels G and H two similar bevel wheels; his Fig. 1 draws a large wheel and a small one, and we use a printed crown wheel and pinion in their place.

Materiais

19

Ferramentas necessárias

21

Ficheiros de design

4

CC0 Domínio Público

Este blueprint é liberado sob CC0. Você é livre para copiar, modificar, distribuir e usar este trabalho para qualquer finalidade, sem pedir permissão.

Apoie o Maker comprando produtos através do Blueprint, onde ele ganha uma Comissão Maker definida pelos vendedores, ou crie uma nova versão deste Blueprint e inclua-o como conexão no seu próprio Blueprint para compartilhar receita.

Discussão

(0)

Entrar para participar da discussão

Carregando comentários...