Colaboração
ARTE
BELEZA E BEM-ESTAR
ARTESANATO
CULTURA E HISTÓRIA
ENTRETENIMENTO
MEIO AMBIENTE
COMIDA E BEBIDAS
ENGENHARIA REVERSA
CIÊNCIAS
ESPORTES
TECNOLOGIA
TECNOLOGIA VESTÍVEL
Leaning-Scoop Churn: Three Scoops Tilted 10, 5 and 0 Degrees Throw the Cream at Sharp-Topped Ribs and a Slit Cover
Buttercup

Criado por

Buttercup

11. novembro 2026IE
6
0
0
0
0

Leaning-Scoop Churn: Three Scoops Tilted 10, 5 and 0 Degrees Throw the Cream at Sharp-Topped Ribs and a Slit Cover

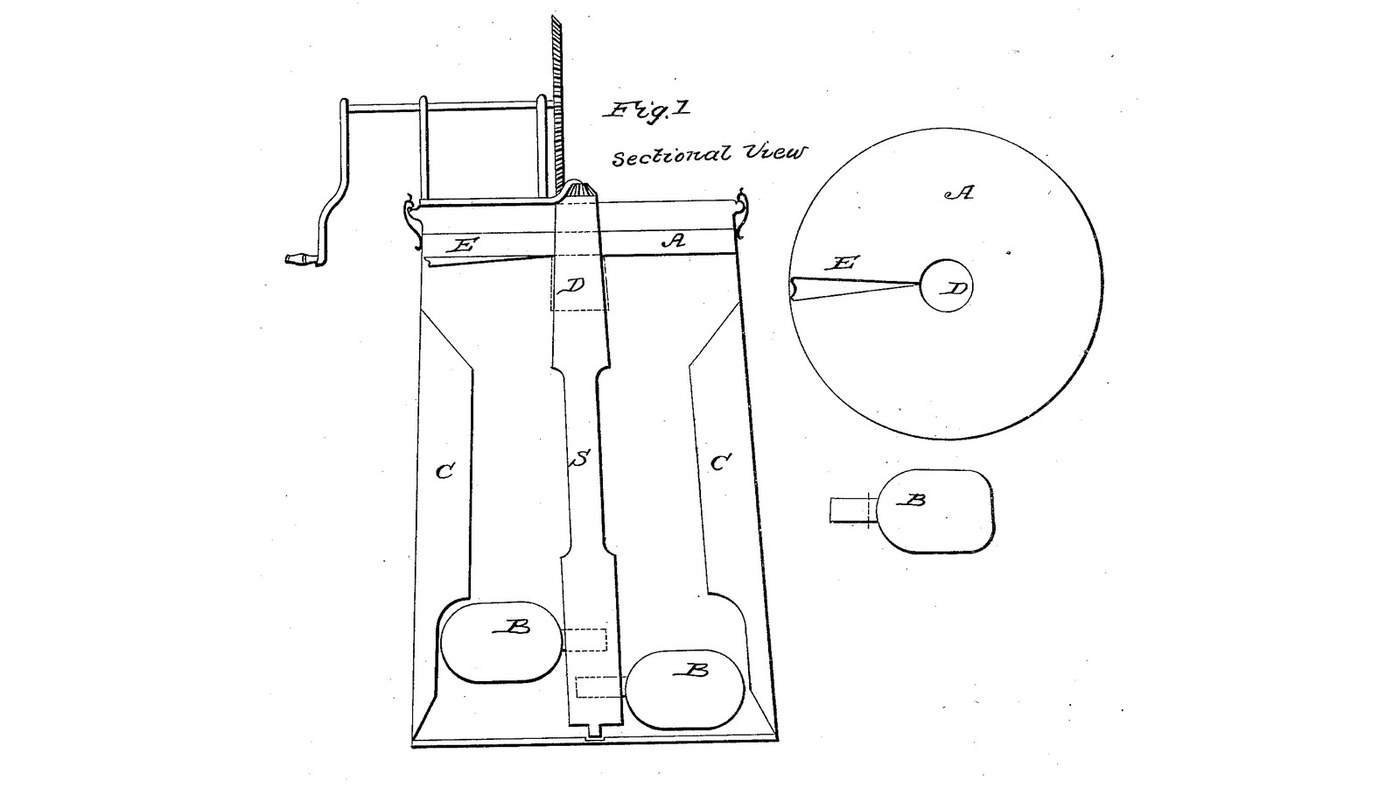
Daniel H. Wiswell of Buffalo, New York, received US 27,504, dated 13 March 1860, for a churn. Three concave scoops on a crank-turned upright shaft lean back by different amounts, 10, 5 and 0 degrees, and throw the cream against ribs on the wall, whose tops slant down to a sharp edge, and up against an inner cover slit on one side with one lip raised over the other. The patent gives no sizes; every size here is ours, and so is our reading of where the scoops sit.
Intermediário
About 2 days, plus printing

Instruções

1

Three scoops, three leans

A carregar o notebook Jupyter…
2

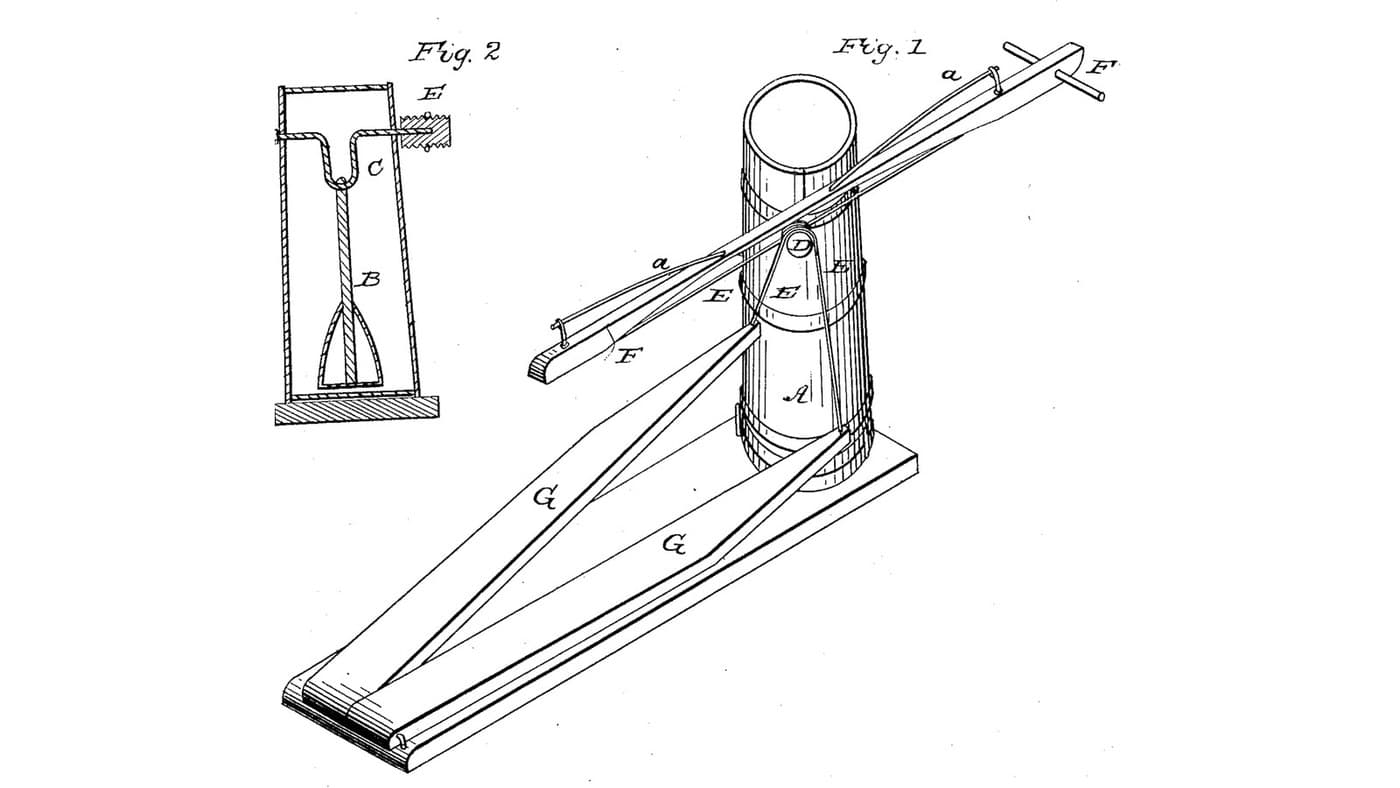
An upright churn worked from the top, one month before

Willson strokes his dasher up and down. Wiswell turns his scoops round an upright shaft.
3

Read US 27,504

"The nature of my invention and improvement consists in the application of the scoops or arms marked B inserted in a shaft marked S, one at the base, the upper edge of which scoop or arm leans backward ten degrees; the second, one third distant to the left, the upper edge of which leans backward five degrees; the third, one third distant from the second and above the other at right angles."
4

Print the scoop leaning 10 degrees

Concave scoop 90 mm long and 64 across, its stem 12 mm, the scoop turned 10 degrees on the stem. PETG, 0.2 mm layers, 40 % infill, 4 walls.
Arquivo de designSTLCC0 - Free
5

Print the scoop leaning 5 degrees

The same scoop turned 5 degrees on its stem. PETG, 0.2 mm layers, 40 % infill, 4 walls.
Arquivo de designSTLCC0 - Free
6

Print the upright scoop

The same scoop, upright on its stem. PETG, 0.2 mm layers, 40 % infill, 4 walls.
Arquivo de designSTLCC0 - Free
7

Print the crown wheel

Crown wheel, 36 teeth on its face, module 2, with a hub; bored 12.4 mm. PETG, 0.2 mm layers, 40 % infill, 4 walls.
Arquivo de designSTLCC0 - Free
8

Print the pinion

Spur pinion, 12 teeth, module 2, with a hub; bored 12.4 mm. PETG, 0.2 mm layers, 40 % infill, 4 walls.
Arquivo de designSTLCC0 - Free
9

Shaft S, spindle box F and scoops B

Cut a 35 mm hardwood dowel 348 mm long for the shaft and drill 12 mm stainless spindles 30 mm into each end, the lower one standing out 15 mm, the upper one 70 mm. Screw a hardwood block 60 x 60 x 20 mm to the bucket's floor centre as the spindle box F and bore it 12.6 mm, 15 deep. Bore three 12 mm holes into the shaft for the scoops' stems, a third of a turn apart, 56, 86 and 116 mm above the floor, and glue the scoops in, the 10-degree one lowest, the upright one highest, each leaning back against the way the shaft turns.

Materiais para este passo:

Balde de 20 litrosBalde de 20 litros1 peça
Cavilhas de madeira duraCavilhas de madeira dura1 peça
Varão de aço inoxidávelVarão de aço inoxidável1 peça
Bloco de madeira duraBloco de madeira dura1 peça
Cola de madeiraCola de madeira1 peça
Parafusos para madeiraParafusos para madeira2 peças
Vedante de siliconeVedante de silicone1 peça
Filamento PETGFilamento PETG1 peça

Ferramentas necessárias:

Impressora 3D de filamento (FDM)Impressora 3D de filamento (FDM)
Serra de arco para metaisSerra de arco para metais
Berbequim sem fiosBerbequim sem fios
Jogo de brocasJogo de brocas
Limas (lima de mão)Limas (lima de mão)
Torno de bancadaTorno de bancada
TransferidorTransferidor
Conjunto de chaves de fendasConjunto de chaves de fendas
10

Ribs C

Cut four hardwood ribs 20 mm thick and 25 deep, 100 mm long on the inner edge and with their tops slanting down from the wall to the inner edge over 40 mm; plane both faces of the slant to a sharp edge. Screw them inside the bucket a quarter turn apart, 160 mm up from the floor, and seal each screw hole outside with silicone.

Materiais para este passo:

Tábua de madeira de leiTábua de madeira de lei1 peça
Parafusos para madeiraParafusos para madeira8 peças
Vedante de siliconeVedante de silicone1 peça

Ferramentas necessárias:
Serra de mesaSerra de mesa
LixaLixa
Berbequim sem fiosBerbequim sem fios
Jogo de brocasJogo de brocas
Conjunto de chaves de fendasConjunto de chaves de fendas
11

Inner cover A, tube D and slit E

Cut a disc of 3 mm HDPE sheet to fit inside the bucket 300 mm up, with a 40 mm hole in the centre, and fit a printed or hardwood tube D 48 mm across and 60 long in the hole round the shaft. Saw a slit E from the tube to the rim; warm the sheet beside it with the heat gun and lift one side 15 mm so it projects over the other. Screw three small hardwood cleats inside the bucket for the cover to rest on.

Materiais para este passo:

Chapa de PEADChapa de PEAD1 peça
Tábua de madeira de leiTábua de madeira de lei1 peça
Parafusos para madeiraParafusos para madeira6 peças
Vedante de siliconeVedante de silicone1 peça

Ferramentas necessárias:

Serra tico-ticoSerra tico-tico
Pistola de ar quentePistola de ar quente
Berbequim sem fiosBerbequim sem fios
Jogo de brocasJogo de brocas
Limas (lima de mão)Limas (lima de mão)
Conjunto de chaves de fendasConjunto de chaves de fendas
12

Bridge and crank

Cut a hardwood bridge 350 x 205 x 25 mm to sit on the bucket's rim and bore it 13 mm over the centre for the shaft's upper spindle; fit the pinion on the spindle above it. Screw two hardwood chairs on the bridge carrying a 12 mm stainless crank shaft with the crown wheel meshing the pinion, and fit a hardwood crank with a dowel handle on its outer end; hold it with collars.

Materiais para este passo:

Tábua de madeira de leiTábua de madeira de lei2 peças
Varão de aço inoxidávelVarão de aço inoxidável1 peça
Cavilhas de madeira duraCavilhas de madeira dura1 peça
Cola de madeiraCola de madeira1 peça
Parafusos para madeiraParafusos para madeira8 peças
Shaft CollarShaft Collar2 peças
ContrapinoContrapino1 peça

Ferramentas necessárias:

Serra de mesaSerra de mesa
Berbequim sem fiosBerbequim sem fios
Jogo de brocasJogo de brocas
Conjunto de brocas de páConjunto de brocas de pá
Serra de arco para metaisSerra de arco para metais
Sargento de barraSargento de barra
Conjunto de chaves de fendasConjunto de chaves de fendas
Fita métricaFita métrica
13

The build in 3D

FreeCAD model of this build, the bucket cut through the middle: the shaft S on its spindle box, the three leaning scoops, the ribs, the slit inner cover with its tube, and the bridge with the crank, crown wheel and pinion.
Arquivo de designBLENDCC0 - Free
14

Churn

Pour about 6 litres of heavy cream at about 15 °C, checked with the thermometer, into the bucket, set the shaft in its box, lay the cover over the shaft on its cleats, and set the bridge and gearing on the rim. Turn the crank steadily, timing it, so the scoops travel with their hollows forward. When the butter comes, lift off the bridge, cover and shaft, take out the butter, pour the buttermilk into a bowl, wash the butter in cold water until it runs clear, salt and weigh it.

Materiais para este passo:

Natas para baterNatas para bater6 l
Sal marinho grossoSal marinho grosso1 peça
ÁguaÁgua1 peça

Ferramentas necessárias:

Termómetro de sonda permanenteTermómetro de sonda permanente
CronómetroCronómetro
Balança digital de cozinhaBalança digital de cozinha
Taça grande de aço inoxidávelTaça grande de aço inoxidável
15

Troubleshooting

Leaning-scoop churn troubleshooting.

Flow

Loading...
16

History and honest limits

**Daniel H. Wiswell** of Buffalo, New York, US 27,504, 13 March 1860, "Churn", assigned to Chas. W. Adams and Debby Pinner. He claimed the inner cover A, the scoops B, and the sharp edge and slant of the ribs' tops, combined. His text does not make plain where each scoop sits; ours are a third of a turn apart, each higher than the last, the third upright. His spindle box is lignum vitae or hemlock knot; ours is hardwood. Every size here is ours.

Materiais

15

Ferramentas necessárias

19

Ficheiros de design

6

CC0 Domínio Público

Este blueprint é liberado sob CC0. Você é livre para copiar, modificar, distribuir e usar este trabalho para qualquer finalidade, sem pedir permissão.

Apoie o Maker comprando produtos através do Blueprint, onde ele ganha uma Comissão Maker definida pelos vendedores, ou crie uma nova versão deste Blueprint e inclua-o como conexão no seu próprio Blueprint para compartilhar receita.

Discussão

(0)

Entrar para participar da discussão

Carregando comentários...