སྒྱུ་རྩལ
མཛེས་སྡུག་དང་བདེ་ཐང
བཟོ་རིག
རིག་གནས་དང་ལོ་རྒྱུས
དགའ་སྟོན
ཁོར་ཡུག
ཟས་དང་བཏུང་རྫས
ཕྱིར་འཕྲུལ་རིག
ཚན་རིག
རྩེད་འགྲན
རིག་རྩལ
གྱོན་རུང
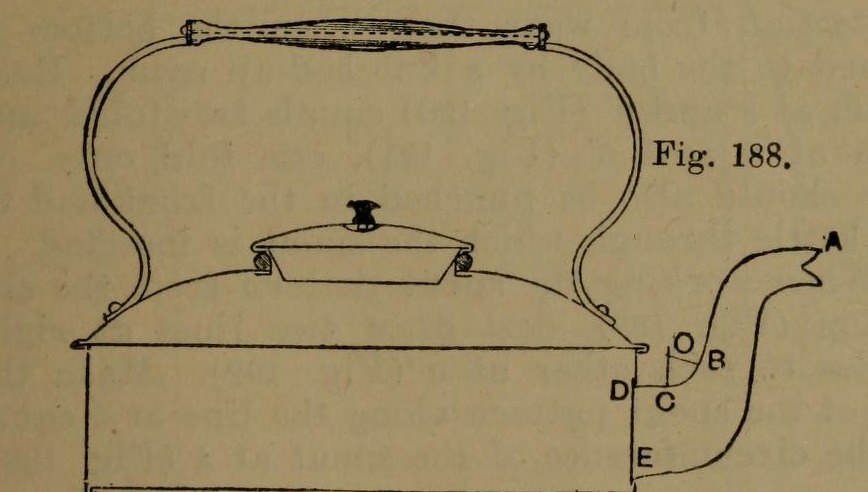


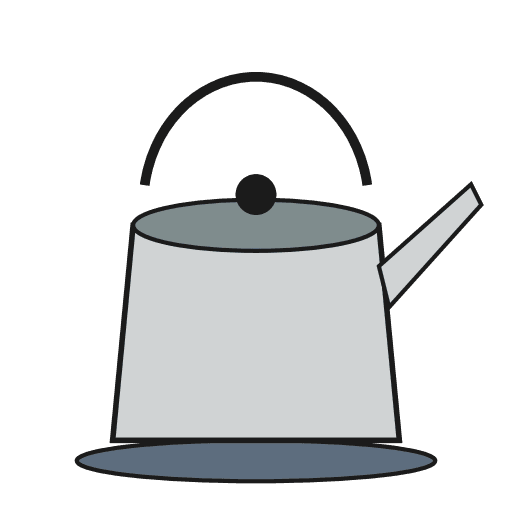
Stovetop Kettle: a Square Copper Kettle (Hasluck, 1907)
A tinsmith's square kettle in sheet copper, 9 x 9 in and 3 5/8 in deep: a box body with folded corner seams, a hollowed top pened on, a brazed and bent spout, a small cover, and a wooden handle on brass uprights.
Hasluck prefers copper; tinplate also works and is a separate route.
Source: Paul N. Hasluck, Tinplate Work (1907), pp. 91-98. Unknown: copper gauge, solder. Picture: Figs. 188-189 of the book.
མཐོ་རིམ
Unknown
ལམ་སྟོན
1
1
Cut the patterns
Cut the patterns
For a body 9 x 9 x 3 5/8 in, cut two ends 9 1/2 x 4 in and two sides 9 1/4 x 4 in, notched for box seams at the corners (Figs. 190-191), with allowances to fold at top and bottom. Punch the spout hole in the front. Cut the bottom 9 1/2 in square, notched for a 1/4 in edge. Set out the top as a 10 1/2 in square with curved allowances for hollowing and a 4 in circle for the cover hole (Fig. 193); set out the spout from the elevation (Fig. 192), the cover and its cone-shaped rim (Figs. 194-195).
གོམ་པ་འདིའི་རྫས་རིགས:
 ཟངས་ཀྱི་ལེབ་ཤོག1 body, bottom, top, spout, cover
ལག་ཆས་དགོས་མཁོ:
 རྩེ་གཉིས་ཀྱི་སྐོར་ཐིག་ཆས།
 ཐིག་འཛུགས་ཁབ།
 ལྕགས་ལེབ་གཏུབ་ནིའི་ཇེམ་ཙི།
2
2
Braze and shape the spout
Braze and shape the spout
Thin the long edges by hammering. Set in the throat with a stretching hammer on a beak iron, bend the spout round until the edges overlap, bind it with wire, lay spelter and borax along the inside of the seam and braze it; then close and braze the under seam. Fill it with lead and bend the neck with a round-faced hammer on the hollowing block; file off spare spelter and smooth it. Run out the lead, throw off a seating round the large end, trim the top with snips and tin the inside.
གོམ་པ་འདིའི་རྫས་རིགས:
 མ་ཤེས་པའི་ལྕགས་རིགས།1 spelter
 གསེར་ཞུན1 tinning
ལག་ཆས་དགོས་མཁོ:
 སྙོམས་བཟོའི་ཐོ་བ།
 ཕུར་པ
 ལྕགས་སྐུད
 ཚ་ལེ་ཕྱེ་མ།
 ལི་སྦྱོར་གྱི་མེ་ཁ།
 ཞའི
 བུ་ག་ཡོད་པའི་སྐྱོགས
 སྲ་བའི་ཤིང་གི་སྒོ་རྡོག
 ལྕགས་ཀྱི་དར་མ།ལྕགས་ལེབ་གཏུབ་ནིའི་ཇེམ་ཙི།
3
3
Fold and seam the body
Fold and seam the body
Fold the top edges square, the front and back outwards and the sides likewise; fold the bottom edges right over inwards to take the bottom (Fig. 188). Hook each side's end over the front's and work the corner seam on a straight-edged tool (Figs. 198-199). Turn up the bottom's 1/4 in edge, push it edge-down into the bottom folds, and solder the bottom and seams.
གོམ་པ་འདིའི་རྫས་རིགས:
 གསའ-ཞ་ཡི་ལྷ་ཡིག1 དུམ་བུ།
ལག་ཆས་དགོས་མཁོ:
 ཤིང་གི་ཐོ་བ།ཕུར་པ
 གློག་གི་ཞ་སྦྱར་ལྕགས
 ཞུ་རོགས་རྫས
4
4
Hollow the top and make the cover
Hollow the top and make the cover
Hollow the top on the block: sink the four sides a little, hollow the corners with a bullet-faced hammer, flatten each side along the block edge, even the shoulder and smooth it all over. Pare the edges, mark the flange with an edging machine, set it down square with a hatchet stake and mallet, and take up an edge to fit over the body. Cut the cover hole with circular snips and fit a narrow wired rim, worked over inside. Make the cover: solder its cone rim to fit the wired rim, throw off a flange, hollow the cover disc and seam it on, and fix the knob.
གོམ་པ་འདིའི་རྫས་རིགས:
ལྕགས་སྐུད1 rimགསའ-ཞ་ཡི་ལྷ་ཡིག1 དུམ་བུ།མ་ཤེས་པའི་ལྕགས་རིགས།1 cover knobལག་ཆས་དགོས་མཁོ:
སྙོམས་བཟོའི་ཐོ་བ།སྲ་བའི་ཤིང་གི་སྒོ་རྡོགཕུར་པཤིང་གི་ཐོ་བ།ལྕགས་ལེབ་གཏུབ་ནིའི་ཇེམ་ཙི།གློག་གི་ཞ་སྦྱར་ལྕགསཞུ་རོགས་རྫས5
5
Handle, top and spout
Handle, top and spout
Cut two handle uprights from stout brass or copper band (Fig. 196), drill them for rivets and for the spindle that carries the wooden handle, and bend them to shape. Rivet them to the top and solder over the rivet heads inside. Pene the top down onto the body and solder along each edge. Push the spout through its hole from inside until its large end butts against the front, and solder it strongly from inside.
གོམ་པ་འདིའི་རྫས་རིགས:
 རག་གི་ལེབ་ཤོག1 handle uprights
 རག་གི་དབྱུག་པ།1 spindle
 ཡུ་བ།1 wood
 ཟངས་ཀྱི་རི་བེཊ།1 number not givenགསའ-ཞ་ཡི་ལྷ་ཡིག1 དུམ་བུ།
ལག་ཆས་དགོས་མཁོ:
 ལག་འཕྲུལ་ཁུང་བཏོན
 གཟེར་བརྡུང་གི་ཐོ་བ།ཤིང་གི་ཐོ་བ།གློག་གི་ཞ་སྦྱར་ལྕགསཞུ་རོགས་རྫས
རྫས་རིགས
9- 1 body, bottom, top, spout, coverས་ཆ་འཛིན
- 1 cover knobས་ཆ་འཛིན
- 1 tinningས་ཆ་འཛིན
- 3 དུམ་བུ།ས་ཆ་འཛིན
- 1 rimས་ཆ་འཛིན
- 1 handle uprightsས་ཆ་འཛིན
- 1 spindleས་ཆ་འཛིན
- 1 woodས་ཆ་འཛིན
- 1 number not givenས་ཆ་འཛིན
ལག་ཆས་དགོས་མཁོ
17- ས་ཆ་འཛིན
- ས་ཆ་འཛིན
- ས་ཆ་འཛིན
- ས་ཆ་འཛིན
- ས་ཆ་འཛིན
- ས་ཆ་འཛིན
- ས་ཆ་འཛིན
- ས་ཆ་འཛིན
- ས་ཆ་འཛིན
- ས་ཆ་འཛིན
- ས་ཆ་འཛིན
- ས་ཆ་འཛིན
- ས་ཆ་འཛིན
- ས་ཆ་འཛིན
- ས་ཆ་འཛིན
- ས་ཆ་འཛིན
- ས་ཆ་འཛིན
མཐུད་སྦྲེལ་བིལུ་པིརིན་ཊི་རྫས་རིགས


བིལུ་པིརིན་ཊི་འདི་གིས་བཟོ་མི
CC0 སྤྱི་དབང
བིལུ་པིརིན་ཊི་འདི་CC0 འོག་བཀྲམས་ཡོད། ཁྱེད་རང་གིས་ཆོག་མཆན་མ་བཞེས་པར་ཕབ་ལེན་དང་བཟོ་བཅོས། བགོ་བཤའ། དགོས་མཁོ་གང་ལའང་བཀོལ་སྤྱོད་བྱས་ཆོག
བཟོ་མཁན་ལ་རྒྱབ་སྐྱོར་བྱེད་པའི་ཆེད་ཁོང་ཚོའི་བིལུ་པིརིན་ཊི་བརྒྱུད་ཐོན་སྐྱེད་ཉོ། བཟོ་མཁན་གྱིས བཟོ་མཁན་གྱི་ཁེ་ཕོགས ཚོང་པས་གཏན་འཁེལ་བྱས་པ། ཡང་ན་བིལུ་པིརིན་ཊི་འདིའི་པར་གསར་བཟོས་ཏེ་ཁྱེད་རང་གི་བིལུ་པིརིན་ཊི་ནང་མཐུད་སྦྲེལ་བྱས་ཏེ་ཡོང་སྒོ་བགོ་བཤའ་བྱེད།