
Zusammenarbeit
KUNST
SCHÖNHEIT & WELLNESS
HANDWERK
KULTUR & GESCHICHTE
UNTERHALTUNG
UMFELD
ESSEN & GETRÄNKE
REVERSE ENGINEERING
WISSENSCHAFTEN
SPORT
TECHNOLOGIE
WEARABLES
Mechanical Kitchen Scale: Sheet-Metal Case, Guided Plate and Two Springs to a Dial (Hansen, 1939)
Penny

Erstellt von

Penny

2. November 2026DK
6
0
0
1
0

Mechanical Kitchen Scale: Sheet-Metal Case, Guided Plate and Two Springs to a Dial (Hansen, 1939)

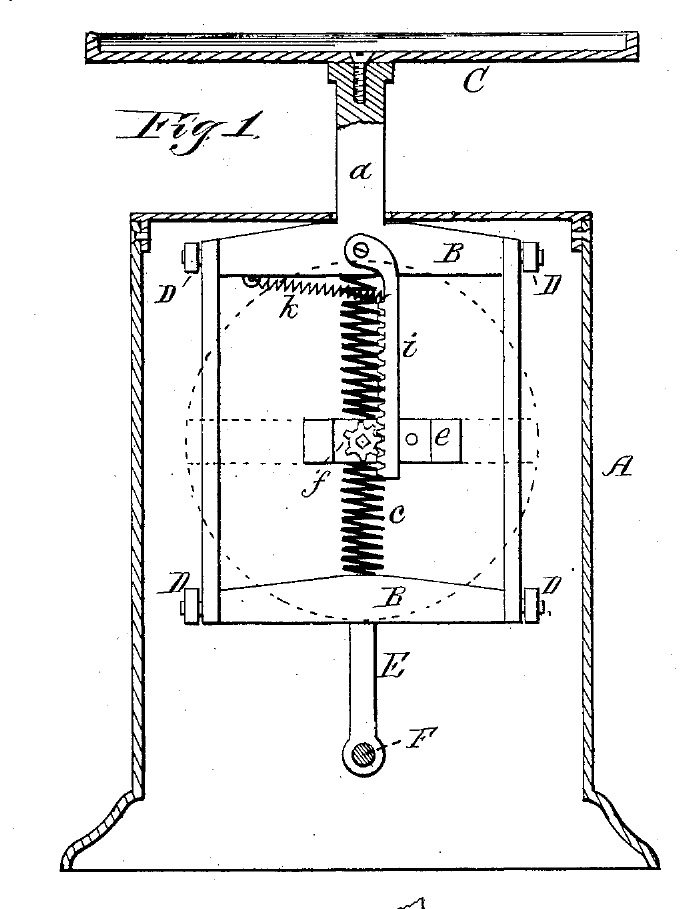
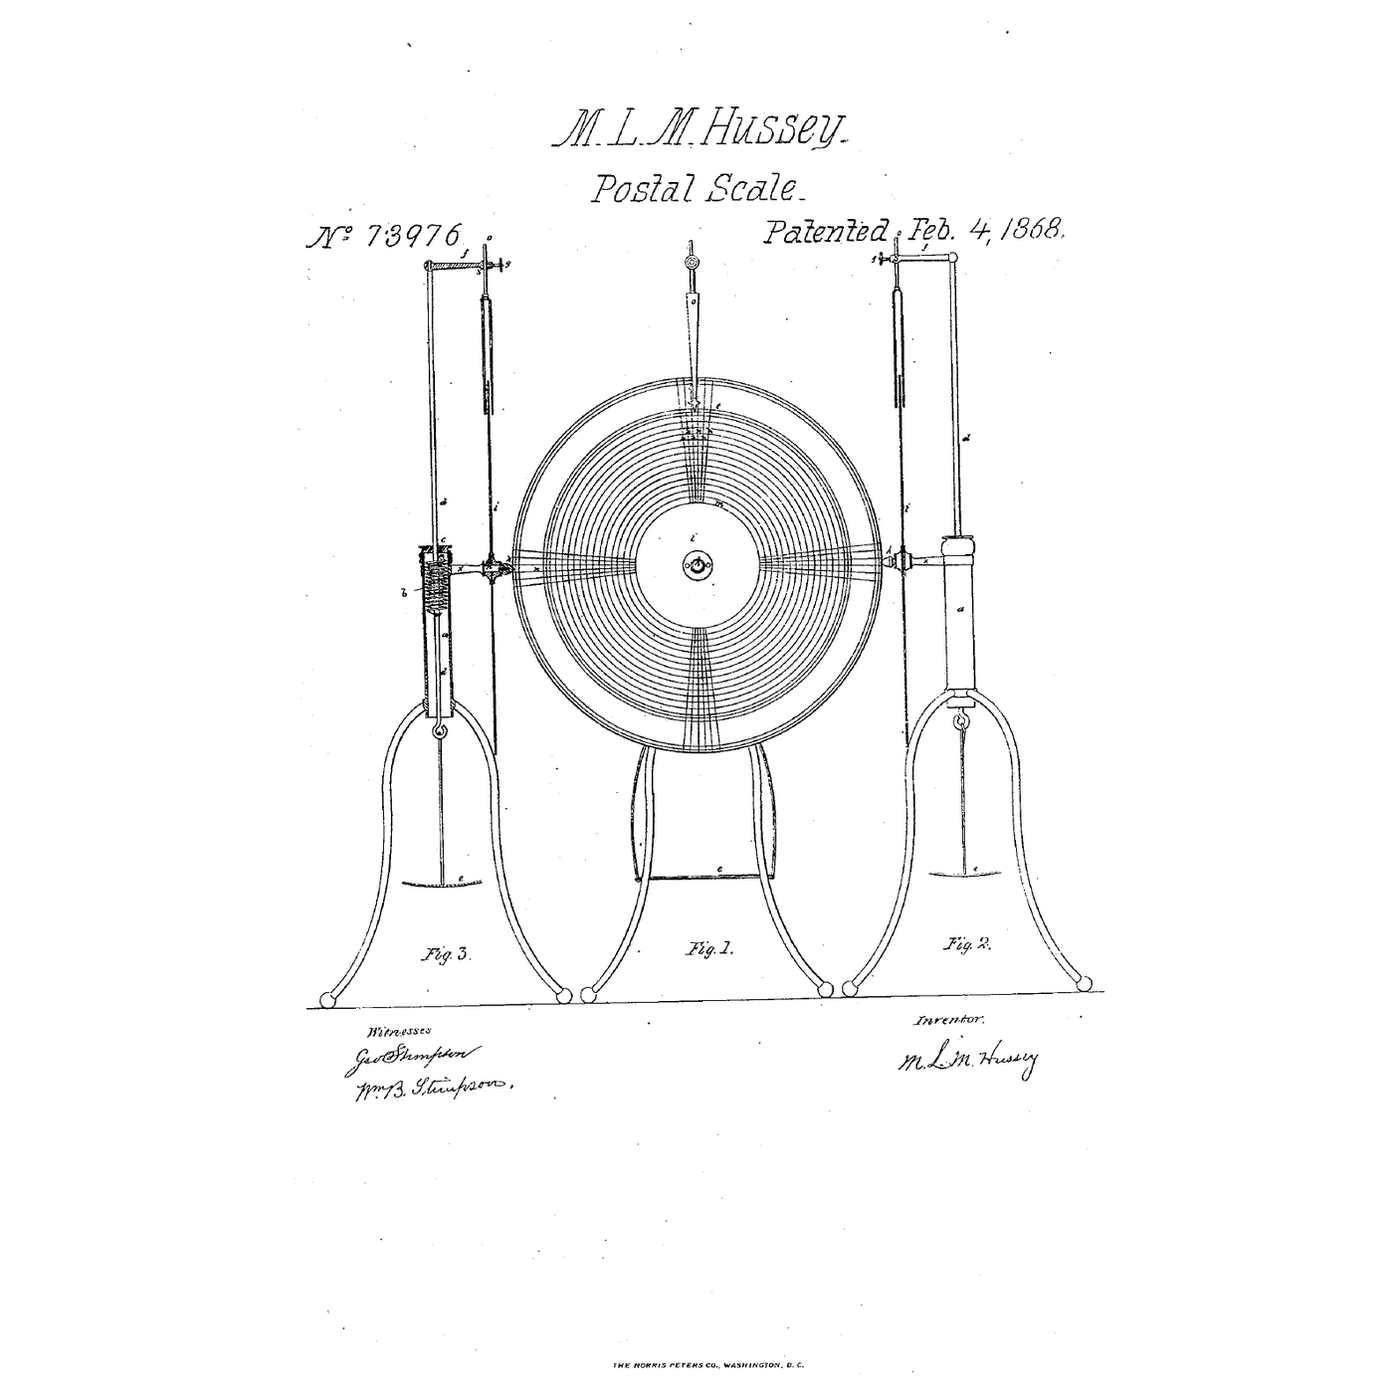
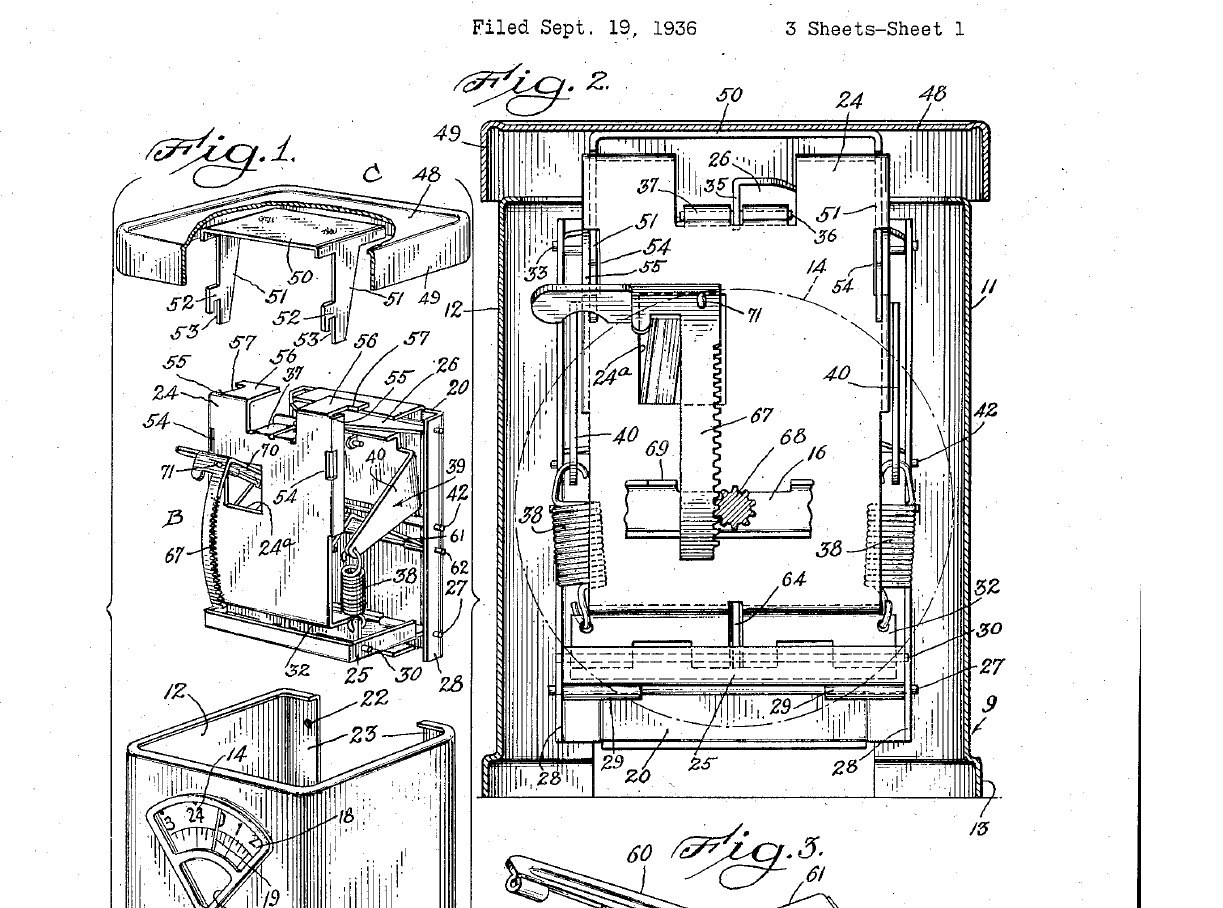
The everyday kitchen spring scale, built almost entirely from sheet metal. The platform hangs from a plate that two pivoted links keep moving straight up and down, the way Roberval's frame keeps a pan level. Two springs carry the load, and a rack turns the numbered dial behind a small window. Result: a household scale that reads the true weight even when the food is put on one edge of the platform, because the dial is driven from the point midway between the two springs. It goes together from three units: case, weighing works and platform. Source: M. H. Hansen (Hanson Scale Co.), US Patent 2,145,480 (1939). Unknown: the sheet metal and its sizes, the springs, the capacity and how the dial is marked. Picture: patent drawing.
Erfahren
3 days

Anweisungen

1

Make the case and fit the dial

Bend sheet metal into a U: a front wall and two side walls, the lower edges flared outward to stand steady, open at the top and back, with inturned flanges on the back edges. Cut a sector-shaped window in the front and glaze it. Fix a bracket across the side walls, and run the dial shaft from the front wall to the bracket. On the shaft goes the round dial, numbered on its face, and a pinion behind it. Fit a fixed pointer at the window. Not given: the metal, gauge and sizes, and how the dial is numbered.

Materialien für diesen Schritt:

Unbekanntes MetallUnbekanntes Metall1 Blatt
GlasscheibeGlasscheibe1 window
Waagen-Skala und ZeigerWaagen-Skala und Zeiger1 Stück
RitzelRitzel1 Stück

Benötigte Werkzeuge:

BlechschereBlechschere
ZangensatzZangensatz
Unbekannte MaßeUnbekannte Maße
2

Build the guided plate on two springs

On a flat rear plate, pin two horizontal links: a lower rectangular one and an upper triangular one. Pin their front ends to an upright plate, which can now only move straight up and down. Hang the upright plate from two tension springs at its lower corners. Hook their tops to the arms of a U-shaped bracket pivoted on the rear plate. A bolt through the rear plate, with a compression spring and a nut, swings the bracket to set the zero.

Materialien für diesen Schritt:

Unbekanntes MetallUnbekanntes Metall1 Blatt
StecknadelnStecknadeln1 Set
ZugfederZugfeder2 Stück
DruckfedernsortimentDruckfedernsortiment1 one spring
MaschinenschraubenMaschinenschrauben1 zero bolt
SechskantmutterSechskantmutter1 Stück

Benötigte Werkzeuge:

BlechschereBlechschere
ZangensatzZangensatz
Unbekannte MaßeUnbekannte Maße
3

Drive the dial from the middle

Pivot an arm on the rear plate and join it by a short link to the upright plate at the pin midway between the two springs. If food sits off-centre, the platform tips and one spring stretches more, but the middle point moves by the average, so the arm gives the true weight. Pass the arm through a hole in the upright plate. Pin it to a curved rack cut in one piece with its extension, so a loose arm cannot skew the rack. The rack will mesh with the dial pinion.

Materialien für diesen Schritt:

Unbekanntes MetallUnbekanntes Metall1 Blatt
StecknadelnStecknadeln1 Set

Benötigte Werkzeuge:

BlechschereBlechschere
ZangensatzZangensatz
4

Make the platform

Cut a rectangular sheet-metal platform with a flange turned down all round. Make the flange clear the case walls, so a tipped platform cannot rub and dirt stays out. Rivet a U-shaped bracket under it. Its two arms end in slotted hooks that drop into openings in the upright plate, held by its flanges so the platform cannot tilt on it.

Materialien für diesen Schritt:

Unbekanntes MetallUnbekanntes Metall1 Blatt
StahlnietenStahlnieten1 a few

Benötigte Werkzeuge:

BlechschereBlechschere
ZangensatzZangensatz
5

Assemble and set the zero

Lower the weighing works into the case through the open top: the rack drops into mesh with the dial pinion. Screw the rear plate to the case flanges. Hook the platform on. With the platform empty, turn the zero nut until the zero on the dial stands at the pointer. Turn it again later if the springs stretch. Ours: check the reading with a known weight.

Materialien für diesen Schritt:

MaschinenschraubenMaschinenschrauben1 rear plate screws

Benötigte Werkzeuge:

Schraubendreher-SatzSchraubendreher-Satz
GewichtGewicht

Materialien

10

Benötigte Werkzeuge

5

CC0 Gemeinfrei

Dieser Blueprint ist unter CC0 veröffentlicht. Sie dürfen dieses Werk für jeden Zweck frei kopieren, ändern, verbreiten und verwenden, ohne um Erlaubnis zu fragen.

Unterstützen Sie den Maker, indem Sie Produkte über seinen Blueprint kaufen, wo er eine Maker-Provision von Anbietern festgelegt, verdient. Oder erstellen Sie eine neue Iteration dieses Blueprints und verbinden Sie ihn in Ihrem eigenen Blueprint, um Einnahmen zu teilen.

Diskussion

(0)

Anmelden um an der Diskussion teilzunehmen

Kommentare werden geladen...