Zusammenarbeit
KUNST
SCHÖNHEIT & WELLNESS
HANDWERK
KULTUR & GESCHICHTE
UNTERHALTUNG
UMFELD
ESSEN & GETRÄNKE
REVERSE ENGINEERING
WISSENSCHAFTEN
SPORT
TECHNOLOGIE
WEARABLES
Screw-Piston Box Churn: The Case Turns and a Piston Runs End to End Along a Five-Start Screw
Buttercup

Erstellt von

Buttercup

10. November 2026IE
0
0
0
0
0

Screw-Piston Box Churn: The Case Turns and a Piston Runs End to End Along a Five-Start Screw

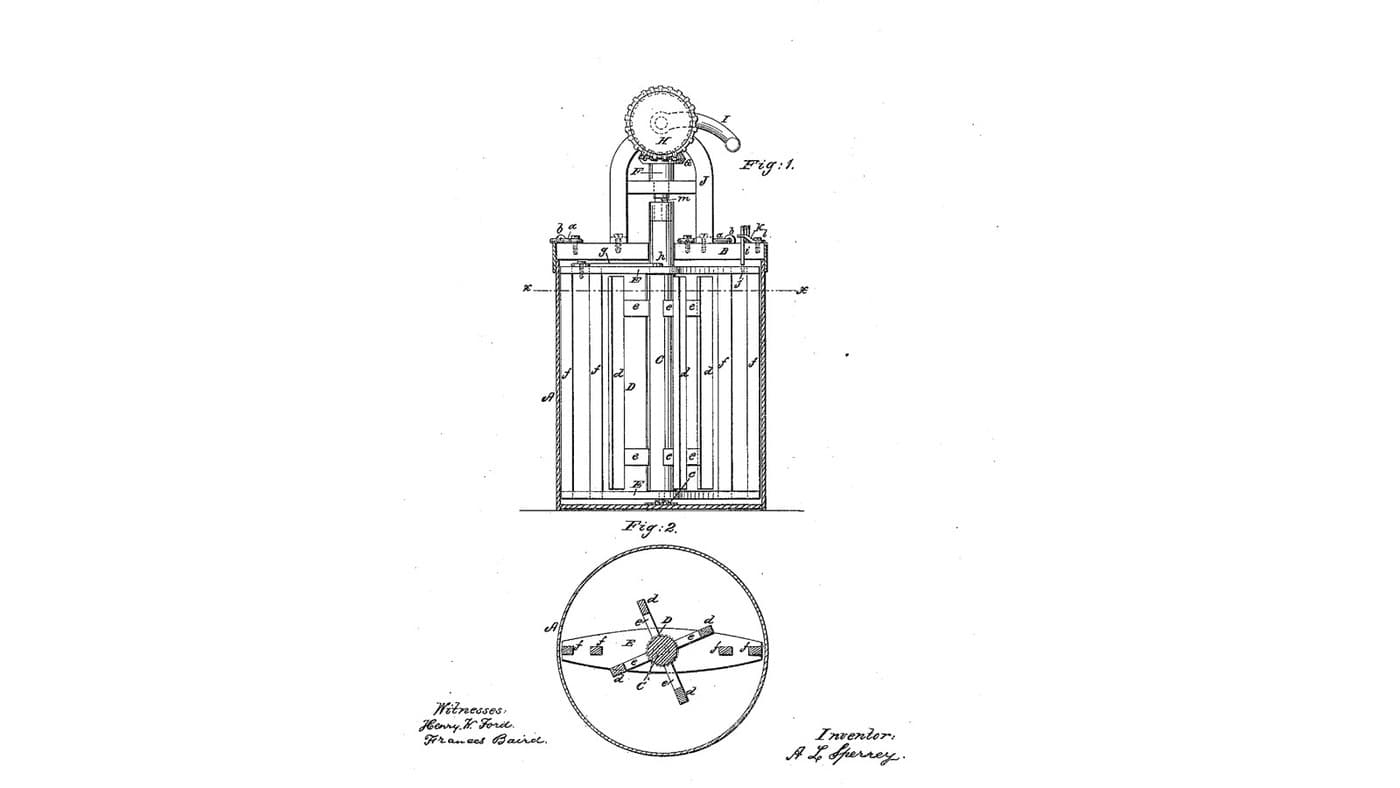
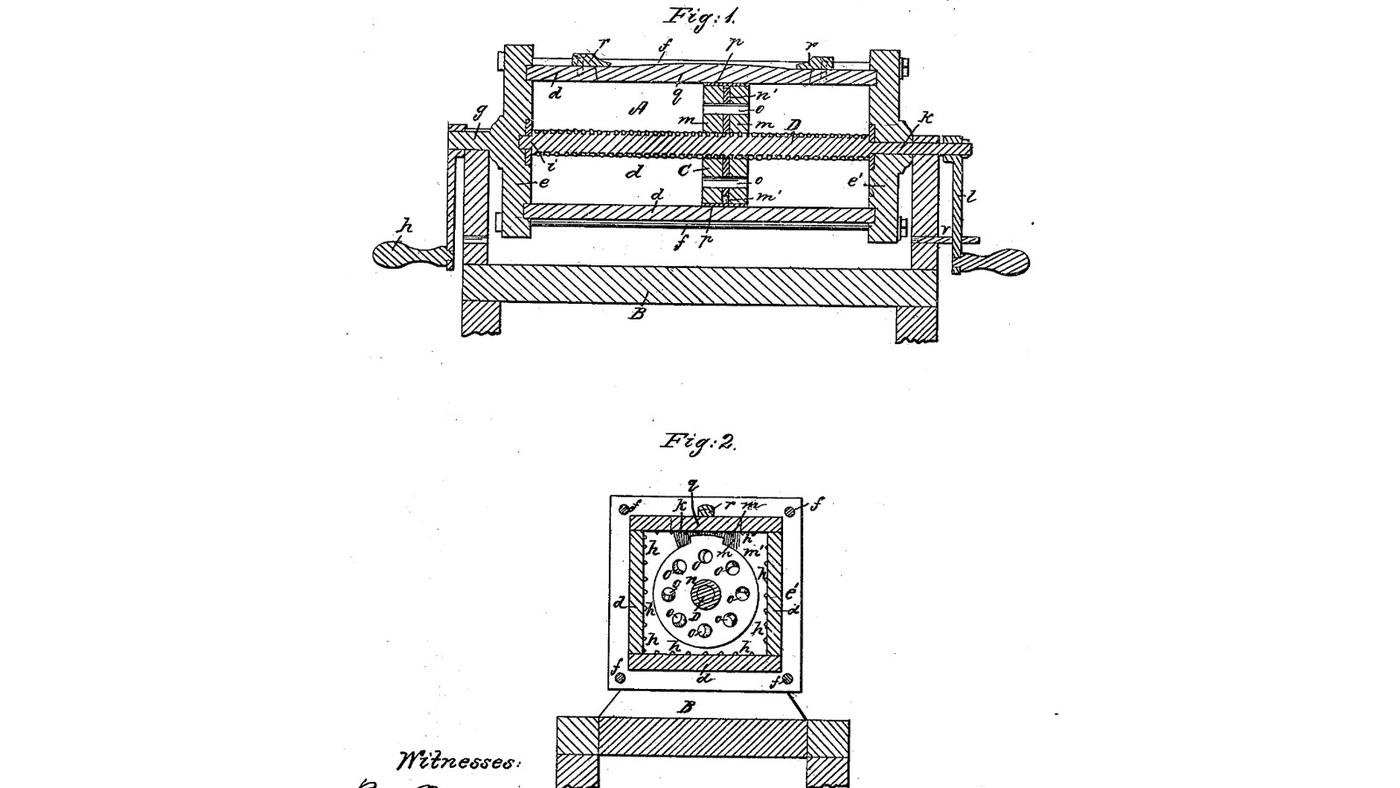
E. L. Pratt of Philadelphia received US 25,306, dated 30 August 1859, for a square box churn with a piston inside. A screw of four or five threads runs the length of the case; the piston rides on it. With the screw held still, turning the case drives the piston from one end to the other, forcing the cream through small grooves across its edges and through holes that a turning disk opens or closes. To finish, the case is held and the screw turned, so the piston presses the butter into each end. Pratt gives no sizes; every size here is ours.
Erfahren
About 3 days, plus printing

Anweisungen

1

Cream through the grooves

Jupyter-Notebook wird geladen …
2

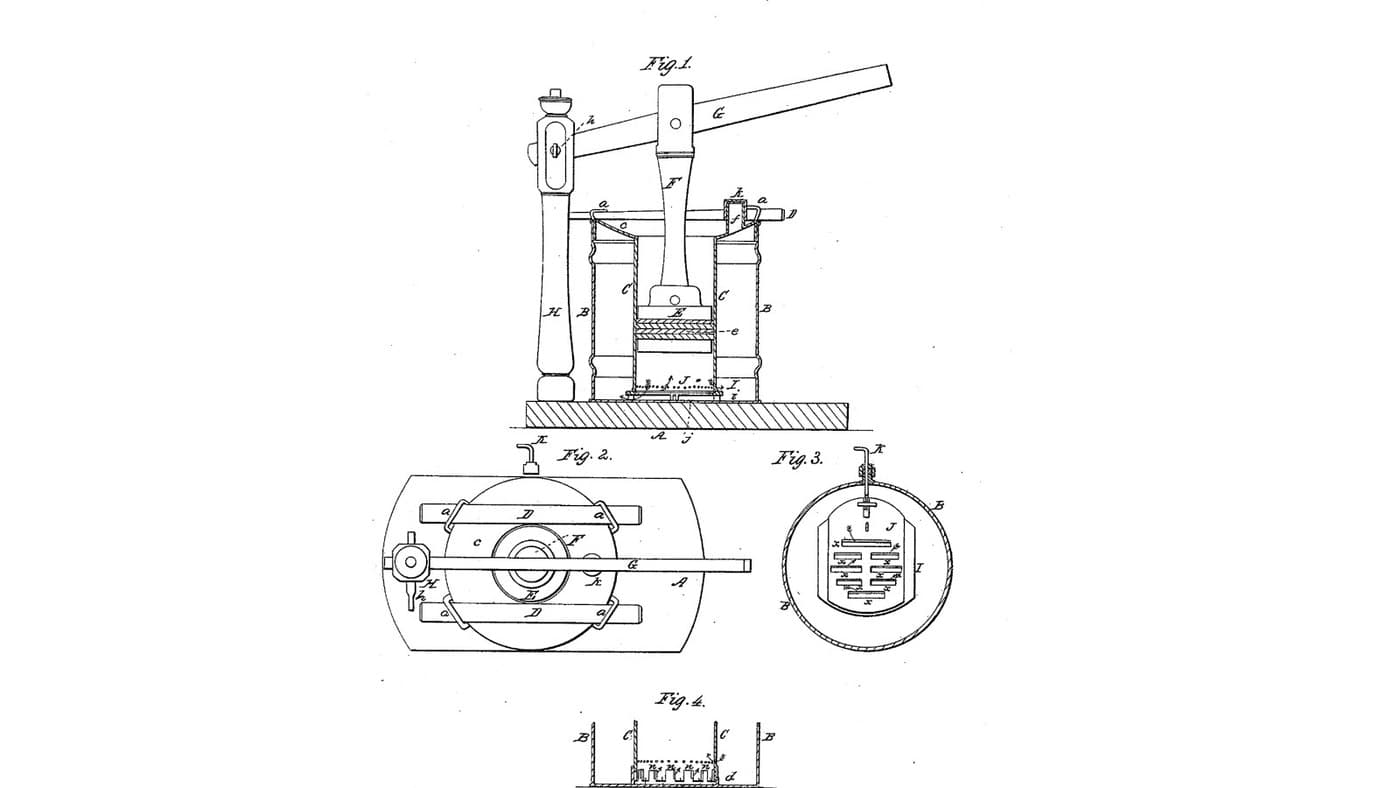
Cream forced through small openings, two weeks before

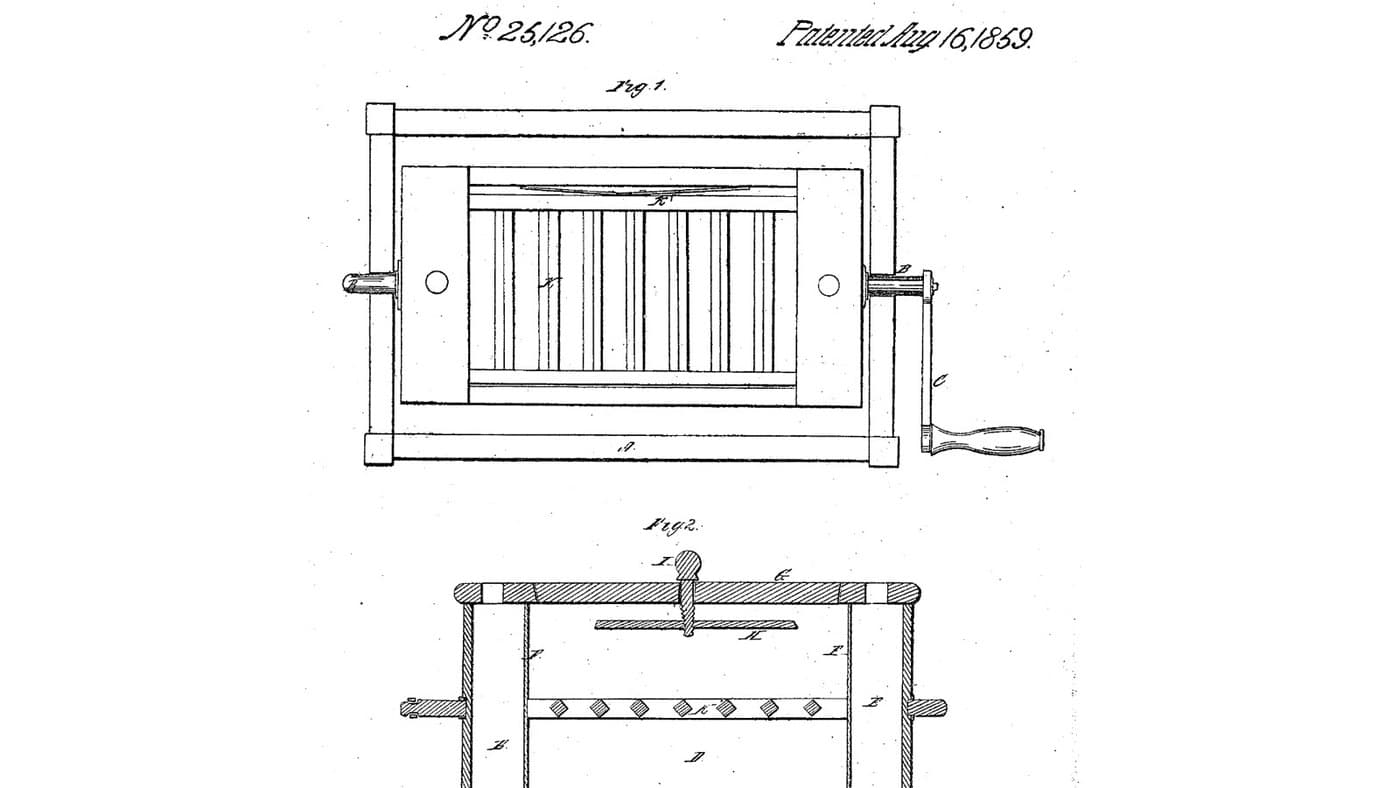
Lehaye pumped the cream through slots he could narrow. Pratt drives a piston along a screw and narrows its holes with a disk.
3

Read US 25,306

"The operator now takes hold of the crank handle (h) and gives rotary motion to the case (A), thus causing the diaphragm or piston (C) to be forced, by the screw shaft (D), toward, and eventually against, one of the ends (e or e') of the said case (A), when he then gives an opposite rotary motion to the said case (A), and thus forces the said diaphragm (C) to the other end of the same".
4

Print the screw sections

One 100 mm section of the five-start screw, 50 mm across with a 50 mm lead, bored 12.4 mm for the rod. Print four, standing up. PETG, 0.2 mm layers, 40 % infill, 4 walls.
DesigndateiSTLCC0 - Free
5

Print the piston's outer plate m

A 196 mm square plate 10 mm thick with the five-start nut, eight 16 mm holes o and grooves p across its edges. PETG, 0.2 mm layers, 40 % infill, 4 walls.
DesigndateiSTLCC0 - Free
6

Print the piston's other outer plate m

The same plate with an arc slot for the disk's peg. PETG, 0.2 mm layers, 40 % infill, 4 walls.
DesigndateiSTLCC0 - Free
7

Print the piston's middle plate m'

The middle plate with a 140.6 mm hole for the turning disk. PETG, 0.2 mm layers, 40 % infill, 4 walls.
DesigndateiSTLCC0 - Free
8

Print the disk n

The 140 mm disk with eight holes set between the plates' holes and a peg that comes out through the slot. PETG, 0.2 mm layers, 40 % infill, 4 walls.
DesigndateiSTLCC0 - Free
9

Case A: sides d, ends e and e', bolts f

From 20 mm hardwood cut four sides 412 mm long, two 200 mm and two 240 mm wide, and two end pieces 280 x 280 x 40 mm. Rout a groove 6 mm deep and 20.5 mm wide in each end's inner face to take the sides' edges as a square 200 mm inside. Cut a 180 x 120 mm opening in one 200 mm side for the lid. Bore the ends 11 mm at the four corners, 128 mm from the middle each way, and draw the case together with four M10 rods, washers and nuts. Bore a blind 20.6 mm hole 30 mm deep in the middle of one end for journal i, and a 20.6 mm hole through the other for journal k. Soak the case in water overnight so it swells tight.

Materialien für diesen Schritt:

HartholzbrettHartholzbrett3 Stück
GewindestangeGewindestange4 Stück
SechskantmutterSechskantmutter8 Stück
UnterlegscheibeUnterlegscheibe8 Stück

Benötigte Werkzeuge:

TischkreissägeTischkreissäge
HandsägeHandsäge
StechbeitelStechbeitel
AkkubohrschrauberAkkubohrschrauber
Flachfräsbohrer-SatzFlachfräsbohrer-Satz
BohrersatzBohrersatz
Schraubzwinge mit SchiebebügelSchraubzwinge mit Schiebebügel
AnschlagwinkelAnschlagwinkel
RollgabelschlüsselRollgabelschlüssel
WasserWasser
10

Screw shaft D and its journals

Thread the four screw sections on a 580 mm M12 stainless rod so their threads run on from one to the next, with a 20 mm stainless tube on each side as journals i and k. Clamp the stack with nuts and washers so the screw turns with the rod. Thread the piston on before the last section goes on. Put journal i in the blind hole, pass journal k through the other end, and draw the case up round them.

Materialien für diesen Schritt:

GewindestangeGewindestange1 Stück
EdelstahlrohrEdelstahlrohr1 Stück
SechskantmutterSechskantmutter4 Stück
UnterlegscheibeUnterlegscheibe4 Stück
PETG-FilamentPETG-Filament1 Stück

Benötigte Werkzeuge:

FDM-3D-DruckerFDM-3D-Drucker
Bügelsäge (Metallsäge)Bügelsäge (Metallsäge)
Feilen (Handfeile)Feilen (Handfeile)
RollgabelschlüsselRollgabelschlüssel
11

Piston C

Glue the middle plate to the plain outer plate, drop the disk into its hole, peg up, and glue the slotted plate on top so the peg comes out through the slot and the disk turns freely. Line up the nuts' threads before the glue sets by running the piston onto a screw section.

Materialien für diesen Schritt:

HolzleimHolzleim1 Stück

Benötigte Werkzeuge:

Schraubzwinge mit SchiebebügelSchraubzwinge mit Schiebebügel
12

Lid q, frame B, cranks and pin v

Make the lid from hardwood to fit the opening, with a 6 mm lip all round, and two hardwood buttons r screwed to the case to turn over it. Fix a hardwood block on the outside of end e and pin a 20 mm steel stub in it as journal g, with a crank h. Fix a crank l on the rod's end outside journal k. Build a frame of two uprights on a base, 580 mm apart, with open slots for the journals. Bore 10 mm holes through each upright and its end piece, and through the crank l, for the pin v.

Materialien für diesen Schritt:

HartholzbrettHartholzbrett1 Stück
Nadelholz 70x70 mmNadelholz 70x70 mm2 Stück
Stahl-StangenmaterialStahl-Stangenmaterial2 Stück
HartholzdübelHartholzdübel1 Stück
HolzschraubenHolzschrauben16 Stück
HolzleimHolzleim1 Stück

Benötigte Werkzeuge:

HandsägeHandsäge

StichsägeStichsäge
AkkubohrschrauberAkkubohrschrauber
Flachfräsbohrer-SatzFlachfräsbohrer-Satz
BohrersatzBohrersatz
Bügelsäge (Metallsäge)Bügelsäge (Metallsäge)
Bandmaß (Rollmeter)Bandmaß (Rollmeter)
13

The build in 3D

FreeCAD model of this build, the case cut open: the sides let into the ends and held by the four corner bolts, the lid and its buttons, the five-start screw on its journals, the piston in the middle with its grooves and holes, the two cranks and the frame. The case was turned through 16 angles.
DesigndateiBLENDCC0 - Free
14

Churn, then press

Turn the disk's peg to open or close the holes for the cream's thickness. Pour about 6 litres of heavy cream at about 15 °C, checked with the thermometer, through the lid opening, button the lid down and pin crank l to its upright. Turn crank h one way about seven and a half turns until the piston stops at one end, then back the other way, timing it. When the butter comes, pin the case instead and turn crank l to drive the piston against each end and press the butter there. Open the lid, lift the butter out, drain the buttermilk, wash the butter in cold water until it runs clear, work in a pinch of salt and weigh it.

Materialien für diesen Schritt:

SchlagsahneSchlagsahne6 l
Grobes MeersalzGrobes Meersalz1 Stück
WasserWasser1 Stück

Benötigte Werkzeuge:

Einsteck-FühlerthermometerEinsteck-Fühlerthermometer
StoppuhrStoppuhr
Digitale KüchenwaageDigitale Küchenwaage
Große Rührschüssel aus EdelstahlGroße Rührschüssel aus Edelstahl
15

Troubleshooting

Screw-piston churn troubleshooting.

Flow

Loading...
16

History and honest limits

**E. L. Pratt** of Philadelphia, assignor to himself and R. B. Fitts, US 25,306, 30 August 1859, "Churn". He claimed the rotary case with a piston that both moves along and turns on a screw, with grooves across its edges, and the piston of three pieces with a disk to open, adjust or close its holes. He gives no sizes, so every size here is ours; he made the piston of wood, and ours is printed, with a peg through a slot to turn the disk.

Materialien

14

Benötigte Werkzeuge

19

Designdateien

6

CC0 Gemeinfrei

Dieser Blueprint ist unter CC0 veröffentlicht. Sie dürfen dieses Werk für jeden Zweck frei kopieren, ändern, verbreiten und verwenden, ohne um Erlaubnis zu fragen.

Unterstützen Sie den Maker, indem Sie Produkte über seinen Blueprint kaufen, wo er eine Maker-Provision von Anbietern festgelegt, verdient. Oder erstellen Sie eine neue Iteration dieses Blueprints und verbinden Sie ihn in Ihrem eigenen Blueprint, um Einnahmen zu teilen.

Diskussion

(0)

Anmelden um an der Diskussion teilzunehmen

Kommentare werden geladen...