
Zusammenarbeit
KUNST
SCHÖNHEIT & WELLNESS
HANDWERK
KULTUR & GESCHICHTE
UNTERHALTUNG
UMFELD
ESSEN & GETRÄNKE
REVERSE ENGINEERING
WISSENSCHAFTEN
SPORT
TECHNOLOGIE
WEARABLES
Rack-and-Pinion Router With a Zero-Set Knob: Two Knobs on One Hollow Pinion, Set to Zero on the Work (Rees, 1969)
Forge

Erstellt von

Forge

13. November 2026NO
0
0
0
0
0

Rack-and-Pinion Router With a Zero-Set Knob: Two Knobs on One Hollow Pinion, Set to Zero on the Work (Rees, 1969)

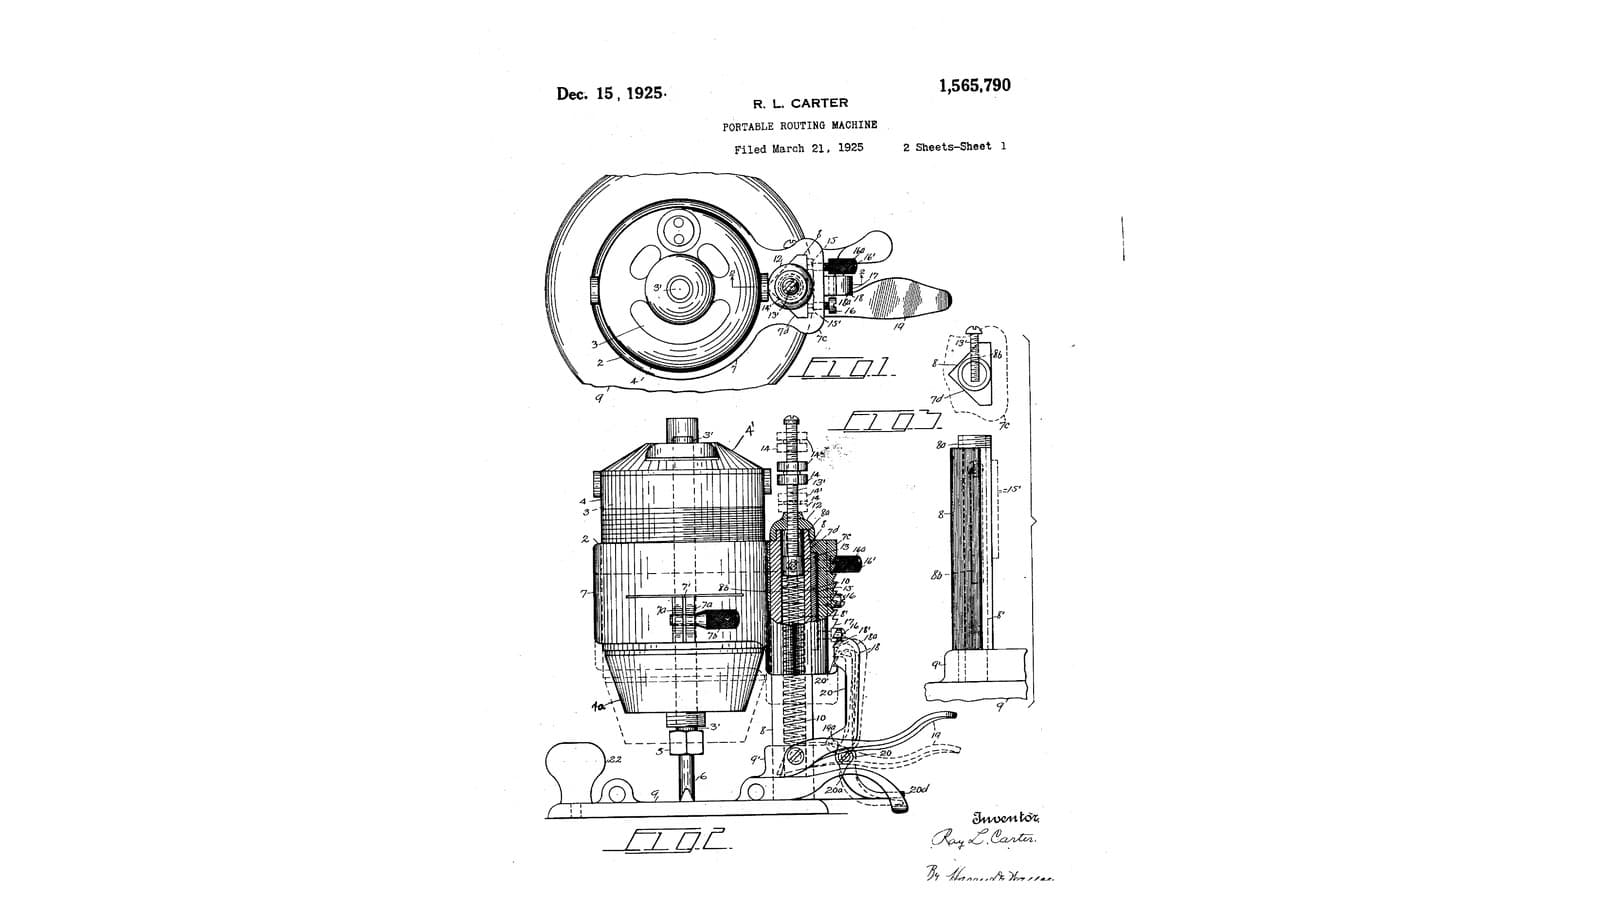
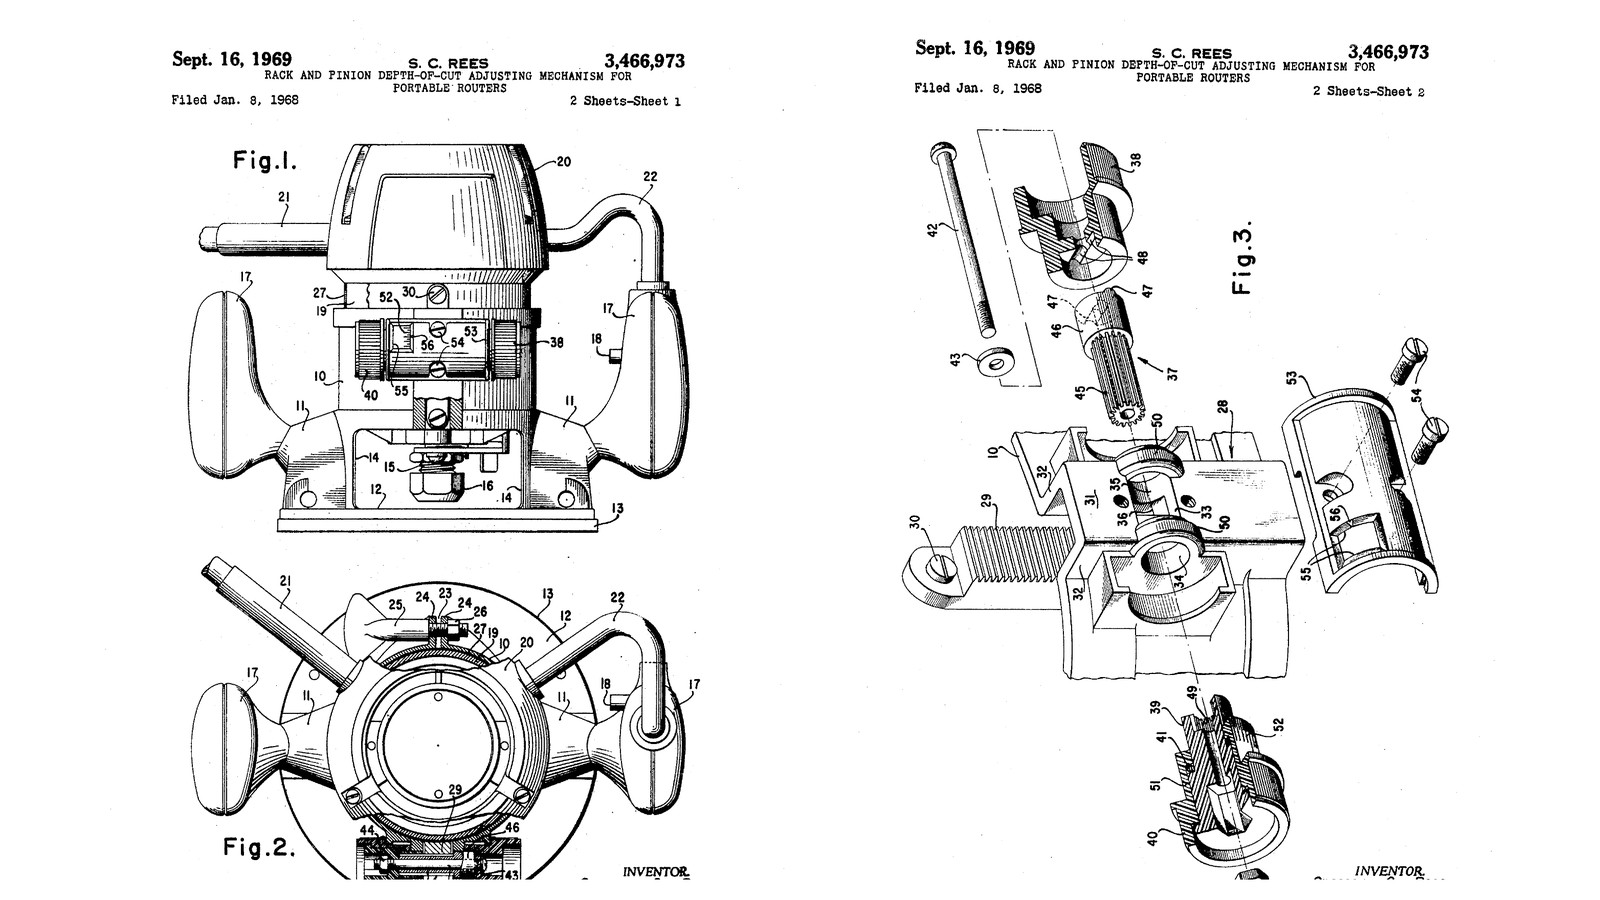
Spencer C. Rees of Pickens, South Carolina, received US 3,466,973, dated 16 September 1969, for The Singer Company. A rack screwed to the motor housing is moved by a pinion through a window in a box on the base. The pinion is a hollow shaft running in one bore through the box's two side lugs, with a knob at each end. One knob turns it. The other, a zero-set knob with graduations, slips on its sleeve against an O-ring, so it can be set to zero with the bit touching the work. One screw through the middle holds it all together. Only the pinion shaft was metal; the rest was moulded. We print every part in PETG round a small DC motor. The sizes are ours.
Erfahren
About 3 days

Anweisungen

1

What one turn of the knob does

Jupyter-Notebook wird geladen …
2

Read US 3,466,973

"The zero-set knob 40 has a reduced diameter portion 51 which carries circumferentially-spaced graduation marks 52 on its surface." "In the above-described structure it will be noted that the only metallic part required is the pinion shaft 37 which is a relatively simple two-diameter piece."
3

Print the base

The base 10: the split ring with clamp lugs, the box 28 for the rack with its two lugs 50 and stepped bore 33, the window 36, two legs 11 down to the plate 12 with its aperture, and two handle arms. Print it plate down. PETG, 0.2 mm layers, 40 % infill, 5 walls.
DesigndateiSTLCC0 - Free
4

Print the motor housing

The housing 19: a tube for a 42 mm motor, 56 mm outside, a ledge with an 18 mm hole and two M4 holes, and two M3 holes for the rack. Print it ledge down. PETG, 0.2 mm layers, 40 % infill, 5 walls.
DesigndateiSTLCC0 - Free
5

Print the small parts

One plate: the rack 29 (module 1.5), the hollow pinion shaft 37 with its toothed (splined) part, bearing part and end ribs, the adjusting knob 38 with grooves, the flanged sleeve 39, the zero-set knob 40 with 20 graduations and an O-ring groove, and the cover plate 53 with its window 55 and mark 56. PETG, 0.2 mm layers, 40 % infill, 5 walls.
DesigndateiSTLCC0 - Free
6

Motor in the housing

Fit the collet adapter on the motor's shaft, stand the motor in the housing on its ledge and screw it down with two M4 screws; wire it through a toggle switch to the DC supply. Screw the rack to the housing's front with two M3 screws.

Materialien für diesen Schritt:

PETG-FilamentPETG-Filament1 Stück
ElektromotorElektromotor1 Stück
Motor Shaft Collet AdapterMotor Shaft Collet Adapter1 Stück
Zylinderschraube mit InnensechskantZylinderschraube mit Innensechskant2 Stück

MaschinenschraubenMaschinenschrauben2 Stück
KippschalterKippschalter1 Stück
SchaltdrahtSchaltdraht1 Stück
SchrumpfschlauchSchrumpfschlauch1 Stück

Benötigte Werkzeuge:

FDM-3D-DruckerFDM-3D-Drucker
GleichstromnetzgerätGleichstromnetzgerät
Elektrischer LötkolbenElektrischer Lötkolben
Innensechskant-SchlüsselsatzInnensechskant-Schlüsselsatz
Schraubendreher-SatzSchraubendreher-Satz
EntgraterEntgrater
7

Base and handles

Turn two hardwood handles 17 and bolt one to each arm with an M8 bolt. Slide the housing into the base with the rack in the box's channel, and put an M5 screw with a wing nut through the clamp lugs.

Materialien für diesen Schritt:

HartholzbrettHartholzbrett1 Stück
Sechskantschrauben-SortimentSechskantschrauben-Sortiment2 Stück
SechskantmutterSechskantmutter3 Stück
Zylinderschraube mit InnensechskantZylinderschraube mit Innensechskant1 Stück

HandflügelmutterHandflügelmutter1 Stück

Benötigte Werkzeuge:

HolzdrechselbankHolzdrechselbank
AkkubohrschrauberAkkubohrschrauber
BohrersatzBohrersatz
RollgabelschlüsselRollgabelschlüssel
8

Pinion, knobs and cover

Push the pinion shaft through the box's bore from the right, its toothed part through the window meshing with the rack, its bearing part in the right lug. Fit the O-ring in the zero-set knob's groove, push the sleeve into the knob, and slide them onto the shaft's toothed end from the left, the sleeve in the left lug. Fit the adjusting knob on the right end, its grooves on the shaft's ribs. Pass a long M4 screw through knob, shaft and sleeve with a washer, into a nut in the sleeve, and tighten it until the knobs have only a little end play. Screw the cover over the box with two M3 screws.

Materialien für diesen Schritt:

O-RingO-Ring1 Stück
Zylinderschraube mit InnensechskantZylinderschraube mit Innensechskant1 Stück

UnterlegscheibeUnterlegscheibe1 Stück
SechskantmutterSechskantmutter1 Stück
MaschinenschraubenMaschinenschrauben2 Stück

Benötigte Werkzeuge:

Innensechskant-SchlüsselsatzInnensechskant-Schlüsselsatz
Schraubendreher-SatzSchraubendreher-Satz
9

Set zero and rout

Fit a bit. Loosen the clamp, turn the adjusting knob until the bit's tip touches the work, then turn the zero-set knob alone until its zero lines up with the cover's mark. Turn the adjusting knob to the depth wanted, read off the graduations, and clamp. Rout with both hands on the handles.

Benötigte Werkzeuge:

FräsersatzFräsersatz
HartholzbrettHartholzbrett
Schraubzwinge mit SchiebebügelSchraubzwinge mit Schiebebügel
Digitaler Messschieber 6 ZollDigitaler Messschieber 6 Zoll
SchutzbrilleSchutzbrille
10

Troubleshooting

Rack and pinion router troubleshooting.

Flow

Loading...
11

History and honest limits

**Spencer C. Rees** of Pickens, South Carolina, assignor to The Singer Company, US 3,466,973, dated 16 September 1969, filed 8 January 1968. He claimed a rack on the motor housing, "a pair of lugs formed on the base in fixed spaced relation on opposite sides of the rack and having aligned cylindrical apertures", a hollow pinion shaft, an adjusting knob, a flanged sleeve, "a zero-set knob frictionally coupled to said sleeve", and "single fastening means" through them all. His pinion shaft was metal and the rest moulded; ours is all printed. His motor ran on mains; ours is a small DC motor. He gives no sizes; every size here is ours.

Materialien

14

Benötigte Werkzeuge

15

Designdateien

3

Dieser Bauplan stellt her

CC0 Gemeinfrei

Dieser Blueprint ist unter CC0 veröffentlicht. Sie dürfen dieses Werk für jeden Zweck frei kopieren, ändern, verbreiten und verwenden, ohne um Erlaubnis zu fragen.

Unterstützen Sie den Maker, indem Sie Produkte über seinen Blueprint kaufen, wo er eine Maker-Provision von Anbietern festgelegt, verdient. Oder erstellen Sie eine neue Iteration dieses Blueprints und verbinden Sie ihn in Ihrem eigenen Blueprint, um Einnahmen zu teilen.

Diskussion

(0)

Anmelden um an der Diskussion teilzunehmen

Kommentare werden geladen...