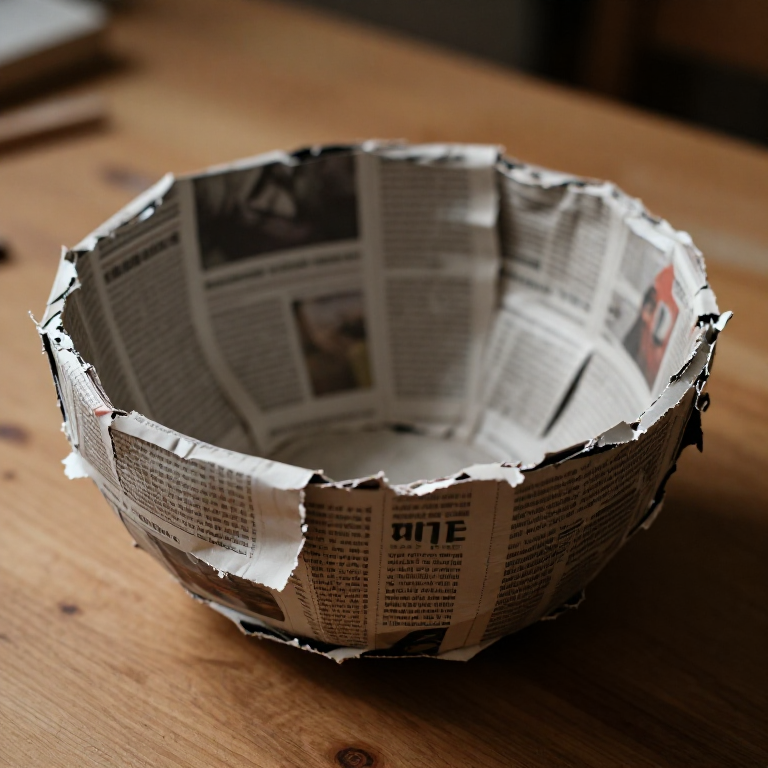


Papier-Mâché
Paper is weak. A stack of paper is weak. But paper soaked in paste and laid up in crossing layers becomes a rigid shell that is astonishingly light and strong for what it costs — the same principle as plywood, fibreglass and carbon fibre, several centuries early. It is a genuine composite: cellulose fibres carrying the tension, dried paste holding them in place.
In eighteenth- and nineteenth-century Britain this was not a craft for children. Henry Clay of Birmingham patented a laminated paper board in 1772 that could be sawn, planed, screwed and japanned, and firms built an industry on it — trays, chair backs, cabinets, even whole architectural mouldings and coach panels.
This blueprint covers the layered method over a mould: paste, lay-up, release and drying.
Istruzioni
Tear the paper, never cut it
Tear the paper, never cut it
Tear newspaper or plain paper into strips about 25 mm wide. A torn edge is feathered and blends into the layer below; a scissor-cut edge leaves a hard ridge that shows through every subsequent layer.
Tear along the grain for long strips
Tear along the grain for long strips
Paper tears cleanly in one direction and raggedly in the other. Find the easy direction and take your long strips that way; use the ragged direction for short patches.
Make a flour paste at one part flour to five parts water
Make a flour paste at one part flour to five parts water
Whisk 100 g plain flour into 500 ml cold water until there are no lumps. Cold first — adding flour to hot water makes lumps that never disperse.
Materiali per questo passaggio:
 Farina 00100 g
Bring the paste to a simmer, stirring
Bring the paste to a simmer, stirring
Heat gently, stirring constantly, until it thickens to single cream and turns slightly translucent — a few minutes. Cooking gelatinises the starch, and cooked paste is far stronger than raw flour-and-water.
Add a pinch of salt and let it cool
Add a pinch of salt and let it cool
Stir in a teaspoon of salt as a mild preservative and cool to room temperature. Flour paste is food and it will go mouldy — mix what you need for the session and discard leftovers.
Materiali per questo passaggio:
 Sale marino grosso5 g
Prepare the mould
Prepare the mould
Use a bowl, a balloon, a clay form or a carved block. Any undercut will trap the shell permanently — check the form releases in one direction before you paste anything to it.
Apply a release layer
Apply a release layer
Cover the mould with cling film, or rub it with petroleum jelly. Skipping this is the classic beginner mistake and the shell will not come off intact.
Lay the first layer with water only
Lay the first layer with water only
Wet the first course of strips with plain water, no paste, and lay them over the release film. This layer peels away cleanly at the end and gives a better release.
Draw each strip through the paste and squeegee it
Draw each strip through the paste and squeegee it
Pull each strip through the paste, then strip the excess off between two fingers. Too much paste is the main cause of failure — it stays wet inside, dries slowly and grows mould.
Lay each layer crossing the one before
Lay each layer crossing the one before
Run the first layer lengthways, the next across it, the next diagonally. Crossing the fibre directions is what makes the shell equally stiff in every direction, exactly as plywood does.
Smooth out every air bubble as you go
Smooth out every air bubble as you go
Press each strip down with your fingers so it beds fully onto the layer below. A trapped bubble becomes a soft blister and later a hole.
Build up four to six layers, drying between pairs
Build up four to six layers, drying between pairs
Apply two layers, let them dry until barely damp, then add two more. Laying six wet layers at once traps moisture in the middle and it will never harden properly.
Alternate paper colours between layers
Alternate paper colours between layers
Use newsprint and plain paper alternately so you can see at a glance where the current layer is complete. A simple trick that prevents thin patches.
Dry slowly in moving air, not heat
Dry slowly in moving air, not heat
Leave it somewhere airy at room temperature for two to three days. An oven or a radiator dries the outside first, and the shell warps and cracks as the inside shrinks later.
Release, trim and seal
Release, trim and seal
Ease the shell off the mould, trim the edge with a knife, then seal inside and out. Unsealed papier-mâché absorbs damp from the air and softens.
Strumenti necessari:
 Taglierino di precisione
History & Context — the composite before composites
History & Context — the composite before composites
Older and less European than the name suggests. The French term means "chewed paper", but the technique long predates its French name and its European industry. Papier-mâché work in Kashmir — naqashi, with its fine painted decoration — arrived via Persia and has a documented history of centuries, and comparable paper-shell work existed in China and Japan. What eighteenth-century Britain and France added was industrialisation, not invention.
The Birmingham industry. Henry Clay patented his laminated paper board in 1772: sheets pasted up, pressed and stove-dried into a material hard enough to be sawn, planed, screwed and turned, and stable enough to take japanning at heat. Firms such as Jennens & Bettridge built a substantial trade in trays, tables, chair backs, cabinets and inlaid decorative ware, and papier-mâché was used for architectural mouldings and coach panels where light weight mattered. The material only faded when cheap pressed metal and later plastics undercut it.
Why crossed layers matter. This is a fibre composite in every meaningful sense: cellulose fibres carry tensile load, the gelatinised starch matrix binds them and transfers stress between them. Paper is much stronger along its fibre alignment than across it, so a shell laid up in one direction is stiff one way and floppy the other. Crossing the layers averages the properties out — the identical reasoning behind plywood veneers, glass-fibre cloth lay-up and carbon-fibre ply schedules. A child pasting strips onto a balloon is doing composite lay-up.
The honest weakness. Starch paste is water-soluble and edible, which means the finished shell is vulnerable to damp, to mould and to insects — the reason so little historical papier-mâché survives compared with the amount made. Traditional makers fought this with heavy varnish, japanning and sometimes additives; modern makers often substitute PVA or methyl cellulose, which resist water far better. Methyl cellulose has the additional advantage of being reversible and pH-neutral, which is why conservators use it. Flour paste is authentic, cheap and pleasant to work with, and it is the least durable option of the three.
Strumenti richiesti
1- Segnaposto
Materiali dei progetti collegati

Questo progetto realizza
Blueprint correlati
Questi blueprint condividono conoscenze — tecniche, materiali o principi

CC0 Pubblico dominio
Questo progetto è rilasciato sotto CC0. Sei libero di copiare, modificare, distribuire e utilizzare quest'opera per qualsiasi scopo, senza chiedere permesso.
Supporta il Maker acquistando prodotti tramite il suo progetto dove guadagna una Commissione Maker stabilita dai venditori, oppure crea una nuova iterazione di questo progetto e includilo come collegamento nel tuo progetto per condividere i ricavi.