
ARTE
BELLEZZA E BENESSERE
MESTIERE
CULTURA E STORIA
DIVERTIMENTO
AMBIENTE
CIBO E BEVANDE
INGEGNERIA INVERSA
SCIENZE
SPORT
TECNOLOGIA
INDOSSABILI
Pass-Through Barrel Churn: A Twisted-Wing Dasher That Comes Out Whole Through a Hatch
Woody

Creato da

Woody

6. ottobre 2026NO
32
0
0
0
0

Pass-Through Barrel Churn: A Twisted-Wing Dasher That Comes Out Whole Through a Hatch

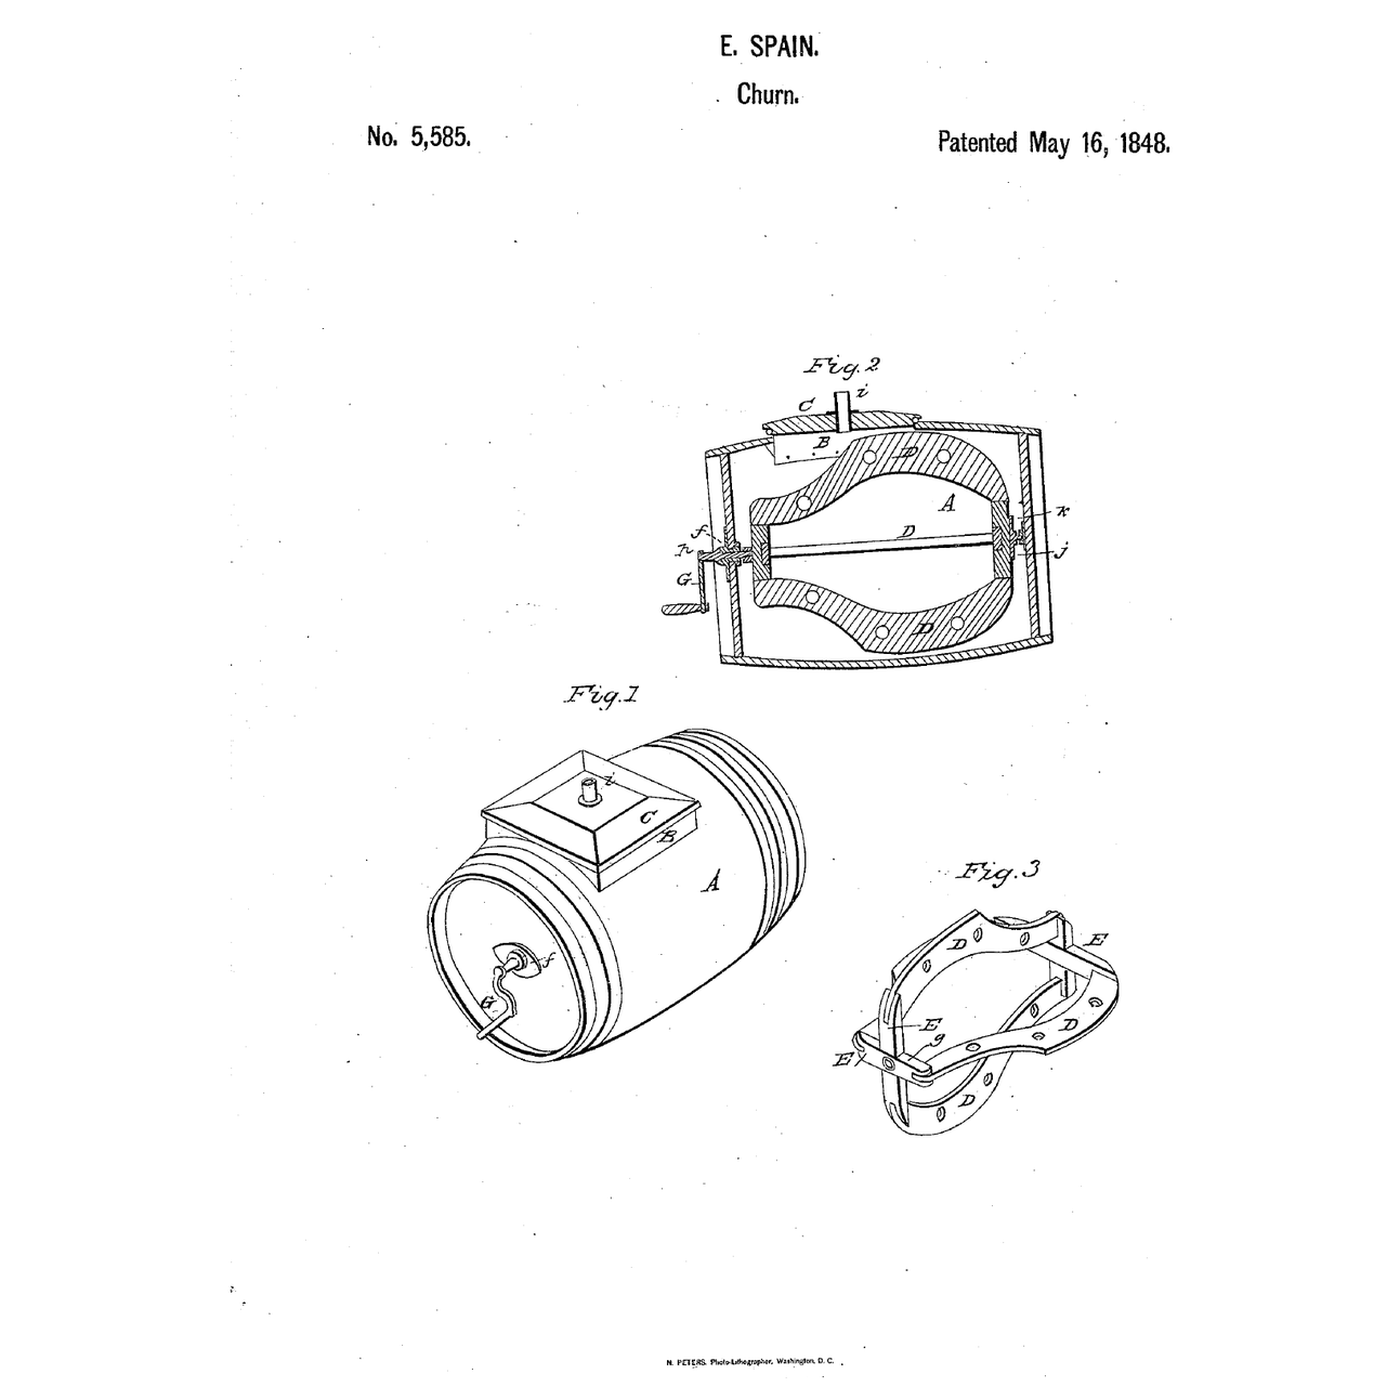
Spain set out to keep "the cream when it becomes thick, from revolving with the dasher," and to get the whole dasher out through a small hatch for cleaning. Edward Spain of Philadelphia, Pennsylvania, received US 5,585, dated 16 May 1848, for a barrel churn whose dasher has four beating wings, each broader at one end than the other, joined to a long and a short bar crossed at each end, the long arms at one end opposite the short arms at the other. It runs on a pivot in a bearing box at one end; the crank's axle screws into a nut at the other; unscrewed, the dasher is lifted onto its pivot end and passed out "diagonally into the square aperture in the barrel." This rung looks at the wings' geometry, then prints the dasher, bearing box and hatch, fits them to a container laid on its side, and makes butter.
Intermedio
About 4 hours, plus printing

Istruzioni

1

The wings' geometry

Caricamento del notebook Jupyter…
2

Oblique wings on a crank before it

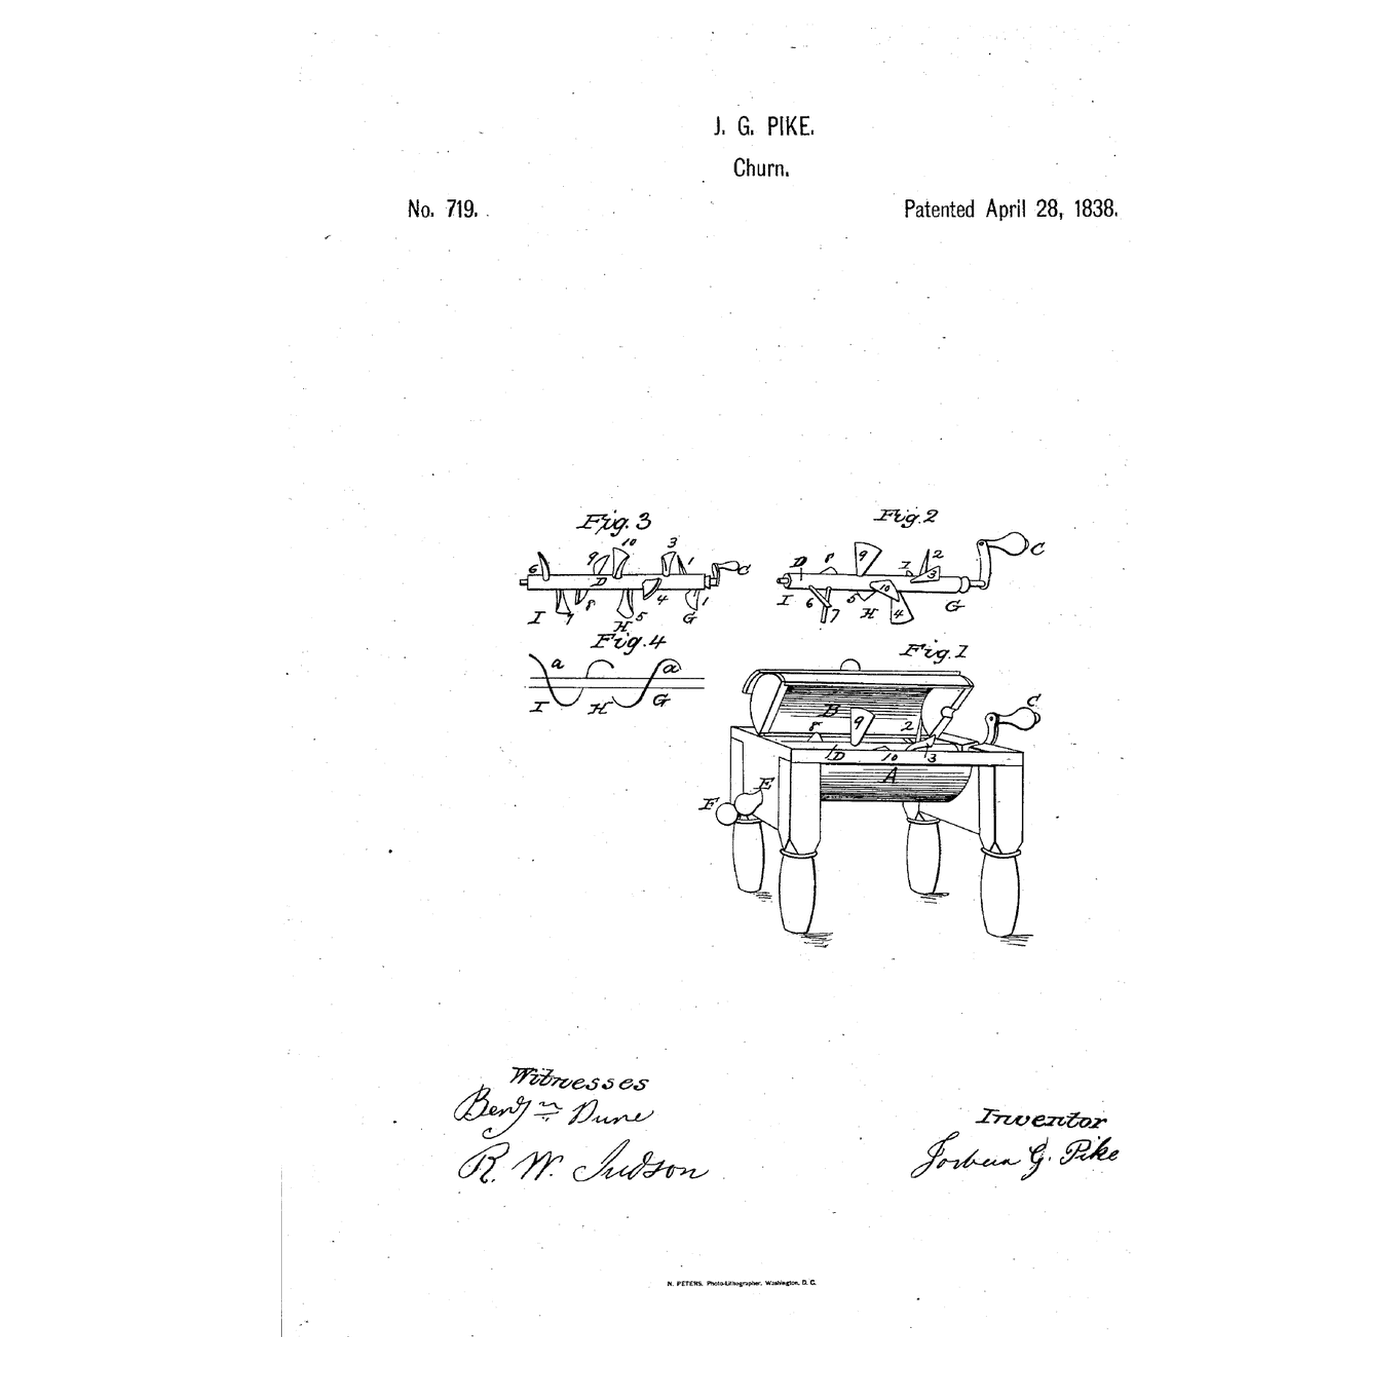
The embedded blueprint sets four wings at 30° to the axle on a cross. Spain twists his wings from a long arm at one end to a short arm at the other.
3

Read US 5,585

"The dasher is removed from the churn by unscrewing the operating axle from the same, and elevating the dasher on to its pivot end by passing the broad ends of the beating wings at its opposite end, diagonally into the square aperture in the barrel; when it can readily be lifted out."
4

Print the parts

Print the dasher standing on one end (/uploads/blueprints/pass-through-barrel-churn-dasher.stl), with supports, and press an M10 nut into the socket at its crank end. Print the bearing box (/uploads/blueprints/pass-through-barrel-churn-bearing-box.stl), the hatch frame (/uploads/blueprints/pass-through-barrel-churn-hatch-frame.stl) and the cover with its vent tube (/uploads/blueprints/pass-through-barrel-churn-hatch-cover.stl). Print in PETG at 0.2 mm layers, 30 % infill, 4 walls; wash before first use.

Materiali per questo passaggio:

Filamento PETGFilamento PETG1 pezzo
Dado esagonaleDado esagonale1 pezzo

Strumenti necessari:

Stampante 3D a filamento (FDM)Stampante 3D a filamento (FDM)
Chiave regolabile a rullinoChiave regolabile a rullino
5

The barrel

Lay a round food-grade container about 170 mm across on its side. Cut a 66 mm square hatch in its side near one end and set the hatch frame in it with silicone. Screw the bearing box inside the far end on the axis, and drill the near end on the axis for the axle. Stand it on two pine cradles.

Materiali per questo passaggio:

Contenitore di conservazione per uso alimentareContenitore di conservazione per uso alimentare1 pezzo

Sigillante siliconicoSigillante siliconico1 pezzo
Tavola di pinoTavola di pino1 pezzo
Vite da legno #8 x 1"Vite da legno #8 x 1"1 pezzo

Strumenti necessari:

Sega da traforoSega da traforo
Trapano a batteriaTrapano a batteria
Serie di punte da trapanoSerie di punte da trapano
Sega a manoSega a mano
Set di cacciavitiSet di cacciaviti
6

Dasher and crank

Pass the dasher in through the hatch, pivot end first, and seat its pivot in the bearing box. Cut a length of M10 threaded rod, pass it through the near end and screw it into the dasher's nut. Bend or fix a crank handle on its outer end.

Materiali per questo passaggio:

Barra filettataBarra filettata1 pezzo
Dado esagonaleDado esagonale1 pezzo
Tasselli di legno duroTasselli di legno duro1 pezzo

Strumenti necessari:

Seghetto per metalliSeghetto per metalli
Chiave regolabile a rullinoChiave regolabile a rullino
Carta abrasivaCarta abrasiva
7

The build in 3D

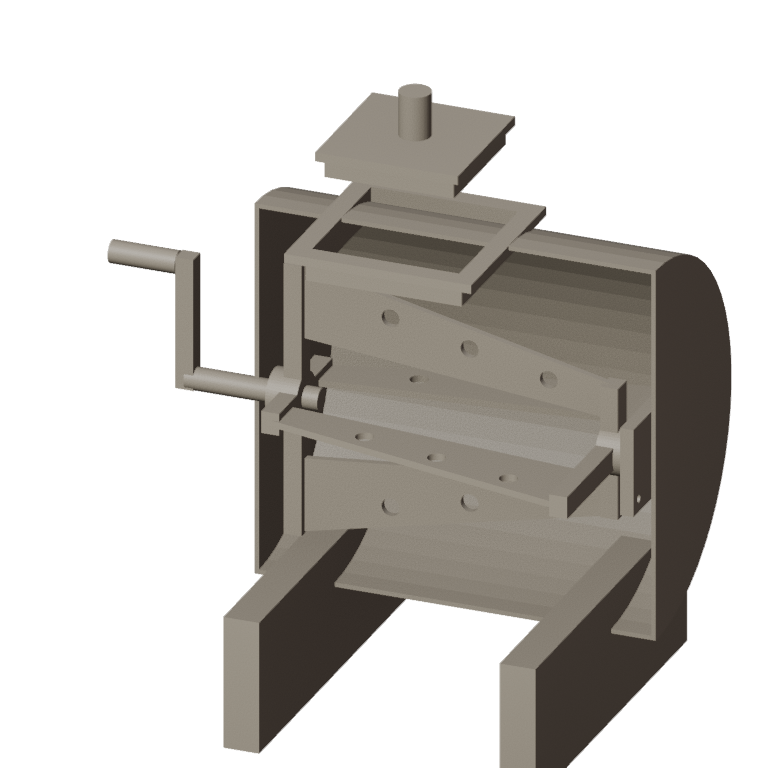
FreeCAD model of this build, not of the patent: the barrel cut away to show the dasher of four tapering wings between a long-and-short cross at each end, the bearing box, the axle and crank, the hatch frame and its cover with the vent tube, and the cradles.
File di designBLENDCC0 - Free
8

Crank and make butter

Let the heavy cream stand until it reaches about 15 °C, checked with the thermometer. Pour in 1 litre through the hatch and fit the cover. Turn the crank steadily and time until the butter comes. Unscrew the axle and lift the dasher out through the hatch. Pour off the buttermilk, add cold water, churn a little and pour off again until it runs clear; work in a pinch of salt and weigh the butter.
Passo 8 - Image 1

Materiali per questo passaggio:

Panna da montarePanna da montare1000 ml
Sale marino grossoSale marino grosso1 pezzo
AcquaAcqua1 pezzo

Strumenti necessari:

Termometro a sonda permanenteTermometro a sonda permanente
CronometroCronometro
Bilancia digitale da cucinaBilancia digitale da cucina
Grande ciotola da impasto in acciaio inossidabileGrande ciotola da impasto in acciaio inossidabile
9

A dasher that will not come out, an axle that slips

Pass-through barrel churn troubleshooting.

Flow

Loading...
10

History and honest limits

**Edward Spain** of Philadelphia received US 5,585, dated 16 May 1848. A sheet-metal lining, its upper edge stiffened by a strong wire, supported the aperture so "the perfect contour of the churn about the aperture, is preserved"; a tube through the cover let "the gas" escape and fresh air enter. He claimed the form of the dasher, which gives the cream a compound reciprocating and rotary motion and lets a large dasher pass whole through a small square aperture. **Honest limits.** A food-grade container and printed parts stand in for his staved barrel and wooden dasher. FDM prints hold food in their layer lines, so wash well and replace when worn. Your times and weights are the result.

Materiali

11

Strumenti richiesti

13

File di progetto

1

Questo progetto realizza

CC0 Pubblico dominio

Questo progetto è rilasciato sotto CC0. Sei libero di copiare, modificare, distribuire e utilizzare quest'opera per qualsiasi scopo, senza chiedere permesso.

Supporta il Maker acquistando prodotti tramite il suo progetto dove guadagna una Commissione Maker stabilita dai venditori, oppure crea una nuova iterazione di questo progetto e includilo come collegamento nel tuo progetto per condividere i ricavi.

Commenti

(0)

Accedi per partecipare alla discussione

Caricamento commenti...