សិល្បៈ
សម្រស់ និង សុខុមាលភាព
សិប្បកម្ម
វប្បធម៌ និង ប្រវត្តិសាស្ត្រ
ការកម្សាន្ត
បរិស្ថាន
ម្ហូប និង ភេសជ្ជៈ
អនាគតបៃតង
វិស្វកម្មបញ្ច្រាស
វិទ្យាសាស្ត្រ
កីឡា
បច្ចេកវិទ្យា
ប្រដាប់ដែលស្លៀក
Building a Shave Horse — The Foot-Operated Clamping Bench for Green Woodworking
Woody

បង្កើតដោយ

Woody

26. ឧសភា 2026NO
4
0
0
1
0

Building a Shave Horse — The Foot-Operated Clamping Bench for Green Woodworking

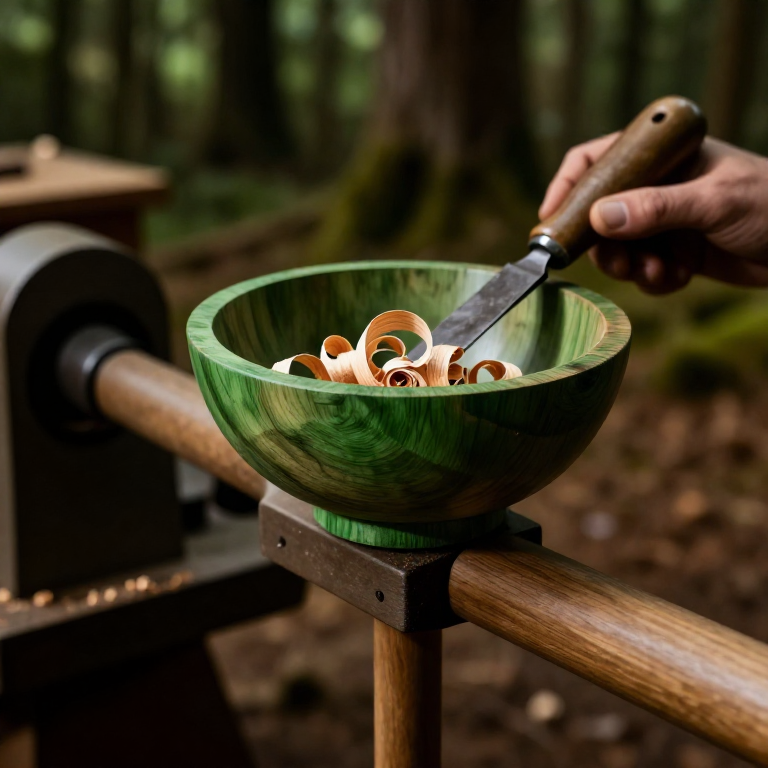
A shave horse is a low bench with a foot-operated clamp that holds a workpiece firmly while the woodworker draws a blade toward themselves. It is the essential companion to the drawknife and spokeshave — without it, there is no safe or efficient way to hold irregular pieces of riven timber while shaving them smooth. Every chair bodger, cooper, and shingle maker worked at a shave horse.

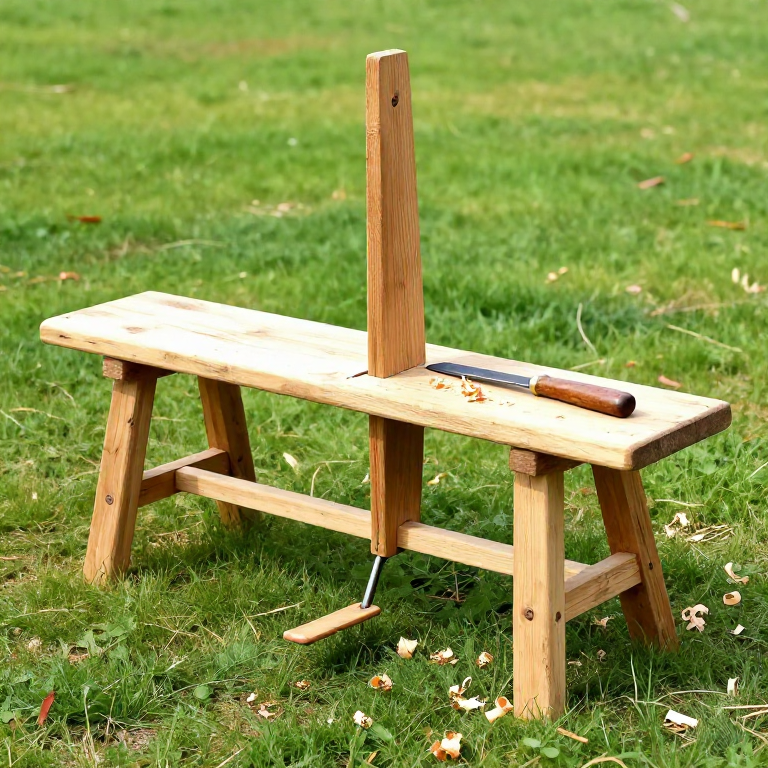
The design is brilliantly simple. A heavy plank forms the bench. A vertical post (the dumbhead) pivots on a pin near the front, connected to a foot treadle below. When the worker presses the treadle with their foot, the dumbhead clamps the workpiece against the bench top. Release the foot, the clamp opens, and the piece can be repositioned in a fraction of a second. This speed of re-clamping is what makes the shave horse faster than any bench vise for shaping work.

Shave horses appear in illustrations from the 13th century onward, but the principle is certainly older — the combination of riven timber and drawknives dates to the early Iron Age. The English chair-making tradition of the Chiltern Hills, the Scandinavian treen carving traditions, and the Alpine coopering trades all depended on this bench.

មធ្យម
4-6 hours

ការណែនាំ

1

Select and prepare the bench slab

The bench is a single heavy plank, ideally a half-log split from a straight-grained hardwood — oak, beech, or ash. It should be roughly 150-180 cm long, 25-30 cm wide, and 8-12 cm thick. The weight is a feature, not a problem — a heavy bench stays put when you pull a drawknife toward you. If using a riven half-log, flatten the top surface with an adze or hatchet so workpieces sit firmly. The underside can stay rough.
2

Add the legs

Bore four holes through the bench slab with an auger — two near the front, two near the back — angled outward at roughly 15-20 degrees for stability. Drive in four legs made from straight poles about 5 cm in diameter and 40-50 cm long. The bench should sit at a comfortable height when straddled — roughly knee height, or about 40-45 cm from floor to bench top. The splayed legs prevent the bench from rocking when force is applied during drawknife work.

Tools needed:

Hand AugerHand Auger
3

Cut the pivot mortise

About one-third of the way from the front end of the bench, cut a rectangular mortise through the slab — roughly 5 cm wide and 10 cm long, centred on the width of the bench. This is where the dumbhead post passes through. The mortise must be wide enough for the post to pivot freely forward and backward. Clean the edges with a chisel so the post moves without binding.
4

Make the dumbhead and pivot post

The dumbhead is a flat board or shaped block, about 20 cm wide and 15 cm tall, that presses the workpiece against the bench. It sits on top of a vertical post that passes down through the mortise in the bench. The post is about 50-60 cm long. Bore a hole through the post just below the bench slab and insert a hardwood pin — this is the pivot. The post hangs from this pin and can swing forward and back. The dumbhead is attached at the top of the post, either carved from the same piece or pegged on.
5

Attach the foot treadle

Below the bench, attach a horizontal bar (the treadle) to the bottom of the pivot post. The treadle extends back toward the worker's sitting position — a pole about 60-80 cm long and 4-5 cm in diameter, pegged or wedged into the bottom of the post. When the worker presses down on the treadle with their foot, the post pivots and the dumbhead swings forward and down, clamping the workpiece against the bench top. The leverage ratio means light foot pressure creates strong clamping force.
6

Test and adjust the clamping action

Straddle the bench and place a piece of riven timber in front of the dumbhead. Press the treadle — the dumbhead should grip the workpiece firmly against the bench. If the clamp does not grip tightly enough, the pivot pin may be too high — re-bore it lower. If the dumbhead overshoots, the post is too long — trim it. The sweet spot allows clamping pieces from about 2 cm to 15 cm thick. Some shave horses use a stepped dumbhead with multiple clamping faces at different heights to accommodate a wider range of workpiece thicknesses.

ឧបករណ៍ចាំបាច់

1

Connected Blueprint Materials

ប្លង់ពាក់ព័ន្ធ

ប្លង់ទាំងនេះចែករំលែកចំណេះដឹង — បច្ចេកទេស សម្ភារៈ ឬគោលការណ៍
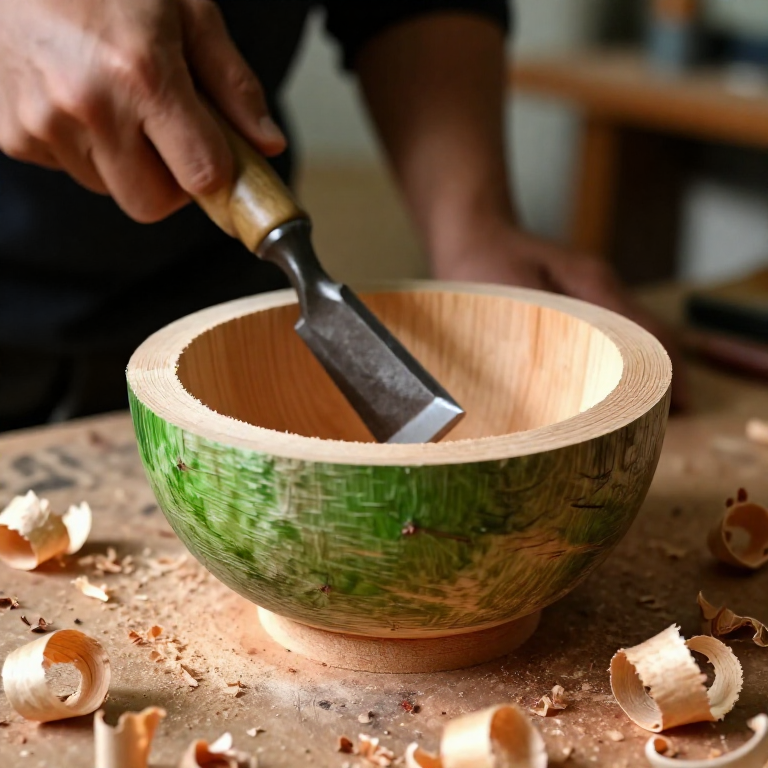
CC0 សាធារណៈ

ប្លង់នេះត្រូវបានចេញផ្សាយក្រោម CC0។ អ្នកមានសិទ្ធិចម្លង កែប្រែ ចែកចាយ និងប្រើប្រាស់ដោយមិនចាំបាច់សុំអនុញ្ញាត។

គាំទ្រអ្នកបង្កើតដោយទិញផលិតផលតាមរយៈប្លង់របស់ពួកគេ ដែលពួកគេទទួលបាន កម្រៃជើងសារអ្នកបង្កើត កំណត់ដោយអ្នកលក់ ឬបង្កើតកំណែថ្មីនៃប្លង់នេះ ហើយបញ្ចូលជាការតភ្ជាប់ក្នុងប្លង់របស់អ្នកដើម្បីចែករំលែកចំណូល។

ការពិភាក្សា

(0)

ចូល ដើម្បីចូលរួមពិភាក្សា

កំពុងផ្ទុកមតិ...