សិល្បៈ
សម្រស់ និង សុខុមាលភាព
សិប្បកម្ម
វប្បធម៌ និង ប្រវត្តិសាស្ត្រ
ការកម្សាន្ត
បរិស្ថាន
ម្ហូប និង ភេសជ្ជៈ
វិស្វកម្មបញ្ច្រាស
វិទ្យាសាស្ត្រ
កីឡា
បច្ចេកវិទ្យា
ប្រដាប់ដែលស្លៀក
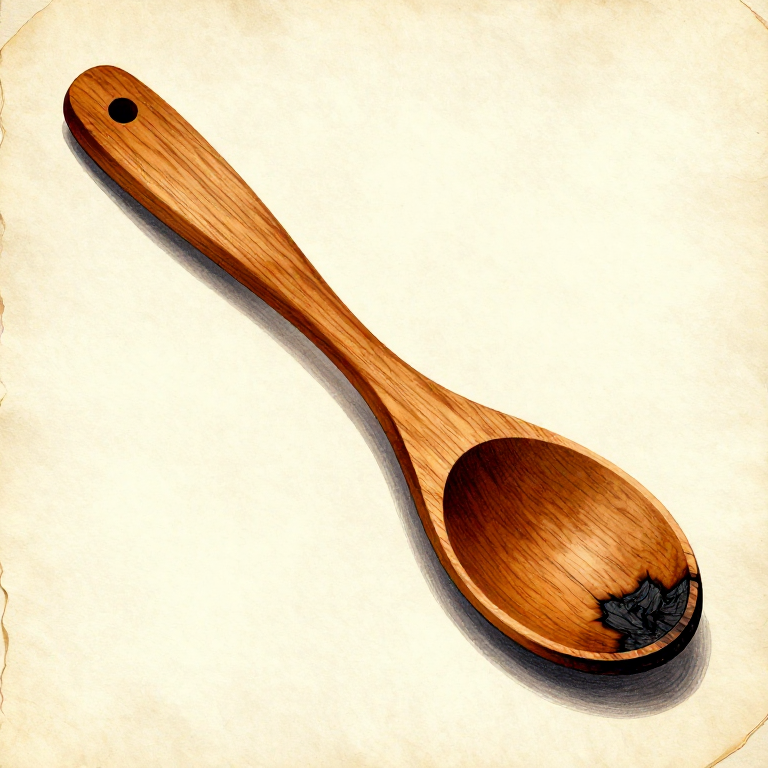
Carving a Wooden Spoon with Stone Tools and Ember Hollowing — The Universal Kitchen Tool
Carved wooden spoons are among the most universal human artefacts — every culture that worked wood made spoons, from Mesolithic hunter-gatherers to modern craft traditions. The wooden spoon is deceptively simple: a bowl connected to a handle, carved from a single piece of wood. But the process of making one teaches fundamental woodworking skills that underpin all more complex projects — reading grain direction, controlling material removal, hollowing curves, and finishing surfaces. Archaeological wooden spoons survive from waterlogged Neolithic sites across Europe, and the shapes they show are essentially identical to spoons carved by traditional craftspeople today: a smooth, oval bowl approximately 6 to 8 cm across, transitioning through a neck into a handle 15 to 20 cm long. The most elegant technique for hollowing the bowl — used by cultures worldwide from Scandinavia to Polynesia — is ember hollowing. A glowing coal is placed in the bowl area and the carver blows through a reed or hollow bone to direct airflow, controlling exactly where the wood burns. The charred wood is then scraped away, deepening the bowl incrementally. This method produces smoother, more uniform bowls than stone-tool gouging alone and requires no special tools beyond fire and a scraper. This blueprint teaches the complete process using only prehistoric materials: selecting green wood, splitting a blank, roughing out the shape, ember-hollowing the bowl, finishing with scraping and sanding, and sealing with animal fat.
ចាប់ផ្តើម
2-3 hours
ការណែនាំ
1
1
Select Green Hardwood with Straight Grain
Select Green Hardwood with Straight Grain
Choose a freshly cut piece of hardwood — birch, cherry, maple, alder, or apple are excellent choices for spoons. The wood must be green (freshly felled, not dried) because green wood is dramatically easier to carve with stone tools — the moisture in the fibres lubricates the cutting edge and prevents the brittle fractures that make dry wood unpredictable. Select a piece approximately 25 to 30 cm long and 8 to 10 cm in diameter. Avoid wood with knots in the area where the bowl will be — knots have chaotic grain that tears and splinters rather than cutting cleanly. A natural crook where a branch meets the trunk provides an ideal blank because the bowl can be carved from the wider crook section and the handle from the narrower branch.
Materials for this step:
 Hardwood Sapling1 piece
2
2
Split the Blank in Half
Split the Blank in Half
Stand the log section on end and split it in half using a stone wedge driven with a hammerstone. Place the wedge on the end grain at the centre and strike it firmly until the split begins, then follow the split down the length by repositioning the wedge. If the split runs off-centre, apply sideways pressure to the thicker half to steer it back. Each half provides one spoon blank — the flat split face becomes the top of the spoon (where the bowl opens), and the rounded bark side becomes the back (the underside of the bowl). Work with the blank while it is still wet from splitting.
Tools needed:
 Hammerstone
3
3
Rough Out the Spoon Profile
Rough Out the Spoon Profile
Using a flint knife or a small stone adze, carve away the waste wood around the spoon outline. Visualise the spoon shape within the blank: the wider end (8 to 10 cm) is the bowl, tapering through a neck (3 to 4 cm wide) into the handle (2 to 3 cm wide), ending in a slight flare at the grip. Remove wood from the sides first, establishing the outline when viewed from above. Then shape the handle from the back (bark side), thinning it from the full half-log thickness down to approximately 1.5 to 2 cm. Leave the bowl area thick — it will be hollowed later.
Tools needed:
 Flint Knife
4
4
Shape the Back of the Bowl
Shape the Back of the Bowl
Turn the blank over so the bark side (back of the bowl) faces up. Carve the back into a smooth, convex dome — the outside of the bowl. Remove wood from the edges first, working toward the centre, until the bowl back curves evenly in all directions. The bowl walls at this stage should be approximately 1.5 to 2 cm thick — they will be thinned further during hollowing. The transition from bowl to handle (the neck) is the weakest point of any spoon and the place most likely to break in use, so leave extra material here — at least 1 cm thick and 3 cm wide.
Tools needed:
Flint Knife5
5
Begin Ember Hollowing the Bowl
Begin Ember Hollowing the Bowl
Build a small fire and select a glowing coal approximately 1 to 2 cm across using green wood tongs or two sticks. Place the coal on the flat (split) face of the blank in the centre of the bowl area. Blow gently and steadily through a hollow reed or rolled bark tube to direct airflow onto the coal, concentrating the burn exactly where you want to remove wood. The directed airflow creates a focused hot spot that chars the wood to a depth of 2 to 3 mm per application. Do not blow hard enough to scatter sparks — a steady, gentle stream is more effective and more controllable.
6
6
Scrape Away Charred Wood
Scrape Away Charred Wood
After the coal has burned for 30 to 60 seconds and created a charred depression, brush away the coal and use a stone scraper or the edge of a flint flake to scrape out the soft, charred wood. Charred wood is extremely soft — it scrapes away to clean, unburnt wood beneath with minimal effort. Scrape the entire charred area clean before placing a new coal. Each ember-and-scrape cycle deepens the bowl by 2 to 3 mm. Check the depth by pressing your thumb into the hollow — you are aiming for a finished bowl depth of approximately 2 to 2.5 cm.
Tools needed:
 Stone Scraper
7
7
Repeat the Ember Hollowing to Full Depth
Repeat the Ember Hollowing to Full Depth
Continue the cycle of placing a coal, blowing to direct the burn, and scraping out the char. After 6 to 10 cycles, the bowl should be approximately 2 to 2.5 cm deep with relatively uniform walls of 5 to 8 mm thickness. Control the bowl shape by placing the coal in different positions: centre first to establish depth, then around the edges to widen and smooth the cavity. If the wall becomes too thin in any spot (less than 4 mm), avoid placing coals there — the wood can burn through. Check wall thickness frequently by holding the bowl up to bright light — thin spots show as lighter areas.
8
8
Refine the Bowl Interior by Scraping
Refine the Bowl Interior by Scraping
Once the ember hollowing is complete, smooth the interior of the bowl using a curved stone scraper or the concave edge of a broken flint flake. Scrape in the direction of the grain, working from the rim toward the centre. Remove all remaining charred material and any ridges left between ember-hollowed zones. The interior should be smooth enough that running a fingertip across it detects no bumps or sharp transitions. A smooth bowl interior is not just aesthetic — it allows the spoon to be cleaned easily and prevents food from sticking in rough patches.
Tools needed:
Stone Scraper9
9
Shape and Smooth the Handle
Shape and Smooth the Handle
Carve the handle to its final shape — approximately 2 to 2.5 cm wide, 1.5 cm thick, and 12 to 16 cm long. The cross-section should be a flattened oval, comfortable to grip without sharp edges. Taper the handle slightly toward the end so it sits naturally in the hand. Use the flint knife for major shaping and the stone scraper for smoothing. Pay special attention to the neck where the handle meets the bowl — this transition should be a smooth, flowing curve with no abrupt changes in thickness. A gentle S-curve at the neck (where the handle angles slightly upward relative to the bowl) improves the ergonomics of stirring and eating.
Tools needed:
Flint KnifeStone Scraper10
10
Sand the Entire Spoon Smooth
Sand the Entire Spoon Smooth
Rub the entire spoon — bowl interior, bowl exterior, handle, and all transitions — with a piece of fine-grained sandstone. Work with the grain in long, even strokes. Sandstone abrasion removes the scraper marks and closes the wood pores, creating a surface that feels silky and sheds water. The bowl interior deserves the most attention — it must be perfectly smooth for both hygiene and comfort when eating. Continue sanding until the entire spoon feels uniformly smooth to the touch with no rough patches, ridges, or tool marks.
Tools needed:
 Sandstone
11
11
Dry the Spoon Slowly to Prevent Cracking
Dry the Spoon Slowly to Prevent Cracking
Because the spoon was carved from green wood, it must dry slowly and evenly to prevent cracking. Place it in a shaded, well-ventilated area — not in direct sun or near a fire. Drying takes 3 to 7 days depending on wood species and humidity. The spoon may warp slightly as it dries — this is normal for green-carved spoons and adds character. If a crack begins to develop (most commonly at the bowl rim or the neck), rub animal fat into the crack immediately and move the spoon to a more humid location to slow drying. Once fully dry, the spoon will be lighter, harder, and stronger than when green.
12
12
Seal with Animal Fat for Water Resistance
Seal with Animal Fat for Water Resistance
Warm a small amount of rendered animal fat (tallow) until liquid and rub it generously into the entire spoon, working it into the end grain at the bowl rim and handle tip where water penetration is greatest. The fat fills the wood pores and creates a hydrophobic barrier that prevents the spoon from absorbing water, swelling, and eventually cracking through repeated wet-dry cycles. Apply two coats, allowing the first to soak in for 30 minutes. After the second coat, buff the surface with a piece of soft leather or dried grass until it develops a gentle sheen. Re-oil the spoon every few weeks of regular use — when the wood looks pale and dry, it is time for another coat of fat.
Materials for this step:
 Animal Fat20 g
សម្ភារៈ
2- 1 pieceកន្លែងទុក
- កន្លែងទុក
Connected Blueprint Materials
ប្លង់ពាក់ព័ន្ធ
ប្លង់ទាំងនេះចែករំលែកចំណេះដឹង — បច្ចេកទេស សម្ភារៈ ឬគោលការណ៍
Related blueprints
Other builds that share materials, tools, or techniques with this one.
Carving a Wooden Bowl by Ember Burning — Hollowing Without Metal Toolswoodworking
Carving a Tally Stick — Humanity's Oldest Record-Keeping Technologywoodworking
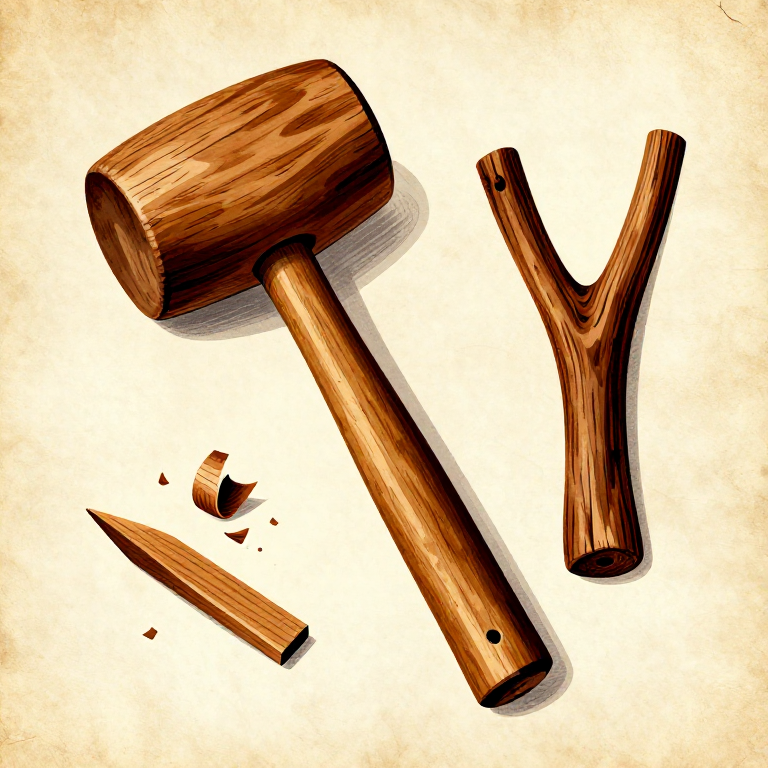
Making a Wooden Mallet — The Percussive Tool That Does Not Damagewoodworking
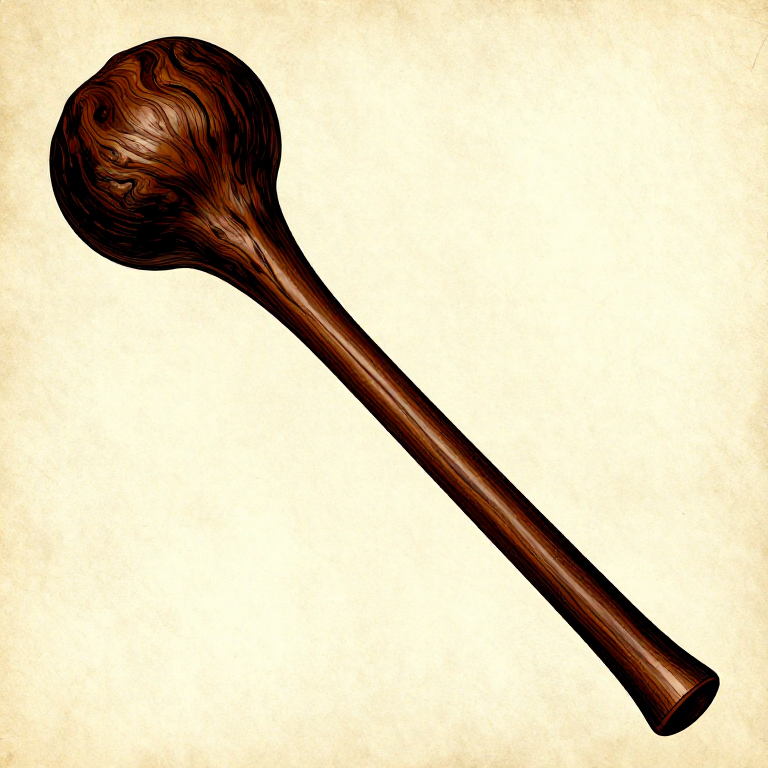
Shaping a Wooden War Club from a Dense Hardwood Root Ball — Stone Age Cudgelwoodworking
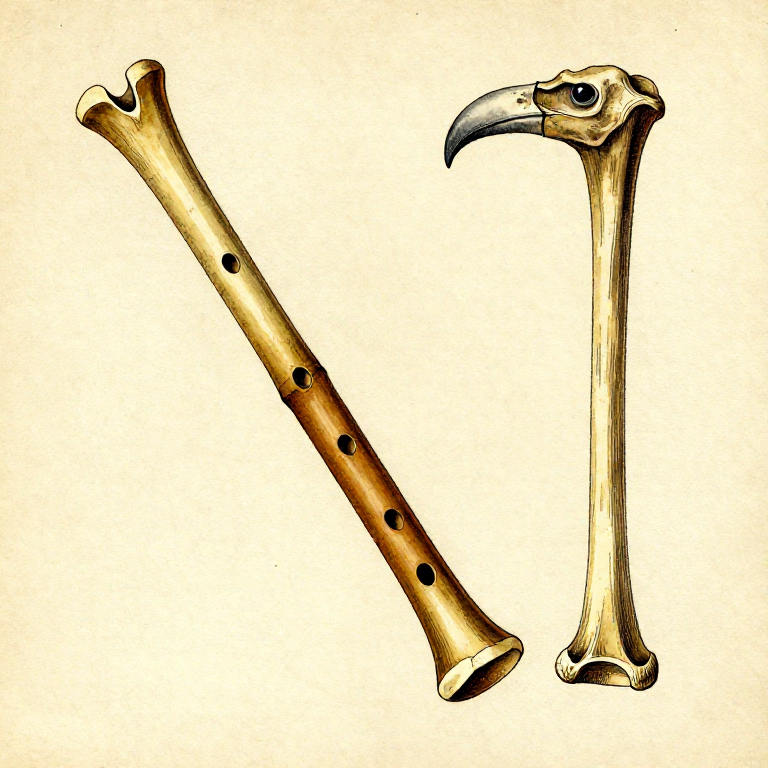
Carving a Bone Flute — Prehistoric Musical Instrumentwoodworking
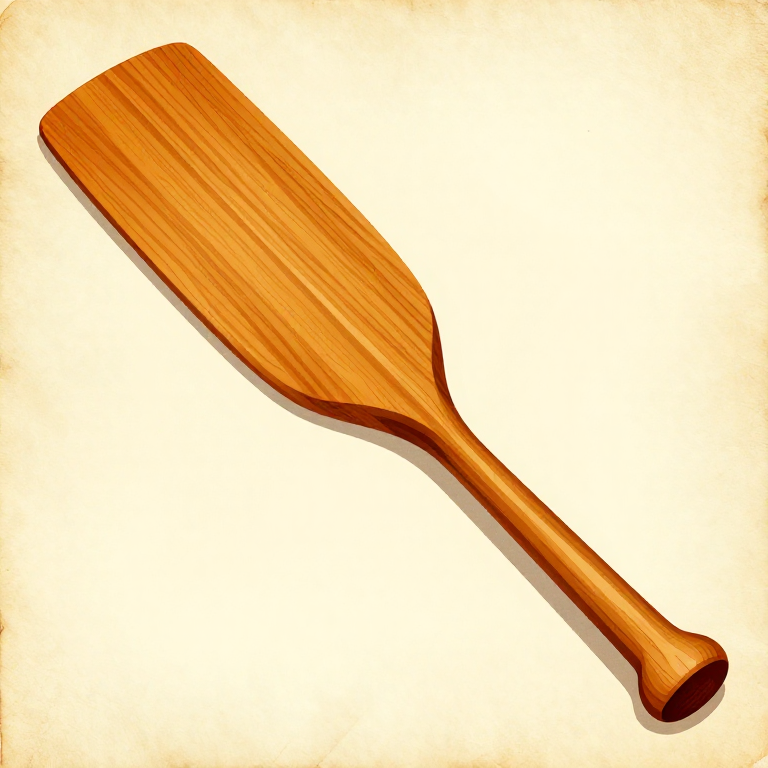
Carving a Wooden Paddle from a Single Piece of Hardwood — Prehistoric Watercraft Propulsionwoodworking
CC0 សាធារណៈ
ប្លង់នេះត្រូវបានចេញផ្សាយក្រោម CC0។ អ្នកមានសិទ្ធិចម្លង កែប្រែ ចែកចាយ និងប្រើប្រាស់ដោយមិនចាំបាច់សុំអនុញ្ញាត។
គាំទ្រអ្នកបង្កើតដោយទិញផលិតផលតាមរយៈប្លង់របស់ពួកគេ ដែលពួកគេទទួលបាន កម្រៃជើងសារអ្នកបង្កើត កំណត់ដោយអ្នកលក់ ឬបង្កើតកំណែថ្មីនៃប្លង់នេះ ហើយបញ្ចូលជាការតភ្ជាប់ក្នុងប្លង់របស់អ្នកដើម្បីចែករំលែកចំណូល។