예술
뷰티 및 웰니스
공예
문화 및 역사
엔터테인먼트
환경
음식 및 음료
그린 퓨처
역공학
과학
스포츠
기술
웨어러블
Forging an Iron Strap Hinge — The Joint That Opens Every Door
Forge

작성자

Forge

26. 5월 2026NO
12
0
0
0
0

Forging an Iron Strap Hinge — The Joint That Opens Every Door

Before the iron hinge, doors were hung on leather straps or wooden pivots that wore out in months. The iron strap hinge — two flat straps joined by a pin through rolled eyes — solved this problem permanently. A well-made iron hinge lasts centuries, as demonstrated by medieval church doors still swinging on their original hinges after 800 years.

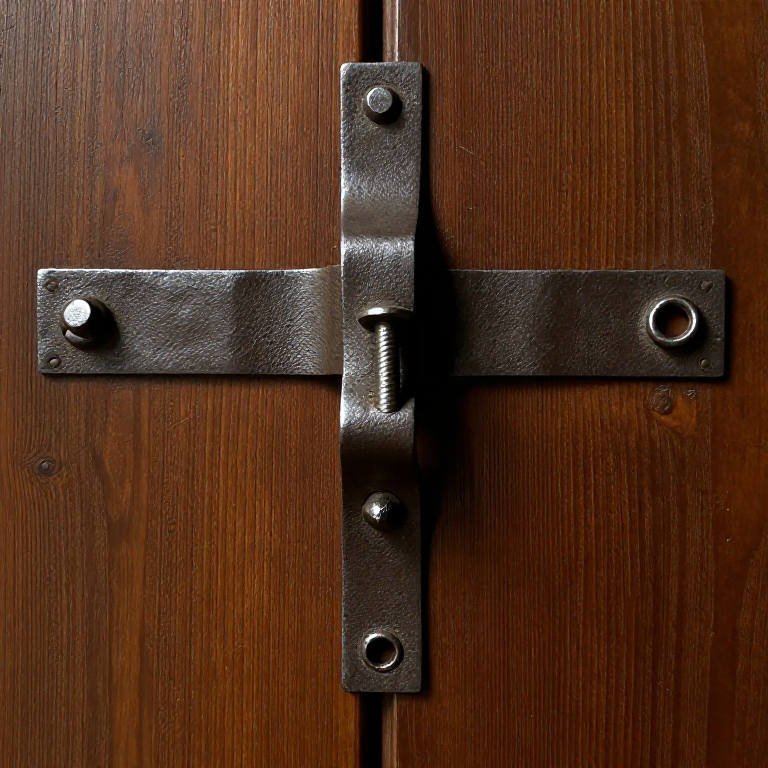
A strap hinge is forged from two flat iron bars. Each bar has one end curled into a tube (the eye) around a mandrel. A pin passes through both eyes to create the pivot. One strap is nailed to the door and the other to the frame. The hinge works because the eyes wrap around the pin with just enough clearance to rotate freely but not wobble.

This blueprint teaches three essential smithing operations: drawing flat bar, scrolling (curling metal around a mandrel), and punching nail holes. These same operations appear in gates, latches, brackets, and every other piece of architectural ironwork.

중급
2-3 hours (one pair of hinges)

안내

1

Cut the strap blanks

Cut two pieces of wrought iron flat bar. The door strap (the long leaf) should be about 30 cm long, 4 cm wide, and 5 mm thick. The frame strap (the short leaf) should be about 15 cm long with the same width and thickness. These dimensions suit a medium door — scale up for heavy gates, down for cabinet doors.
2

Forge the eye on the door strap

Heat the last 5-6 cm of the long strap to bright orange. Place a round mandrel (an iron rod about 10-12 mm diameter) against the end of the strap on the anvil edge. Hammer the hot end down and around the mandrel, curling the iron into a complete tube. The eye must wrap at least 270 degrees — ideally a full 360. Remove the mandrel and check that it slides freely back through the eye. If the eye is too tight, reheat and open slightly with the mandrel.

이 단계의 재료:

CharcoalCharcoal3 kg

필요한 도구:

Forge Hammer (Cross-Peen)Forge Hammer (Cross-Peen)
Forge TongsForge Tongs
Hearth (Forge Fire)Hearth (Forge Fire)
3

Forge the eye on the frame strap

Repeat the same curling operation on the short strap. The two eyes must be the same diameter so they align on a common pin. Place both eyes side by side and check that the mandrel passes through both smoothly. If one eye is tighter or offset, reheat and adjust.
4

Punch the nail holes

Each strap needs holes for the nails or screws that attach it to the wood. Heat a section of the strap to bright orange and drive a square punch through from one side, using the pritchel hole in the anvil to clear the slug. Space the holes evenly along the strap — three to four holes per leaf for a medium hinge. The holes should be sized to accept the hand-forged nails from your nail-making stock.
5

Decorative taper (optional)

Traditional strap hinges often have a decorative taper or point at the free end of the door strap. Heat the end and draw it to a gentle taper, or split it with a hot chisel and curl the two halves into scrolls. This serves no structural purpose but identifies the smith's work and adds beauty to the door. Many surviving medieval hinges have elaborate scroll terminals.
6

Make the hinge pin

Forge a pin from round rod stock, sized to fit snugly through both eyes. The pin should be about 2-3 cm longer than the combined width of both eyes. After inserting the pin, peen over the top end to form a small head that prevents the pin from dropping out. Leave the bottom end straight or bend it into a small hook for easy removal — a removable pin allows the door to be taken off its hinges.
7

Assemble and test the hinge

Thread the pin through both eyes — the door strap eye and the frame strap eye should interlock, with the straps extending in opposite directions. Swing the hinge open and closed to check that it pivots freely through at least 180 degrees. If it binds, the eyes are misaligned — reheat the offending eye and adjust. Apply a thin coat of tallow or grease to the pin to prevent rust and reduce friction.

재료

1

필요 도구

3

연결된 블루프린트 재료

관련 블루프린트

이 블루프린트들은 지식을 공유합니다 — 기술, 재료 또는 원리

CC0 퍼블릭 도메인

이 블루프린트는 CC0로 공개되었습니다. 어떤 목적으로든 자유롭게 복사, 수정, 배포 및 사용할 수 있습니다.

제품 구매를 통해 메이커를 지원하세요. 판매자가 설정한 메이커 커미션 을 받거나, 이 블루프린트의 새로운 반복을 만들어 연결로 포함시킬 수 있습니다.

토론

(0)

로그인 하여 토론에 참여하세요

댓글 로딩 중...