Pakikipagtulungan
SINING
BEAUTY AT WELLNESS
CRAFTS
KULTURA AT KASAYSAYAN
LIBANGAN
KAPALIGIRAN
PAGKAIN AT INUMIN
REVERSE ENGINEERING
AGHAM
ISPORTS
TEKNOLOHIYA
MGA WEARABLE
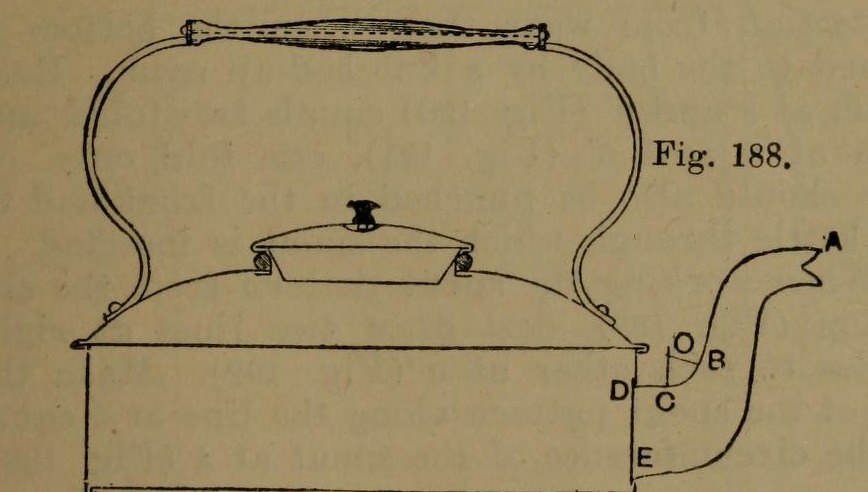


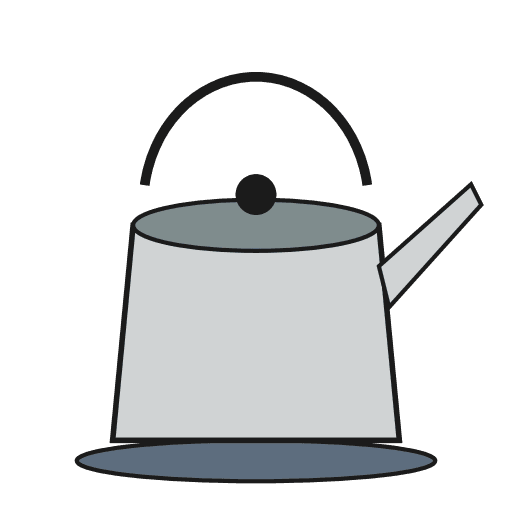
Stovetop Kettle: a Square Copper Kettle (Hasluck, 1907)
A tinsmith's square kettle in sheet copper, 9 x 9 in and 3 5/8 in deep: a box body with folded corner seams, a hollowed top pened on, a brazed and bent spout, a small cover, and a wooden handle on brass uprights.
Hasluck prefers copper; tinplate also works and is a separate route.
Source: Paul N. Hasluck, Tinplate Work (1907), pp. 91-98. Unknown: copper gauge, solder. Picture: Figs. 188-189 of the book.
Abantado
Unknown
Mga Tagubilin
1
1
Cut the patterns
Cut the patterns
For a body 9 x 9 x 3 5/8 in, cut two ends 9 1/2 x 4 in and two sides 9 1/4 x 4 in, notched for box seams at the corners (Figs. 190-191), with allowances to fold at top and bottom. Punch the spout hole in the front. Cut the bottom 9 1/2 in square, notched for a 1/4 in edge. Set out the top as a 10 1/2 in square with curved allowances for hollowing and a 4 in circle for the cover hole (Fig. 193); set out the spout from the elevation (Fig. 192), the cover and its cone-shaped rim (Figs. 194-195).
Mga materyales para sa hakbang na ito:
 Lapad na Tanso1 body, bottom, top, spout, cover
Mga kailangang kasangkapan:
 Kompas na dalawang tulis
 Panggurlis
 Gunting na pangyero
2
2
Braze and shape the spout
Braze and shape the spout
Thin the long edges by hammering. Set in the throat with a stretching hammer on a beak iron, bend the spout round until the edges overlap, bind it with wire, lay spelter and borax along the inside of the seam and braze it; then close and braze the under seam. Fill it with lead and bend the neck with a round-faced hammer on the hollowing block; file off spare spelter and smooth it. Run out the lead, throw off a seating round the large end, trim the top with snips and tin the inside.
Mga materyales para sa hakbang na ito:
 Hindi alam na metal1 spelter
 Lata1 tinning
Mga kailangang kasangkapan:
 Martilyong pampakinis
 Tulos
 Alambreng bakal
 Pulbos na boraks
 Pang-hinang na brazing
 Tingga
 Butas-butas na sandok
 Tipak ng Matigas na Kahoy
 Kikil na Pang-metalGunting na pangyero
3
3
Fold and seam the body
Fold and seam the body
Fold the top edges square, the front and back outwards and the sides likewise; fold the bottom edges right over inwards to take the bottom (Fig. 188). Hook each side's end over the front's and work the corner seam on a straight-edged tool (Figs. 198-199). Turn up the bottom's 1/4 in edge, push it edge-down into the bottom folds, and solder the bottom and seams.
Mga materyales para sa hakbang na ito:
 Panghinang na lata-tingga1 piraso
Mga kailangang kasangkapan:
 Kahoy na PamukpokTulos
 De-kuryenteng Kautin
 Flux
4
4
Hollow the top and make the cover
Hollow the top and make the cover
Hollow the top on the block: sink the four sides a little, hollow the corners with a bullet-faced hammer, flatten each side along the block edge, even the shoulder and smooth it all over. Pare the edges, mark the flange with an edging machine, set it down square with a hatchet stake and mallet, and take up an edge to fit over the body. Cut the cover hole with circular snips and fit a narrow wired rim, worked over inside. Make the cover: solder its cone rim to fit the wired rim, throw off a flange, hollow the cover disc and seam it on, and fix the knob.
Mga materyales para sa hakbang na ito:
Alambreng bakal1 rimPanghinang na lata-tingga1 pirasoHindi alam na metal1 cover knobMga kailangang kasangkapan:
Martilyong pampakinisTipak ng Matigas na KahoyTulosKahoy na PamukpokGunting na pangyeroDe-kuryenteng KautinFlux5
5
Handle, top and spout
Handle, top and spout
Cut two handle uprights from stout brass or copper band (Fig. 196), drill them for rivets and for the spindle that carries the wooden handle, and bend them to shape. Rivet them to the top and solder over the rivet heads inside. Pene the top down onto the body and solder along each edge. Push the spout through its hole from inside until its large end butts against the front, and solder it strongly from inside.
Mga materyales para sa hakbang na ito:
 Lapad na Bronse1 handle uprights
 Bara ng Bronse1 spindle
 Puluhan1 wood
 Remaste na tanso1 number not givenPanghinang na lata-tingga1 piraso
Mga kailangang kasangkapan:
 Barenang de-kamay
 Martilyong pang-remachesKahoy na PamukpokDe-kuryenteng KautinFlux
Mga Materyales
9- 1 body, bottom, top, spout, coverPlaceholder
- 1 cover knobPlaceholder
- 1 tinningPlaceholder
- 3 pirasoPlaceholder
- 1 rimPlaceholder
- 1 handle uprightsPlaceholder
- 1 spindlePlaceholder
- 1 woodPlaceholder
- 1 number not givenPlaceholder
Mga Kinakailangang Kasangkapan
17- Placeholder
- Placeholder
- Placeholder
- Placeholder
- Placeholder
- Placeholder
- Placeholder
- Placeholder
- Placeholder
- Placeholder
- Placeholder
- Placeholder
- Placeholder
- Placeholder
- Placeholder
- Placeholder
- Placeholder
Mga Materyales ng Nakakonektang Blueprint


Ang blueprint na ito ay gumagawa ng
CC0 Pampublikong Domain
Ang blueprint na ito ay inilabas sa ilalim ng CC0. Malaya kang kumopya, magbago, mamahagi, at gumamit nang walang pahintulot.
Suportahan ang Maker sa pamamagitan ng pagbili ng mga produkto sa kanilang Blueprint Komisyon ng Maker itinakda ng mga Vendor, o lumikha ng bagong bersyon ng Blueprint na ito at isama bilang koneksyon sa iyong Blueprint upang ibahagi ang kita.